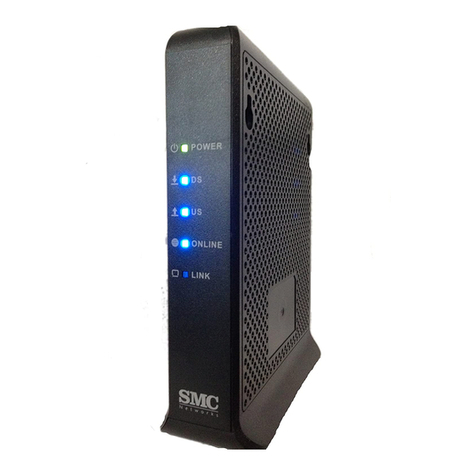
element mobile SCT-UM300 User manual

Element Mobile
SCT-UM300 Wireless Broadband Modem
User Guide
Version 1.0

1
Introduction
Mobile Connect is a software program running on your PC. With Mobile Connect, the user can
activate the device and establish a data link.
Windows
The Main Window ...........................................................................................................................2
Data Link .........................................................................................................................................3
Basics .............................................................................................................................. 3
Establishing a data link ................................................................................................... 3
Disconnect a data link..................................................................................................... 3
Profiles (Dialup Configuration) ...................................................................................... 3
Statistics .......................................................................................................................... 4
Settings.............................................................................................................................................5
General............................................................................................................................ 5
Network........................................................................................................................... 5
Flow warning .................................................................................................................. 6
Version............................................................................................................................ 7
OTA ................................................................................................................................ 7
Device Activation ........................................................................................................... 8
Live Update..................................................................................................................... 8
Help................................................................................................................................................12
Mac Installation .............................................................................................................................13
Mac Home Screen..........................................................................................................................20
Data Link ...................................................................................................................................... 20
Establishing a data link ................................................................................................. 20
Disconnect a data link................................................................................................... 21
Device Activation ......................................................................................................................... 21
OTA .............................................................................................................................. 22
View OTA..................................................................................................................... 22
Display .......................................................................................................................... 22
Device Activation ......................................................................................................... 22
Network......................................................................................................................................... 22
Frequency Band ............................................................................................................ 23
Safety Information .........................................................................................................................24

2
The Main Window
The main window of Mobile Connect consists of three areas:
1. Main Menu - Connect, Statistics, Setting. Make proper configuration to functions.
2. Client - display the details of each function.
3. Status - display the status of the Mobile Equipment.
Icons in the main window
ICON
DESCRIPTION
Signal level
Internet connection duration
Transferring baud rate
Receiving baud rate

3
Data Link
Basics
You can establish a dialup data link over CDMA/EVDO via the device.
The dialup data link requires network coverage for CDMA or EVDO. In each of the links, the
device will be connected to a specific phone number.
Establishing a data link
1. Select “Connect”tab
2. Select a profile from the profile list, or click “More Profiles”to set a profile as your
default profile
3. Select “Connect”tab and click the “Connect”button to establish a data link.
Disconnect a data link
To disconnect, press the “Disconnect” button.
Profiles (Dialup Configuration)
Add
1. Select "Connect-->More Profiles".
2. Select "New", enter the profile name, choose a network in the popup window; setup the
device in advanced settings; click "Finish" to save and close the window.
Note:
a. Each profile depends on the setup settings of the carriers. Contact your service provider
for these settings.
b. If the settings for CSD, DNS, PPP and TCP/IP are needed, click on "Advanced Settings"
to enter the proper settings for your carrier. After selecting, click "OK" to save the
settings.
Set Default Profile
1. Select "Connect-->More Profiles"
2. Choose a profile in the list, and then click "Set as Default".
Modify
1. Select "Connect-->More Profiles";
2. Choose a profile in the list, and then click "View/Modify";
3. Make modifications;
4. Click "Finish" to save the settings.

4
Delete
1. Select "Connect-->More Profiles"
2. Choose a profile in the list, and then click "Delete"
3. In the confirmation box, click "OK" to proceed.
Restore
1. Select "Connect-->More Profiles"
2. Click "Restore" for initial settings.
Close
After editing the profiles, you can click "Close" to close the profile list windows.
Statistics
Data Flow
To view the data card's traffic statistics in real time or of current or last month, select
"Statistics-->Current Statistic", " Statistics-->Usage This Month", " Statistics -->Usage Previous
Month".

5
Settings
General
Auto Launch on Startup
If selected, Mobile Connect will run after Windows startup. Otherwise, Mobile Connect must be
started manually (either by using the desktop icon or the "Start" menu).
1. In the main window, select "Settings-->General"
2. Select the checkbox "Auto Launch on Startup".
Auto Minimized
If selected, Mobile Connect will be minimized after Windows startup. You can check the current
status on the system bar.
1. In the main window, select "Settings-->General"
2. Select the checkbox "Auto Minimized".
Link Auto Reactivation
If selected, Mobile Connect will try to reactive the internet disconnected link when the service
recovers.
1. In the main window, select "Settings-->General"
2. Select the checkbox "Link Auto Reactivation".
The Idle Time Before Disconnect
You can define the idle time before the network connection is terminated, which will take effect
on the next session.
Network
Depending on the coverage area, you may be covered by several networks at a same time. By
default, the phone will choose the available network based on your account.
Frequency Band
By default, the phone will pick a Frequency Band automatically, unless your carrier has special
instructions.
1. In the main window, select "Settings-->Network"
2. Select in "Frequency Band" dropdown list.

6
Details of each frequency band
Option
Note
Hybrid
Allows the phone to select the either EVDO or CDMA service based
on the networks available in your current l
ocation.
CDMA 1x Only
Restricts the device to CDMA service.
EVDO Only
Restricts the device to EVDO service.
Select the Network
1. In the main window, select "Settings-->Network"
2. Select "Hybrid", "EVDO Only", or "CDMA1x Only".
Flow warning
In "Settings", "Flow Warning" contains settings for displaying contents, mode of flow statistics,
and setting of threshold alerts.
Display
The display of statistics on flow can be set by data or by time:
1. In the main window, select "Settings-->Flow Warning"
2. Select the checkbox "Warn when a limit is approaching" to activate
3. To display by data, select "Data Limits (MB)" and enter the value of data range; or to
display by time, select "Time Limits (Hours)" and enter the value of time range
4. In the dropdown list "Beginning day of month to calculate", choose the starting date of
the statistics
5. Click on "Apply" to save.
To clear all the records of flow statistics, click "Delete History" and confirm to proceed.
Flow Warning
When the data flow or network connection time has reached the pre-set range, a notifying
message will be displayed as an alert.
1. In the main window, select "Settings-->Flow Warning"
2. In the dropdown list "First warning point (%)", select one for the first-time notification

7
3. In the dropdown list "Second warning point (%)", select one for the second-time
notification
4. Click on "Apply" to save.
Version
To view versions, select "Settings-->Version" in the main window.
The version screen displays Software, Driver, Firmware, Firmware build, Hardware, and Boot
Loader versions.
OTA
In "Settings", "OTA" page contains two OTA requests –Programming and PRL Update.
View OTA
1. Make sure the device is connected
2. In the main window, select "Settings-->OTA".
3. Select Programming to have your device programmed via OTA.
4. Select PRL Update to update the PRL in your device via OTA.
5. Click the "Send" button on the OTA option you require.

8
Device Activation
In "Settings", the "Device Activation" page contains device parameters and the device activation
function.
Display
The following information is displayed:
1. Electronic Serial Number (ESN): contains the ESN (Electronic Serial Number) of the
device in decimal format
2. MEID Hex: contains the MEID (Mobile Equipment Identity) of the device in hex format
3. pESN Hex: contains the ESN (Electronic Serial Number) of the device in hex format.
Device Activation
1. In the main window, select "Settings-->Device Activation"
2. Input some or all parameters including MDN (Phone Number), MIN (IMSI), SID, NID
and select a PRL file
3. Click on "OK" to activate the device.
Live Update
In "Settings", the "Live Update" page provides a link to download the latest software for update.
Live Update
1. Make sure the network is connected
2. Verify the version of your device by going to the “Settings”tab and selecting “Version”.
The version number is under Software.
3. Open the SCT-UM300 Mobile Connect. Go to the Settings tab and select Live Update.
Press the Update button to launch your browser. Once the browser has opened, close
the SCT-UM300 Mobile Connect.

9
4. The browser will automatically navigate to the Update site. Select the SCT.exe file.
Compare the version from Step 1 to this version. If they are the same, no update is
necessary.
5. When the .exe file is selected, a file download window will appear. Select “Run”. The
update program will be downloaded. The progress will be displayed in a pop-up
window.
6. When the program has fully downloaded, an action pop-up window will appear. Select
“Run”to continue the update.
7. The Firmware Upgrade window will launch. After scanning, the window will display
that the device has been found. To start the process, select Upgrade. The entire
upgrade process takes approximately 5 minutes and 30 seconds.
8. A pop-up warning will appear reminding the user not to remove the device or to close the
program. Doing either of this actions will damage the device. Select “Yes” to
continue.

10
9. The upgrade process will begin with Task 1 of 3 and will continue until Task 3 of 3 is
complete. When the upgrade is complete, the window below will appear.
10. The installation of the new Mobile Connect will now begin. Select “Next” to continue.

11
11. A status bar will track the software installation. Select “Finish” to complete the
installation.

12
Help
Through Help, you can learn the details of each menu in Mobile Connect for a quick
understanding of functions of mobile. To read, select the "Help" view in the main window.

13
Mac Installation
1. Remove the cover from the USB connector of the SCT-UM300.
2. Insert the USB connector of the SCT-UM300 into a USB port on your computer.
3. On the desktop, the icon for the SCT-UM300 will be displayed. Double click the icon
to open the package.
4. The contents will be displayed in a window. Open “SCT-UM300-v2.0.2.dmg”.
5. Three files will be available to select: the SCT-UM300 User Guide, the SCT-UM300
3G CDMA Mobile Connect, and the SCT-UM300 USB Driver. Select “SCT-UM300
3G Mobile Connect”.

14
6. The SCT-UM300 Mobile Connect Installer will open and will consist of five steps:
Introduction, Destination Select, Installation Type, Installation, and Summary. Select
“Continue”
7. Select the destination of the software. Press “Continue” to proceed.

15
8. The Installation type will be displayed. There is the option to change the Installation
location on this screen. Select “Install” to proceed.
9. The Installer will request your password. Enter your password and press “OK”.

16
10. The installation process will begin. When the installation is complete, “Install
Succeeded” will be displayed on the Summary Page. Press “Close”.
11. The SCT-UM300-v2.0.5 folder will still be open. Select the “SCT-UM300 USB
Driver” package.
12. The SCT-UM300 USB Driver Installer will open. Press “Continue”.

17
13. Select a Destination for the driver software. Press “Continue”
14. Confirm the installation and location. Press “Install”.

18
15. The Installer will request your password. Enter your password and press “OK”.
16. The installation will require your computer to restart. Press “Continue Installation”.
17. The installation process will begin. When the installation is complete, “Install
Succeeded” will be displayed on the Summary Page. Press “Restart”.

19
18. After the restart, close any open windows. The Mobile Connect software will be located
in the applications list.
Table of contents
