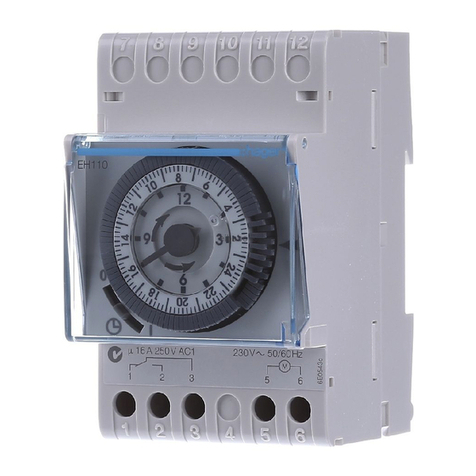
Elgo 1180 User manual

Exemple de programmation
A. Chaque matin à 6H et chaque après-midi à 18H pendant 10 mn chaque fois.
Le premier jour à 6H du matin ou à 18H, mettre le bouton fréquence à la position 12 (12 heures entre chaque arrosa e) et le
bouton de durée darrosa e sur 10 (10 minutes). Le pro rammateur se met en eau et sarrêtera automatiquement 10 minutes plus
tard. Il se remettra en eau automatiquement 12 heures après, et ainsi de suite à 6H et à 18H chaque jour, automatiquement
pendant 10 minutes.
B. Chaque matin à 7H pendant 45mn.
Le premier jour à 7H du matin mettre le bouton fréquence à la position 24 (24 heures entre chaque arrosa e) et le bouton de durée
darrosa e sur 45 (45 minutes). Le pro rammateur se met en eau et sarrêtera automatiquement 20 minutesplus tard.
Il se remettra en eau automatiquement 24 heures après, et ainsi de suite à 7H chaque jour, automatiquement pendant 45 minutes
jusquà ce que vous le chan iez.
Mise en place:
1. Retirer le couvercle étanche en le dévissant. Avec précautions, faire lisser le porte-piles hors de son boitier. Y installer 2 piles
AAA alkalines de 1,5V neuves. Replacer le porte-piles.
2. Tester le pro rammateur en tournant le bouton RUN TIME (durée darrosa e) de la position OFF (arrêt) à la position ON (marche).
Le moteur devrait se mettre en marche dans un délai de 30 secondes.
3. En cas de non fonctionnement du moteur, vérifiez la bonne insertion et la polarité des piles.
4. Tenir lappareil bien en main. Desserrer le rand collier de serra e situé sur le haut de lappareil jusquà ce que le raccord de robinet
interne soit libre. Vissez le raccord sur votre robinet fileté en le serrant à la main, puis serrer le collier de serra e. Mettre en eau.
ATTENTION: ne serrer les colliers quà la main sans trop forcer. Lemploi de clés ou de pinces risque dendomma er la pro rammateur.
Programmation:
1. Ré lez la fréquence darrosa e (FREQUENCY) en heures et la durée darrosa e (RUN TIME) en minutes.
Note: lors de la première pro rammation, lappareil nentrera en opération QUAPRES le délai demandé.
Timer installation:
1. Unscrew and remove waterproof cover. Slowly slide out the battery box from its compartment in the face of the
timer. Install two new 1.5V alkaline batteries (size AAA). Replace battery box.
2. Test the unit by turnin the RUN TIME knob from the "OFF" position to the "ON" position. You should hear the sound
of the motor within 30 seconds. You will be settin the pro ram momentarily.
3. If you do not hear the motor, check to be sure the batteries are installed correctly.
4.
Hold the unit steady. Loosen the LARGE LOCKING COLLAR RING located on the top of the timer until the inner TAP CONNECTOR is
loose. Screw the TAP CONNECTOR onto the tap until it is hand ti ht and then ti hten the LARGE LOCKING COLLAR RING. Turn on the tap
to open the flow of water. WARNING - DO NOT USE PLIERS OR WRENCHES TO TIGHTEN THE COLLARS, this will dama e the unit.
Programming:
1.
Turn the knobs to set the FREQUENCY TIME in hours and the RUN TIME in minutes. NOTE: The first time you pro ram the timer,
it will not be in waterin until after the time delay. The time delay is the number of hours to which you set the FREQUENCY knob.
Sample Programs:
A. You want to water every morning at 6:00AM and every evening at 6:00PM for 10 minutes each watering:
You must pro ram your timer at either 6:00 am or 6:00 pm (the hour that your want to be in waterin ). At 6:00AM OR 6:00PM
set the FREQUENCY knob to 12 (hours) and the RUN TIME knob to 10 (minutes). AFTER 12 HOURS, the timer will be in its first
pro ram and run for 10 minutes. 12 hours is the time delay before the timer be ins its first pro ram. The timer will now water
everyday at 6:00 AM and 6:00 PM for 10 minutes until you chan e it.
B. You want to water every morning at 7:00AM for 45 minutes:
At 7:00AM, set the FREQUENCY knob to 24 (hours) and the RUN TIME knob to 45 (minutes). The timer will not be in its pro ram
until THE NEXT DAY AT 7:00AM when it will water for 45 minutes. The timer will now water everyday at 7:00AM for 45 minutes
until you chan e it.
LARGE LOCKING
COLLAR RING
TIME DELAY FEATURE
FREQUENCY
CONTROL KNOB
BATTERY
COMPARTMENT
3/4 TAP CONNECTOR
LOW BATTERY
INDICATOR
MANUAL ON/OFF
RUN TIME CONTROL
HOSE CONNECTOR
2. Make a record of the date you pro rammed the timer, the FREQUENCY and the RUN TIME settin s for your reference.
3. You can use the "ON/OFF" functions at any time without interruptin the FREQUENCY settin .
Just turn the RUN TIME knob to the "ON" position. When finished turn to "OFF" for five seconds then return the RUN TIME knob
to your desired settin .
4. REPLACE THE WATERPROOF COVER AFTER PROGRAMMING, ENSURING THAT IT IS TIGHTLY SCREWED ONTO THE TIMER.
5. You can delay the start of your waterin time usin the Time delay feature.
Use the point of a pen to press the button once for each hour you want todelay the waterin time.
You can delay waterin by 1 hour intervals only, up to a maximum of12 hours.
For example, to delay waterin for 3 hours, press the time delay button 3 times.
Notes:
1. The timer starts keepin time when you set it. You MUST set the timer at the hour you want it to run. For example, as in Sample
Pro ram B above, ifyou want the timer to come on at 7:00AM you must physically set it at 7:00AM.
2. You may chan e frequencies and run time at any time by just turnin the Frequency knob or the Run Time knob to a new settin .
3. To STOP the timer and cancel the frequency settin , turn the Frequency knob to RESET. All waterin will stop. To reactivate,
you must repro ram the timer.
Trouble-shooting guide:
If the water does not come on, please check the followin :
1. Be sure the tap is turned on.
2. Check to be sure the batteries are in ood condition and are installed correctly.
3. Check to be certain that the frequency and run times are the same as your record.
4. Be sure that the frequency settin is lon er than the run time. For example, you cannot set the frequency at the1 hour settin
and have the run time set for anythin over 60 minutes.
5. If the timer still does not work, please contact the store where you bou ht the timer.
Caution:
PROTECT THE TIMER AND ITS PARTS FROM FREEZING. Prior to the first frost or freeze, remove the timer from the faucet and store
indoors until sprin . Remember to remove the batteries from the battery compartment
Installation:
1. Wasserdichte Kappe abschrauben. Die Batterie-box lan sam aus der Vorderseite herausschieben.
2 neue 1.5V Alkaline Batterien (Grösse AAA) einle en.
2. Uhr testen: RUN TIME Knopf von "OFF" Position zu "ON" Position drehen. Motor wird binnen
30 Sekunden hörbar. Sie können jetzt die Schaltuhr pro rammieren.
3. Falls der Motor nicht hörbar ist, sehen Sie ob die Batterien richti lie en.
4.
Die Schaltuhr erade halten. Die GROSSE HALSSCHRAUBE oben aufschrauben bis der innere HAHNANSCHLUSS lose ist. Den
HAHNANSCHLUSS an den Hahn schrauben is er handfest sitzt und dann die GROSSE HALSSCHRAUBE festschrauben. Hahn aufdrehen.
WARNUNG - KEINE ZANGEN VERWENDEN UM DIE SCHRAUBEN FESTZUDREHEN, dies beschädi t die Schaltuhr.
Programmieren:
1.
Knöpfe drehen um die FREQUENZ ZEIT in Stunden und die LAUFZEIT in Minuten einzustellen. BEMERKUNG: Nach der ersten
Pro rammierun , be innt die Bewässerun erst nach der ersten Zeitfrist. Die Zeitfrist is die Anzahl der Stunden auf dem FREQUENZ-Knopf.
Programmbeispiele:
A. Sie wollen jeden Morgen um 6:00 AM und jeden Abend um 6:00 PM 10 Minuten bewässern:
Pro rammieren Sie die Schaltuhr um 6:00 AM or 6:00 PM (zur Stunde der erwünschten Bewässerun ). Um 6:00 AM oder 6:00
PM setzen Sie den FREQUENZ Knopf auf 12 (Stunden) und den LAUFZEIT Knopf auf 10 (Minuten). Nach 12 Stunden wird die
Schaltuhr zum ersen mal 10 Minuten bewässern. 12 Stunden ist die Zeitfrist nach der die erste Bewässerun be innt. Die Schaltuhr
wird nun tä lich um 6:00 AM und 6:00 PM 10 Minuten bewässern, bis Sie sie neu pro rammieren.
B. Sie wollen jeden Morgen um 7:00AM 45 Minuten bewässern:
Um 7:00AM, setzen Sie den FREQUENZ Knopf auf 24 (Stunden) und den LAUFZEIT Knopf auf 45 (Minuten). Die Bewässerun
be innt erst am nächsten Ta um 7:00AM während 45 Minuten. Die Schaltuhr wird nun tä lich um 7:00AM 45 bis Sie sie neu
pro rammieren.
2. Prenez note de la date, de lheure du ré la e ainsi que la fréquence et la durée darrosa e pour toute référence future.
3. Vous pouvez utiliser les fonctions ON/OFF (arrêt/marche) à tout moment, sans chan er le ré la e de fréquence: il suffit de posistionner
le bouton RUN TIME (temps darrosa e) sur ON (marche). Larrêt se fait en position OFF (arrêt) pendant cinq secondes avant le retour
de repositionner le bouton au ré la e ori inal.
4.
POUR ASSURER UNE BONNE ÉTANCHÉITÉ, LAPPAREIL DOIT FONCTIONNER AVEC SON COUVERCLE FERMEMENT VISSÉ SUR SA FACE AVANT
5.
Vous pouvez utiliser la fonction ré la e de délai et commencer larrosa e à retardement en pressant le voyant REGLAGE DE DELAI.
Utiliser la pointe dun crayon pour chaque heure de retardement désirée. Vous pourrez repousser larrosa e à 1heure dintervalle et
jusquà un maximum de 12heures. Par exemple: pour reposser larrosa e de 3 heures, appuyer sur le si nal ré la e de délai 3 fois.
Notes:
1. Le pro rammateur commence son compte à rebours dès son ré la e. Vous DEVEZ faire ce ré la e à lheure et à la minute même
ou vous souhaitez la mise en eau pro rammée. Par ex. vous souhaitez une mise en eau journalière à 7h du matin. Vous devez donc
ré ler le pro rammateur en temps réel à 7h du matin!
2. Vous pouvez modifier les ré la es de fréquences et de durées tout simplement en repositionnant les boutons.
3. Pour stopper le pro rammateur et annuler le ré la e de fréquence, positionner celui-ci sur RESET.
En cas de problème:
SI LEAU NE PASSE PAS, VERIFIER:
1. Le robinet / vanne dalimentation qui doit doit être mis en eau.
2. Sassurer de la bonne char e et du bon état des piles.
3. Sassurer que le ré la e de fréquence et de la durée darrosa e sont ceux que vous désirez et que vous avez au préalable notés .
4. La valeur de la fréquence doit être supérieure à la valeur de la durée darrosa e.
5. Au cas ou lappareil ne fonctionnerait toujours pas, votre revendeur se fera un plaisir de vous venir en aide.
ATTENTION
EN CAS DE GEL.
Avant les elées dhiver, il est prudent de remiser le pro rammateur à labri jusquau printemps. Ne pas laisser les piles dans lappareil.
2. Notieren sie das Datum, die FREQUENZ und die LAUFZEIT Einstellun .
3. Sie können die "ON/OFF" Funktion zu jeder Zeit einstellen, ohne die FREQUENZ Einstellun zu ändern.
Drehen Sie den LAUFZEIT Knopf zur "ON" Position. Danach drehen Sie zu "OFF" auf 5 Sekunden , dann drehen Sie den LAUFZEIT
Knopf zur ewünschten Einstellun .
4. NACH DEM PROGRAMMIEREN DIE WASSERDICHTE KAPPE WIEDER DICHT AUFSCHRAUBEN.
5. Sie können durch Drücken auf den Zeitfrist Knopf die Zeitfrist-Funktion verwenden um die Bewässerun szeit hinauszuschieben.
Drücken Sie mit einem dünnen Stift einmal für jede Stunde die Sie die Bewässerun szeit hinauszuschieben wünschen, bis zu
einem Maximum von 12 Stunden
Z.B. falls Sie die bewässerun szeit um 3 Stunden hinausschieben wollen drücken Sie dreimal auf den Knopf.
Notieren:
1. Die Schaltuhr hält sich an die ein estellte Zeit. Sie MÜSSEN die Uhr auf die ewünschte Zeit setzen. Zum Beispiel, wie im
Pro ramm B oben, falls Sie die Bewässerun um 7:00AM wünschen, müssen Sie sie auf 7:00AM einstellen.
2. Sie können Frequenz und Laufzeit jederzeit ändern, durch Einstellen des FREQUENZ oder LAUFZEIT Knopfes.
3. Um die Uhr zu stoppen und die Frequez zu ändern, drehen sie den FREQUENZ Knopf zu RESET. Die Bewässerun hört auf.
Um zu reaktivieren, müssen Sie repro rammieren.
Problemlösung:
Falls das Wasser nicht fliessen sollte:
1. Prüfen Sie ob der Hahn auf edreht ist.
2. Prüfen Sie ob die Batterien in Ordnun sind und richti ein ele t sind.
3. Prüfen Sie ob die FREQUENZ und LAUFZEIT Ihren Notizen ensprechen.
4. Prüfen Sie, dass die FREQUENZ Einstellun län er als die LAUFZEIT ist. Zum Beispiel können Sie nicht die FREQUENZ auf1
Stunde und die LAUFZEIT auf über 60 Minuten setzen.
5. Falls die Schaltuhr doch noch nicht funktioniert, bitte kontaktieren Sie den Verkäufer.
Achtung:
SCHÜTZEN SIE DIE SCHALTUHR VOR FROST
Vor dem ersten Frost, die Schaltuhr vom Hahn abschrauben und bis Frühlin im Inneren aufbewaren. Batterien aus dem Gehäuse
nehmen.
Operation Instructions
1180 Watering Timer
GRAND COLLIER
DE SERRAGE
REGLAGE DE DELAI
REGLAGE DE
FREQUENCE
DARROSAGE
BOITIER ET
PORTE-PILES
RACCORD DE ROBINET
3/4- 20/27MM
NIVEAU
DE PILES
ARRET/MARCHE
MANUEL
DUREE
DARROSAGE
RACCORD DE TUYAU
Notice dutilisation
Programmateur darrosage 1180
Betriebsanweisungen
1180 Elektronische Bewässerungsschaltuhr
GROSSE HALSSCHRAUBE
ZEITFRIST
KENNZEICHEN
FREQUENZ KNOPF
BATTERIEN BOX
3/4 HAHNANSCHLUSS
NIEDRIGE
BATTERIE
ANZEIGER
MANUELLE
SCHALTUNG ON/OFF
LAUFZEIT KONTROLLE
SCHLAUCHANSCHLUSS
SAVING WATER S INCE 1906
TM
BATTERY WARNINGS
* Remove exhausted batteries from this product.
* o not dispose of batteries in a fire, batteries may explode or leak.
* o not short-circuit the battery terminals.
* o not mix used and new batteries.
* o not mix alkaline standard (carbon-zinc) or rechargeable batteries.
* o not use rechargeable batteries in this product.
* o not recharge non-rechargeable batteries.
* o not allow any part to come in contact with heat or a direct flame.
* o not allow water to come into contact with the batteries or wiring.
*
When installing batteries in the battery compartment, ensure the batteries are placed as marked (+)(-).
* Only the recommended batteries should be used.
* Keep this product out of the reach of small children.
BATTER E WARNUNGEN
* Lehre Batterien aus dem Gehäuse nehmen.
* Batterien nicht ins Feuer werfen, sie können explodieren oder ausrinnen.
* Vermeiden Sie Kurzschluss an den Batterie-enden.
* Nicht alte und neue Batterien gleichzeitig einlegen.
* Nicht Alkaline Standart (carbon-zinc) oder aufladbare Batterien mischen.
* Aufladbare Batterien in diesem Produkt nicht verwenden.
* Nicht-aufladbare Batterien nicht aufladen.
* Kein Teil der Batterien in Kontakt mit Hitze oder Flamme bringen.
* Wasser nicht in Kontakt mit Batterien oder rähten bringen
* Beim einlegen der Batterien in die Batterien-box, versichern dass die Batterien wie markiert (+)(-) liegen.
* Nur empfolene Batterien verwenden.
* as Produkt aus der Nähe von Kindern entfernen.
LES PILES:
* Ne pas laisser des piles déchargées dans lappareil.
* Ne jamais jeter les piles dans le feu.
* Ne jamais court-circuiter les plots d'une pile.
* Ne pas mélanger piles chargées et déchargées.
* Ne pas utiliser conjointement des piles standard et rechargeables.
* Ne pas utiliser des piles rechargeables dans cet appareil.
* Ne jamais essayer de recharger des piles non-rechargeables.
* Ne pas mettre au contact du feu.
* Ne pas mettre au contact de leau.
* Lors de linstallation, sassurer de la bonne position des plots (+) (-).
* Nutiliser que les sortes de piles recommandées.
* Tenir hors de portée des enfants en bas âge.

