Ellison eclips EC-C1200 User manual

SUBSECTION
CUTTING BLADE MAINTENANCE
MAINTENANCE
CLEANING ThE CUTTING BLADE
internal use only V.2.02
Read Guide Before Operating Product.
Save for Reference.
Version 2.0 Software
For software updates,
please visit
Sizzix.com/eclips
Now you’re in control.
USER’S GUIDE
Electronic Shape-Cutting Machine
and Handheld Remote Control

2WELCOME
WELCOME
Brace yourself for the total eclips!
It all starts with one touch. e eclips™ Electronic Shape-Cutting Machine and Handheld Remote
Control combines the creativity of award-winning Sizzix artwork with the amazing cutting
precision and remote-controlled intelligence of our most innovative creative product ever.
With just the touch of a button, you can create spot-on shapes and letters to adorn almost
anything imaginable. In addition, several different image-enhancing features help transform any
shape into a customizable creation. Want to change things up a bit? Just change the cartridge
and change your possibilities! Best of all, everything you need to get started is right here –
no computer required!
But there’s more … much more! With Version 2.0, we’ve incorporated many new changes to
enhance your user experience.Among the highlights is a Pen Holder accessory to draw any shape
with virtually any felt tip, ballpoint or glue pen. Also, for the first time, you can cut and score
easy fold lines at once to create albums, bags, boxes, cards and envelopes. And with Print2Cut
Creative Software, feel free to colorize, design and print an eclips shape from your home
computer and printer and cut it with the eclips Machine.
For Tips & Tricks, software updates and more, visit Sizzix.com.
Want to learn more about an eclips feature?
At Sizzix.com/eclips, there’s a video that corresponds to
almost any topic in the Table of Contents.

3
TABLE OF CONTENTS
Welcome.............................. 2
Important Safety Instructions. . . . . . . . . . . . . . 4
Contents.............................. 5
Accessories............................5
Set Up ............................... 6
Connecting............................6
Setting Your Blade Depth. . . . . . . . . . . . . . . . . .6
Inserting Blade in Blade Holder . . . . . . . . . . . . .7
Installing the Cutting Blade Holder. . . . . . . . . . .7
Workspace ............................8
StartingtheMachine.....................8
CuttingMat............................8
Placing Material on Cutting Mat . . . . . . . . .8
Loading Cutting Mat in Machine . . . . . . . . .8
Handheld Remote Control . . . . . . . . . . . . . . . . 9
Introduction Screen . . . . . . . . . . . . . . . . . . . . .10
Inserting a Cartridge . . . . . . . . . . . . . . . . . . . .10
EasyStartBasics....................... 11
Selecting Material Type . . . . . . . . . . . . . . . . . .11
Selecting Material Size. . . . . . . . . . . . . . . . . . .11
SelectingaShape ......................12
Cutting..............................12
SelectingaFont........................12
Font Spacing and Line Breaks. . . . . . . . . . .13
Additional Font Features . . . . . . . . . . . . . .13
BlueandRedALTkeys...................13
BeyondtheBasics...................... 14
OptionsMenu.........................14
Solid.............................14
Outline...........................14
Shadow...........................14
Pieces ............................14
Embellishments.....................14
Border............................15
AddtoQueue.........................15
EditQueue ........................15
FunctionKeys .........................16
Setup ............................16
Fill...............................16
Fit...............................16
PIP ..............................17
Mirror . . . . . . . . . . . . . . . . . . . . . . . . . . . .17
Actual ...........................18
Load/Unload.......................18
LastPt. ...........................18
Repeat............................19
Search ...........................19
Advanced............................. 19
SpeedSettings.........................19
PressureSettings.......................20
ScoringAdjustment.....................20
Adjusting for the Perfect Cut . . . . . . . . . . . . . .20
Blade & Material Positioning . . . . . . . . . . . . . .21
PaperSaver...........................21
Laser Calibration Setup . . . . . . . . . . . . . . . . . .22
DimensionsSetting.....................22
LaserSetting..........................23
Pop-UpMenu.........................23
AddtoFavorites ....................24
BladeHolder.......................24
CenterPoint .......................25
DoubleCut........................25
LaserCutPreview....................26
PenHolder.........................26
Print2Cut..........................27
Rotate............................28
Frequently Asked Questions . . . . . . . . . . . . . . 29
Maintenance.......................... 30
Cutting Blade Maintenance . . . . . . . . . . . . . . .30
Cleaning the Machine . . . . . . . . . . . . . . . . . . .31
Troubleshooting ....................... 32
End User License Agreement. . . . . . . . . . . . . . 33
Warranty............................. 34
TABLE OF CONTENTS
4
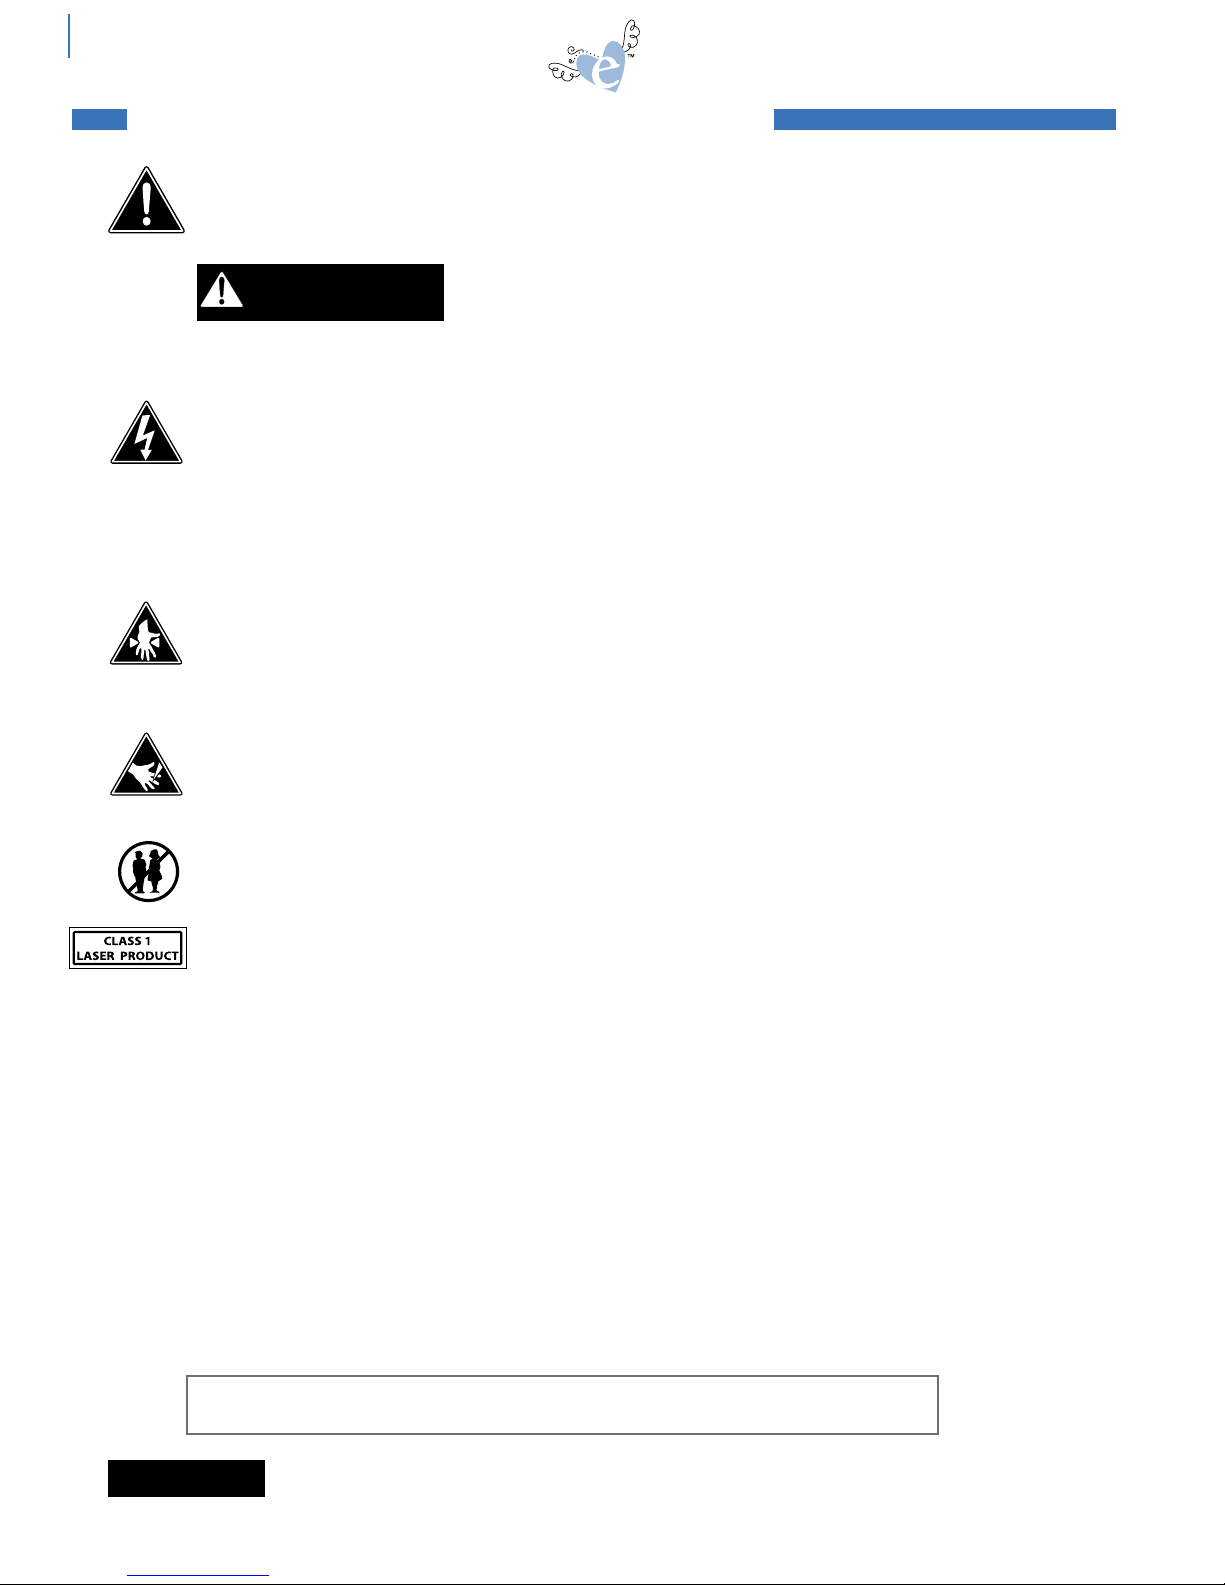
Important safety InstructIons
THIS DEVICE IS INTENDED FOR HOUSEHOLD USE ONLY!
To reduce the risk of fire, electrical shock or personal injury, read and understand all the instructions
and warnings that come with your eclips™ Electronic Shape-Cutting Machine and Handheld Remote
Control (“Product”).
ELECTRICAL SHOCK HAZARD
Product is an electrical device. Use with caution. Observe the following precautions:
• Do not operate Product on wet surfaces or near any water sources (tub,
shower, sink, etc.).
• Keep liquids and beverages away from Product.
• Unplug Product from outlet when not in use or before cleaning.
• Unplug Product when removing or installing Blades and/or Blade Holder.
PINCH HAZARD
Cutting Carriage can pinch fingers or hand. Feed Rollers can catch hair or clothing.
• Keep fingers away from moving parts.
• Keep hair and clothing away from moving parts.
CUTTING HAZARD
Cutting Blades are sharp. Handle with care.
• Keep fingers away from exposed blade.
Keep away from Children
• Choking hazard. Small parts.
This product has a Class 1 laser and complies with International Standards EN 60825-1; a Class 1 laser
product is safe under reasonably foreseeable conditions of operation. Use of controls or adjustments
or performance of procedures other than those specified herein may result in hazardous radiation
exposure.
• Do not disassemble the device.
• Do not shine the laser on a reflective surface.
• Do dispose of the product according to the local laws and regulations of your region.
• Do not look directly at laser at any time.
GENERAL SAFETY RULES:
• Read and understand all the instructions and warnings that come with the Product.
• Always operate Product on a dry, clean, level surface.
• Do not operate Product with wet hands.
• Keep area of operation well lit.
• Do not operate Product near flammable liquids or gases.
• Do not operate Product out of doors.
• Do not unplug Product by tugging or pulling the power cord.
SAVE THESE INSTRUCTIONS AND WARNINGS and keep them near your eclips™ products.
Please visit Sizzix.com for more information about your eclips products.
The device complies with Part 15 of the FCC Rules. Operation is subject to the following two
conditions: (1) this device may not cause harmful interference, and (2) this device must
accept any interference received, including interference that may cause undesired operation.
IMPORTANT SAFETY INSTRUCTIONS
WARNING
NOTICE
important safety instructions

5
656160
ALL OCCASIONS
656166
BABY
MILESTONES
656172
VACATION
1. eclips 12" (30.5cm) Shape-Cutting Machine
(Model # EC-C1200)
2. eclips Handheld Remote Control (Model # EC-R1200)
3. eclips Handheld Remote Control Cradle
4. eclips User‘s Guide – Multi-Language
5. Universal Power Supply
6. Power Cord
7. eclips Blade Holder
8. eclips Blades, Standard, 2 Pack
9. eclips Cartridge Easy-Store Case
10. eclips 12" x 12" (30.5cm x 30.5cm) Cutting Mat
11. 6' (1.8m) USB 2.0 Cable
12. eclips Starter Design and Font Cartridge
13. eclips Starter Design and Font Cartridge Booklet
2
4
5
7
8
10
11
3
9
CONTENTS
1
14. Shape and Font Cartridges – More shapes in fun
themes, styles and occasions
15. eclips Replacement Blades – Keeps cutting crisp
16. 12" x 24" (30.5cm x 61.0cm) Cutting Mat –
For longer cuts such as borders
17. Tool Kit – Set of useful tools to enhance shapes and
ensure easy removal from Cutting Mat
18. Spatula/Burnisher – Lifts shapes off Cutting Mat,
plus burnishes rub-on designs
19. Die Pick – Helps remove tiny cut pieces from Cutting Mat
20. Craft Knife – For precision cutting and trimming
21. Mini USB Cable – Connects Handheld Remote
Control to your computer for future software upgrades
22. Pen Holder – Holds most felt tip, ballpoint or glue pens
to draw a shape
23. Print2Cut Software – design and print an eclips shape
from your home computer
SOLD SEPARATELY – Available at your local Sizzix retailer or online at Sizzix.com.
15
12
16
17 18
19
20
6
13
21
14
CONTENTS
ACCESSORIES
22
CONTENTS

6
Back of
Handheld Remote Control
Back of machine
2
3
1
Printed on a ring around the Blade Holder top are Blade Depth Settings. Ranging from 1 to
6, these numbers can be selected individually by turning the wheel to the number relative
to the material you are using.
As a general rule, thinner materials such as paper and vinyl require a lower number
Blade Depth Setting, while thicker materials such as light chipboard and heavy cardstock
require a higher number Blade Depth Setting. For optimal results, try a test cut and make
necessary adjustments to the Blade Depth Setting before performing the final cut.
Depth Selection
Arrow
1. Plug Power Cord into Universal Power Supply.
2. Plug Universal Power Supply into back of eclips Machine.
3. Plug USB cable into back of eclips Machine.
4. Plug flat end of the USB cable into Handheld Remote Control.
4
CONNECTING
set up
DO NOT adjust blade depth while Machine is operating.
NOTICE
SET UP
SETTING YOUR BLADE DEPTH
Lower number = Thinner material.
Higher number = Thicker material.

7
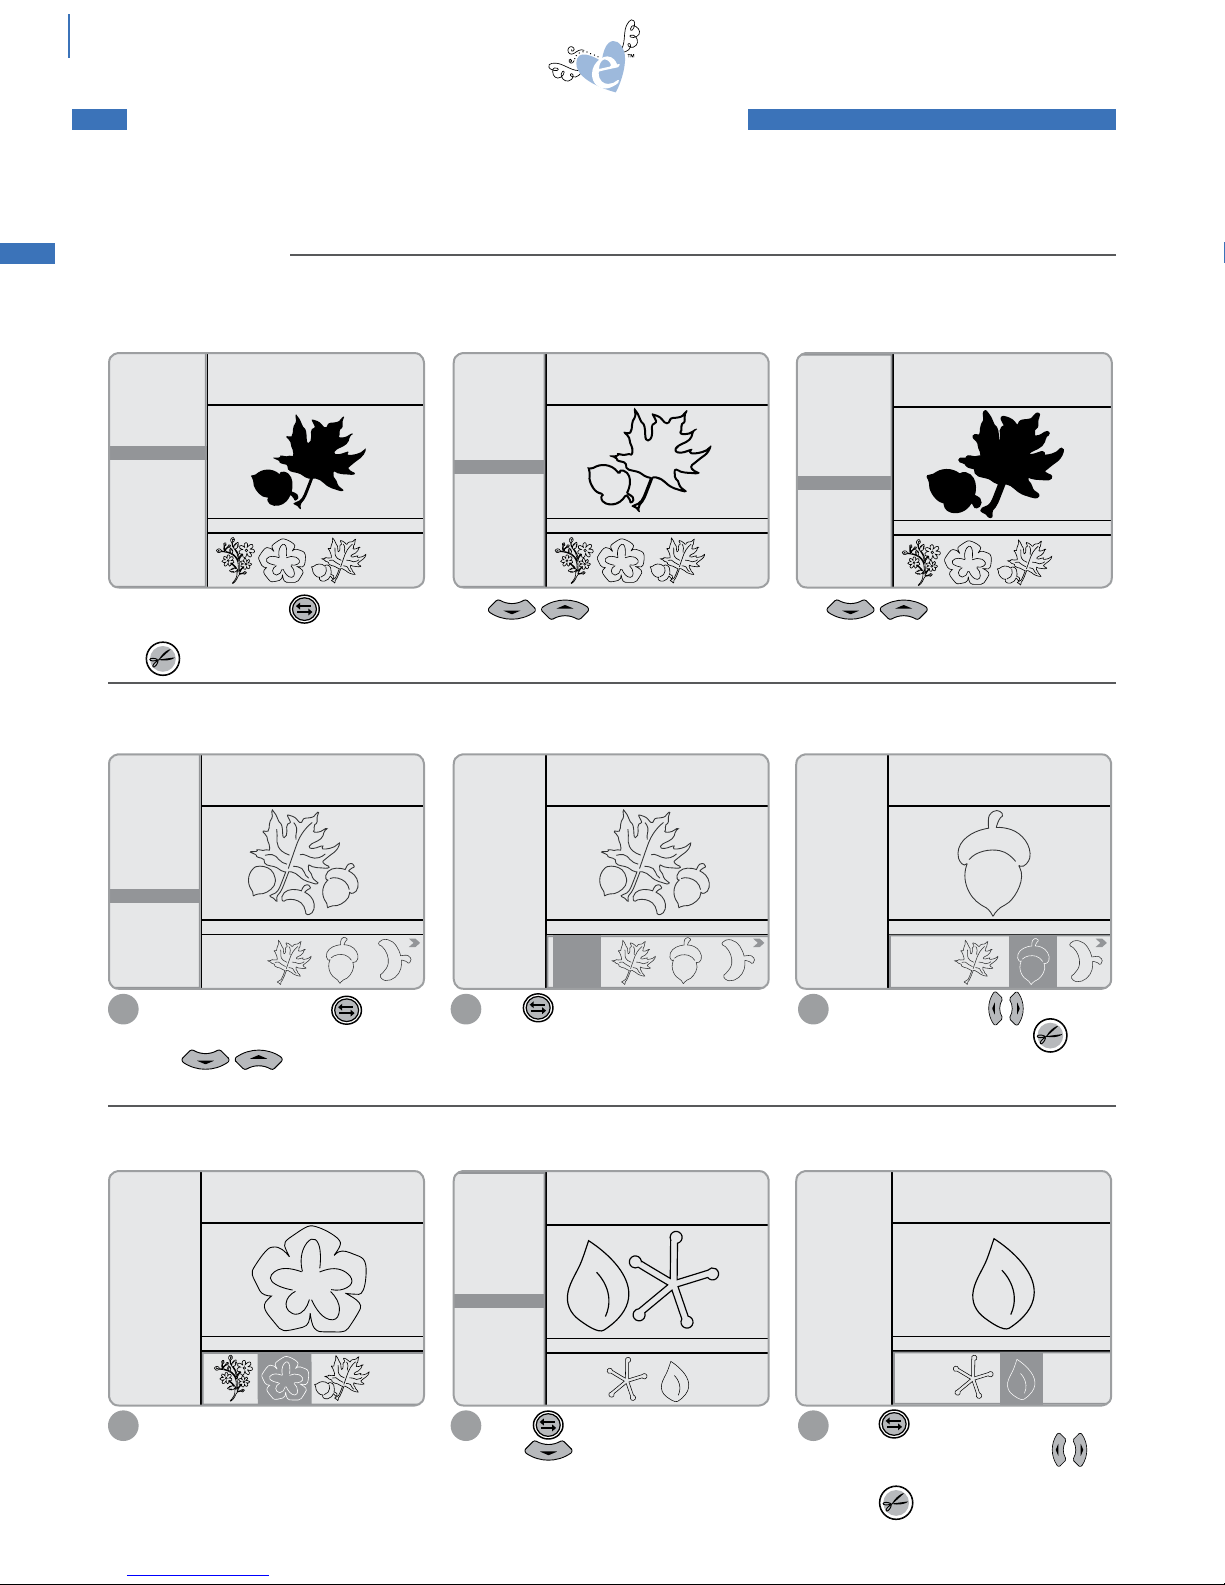
CUTTING BLADE MAINTENANCE
Lift open Machine cover to expose
Carriage and Blade Holder Clamp.
Loosen Clamp by turning Clamp Screw
counterclockwise approximately 1/4 of
a turn. (Important: Spring on end of
Clamp Screw MUST be kept in place.)
Place Blade Holder into Clamp, making
sure that Depth Selection Arrow is
facing out.
1 2 3
Clamp Screw
Top edge of Clamp
Depth Selection
White Ring
Arrow
Angled
Cutting edge
Blue
Safety Cap
Insert this end
into Blade Holder
Non-cutting side
Tighten Blade Holder by turning the
Clamp Screw clockwise until Blade
Holder is secure.
4
Clamp Screw
White Ring
Clamp
set up
CAUTION: CUTTING HAZARD Blade is sharp, handle with care.
WARNING: MOVING PARTS Keep fingers, hair and clothing away.
CAUTION: CUTTING HAZARD Keep fingers away from exposed blade.
CAUTION: Always unplug Machine before removing or installing Blade Holder.
INSTALLING THE CUTTING BLADE HOLDER
Carefully remove Blue Safety Cap from
Blade, exposing angled cutting edge.
Carefully insert non-cutting side of
Blade into hole at bottom of Blade
Holder. Blade is held in place
magnetically.
Note that blade is exposed but barely
visible when inserted properly.
1 2 3
INSERTING BLADE IN BLADE HOLDER

8
Plug Power Cord into wall outlet.
1Press Power button (front of Machine shown).
2
Pressing Power button
again will turn the
Machine OFF.
Leave 12" to 24" clear space behind your eclips Machine to allow full Cutting Mat movement.
Place your eclips Machine at least 12" from the edge of your table to prevent it from tipping
over and causing possible injury.
Front
12" - 24"
12" – 24"
12"
Peel back and remove plastic cover from
Cutting Mat.
Align material to be cut with top left edge
of Cutting Mat. Press evenly into place.
1 2
Open cover and extend tray. (The Cutting
Mat can also be loaded with the Machine
cover closed.)
Align top edge of Cutting Mat against rollers and
push Load button. The Machine will automatically
move the Cutting Mat to Start position.
1 2
Rollers
Load Button
Tray
PLACEMENT
Replace plastic cover on
Cutting Mat when not in use.
set up
Place eclips Machine on clean, level, dry and sturdy surface.
ENVIRONMENT
DO NOT unplug USB cable from Handheld Remote Control while Machine is
in use. This will cause data loss.
NOTICE
WARNING: MOVING PARTS Keep fingers, hair and clothing away.
When removing more intricate shapes
from Cutting Mat, an eclips Spatula is
recommended (sold separately).
3
Push the Load button
again to remove Cutting
Mat from Machine.
PLACING MATERIAL ON CUTTING MAT
STARTING THE MACHINE
CUTTING MAT
LOADING CUTTING MAT IN MACHINE
WORKSPACE

9
Blade
Positioner
Control
Delete
ALT Blue
Rectangle
Screen
Navigator
Control
Function
Keys
Add to Queue
Display Window
Pop-Up
Menu
Toggle Escape
Return
ALT Red
Circle
Shift
Options
Menu
Queue Display
Main Display
Selection Display
ALT keys add options to keypad. When highlighted, red or blue keypad characters are active.
Cut
HANDHELD REMOTE CONTROL
Page 16 Page 16 Page 16 Page 17 Page 17 Page 18 Page 18 Page 18 Page 19 Page 19
The Function Keys along the top of the keypad access additional features.
View the pages indicated below for details on how to use these keys.
Screen slides up
FUNCTION KEYS
HANDHELD REMOTE CONTROL

10
Setup
Space
P
R
Screen Navigator
Control
Select default language using Screen
Navigator Control and
press .
Setup
Space
P
R
Setup
Space
P
R
Setup
Space
P
R
1Select default dimensions and
press .
Setup
Space
P
R
2Enter your name and press .
Setup
Space
P
R
3
Insert a cartridge to begin.
4
Select eclips cartridge with logo side up.
1Slide eclips cartridge into right side of
Handheld Remote Control.
2
English
Spanish
German
French
Select default language and
press
Inches
Millimeters
Select default dimension and
press
Please enter your name and
press
Megan
SPEED: 4
PRESSURE: 3
12"x12"
CARDSTOCK M
H: 1.50" W: 1.50" QTY: 1
Please insert Cartridge
Note that cartridges are
interchangeable while
Machine is on except
when warning message
appears.
handheld remote control
INSERTING A CARTRIDGE
INTRODUCTION SCREEN
Screen slides up and down
11
Press to highlight material.
Press to apply changes.
Setup
Space
P
R
Setup
Space
P
R
Setup
Space
P
R
Press in Options Menu.
1
SPEED: 4
PRESSURE: 3
12"x12"
Cardstock M
Flowers
Frames
Phrases
Rockin’ Janie.f
Shapes
H: 1.50" W: 1.50" QTY: 1
to open category
for more options
Select artwork from category
SPEED: 4
PRESSURE: 3
12"x12"
Cardstock M
H: 1.50" W: 1.50" QTY: 1
to see material options
for more options
2Press to see materials options.
Setup
Space
P
R
Selected material now appears on screen.
4
SPEED: 4
PRESSURE: 2
12"x12"
Cardstock L
H: 1.50" W: 1.50" QTY: 1
to see material options
for more options
Setup
Space
P
R
Setup
Space
P
R
Setup
Space
P
R
Setup
Space
P
R
Press in Options Menu.
Press to see material size options.
Selected material now appears on screen.
Press to continue.
1 3
SPEED: 4
PRESSURE: 2
12"x12"
Cardstock L
H: 1.50" W: 1.50" QTY: 1
to select material size; to Esc
for more options
SPEED: 4
PRESSURE: 2
12"x12"
Cardstock L
H: 1.50" W: 1.50" QTY: 1
to select material size; to Esc
for more options
12"x12"
8 1/2"x11"
8"x8"
6"x6"
A4
12"x24"
Dimensions
Laser
SPEED: 4
PRESSURE: 2
8"x8"
Cardstock L
H: 1.50" W: 1.50" QTY: 1
to select material size; to Esc
for more options
Setup
Space
P
R
Setup
Space
P
R
2Press to highlight material
size. Press to apply changes.
Setup
Space
P
R
Setup
Space
P
R
Setup
Space
P
R
The eclips Machine can cut a variety of materials from paper and vellum to construction paper, cardstock, vinyl, foam and
light chipboard. Select the material to be cut in the Options Menu as shown below.
3
SPEED: 4
PRESSURE: 3
12"x12"
Cardstock M
H: 1.50" W: 1.50" QTY: 1
to select material; to Esc
for more options
Cardstock L
Cardstock M
Cardstock H
Chipboard
Vellum L
Vellum H
Vinyl
Fabric
Setup
Space
P
R
Setup
Space
P
R
easy start basics
Cardstock L (Light), M (Medium), H (Heavy)
Begin with preset settings for Speed and Pressure.
Try a test cut on similar material weight. Please see
pg. 20 for more suggestions.
Speed and Pressure adjust automatically based on
material selected. To manually adjust these settings,
please see pgs. 19-20.
SELECTING MATERIAL TYPE
SELECTING MATERIAL SIZE
To CUT: Press to send design or font selection to Machine.
To PAUSE: Press again to pause Machine.
To RESUME Cutting: Press to resume cutting.
To POSITION CUTTING BLADE: Use Blade Positioner Control to move Cutting Blade.
To ESCAPE: Press to go back one screen.
easy start basics
12
Highlight a category from Options
Menu and press .
Setup
Space
P
R
1
SPEED: 4
PRESSURE: 2
8"x8"
Cardstock L
Flowers
Frames
Phrases
Rockin’ Janie.f
Shapes
H: 1.50" W: 1.50" QTY: 1
to open category
for more options
Select artwork from category
SPEED: 4
PRESSURE:2
8"x8"
Cardstock L
Shadow
Pieces
Embellishment
H: 1.50" W: 1.61" QTY: 1
Starter and Rockin’
Janie
suggested min
height=2.5"
Starter and Rockin’
Janie
H: 2.50"W: 1.61" QTY: 1
to edit height; to Esc
to apply changes; to width
2Press from right Screen
Navigator Control to highlight a shape.
Press to send the shape to be cut. To
change the size or quantity, press .
See pg. 14 for more options.
Setup
Space
P
R
Setup
Space
P
R
Setup
Space
P
R
3
suggested min
width=2.7"
Starter and Rockin’
Janie
H: 2.25" W: 2.42"QTY: 1
to edit width; to Esc
to apply to height to QTY
4
easy start basics
Setup
Space
P
R
Blade Positioner
Control
Use to edit height
incrementally or use red numbers on
Keypad for exact cutting size. Press
to apply changes.
Setup
Space
P
R
Setup
Space
P
R
Press to edit width. Use
to change width incrementally or use red
numbers on Keypad for exact cutting size.
Press to apply changes.
Setup
Space
P
R
Setup
Space
P
R
Setup
Space
P
R
Press to send the shape to be cut to
the Machine.
Press again to pause the Machine.
Setup
Space
P
R
WARNING: MOVING PARTS Keep fingers, hair and clothing away.
Setup
Space
P
R
Setup
Space
P
R
Setup
Space
P
R
SELECTING A SHAPE
CUTTING
Starter and Rockin’
Janie
H: 2.25" W: 2.42" QTY: 1
to edit qty; to Esc
to apply; to width
5Press to edit quantity. Use
to change quantity or use red numbers on
Keypad for specific quantity. Press
to apply changes.
Setup
Space
P
R
Setup
Space
P
R
Setup
Space
P
R
Setup
Space
P
R
When editing size, the
Options Menu displays
suggested minimums,
which should be used
for optimum results.
For smaller sizes,
perform test cut.
Setup
Space
P
R
SELECTING A FONT
Highlight a font from Options Menu
and press .
Setup
Space
P
R
1
SPEED: 4
PRESSURE: 2
8"x8"
Cardstock L
Flowers
Frames
Phrases
Rockin’ Janie.f
Shapes
H: 2.25" W: 2.42" QTY: 2
to open category
for more options
Select artwork from category
SPEED: 4
PRESSURE: 2
8"x8"
Cardstock L
H: 2.25" W: 2.25" QTY: 2
Please enter characters using keypad
Starter and Rockin’
Janie
SPEED: 4
PRESSURE: 2
8"x8"
Cardstock L
Solid
Shadow
Tag
Charm
H: 2.25" W: 1.44" QTY: 2
Starter and Rockin’
Janie
2Use Keypad to select a letter. Use
to capitalize a letter.
Press to send to Machine. (See pg.
14 for more options.)
3
Setup
Space
P
R
Fonts are available on selected eclips cartridges. Fonts have a unique option that allows you to cut individual letters out of
tags and charm shapes. These can be placed together to form words.
Change height or width
but not both; when one
dimension is changed,
the other adjusts
automatically.
13
EASY START BASICS
Press the key to add a space
between letters. A space character will
appear in the Display Window but will
not cut.
1
SPEED: 4
PRESSURE: 2
8"x8"
Cardstock L
H: 2.25" W: --" QTY: 1
Starter and Rockin’
Janie
SPEED: 4
PRESSURE: 2
8"x8"
Cardstock L
H: 2.25" W: --" QTY: 1
Starter and Rockin’
Janie
2Press the key to add a line break
between letters. A return character will
appear in the Display Window but will
not cut.
SPEED: 4
PRESSURE: 2
8"x8"
Cardstock L
Solid
Shadow
Tag
Charm
H: 2.25" W: 1.79" QTY: 1
Starter and Rockin’
Janie
SPEED: 4
PRESSURE: 2
8"x8"
Cardstock L
Solid
Shadow
Tag
Charm
H: 2.25" W: 1.68" QTY: 1
Starter and Rockin’
Janie
Fonts have two unique options of Tag and
Charm. Press then to select Tag or
Charm. The Tag or Charm will be cut at the size
selected with the letter smaller to fit within. (For
more options see pg. 14.)
Setup
Space
P
R
Setup
Space
P
R
To cut several letters at once, use Keypad
to input letters in Selection Display. Press
and all letters will move up to Queue Display.
Press to cut. (See pg. 15 for more
information about the Queue.)
Setup
Space
P
R
Using Keypad to edit size
allows more exact sizes.
Setup
Space
P
R
Additional Font Features add shortcuts and tricks to simplify using fonts.
SPEED: 4
PRESSURE: 2
8"x8"
Cardstock L
Solid
Shadow
Tag
Charm
H: 2.25" W: 1.17" QTY: 2
Starter and Rockin’
Janie
The Keypad contains additional options beyond the standard alphabet. These can be accessed using the ALT Red Circle key
and the ALT Blue Rectangle key located on the Keypad.
Here is an example from the Rockin’ Janie font.
For capital G, press and
For lowercase G, press
For lowercase G option,
press (ALT Blue Rectangle key) and
For Percent symbol,
press (ALT Red Circle key) and
Numbers are created using ALT Red Circle key and second row of keys.
Setup
Space
P
R
Not every Keypad option
is available for every
font.
Height of a font is
measured by tallest
character.*
Lowercase letters cut in
proportion to selected
alphabet size.
*Heights of other letters may vary.
BLUE AND RED ALT KEYS
ADDITIONAL FONT FEATURES
FONT SPACING AND LINE BREAKS
Setup
Space
P
R
Font Spacing and Line Breaks: When using the negative space of the paper as a stencil, a non-cutting space and line
break can be added.
14 Beyond the Basics
Highlight shape and press to toggle to
Options Menu. Highlight Solid option.
Press to cut.
Setup
Space
P
R
Solid: the shape fully filled in
without details.
PieceS: all parts of a design that individually comprise some shapes. This feature allows the option to cut separate pieces
of a selected shape.
embelliShmentS: additional pieces of a design available for some shapes. This feature allows the option to cut
additional pieces of a selected shape for decorative purposes.
Setup
Space
P
R
Use to toggle to Selection Display. Highlight ALL or press to
highlight a single piece. Press
to cut.
2 3
SPEED: 4
PRESSURE: 2
12"x12"
Cardstock L
Solid
Outline
Shadow
Pieces
H: 2.25" W: 2.73" QTY: 2
Starter and Rockin’
Janie
Use to scroll through Options
Menu. Highlight Shadow option.
Shadow: proportionately larger solid
shape to layer behind an Original or
Solid shape.
Starter and Rockin’
Janie
SPEED: 4
PRESSURE: 2
12"x12"
Cardstock L
Solid
Outline
Shadow
Pieces
H: 2.25" W: 2.86" QTY: 2
Use to scroll through Options
Menu. Highlight Outline option.
outline: a hollow version of the
shape.
Setup
Space
P
R
Setup
Space
P
R
SPEED: 4
PRESSURE: 2
12"x12"
Cardstock L
Solid
Outline
Shadow
Pieces
H: 2.25" W: 2.67" QTY: 2
Starter and Rockin’
Janie
SPEED: 4
PRESSURE: 2
12"x12"
Cardstock L
Solid
Outline
Shadow
Pieces
H: 2.25" W: 2.72" QTY: 2
Starter and Rockin’
Janie
All
SPEED: 4
PRESSURE: 2
12"x12"
Cardstock L
Solid
Outline
Shadow
Pieces
H: 2.25" W: 2.72" QTY: 2
Starter and Rockin’
Janie
All
SPEED: 4
PRESSURE: 2
12"x12"
Cardstock L
Solid
Outline
Shadow
Pieces
H: 2.25" W: 2.72" QTY: 2
All
Starter and Rockin’
Janie
SPEED: 4
PRESSURE: 2
12"x12"
Cardstock L
Shadow
Pieces
Embellishment
H: 2.25" W: 2.42" QTY: 2
Starter and Rockin’
Janie
SPEED: 4
PRESSURE: 2
12"x12"
Cardstock L
Shadow
Pieces
Embellishment
H: 2.25" W: 2.42" QTY: 2
All
Starter and Rockin’
Janie
SPEED: 4
PRESSURE: 2
12"x12"
Cardstock L
Shadow
Pieces
Embellishment
H: 2.25" W: 2.42" QTY: 2
All
Starter and Rockin’
Janie
Setup
Space
P
R
Setup
Space
P
R
Setup
Space
P
R
Press to toggle to Options Menu.
Use to highlight Embellishment.
Press to toggle to Selection
Display. Highlight ALL or press
to highlight a single shape.
Press to cut.
2 3
Setup
Space
P
R
Setup
Space
P
R
Highlight shape and press
to toggle to Options Menu.
Use to scroll through
Menu to highlight Pieces.
1
Setup
Space
P
R
Highlight shape.
1
Setup
Space
P
R
Setup
Space
P
R
Setup
Space
P
R
Setup
Space
P
R
Setup
Space
P
R
Setup
Space
P
R
Setup
Space
P
R
Setup
Space
P
R
Setup
Space
P
R
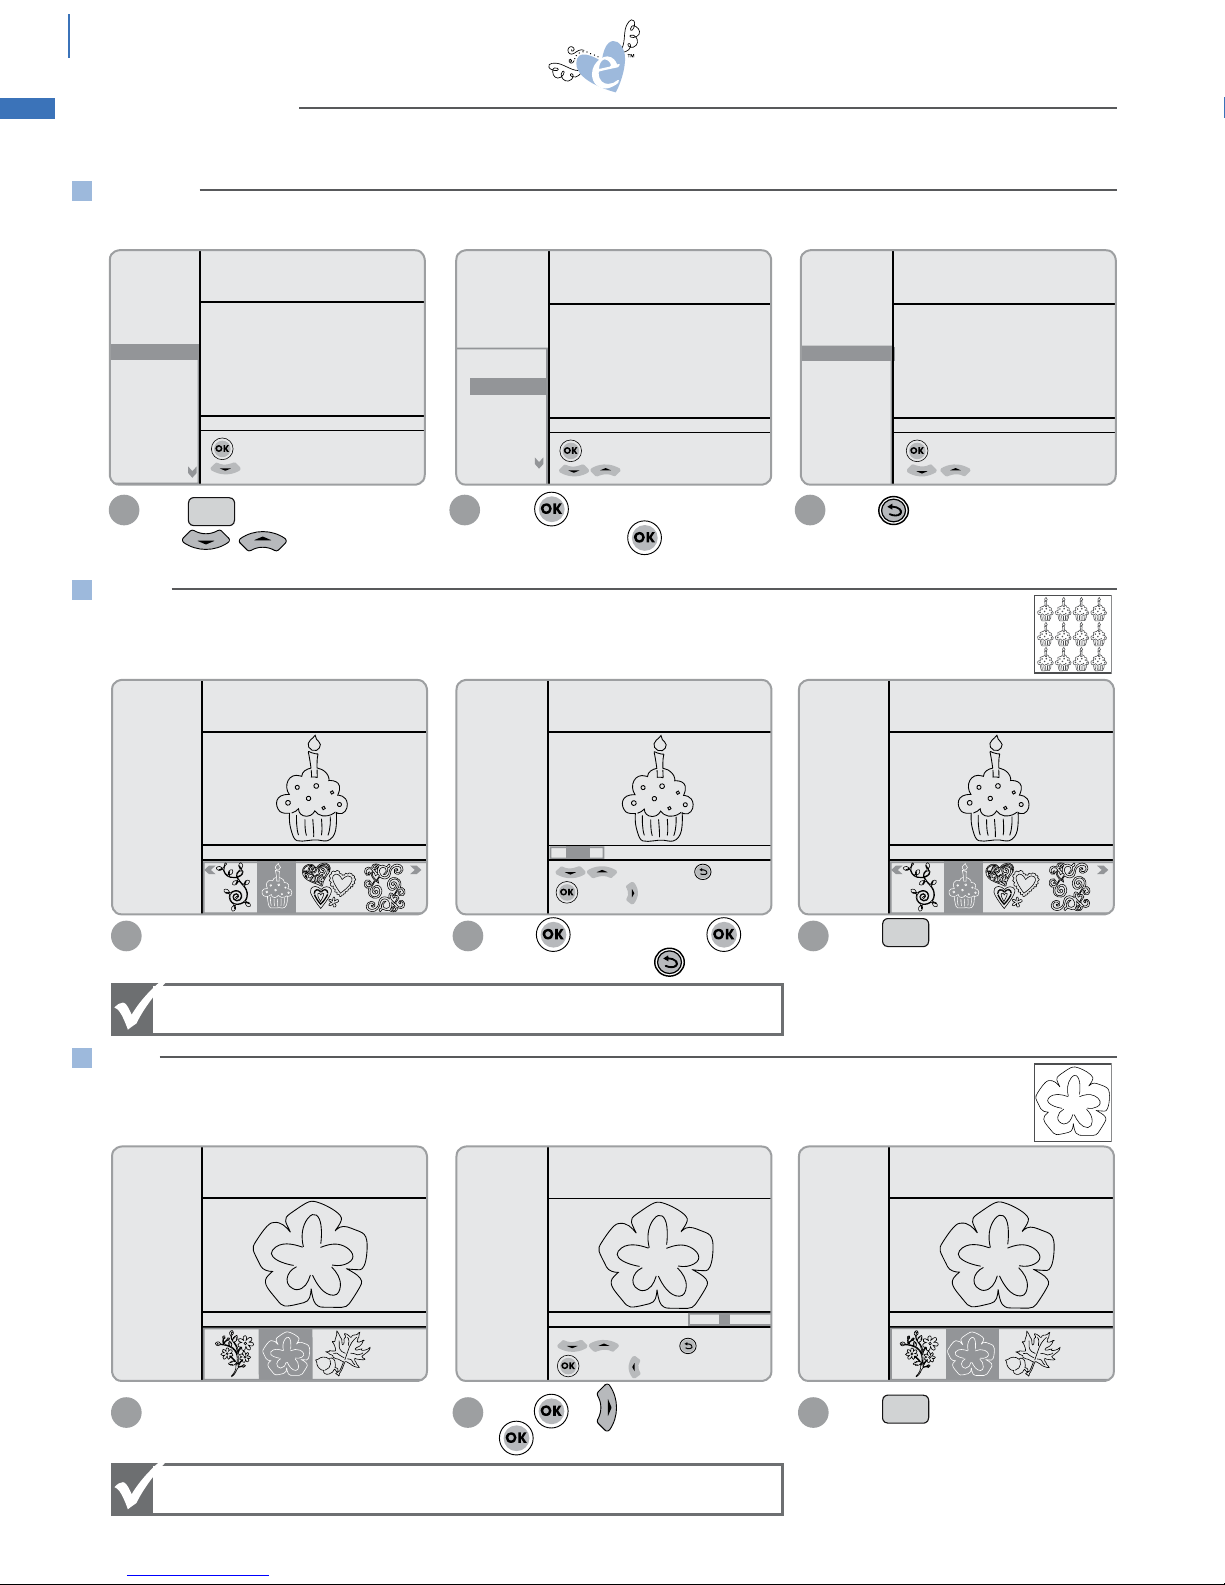
For even more creative possibilities, use the Options Menu to modify basic shapes. Options vary by design, and not all
options are available on all shapes.
OPTIONS MENU
BEYOND THE BASICS: Intermediate

15
When cutting multiple shapes, the Machine can temporarily store a number of shapes into the Queue before modifying them
or cutting them all at once.
For shapes that include a Border option,
press to toggle to Options Menu.
Use to highlight Border option.
Setup
Space
P
R
Setup
Space
P
R
1
You can also change the style, size or
quantity of any shape before adding it
to Queue.
21 Highlight shape and press to add to
Queue. Shape will now appear in Queue
Display at top of screen.
Setup
Space
P
R
6"
6" 12" 18" 24"
SPEED: 4
PRESSURE: 2
12"x12"
Cardstock L
Solid
Shadow
Border
H: 2.31" W: 6.00" QTY: 1
Starter and Rockin’
Janie
6"
SPEED: 4
PRESSURE: 2
12"x12"
Cardstock L
Solid
Shadow
Border
H: 2.31" W: 6.00" QTY: 1
6" 12" 18" 24"
Starter and Rockin’
Janie
6"
to edit size; to Esc
to apply changes; to QTY
H: 2.31" W: 6.00" QTY: 1
Starter and Rockin’
Janie
Starter and Rockin’
Janie
SPEED: 4
PRESSURE: 2
12"x12"
Cardstock L
Outline
Shadow
Pieces
H: 2.25" W: 1.51" QTY: 1
Starter and Rockin’
Janie
SPEED: 4
PRESSURE: 2
12"x12"
Cardstock L
Solid
Shadow
H: 2.25" W: 4.04" QTY: 1
Press to toggle to Selection
Display. Press to highlight desired
Border length. Press to cut.
2
Setup
Space
P
R
Setup
Space
P
R
Setup
Space
P
R
Note: Border size (height) cannot be
edited. To change quantity, press
and use to change
quantity.
Setup
Space
P
R
3
Setup
Space
P
R
Setup
Space
P
R
SPEED: 4
PRESSURE: 2
12"x12"
Cardstock L
Solid
Shadow
Tag
Charm
H: 2.25" W: 1.79" QTY: 1
Starter and Rockin’
Janie
For fonts, add all characters to
Selection Display and press
to add everything to Queue.
3
Setup
Space
P
R
From Selection Display, press
to go to Queue Display.
Setup
Space
P
R
1
H: 2.25" W: 2.95" QTY: 1
Starter and Rockin’
Janie
H: 2.25" W: 4.04" QTY: 1
Starter and Rockin’
Janie
to edit height to Esc
to apply to width
H: 2.25"W: 2.95" QTY: 1
Starter and Rockin’
Janie
suggested min
height=2.5"
Use to scroll through items in
Queue and highlight to edit. Press
to delete.
2
Setup
Space
P
R
Setup
Space
P
R
Setup
Space
P
R
To edit size or quantity, press .
3
Setup
Space
P
R
beyond the basics
Setup
Space
P
R
ADD TO QUEUE
EDIT QUEUE
Shapes will remain in Queue when a cartridge is removed and another is inserted. This way, shapes from multiple cartridges
can be added to the Queue.
Border: option on some shapes to create a repeated design in lengths of 6" (15.2cm), 12" (30.5cm), 18" (45.7 cm) or
24" (61.0 cm). An optional 24" Cutting Mat is needed to cut 18" and 24" Borders.
16
FIT takes the selected shape(s) and automatically fits it inside the material to be cut. This function can also be
used for multiple shapes in Queue.
Highlight shape. Press and edit size. Press to
apply changes or press to Escape.
Press and quantity automatically
changes to fill selected material size.
1 2 3
Setup
Space
P
R
Setup
Space
P
R
Fill
To ensure function works correctly, check material size.
Highlight shape. Press and to edit quantity. Press
to apply changes.
Press and size automatically
changes to fit selected material size.
1 2 3
Setup
Space
P
R
Fit
beyond the basics
SPEED: 4
PRESSURE: 2
12"x12"
Cardstock L
Outline
Shadow
Pieces
H: 2.25" W: 1.51" QTY: 1
Starter and Rockin’
Janie
suggested min
height=4.0"
H: 4.00"W: 1.51" QTY: 1
Starter and Rockin’
Janie
to edit height to Esc
to apply to width
SPEED: 4
PRESSURE: 2
12"x12"
Cardstock L
Outline
Shadow
Pieces
H: 4.00" W: 2.68" QTY: 8
Starter and Rockin’
Janie
SPEED: 4
PRESSURE: 2
12"x12"
Cardstock L
Shadow
Pieces
Embellishment
H: 4.00" W: 4.30" QTY: 1
Starter and Rockin’
Janie
H: 4.00" W: 4.30" QTY: 4
Starter and Rockin’
Janie
to edit qty to Esc
to apply to width
SPEED: 4
PRESSURE: 2
12"x12"
Cardstock L
Shadow
Pieces
Embellishment
H: 5.49" W: 5.90" QTY: 4
Starter and Rockin’
Janie
Press to view Setup Menu.
Use to scroll through
options.
Press to open a menu. Make
changes and press to apply.
Press at any time to return to
previous Selection display.
SETUP allows you to change Greetings, Language, Dimensions, Sound and Cartridge Name appearance.
Setup
Space
P
R
Setup
Space
P
R
1 2 3
At the top of the eclips Keypad is a row of ten Function keys. The following pages offer a brief summary of each Function key.
Setup
Space
P
R
Setup
Space
P
R
Setup
Space
P
R
to see greeting options
for more options
SPEED: 4
PRESSURE: 2
12"x12"
Cardstock L
+ Greetings
+ Languages
+ Dimension
Version
Scoring Adj.
+ Sound
+ Cart. Name
+ Paper Saver
H: 2.25" W: 1.92" QTY: 1
to set as default
for more options
SPEED: 4
PRESSURE: 2
12"x12"
Cardstock L
+ Greetings
- Languages
English
Spanish
German
French
+ Dimension
Version
H: 2.25" W: 1.92" QTY: 1
Select artwork from category
to open category
for more options
SPEED: 4
PRESSURE: 2
12"x12"
Cardstock L
Flowers
Frames
Phrases
Rockin’ Janie.f
Shapes
H: 2.25" W: 1.92" QTY: 1
Setup
Setup
Space
P
R
Setup
Space
P
R
Setup
Space
P
R
FUNCTION KEYS
SETUP
FILL
FIT
To ensure function works correctly, check material size.
FILL takes the selected shape and automatically fills the material with as many as possible.
This function can also be used to cut multiple shapes from the Queue.

17
PIP (Picture in Picture) – takes the selected shape and encloses it inside of a circle, square, flower, star or any number of
shapes. These are easy to choose by scrolling through the Selection Display on the Handheld Remote Control.
Highlight design. Press to edit
Size. The size you select will be the size
of the outer shape. Press .
Press to view Picture in Picture
feature. Use to scroll through
shapes in Selection Display.
Press to select. The inside design
will now cut out of the outside shape.
To turn off the feature, press .
1 2 3
Setup
Space
P
R
to edit size; to Esc
to apply to width
suggested min
height=3.5"
H: 4.00"W: 4.00" QTY: 1
Starter and Rockin’
Janie
SPEED: 4
PRESSURE: 2
12"x12"
Cardstock L
H: 4.00" W: 4.00" QTY: 1
Starter and Rockin’
Janie
SPEED: 4
PRESSURE: 2
12"x12"
Cardstock L
Outline
Shadow
Pieces
H: 4.00" W: 4.00" QTY: 1
Starter and Rockin’
Janie
PIP
Setup
Space
P
R
Setup
Space
P
R
Setup
Space
P
R
PIP
beyond the basics
Setup
Space
P
R
PIP
Highlight design or font. Press to view a mirror image of
highlighted design or font.
MIRROR displays the selected design or font in reverse.
1 2
Pressing Mirror key once = ON
Pressing again = OFF
SPEED: 4
PRESSURE: 2
12"x12"
Cardstock L
Solid
Shadow
Tag
Charm
H: 2.25" W: 1.49" QTY: 1
Starter and Rockin’
Janie
SPEED: 4
PRESSURE: 2
12"x12"
Cardstock L
Solid
Shadow
Tag
Charm
H: 2.25" W: 1.49" QTY: 1
Starter and Rockin’
Janie
Press to add mirror image to
Queue. When Mirror feature is turned
off, mirror image will remain in Queue.
3
SPEED: 4
PRESSURE: 2
12"x12"
Cardstock L
Solid
Shadow
Tag
Charm
H: 2.25" W: 1.49" QTY: 1
Starter and Rockin’
Janie
Setup
Space
P
R
Mirror
MIRROR

18
LAST POINT realigns the Cutting Blade at the last point before Cutting Mat was unloaded. Reload the Cutting Mat,
press and the blade will align to begin cutting the next shape at the point where it ended. This function optimizes
the use of the cutting material.
Setup
Space
P
R
Last Pt.
beyond the basics
You can also load/unload Cutting
Mat using the button on front right
side of Machine.
ACTUAL ignores scale and instead sizes selected shape at
selected size not relative to accompanying shapes.
Actual: Off Actual: On
USING ACTUAL WITH FONTS:
1 2
Pressing Actual key once = ON
Pressing again = OFF
Press . Select a shape and then
select a size. Press .
Selected piece will be cut at the
selected size and not relative to other
shapes.
USING ACTUAL WITH SHAPES:
1 2
Actual
to edit height to Esc
to apply to width
suggested min
height=4.0"
H: 4.00"W: 3.63" QTY: 1
Starter and Rockin’
Janie
SPEED: 4
PRESSURE: 2
12"x12"
Cardstock L
Solid
Outline
Shadow
Pieces
H: 4.00" W: 4.84" QTY: 1
Starter and Rockin’
Janie
All
Actual = ON
Actual = OFF
Actual = ON
Setup
Space
P
R
ACTUAL
LOAD/UNLOAD
LAST POINT
LOAD/UNLOAD loads or unloads the Cutting Mat into or out of Machine using the Keypad.

19
REPEAT stores the last shape that was cut into the Queue.
SEARCH lets you search through a cartridge to find a particular shape.
advanced
Press . Use the Keypad to input
letters until your selection appears in
the list. Press to scroll
through list.
Searches can also be conducted by
inputting the first letter of word. An
alphabetical list is generated.
Press on highlighted word. Shapes
that fit your Search criteria appear in
Selection Display.
1 2 3
Use keypad to enter search word
to enter highlighted word
to Esc search
SPEED: 4
PRESSURE: 2
12"x12"
Cardstock L
H: 3.75" W: 4.92" QTY: 1
sn
snow
snowflake
Use keypad to enter search word
to enter highlighted word
to Esc search
SPEED: 4
PRESSURE: 2
12"x12"
Cardstock L
H: 3.75" W: 4.92" QTY: 1
s
scroll filigree frame
simple scroll frame
skeleton
snow
snowflake
spring
SPEED: 4
PRESSURE: 2
12"x12"
Cardstock L
Solid
Shadow
Border
H: 3.75" W: 3.25" QTY: 1
Starter and Rockin’
Janie
Setup
Space
P
R
Search
Setup
Space
P
R
Setup
Space
P
R
Select and cut a shape. Press
and same shape will appear in Queue
again.
1
SPEED: 4
PRESSURE: 2
12"x12"
Cardstock L
Outline
Shadow
Pieces
H: 4.00" W: 2.68" QTY: 1
Starter and Rockin’
Janie
It is also possible to select other shapes
and add them to Queue.
Press again and last cut shape
will appear in Queue again.
2 3
Starter and Rockin’
Janie
SPEED: 4
PRESSURE: 2
12"x12"
Cardstock L
Solid
Shadow
H: 4.19" W: 5.50" QTY: 1
Starter and Rockin’
Janie
SPEED: 4
PRESSURE: 2
12"x12"
Cardstock L
Solid
Shadow
H: 4.19" W: 5.50" QTY: 1
Repeat Repeat
REPEAT
SEARCH
SPEED SETTINGS
Enter a number between 1 and 9 using
Keypad or and press
to apply. Material now appears as Custom.
SPEED: 4
PRESSURE: 2
12"x12"
Cardstock L
H: 3.75" W: 3.25" QTY: 1
to select speed options
for more options; Esc
Setup
Space
P
R
Setup
Space
P
R
Setup
Space
P
R
SPEED: 7
H: 3.75" W: 3.25" QTY: 1
to change speed 1-9
to select; to Esc
Scroll up in the Options Menu and
highlight Speed. Press .
1 2
For even more control of cutting various materials, the Speed Option allows manual adjustment of cutting speed to
produce the best result.
Higher number =
Faster cutting speed.
Lower number =
Slower cutting speed.
When cutting lighter materials or simple shapes, increase cutting speed.
For thicker materials or more intricate cuts, decrease cutting speed.
Setup
Space
P
R
Beyond the basic and intermediate settings, the advanced settings provide more access and more control to Speed,
Pressure, Scoring and Laser settings, as well as allow a number of advanced cutting options in the Pop-Up Menu. Please
note: material option will change to Custom on the screen as material settings are manually changed.
advanced

20
Designs on some cartridges contain easy scoring lines for simple folding. These lines are indicated with a dotted line in
the Display Window.
Scoring adjustment should be varied relative to the material being used. (The age of the blade also affects the scoring quality.)
If the default setting is not scoring deeply enough for a clean fold, the depth should be increased to a higher number.
If the material has been cut along the scoring lines, then the scoring depth should be set to a lower number.
advanced
This option controls how hard the blade presses through the material to be cut. Pressure settings should be varied relative
to the material being used. For example, copy paper and vinyl generally work well at settings of 1 or 2. Cardstock and
vellum work best at 2 to 4, depending on material. Shrink film and light chipboard work best between 5 and 6.
SPEED: 7
PRESSURE: 2
12"x12"
CUSTOM
H: 3.75" W: 3.25" QTY: 1
to select pressure options
for more options Esc
PRESSURE: 4
H: 3.75" W: 3.25" QTY: 1
to change pressure 1-6
to select Esc
Scroll down to highlight Pressure.
Press .
Enter a number between 1 and 6 using Keypad
or and press to apply.
Material now appears as Custom.
1 2
Setup
Space
P
R
Setup
Space
P
R
Setup
Space
P
R
Setup
Space
P
R
PRESSURE SETTINGS
Higher number =
Greater pressure.
Lower number =
Lesser pressure.
Press on Keypad. Press
to highlight Scoring Adj. Press .
To make cutting easy, the Machine has preset adjustments for various materials that may be selected. Choose a material,
and the Pressure and Speed (and Scoring on selected designs) are automatically adjusted for you.
However, since there are so many options of material thicknesses, the Machine gives you the ability to manually adjust
settings for the perfect cut (see pg. 19 for details). We suggest that you begin with the preset options and do a test cut
on a similar weighted material.
Some other general cutting guidelines to keep in mind:
• If material wrinkles as it cuts, then Speed should be manually set at a slower, lower number. Material will also wrinkle
if Cutting Mat has lost its adhesion. In this case, replace the Cutting Mat.
• If material is not cutting all the way through, try increasing Pressure or Blade Depth number.
• If material appears scraped or bruised near Blade, try decreasing Pressure.
• If shape being cut is simple, try increasing Speed.
• If shape is highly detailed, try decreasing Speed.
• Adjust the Blade Depth for a deeper or shallower cut (see pg. 6 for details).
• For optimal results, try a test cut first and make necessary adjustments to settings before making final cut.
Setup
Space
P
R
Setup
Setup
Space
P
R
Setup
Space
P
R
Setup
Space
P
R
Setup
Space
P
R
Higher number =
deeper scoring.
Lower number =
lighter scoring.
Check that your correct
material type is selected
in the Options Menu.
Enter a number between 1 and 9 using
Keypad or and press
to apply.
1 2
SPEED: 7
PRESSURE: 2
12"x12"
CUSTOM
+ Greetings
+ Languages
+ Dimension
Version
Scoring Adj.
+ Sound
+ Cart. Name
+ Paper Saver
H: 3.75" W: 3.25" QTY: 1
Adjust scoring pressure value ID
specify: 5
SPEED: 7
PRESSURE: 2
12"x12"
CUSTOM
+ Greetings
+ Languages
+ Dimension
Version
Scoring Adj.
+ Sound
+ Cart. Name
+ Paper Saver
H: 3.75" W: 3.25" QTY: 1
Also check your blade
depth to ensure it is
adjusted to the
appropriate material.
SCORING ADJUSTMENT
ADJUSTING FOR THE PERFECT CUT
Table of contents
Other Ellison Cutter manuals


