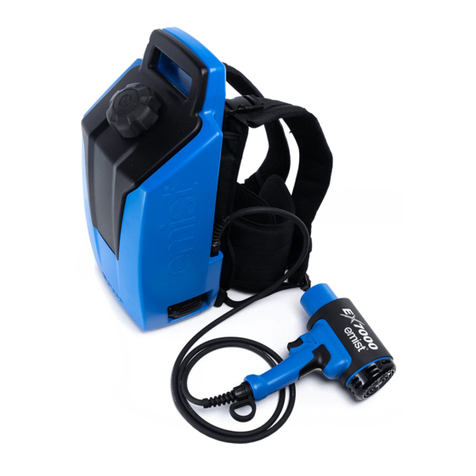
Emist EPIX360 User manual

OPS MANUAL
Version 052721

ENGLISH
For video explanation,
scan code and watch
the video
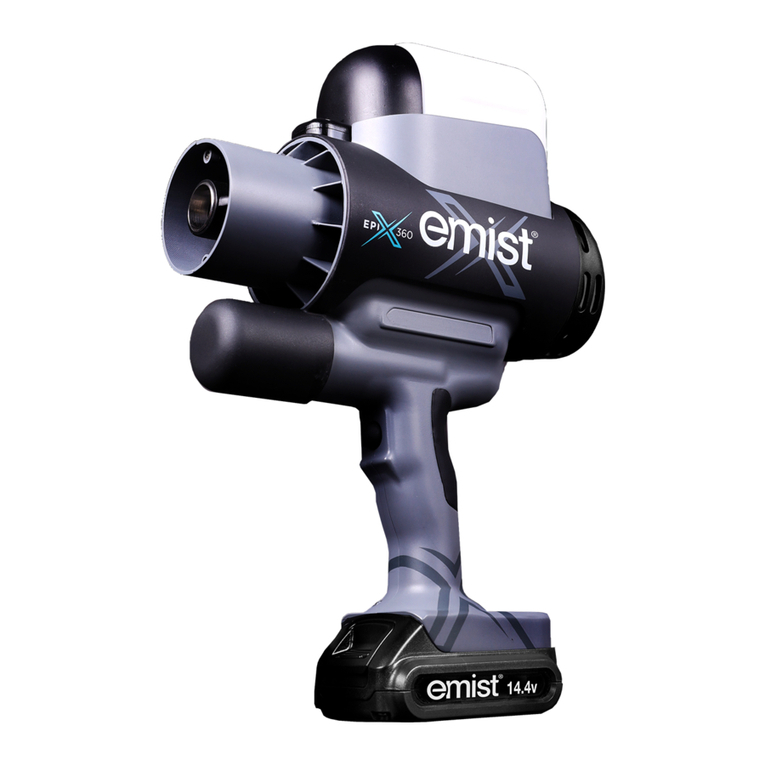
Thank you for choosing the EMist®EPIX360TM TruElectrostaticTM Sprayer.
We’ve created an easy-to-use system that combines advanced liquid application technologies
with improved mobility. The result is superior application and enhanced disinfection, as well as
a convenient convertible design for users.
We recommend you read through this entire instruction manual before beginning.
Included are assembly, operating, and safety instructions. Following these manufacturer
guidelines will help the system perform at peak eectiveness, extend the life of the product,
and ensure operator safety.
Questions?
Each component has been inspected prior to your purchase. However, in the event that
there is a problem, please contact our technical support center at Emist.com.
In the event of a conflict between different translations
of this document, the English translation shall prevail.
In addition, certain services and documents provided
by EMist may only be available in English.
SERVICES IN ENGLISH
- Original Version -

EN
Copyright ©2021 SanoTech 360, LLC. All rights reserved. All product names, logos, and brands are property of their
respective owners. Prices are in U.S. Dollars. Prices are subject to change. All use of the website and resources is
subject to the Terms of Use. EMI-018-21 Multilingual Manuals - 052721 3
Warnings
Please read the manual carefully and pay special attention to the
symbols and warning labels. Warning labels indicate a potentially
hazardous situation which, if not avoided, could result in serious injury
or death.
SAFETY NOTICES
• Read and fully understand the EMist Electrostatic Sprayer Operators
Manual prior to using the electrostatic sprayer.
• EMist TruElectrostatic Sprayers should never be used in a hazardous
environment.
• EMist Electrostatic Sprayers should never be used in an area
containing volatile chemicals. Nor should it be used in any area
containing volatile or explosive levels of gas, vapor or particulates.
• EMist Electrostatic Sprayers should never be used by untrained
personnel.
WARNINGS
• Check equipment daily. Replace worn or
damaged parts immediately.
PRESSURIZED EQUIPMENT HAZARD
Liquid from equipment that leaks or ruptures from a
component can splash in the eyes or on skin, causing serious
injury. In order help prevent a leak or rupture:
WARNINGS
This manual contains information that is important for you to know
and understand before operating the EMist Electrostatic Sprayer. This
information relates to protecting your safety and ensures product
reliability and performance. It is the owner’s responsibility to ensure
that all who operate this equipment read this manual.

EN
Copyright ©2021 SanoTech 360, LLC. All rights reserved. All product names, logos, and brands are property of their
respective owners. Prices are in U.S. Dollars. Prices are subject to change. All use of the website and resources is
subject to the Terms of Use. EMI-018-21 Multilingual Manuals - 052721
4
• Use only water-based solvents to clean
equipment or parts.
PLASTIC PARTS CLEANING SOLVENT HAZARD
Many solvents can degrade plastic parts and cause them to fail,
which can lead to serious injury or property damage. In order to help
prevent against degradation:
WARNINGS
• Electrostatic equipment must be used only
by trained, qualied personnel who understand
the requirements of this manual.
• Stop operation immediately if static sparking
occurs or you feel a shock. Do not use
equipment until you identify and correct the
problem.
• Use and clean equipment only in well
ventilated area.
• Never spray a ammable chemical
(with a ashpoint less than 60˚C).
• Do not turn lights on or o when ammable
fumes are present.
• Keep spray area free of debris, including
solvents, rags, gasoline or any ammable
chemicals.
• CAUTION, DO NOT INSERT ANY
FOREIGN OBJECT IN THE NOZZLE OF
THE SPRAYER TO AVOID DAMAGING THE
EQUIPMENT OR STATIC DISCHARGE.
• Disconnect electrostatic equipment from
its power source when servicing or replacing
parts.
FIRE, EXPLOSION AND ELECTRIC SHOCK
HAZARD
Flammable fumes, such as solvent and paint fumes, in a work area
can ignite or explode. To help prevent fire, explosion and electric
shock:
WARNINGS

EN
Copyright ©2021 SanoTech 360, LLC. All rights reserved. All product names, logos, and brands are property of their
respective owners. Prices are in U.S. Dollars. Prices are subject to change. All use of the website and resources is
subject to the Terms of Use. EMI-018-21 Multilingual Manuals - 052721 5
• Follow the chemical manufacturer’s
recommended directions of use found on
product label including but not limited to
wearing appropriate protective equipment
to help prevent serious injury.
PERSONAL PROTECTIVE EQUIPMENT
Wear appropriate protective equipment to help prevent
serious injury.
WARNINGS
• Do not operate the unit when fatigued
or under the inuence of drugs or alcohol.
• Use only water soluble uids that are
compatible with equipment wetted parts.
• Check equipment daily. Repair
or replace worn or damaged parts
immediately with genuine replacement
parts from trusted EMist partners only.
• Do not alter or modify equipment.
Alterations or modications void your
EMist warranty, and create safety
hazards.
EQUIPMENT MISUSE HAZARD
Misuse can cause serious injury or death.
WARNINGS

EN
Copyright ©2021 SanoTech 360, LLC. All rights reserved. All product names, logos, and brands are property of their
respective owners. Prices are in U.S. Dollars. Prices are subject to change. All use of the website and resources is
subject to the Terms of Use. EMI-018-21 Multilingual Manuals - 052721
6
• Be aware of rst aid procedures related to the product in
use.
• It is a violation of Federal law to use a chemical in a manner
inconsistent with its label.
• For use with water-soluble, non-ammable, non-combustible
and non-volatile liquids only. Never spray a ammable
chemical (ash point less than 60˚C).
• Ensure the area being sprayed has proper ventilation.
• Store all chemicals in original containers in a cool, dry place,
away from heat and open ames.
• Do not reuse or rell a chemical container.
• Follow the chemical manufacturer’s recommended directions
of use found on product label.
CHEMICAL USE HAZARD
Each chemical, such as a disinfectant, has a unique set of
hazards and needs to be handled properly to ensure worker
safety.
WARNINGS
SAFETY WARNING!
DO NOT USE THE ELECTROSTATIC
APPLICATION SYSTEM IF YOU HAVE
A PACEMAKER OR AN IMPLANTABLE
CARDIOVERTER DEFIBRILLATOR
(ICD).
WARNINGS
STATE OF CALIFORNIA -
PROPOSITION 65 WARNING
• This product may contain chemicals
known to the State of California to
cause cancer and birth defects or other
reproductive harm.
WARNINGS

EN
Copyright ©2021 SanoTech 360, LLC. All rights reserved. All product names, logos, and brands are property of their
respective owners. Prices are in U.S. Dollars. Prices are subject to change. All use of the website and resources is
subject to the Terms of Use. EMI-018-21 Multilingual Manuals - 052721 7
Storage Case
6
5
7
1 42 3
1. Electrostatic Sprayer: a cordless, handheld electrostatic sprayer that is
powerful, durable and provides breakthrough disinfectant application performance.
2. Tank: Interchangeable liquid tank includes liner with cap washer, cap with strain
lter and tank cap cover. The tank was specically designed to t securely onto the
sprayer and is easy to use. The tank has a tab along the threads to keep a user
from over rotating the tank cap. Please Note: a small amount of water may reside
in the tank when rst used as a result of quality control testing. When switching
tank liners, also move the removable rubber liner ring to the new liner to be used.
This ring ensures proper t and seal of tank cap assembly to the tank.
3. Liquid Tank Liners: The purpose of our disposable tank liners is to provide all
directional spraying and the ability to use all the disinfectant within the tank. Our
tank liners are manufactured to be used up to 100 hours or 3 months before an
actual liner must be replaced.
4. Tank Cap Assembly: The tank cap assembly comes with the cap, a check
valve, O-ring and strain lter. This cap is designed to t securely onto the tank. The
cap has a tab in order to stop over rotation onto the tank.
5. Tank Cap Cover: The cap cover is the main piece that locks the tank in place
on the sprayer along with the clip on the back of the unit. This allows for all
directional spraying, including upside down, when needed.
6. Rechargeable Battery: The system comes with 2 14.4v lithium ion batteries.
Each has a 3-bar green indicator light to determine charge. If the battery shows no
bars, place on the charger for recharging.
7. Battery Charger: The battery charger comes with 110-120v standard plug. It
takes approximately 45 minutes to recharge a battery. International charger cables
are available for purchase upon request.
INITIAL INSPECTION & SET UP - INVENTORY

EN
Copyright ©2021 SanoTech 360, LLC. All rights reserved. All product names, logos, and brands are property of their
respective owners. Prices are in U.S. Dollars. Prices are subject to change. All use of the website and resources is
subject to the Terms of Use. EMI-018-21 Multilingual Manuals - 052721
8
ASSEMBLY & OPERATING INSTRUCTIONS
Tip: Charge battery rst
1. Plug charger cord into wall outlet.
2. Install battery into charger.
3. Reference power indicator (3 bars = full charge)
Step 1: Install Battery into Charger.
yTo install, slide battery pack into the charger until the battery pack is
rmly seated. It will click into the slot.- Note: Some chargers might
require more force on rst seat.
yOnce battery is on the charger, a ashing red light indicates the battery
is charging.
yOnce the battery is fully charged, a solid red light will indicate the batter
is fully charged.
- Tip: A fast blinking light on the charger indicates battery pack is not
seated correctly.
yTo remove battery from charger, grasp battery pack rmly, depress
battery pack button down, and slide out from the charger.
yTo check charge, press down on the battery indicator light, the light will
illuminate 3 green bars when battery is fully charged.
Step 2: Liquid Tank Removal:
yTo remove the 8oz tank from the spray system hold the tank cap cover
and the tank while gently pulling up the front of the tank from the spray
system to remove it from the tank lock. Then pull up on the back to
remove it from the tank back clip.
yThis removes the whole tank assembly from the sprayer.
Step 3: Removing the Tank Cap Cover & Cap.
yWith the tank removed from the sprayer and holding it vertically, pull the
tank cap cover straight up. No twisting is required.
yTo remove the tank cap, gently turn the cap counterclockwise until it is
fully removed from the tank.
Step 4: Installing the Tank Liner:
Tip: When you rst receive your sprayer bundle, a tank liner is already
installed in the tank for you. It includes the cap washer which is
required for the liner to sit correctly into the tank itself. The liner is
manufactured to last 100 spray hours or up to 3 months.
yWhen replacing your tank liner, rst remove the used liner from the tank
with the black cap washer by rmly holding the tank.
yOnce removed from the tank, remove the liner from the black cap
washer by holding the liner rmly in one hand, and pushing upwards on
the washer to remove it from the liner threads.
yGet new liner, push the black cap washer on by pushing it down around
the spout of the liner. Push the cap washer until the top of the liner spout
and washer are ush with each other.
yOnce the liner is installed with cap washer, fold the liner in an accordion
style and slide it into the tank until the cap washer is ush with the tank
opening.

EN
Copyright ©2021 SanoTech 360, LLC. All rights reserved. All product names, logos, and brands are property of their
respective owners. Prices are in U.S. Dollars. Prices are subject to change. All use of the website and resources is
subject to the Terms of Use. EMI-018-21 Multilingual Manuals - 052721 9
ASSEMBLY & OPERATING INSTRUCTIONS
Tip: When a new liner is rst installed it requires air to be blown into
it for the liner to fully expand. By doing this the liner becomes fully
inated for all of uid to ll the tank.
CAUTION: If a tank liner is not used, liquid will leak from the small
holes in the bottom of the tank.
These holes allow for air to escape through the tank itself to collapse
the liner. Collapsing the liner is what makes the system capable of
using all liquid solutions and provide all directional spraying.
Warning: Do not plug the hole in the bottom of the tank to keep from
using the tank liner. This is considered a modication to the product and
will void the warranty if done. There is high potential for burning up the
pump if this is done.
yOnce this is completed, pour the diluted or ready to use solution into the
tank.
Step 5: Installing the Tank Cap and Cover:
yTo install the tank cap, gently turn clockwise against the threads until the
cap no longer turns.
yEach tank cap has a stopper along the tank that prevents overturning.
yTo install the tank cap cover, simply line the opening of the cover with
the nose of the tank cap.
Step 6: Installing the Liquid Tank:
yTo install the tank onto the sprayer, align the tank nozzle to the port on
the body of the sprayer and gently press in until you hear a click. This
is the tank lock locking into place along with the tank back clip. This is
what holds the overall tank in place.
Step 7: Depress the Trigger Button to Begin Spraying:
yOnce the system has been lled with liquid solution, you can begin
spraying.
yDepress the trigger button located on the front of the sprayer handle.
Hold it down for the entire spray time required for surface treatment.
yThe red indicator light at the back of the system indicates power on
and the high voltage power supply is charging the liquid droplets and
recognizes power to the system.
Tip: When rst starting to spray, the system needs to be primed with liquid,
hold down the trigger button for 10 to 15 seconds or until the sprayer
produces the mist. This needs to be done every time a tank is relled or the
liner has been replaced.

EN
Copyright ©2021 SanoTech 360, LLC. All rights reserved. All product names, logos, and brands are property of their
respective owners. Prices are in U.S. Dollars. Prices are subject to change. All use of the website and resources is
subject to the Terms of Use. EMI-018-21 Multilingual Manuals - 052721
10
1. EMist recommends the use of disinfecting products on EPA’s
Disinfection List N that are approved for electrostatic application.
2. Begin at the farthest point from the doorway and work back toward
the doorway so you can step out when application is complete.
3. Aim applicator 24”-36” (optimal distance) from the surface target
area and begin with a smooth figure “S” movement aiming below,
at, and above the surface target area while walking at an average
pace (continuously moving).
4. Make sure you are working in a methodical “S” pattern and let your
passes overlap when moving to the next surface target area.
5. Allow treated area to sit for contact time as recommended by the
chemical manufacturer’s label before re-entry into the area.
B. SPRAY APPLICATION PROCESS:
1. Make sure food and drinks are removed or covered before
application.
2. Spotless, clean interiors require no prep work prior to application.
3. Loose debris should be swept from floors and other surfaces prior
to application.
4. Inspect the area for mechanical barriers such as: magazines
on table tops, chairs touching each other, a table or a wall.
The intended target surface area for application will need to be
accessible.
5. Please cover and remove valuables. Electronics, furniture, paper
or other common necessities do not need to be removed from the
area.
6. Once the area has been cleaned, application can begin.
7. This system is NOT a mechanical cleaner.
A. PREPARING THE SPRAY AREA:
TIP: IF THE APPLICATOR BECOMES WET OR BEGINS
TO DRIP, YOU ARE MOVING TOO SLOWLY OVER THE
SURFACE TARGET AREA AND NEED TO SPEED UP THE
APPLICATION PROCESS. DO NOT OVER-SATURATE THE
SURFACE. IF YOU SEE RUNS OR PUDDLES YOU ARE
APPLYING TOO MUCH CHEMICAL. THE GOAL IS TO
ACHIEVE EVEN COVERAGE OVER THE TARGET SURFACE
AREA.
SPRAY APPLICATION

EN
Copyright ©2021 SanoTech 360, LLC. All rights reserved. All product names, logos, and brands are property of their
respective owners. Prices are in U.S. Dollars. Prices are subject to change. All use of the website and resources is
subject to the Terms of Use. EMI-018-21 Multilingual Manuals - 052721 11
The system is designed for single or multiple application
environments. Please use the multiple tank applications carefully
by marking tanks with your chemical identiers when necessary.
Application Tips:
1. While depressing the trigger button, move the applicator in an
“S” pattern from bottom to the top of the surface target area in a
continuous motion.
2. Stay in motion, electrostatically charged droplets will accumulate in
higher levels at the tip of the applicator if you move too slowly while
the device is in use.
3. Do not over apply.
4. In between chemical changes, press the trigger while pointing
to the floor or other safe target area 1-2 minutes to clear the
remaining chemical in the system.
C. FLUID MANAGEMENT:
Tips:
1. Fully charge each battery before use.
2. Keep battery, charger and all connectors clean and dry at all times.
3. Insert with the battery release button facing upwards into the
battery port.
4. Do not expose batteries, chargers or connectors to liquid.
D. BATTERY MANAGEMENT:
SPRAY APPLICATION

EN
Copyright ©2021 SanoTech 360, LLC. All rights reserved. All product names, logos, and brands are property of their
respective owners. Prices are in U.S. Dollars. Prices are subject to change. All use of the website and resources is
subject to the Terms of Use. EMI-018-21 Multilingual Manuals - 052721
12
IT IS IMPORTANT TO FLUSH THE APPLICATION SYSTEM
AT LEAST ONCE EVERY 24 HOURS WITH CLEAN WATER
AND BETWEEN EACH USE. DO NOT STORE CHEMICALS
IN THE RESERVOIR WHILE THE SYSTEM IS NOT IN USE
FOR GREATER THAN A 24 HOUR PERIOD.
IT’S IMPORTANT TO FLUSH THE SYSTEM IN BETWEEN
USES OR WHEN SWITCHING CHEMICALS TO PREVENT
RESIDUAL BUILD UP OR CORROSION AND TO AVOID
MIXING CHEMICALS.
CHANGING CHEMICALS:
The sprayer is designed to require minimal maintenance and
cleaning.
• Fill the tank and liner with 4oz (1/2 of a tank) of water.
• Spray for at least 1-2 minutes to flush the previous chemistry
from the system.
• Pour the new solution into the recently flushed tank to begin next
surface treatment.
• Make sure the system is primed with the new solution by
depressing the trigger button continuously for about 10 - 15
seconds.
FLUSHING THE ELECTROSTATIC SPRAYER
MAINTENANCE & CLEANING
• Flush the system at least once a day by spraying at least 4oz (1/2 of a
tank) of clean water through the sprayer for at least 1-2 minutes.
• Do this by filling the tank and liner with 4oz (1/2 of a tank) of water and
continuously depressing the trigger button as this will flush the entire
system.
• Some chemicals are harsher or more volatile than others. Because
corrosion caused by chemicals is not covered under Manufacturer’s
limited warranty, it is imperative that you properly flush the system
as directed herein. Note that the use of some chemicals may require
more frequent flushing of the system based on the chemicals corrosive
nature. Signs of failing to properly flush the system include clogged
nozzle, hardened or calcified hoses or lines, deterioration of the plastics
such as the manifold, and/or clogged filters.
• After flushing the system, inspect for any debris or damage from the
days use.

EN
Copyright ©2021 SanoTech 360, LLC. All rights reserved. All product names, logos, and brands are property of their
respective owners. Prices are in U.S. Dollars. Prices are subject to change. All use of the website and resources is
subject to the Terms of Use. EMI-018-21 Multilingual Manuals - 052721 13
STORAGE
• Insert at least 4 oz of water into the liquid tank.
• Run the sprayer for at least 1-2 minutes to flush active chemicals from
the system.
• Remove batteries and re-charge by placing on the charger.
• Wipe down exterior with water or alcohol to remove dirt and soil.
• Use the battery power indicator to determine the `battery’s state of
charge (3 bars = full charge).
• Remove the tank and battery from the system when not in use.
This keeps the unit from leaking or getting any fluid into the battery
compartment or the contacts.
BATTERY REMOVAL
• Make sure the system is off.
• Remove the battery from the sprayer by grasping the battery pack
firmly, depress the battery pack button down and slide out from the
bottom of the unit.
• Place battery into charger to fully charge for next usage. Each battery
takes approximately 45 minutes to fully charge.
• Store batteries and chargers in a cool, dry place.
MAINTENANCE & CLEANING
Empty uid or run until empty
CAUTION: DO NOT STORE THE SPRAYER IN AN AREA
THAT MAY FREEZE (TO AVOID DAMAGE FROM LIQUID
REMAINING IN THE SYSTEM AND LINES). THIS WILL
VOID THE WARRANTY. DO NOT STORE THE UNIT IN
EXTREME HEAT, AS IT DOES HAVE CIRCUIT BOARDS
AND ELECTRICAL COMPONENTS. THIS WILL VOID THE
WARRANTY.
TO PREVENT CROSS CONTAMINATION OF CHEMICALS,
YOU MUST PERFORM A FLUSH ANY TIME YOU CHANGE
THE TYPE OF CHEMICALS BEING USED.

EN
Copyright ©2021 SanoTech 360, LLC. All rights reserved. All product names, logos, and brands are property of their
respective owners. Prices are in U.S. Dollars. Prices are subject to change. All use of the website and resources is
subject to the Terms of Use. EMI-018-21 Multilingual Manuals - 052721
14
INDICATIONS & REMEDIES
PLEASE SEE BELOW FOR EASY INSTRUCTIONS FOR ADDRESSING
ISSUES THAT MAY ARISE WHILE USING THE EPIX360™
TROUBLESHOOTING, SUPPORT, & REPAIR
Issue Reason Troubleshooting
No Power to
the System
(Battery)
• Battery Not Installed
Correctly
• Battery Not Charged
• Battery Does Not
Slide Easily into the
slot (Do not try to
slam the battery to
seat)
Verify battery connector
issue by trying the 2nd
battery to determine if it will
not seat correctly. if not,
Battery is mechanically
obstructed
System
operates, but
red indicator
light not
illuminating
• High Voltage power
supply LED is
broken
• High voltage power
supply is not
working
Call Customer Care
No Mist or
Inadequate
Mist
• Tank Empty
• Tank Not Seated
Correctly
• System Lines not
primed
• Battery Not fully
charged
• Nozzle Clogged
• Release check valve
missing from port of
system
• Internal Component
Leak
• Pump Failure
• Fill Tank
• Remove Tank and
Re-apply
• Prime System for 5
to 10 seconds after
replacing tank
• Charge to Full battery
• Remove Nozzle Tip to
check if any residual
or contaminant is
blocking
• Replace check valve if
missing
• Call Customer Care
Nozzle Tip
leaking or
dribbling
• Remove tank when
system not in use.
• Nozzle Extension &
Tip are not lined up
or check valve is not
seated correctly
Verify the nozzle tip is
hand tighened in place
System turns
on and o
automatically
• Trigger button failure
• Main electrical
componets have
been exposed to
liquid/moisture
Call Customer Care

EN
Copyright ©2021 SanoTech 360, LLC. All rights reserved. All product names, logos, and brands are property of their
respective owners. Prices are in U.S. Dollars. Prices are subject to change. All use of the website and resources is
subject to the Terms of Use. EMI-018-21 Multilingual Manuals - 052721 15
The EPIX360™ is designed and manufactured to function without
defects. The system will operate normally with properly maintained
batteries and without abuse to any parts of the system.
If your system fails to return to normal use, excluding obvious user
damage, please contact EMist or your authorized EMist distributor.
If an issue occurs that is not addressed in the troubleshooting
methods, please contact an EMist Customer Care representative
at: 888.534.7001 or visit Emist.com to ll out a request for a
warranty or repair form.
SUPPORT OR REPAIR
TROUBLESHOOTING, SUPPORT, & REPAIR

ESPAÑOL

ES
17
Copyright © 2021 SanoTech 360, LLC. Reservados todos los derechos. Todos los nombres de productos, logotipos
y marcas son propiedad de sus respectivos dueños. Los precios están en dólares estadounidenses. Los precios
están sujetos a cambios. Todo uso del sitio web y los recursos está sujeto a los Términos de uso. Manuales
multilingües EMI-018-21 - 052721
Advertencias
Lea atentamente el manual y preste especial atención a los símbolos
y etiquetas de advertencia. Las etiquetas de advertencia indican una
situación potencialmente peligrosa que, si no se evita, podría provocar
lesiones graves o la muerte.
AVISOS DE SEGURIDAD
• Lea y comprenda completamente el Manual del operador del
pulverizador electrostático EMist antes de usar el pulverizador
electrostático.
• Los pulverizadores EMist TruElectrostatic nunca deben utilizarse en
un entorno peligroso.
• Los pulverizadores electrostáticos EMist nunca deben utilizarse en
un área que contenga productos químicos volátiles. Tampoco debe
usarse en áreas que contengan niveles volátiles o explosivos de gas,
vapor o partículas.
• Los pulverizadores electrostáticos EMist nunca deben ser utilizados
por personal no capacitado.
ADVERTENCIAS
• Revise el equipo a diario. Reemplace las
piezas gastadas o dañadas inmediatamente.
PELIGRO DE EQUIPO A PRESIÓN
El líquido del equipo que tiene fugas o rupturas de un
componente puede salpicar los ojos o la piel y causar lesiones
graves. Para ayudar a prevenir una fuga o ruptura:
ADVERTENCIAS
Este manual contiene información que es importante que usted
conozca y comprenda antes de utilizar el pulverizador electrostático
EMist. Esta información se relaciona con la protección de su
seguridad y garantiza la conabilidad y el rendimiento del producto. Es
responsabilidad del propietario asegurarse de que todos los que
operan este equipo lean este manual.

ES
18
Copyright © 2021 SanoTech 360, LLC. Reservados todos los derechos. Todos los nombres de productos, logotipos
y marcas son propiedad de sus respectivos dueños. Los precios están en dólares estadounidenses. Los precios
están sujetos a cambios. Todo uso del sitio web y los recursos está sujeto a los Términos de uso. Manuales
multilingües EMI-018-21 - 052721
• Utilice solo disolventes a base de agua para
limpiar equipos o piezas.
PELIGRO DEL DISOLVENTELA LIMPIEZA DE
PIEZAS DE PLÁSTICO
Muchos disolventes pueden degradar las piezas de plástico y hacer
que fallen, lo que puede provocar lesiones graves o daños a la
propiedad. Para ayudar a prevenir la degradación:
ADVERTENCIAS
• El equipo electrostático debe ser utilizado
únicamente por personal capacitado y calificado
que comprenda los requisitos de este manual.
• Detenga el funcionamiento inmediatamente si
se producen chispas estáticas o si siente una
descarga. No utilice el equipo hasta que identifique
y corrija el problema.
• Use y limpie el equipo solo en áreas bien
ventiladas.
• Nunca rocíe un químico inflamable
(con un punto de inflamación inferior a 60˚C).
• No encienda ni apague las luces en presencia de
vapores inflamables.
• Mantenga el área de rociado libre de escombros,
incluidos solventes, trapos, gasolina o cualquier
químico inflamable.
• PRECAUCIÓN, NO INSERTE NINGÚN OBJETO
EXTRAÑO EN LA BOQUILLA DEL PULVERIZADOR
PARA EVITAR DAÑAR EL EQUIPO O DESCARGAS
ESTÁTICAS.
• Desconecte el equipo electrostático de su fuente
de alimentación al reparar o reemplazar piezas.
PELIGRO DE INCENDIO, EXPLOSIÓN Y
DESCARGA ELÉCTRICA
Los vapores inflamables, como los vapores de disolvente y pintura,
en un área de trabajo pueden encenderse o explotar. Para ayudar a
prevenir incendios, explosiones y descargas eléctricas:
ADVERTENCIAS

ES
19
Copyright © 2021 SanoTech 360, LLC. Reservados todos los derechos. Todos los nombres de productos, logotipos
y marcas son propiedad de sus respectivos dueños. Los precios están en dólares estadounidenses. Los precios
están sujetos a cambios. Todo uso del sitio web y los recursos está sujeto a los Términos de uso. Manuales
multilingües EMI-018-21 - 052721
• Siga las instrucciones de uso
recomendadas por el fabricante del
producto químico que se encuentran en
la etiqueta del producto, incluido, entre
otros, el uso del equipo de protección
adecuado para ayudar a prevenir lesiones
graves.
DE PROTECCIÓN PERSONAL
Use el equipo de protección adecuado para ayudar a prevenir
lesiones graves.
ADVERTENCIAS
• No opere la unidad cuando esté
fatigado o bajo la inuencia de drogas o
alcohol.
• Utilice únicamente uidos solubles
en agua que sean compatibles con las
piezas húmedas del equipo.
• Revise el equipo a diario. Repare o
reemplace las piezas desgastadas o
dañadas inmediatamente con piezas de
repuesto originales de socios EMist de
conanza.
• No altere ni modique el equipo. Las
alteraciones o modicaciones anulan la
garantía de EMist y crean peligros para la
seguridad.
PELIGRO DE USO INDEBIDO DEL EQUIPO
El uso incorrecto puede causar lesiones graves o la muerte.
ADVERTENCIAS

ES
20
Copyright © 2021 SanoTech 360, LLC. Reservados todos los derechos. Todos los nombres de productos, logotipos
y marcas son propiedad de sus respectivos dueños. Los precios están en dólares estadounidenses. Los precios
están sujetos a cambios. Todo uso del sitio web y los recursos está sujeto a los Términos de uso. Manuales
multilingües EMI-018-21 - 052721
• Tenga en cuenta los procedimientos de primeros auxilios
relacionados con el producto en uso.
• Es una violación de la ley federal usar una sustancia química de
una manera
inconsistente con su etiqueta.
• Solo para uso con líquidos solubles en agua, no inflamables,
no combustibles y no volátiles. Nunca rocíe un producto químico
inflamable (punto de inflamación inferior a 60 ° C).
• Asegúrese de que el área que se está rociando tenga la
ventilación adecuada.
• Almacene todos los productos químicos en los envases
originales en un lugar fresco y seco, lejos del calor y las llamas
abiertas.
• No reutilice ni vuelva a llenar un recipiente de productos
químicos.
• Siga las instrucciones de uso recomendadas por el fabricante
del producto químico que se encuentran en la etiqueta del
producto.
PELIGRO DE USO DE PRODUCTOS QUÍMICOS
Cada producto químico, como un desinfectante, tiene un
conjunto único de peligros y debe manipularse correctamente
para garantizar la seguridad de los trabajadores.
ADVERTENCIAS
¡DE SEGURIDAD!
NO USE EL SISTEMA DE
APLICACIÓN ELECTROSTÁTICA
SI TIENE UN MARCAPASOS
O UNIMPLANTABLE
DESFIBRILADOR DE
CARDIOVERTER(ICD).
ADVERTENCIAS
ESTADO DE CALIFORNIA -
PROPOSICIÓN 65 ADVERTENCIA
• Este producto puede contener
sustancias químicas que el estado de
California reconoce como causantes de
cáncer y defectos de nacimiento u otros
daños reproductivos.
ADVERTENCIAS
Other manuals for EPIX360
5
This manual suits for next models
1
Table of contents
Languages:
Other Emist Paint Sprayer manuals
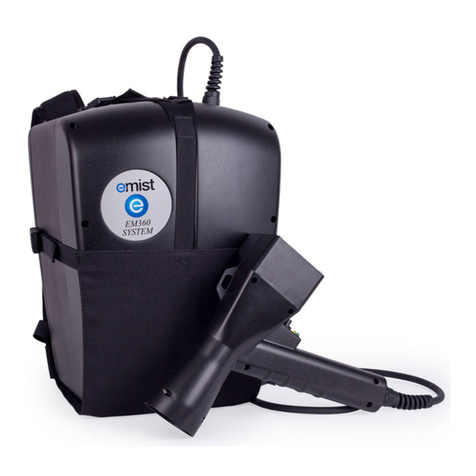
Emist
Emist EM360 User manual

Emist
Emist EM360 User manual
Emist
Emist EM360 User manual

Emist
Emist EM360RC User manual
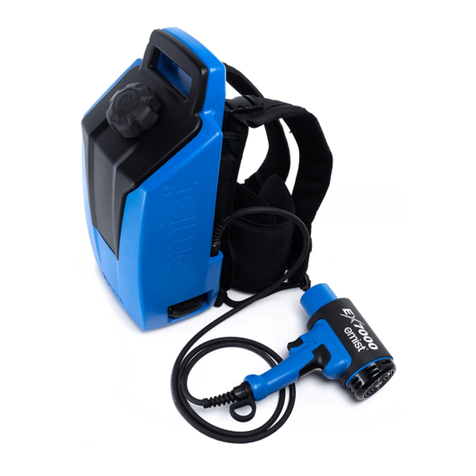
Emist
Emist Tru Electrostatic EX-7000 User manual

Emist
Emist EM360 User manual
Emist
Emist EPIX360 User manual

Emist
Emist EPIX360 User manual
Emist
Emist EPIX360 User manual

Emist
Emist EPIX360 User manual

