manuals.online logo
Brands
  1. Home
  2. •
  3. Brands
  4. •
  5. Emist
  6. •
  7. Paint Sprayer
  8. •
  9. Emist EM360 User manual

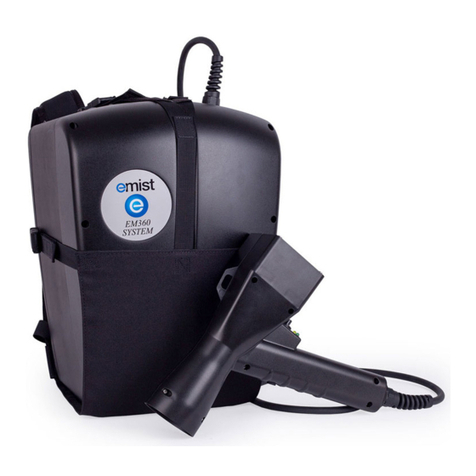
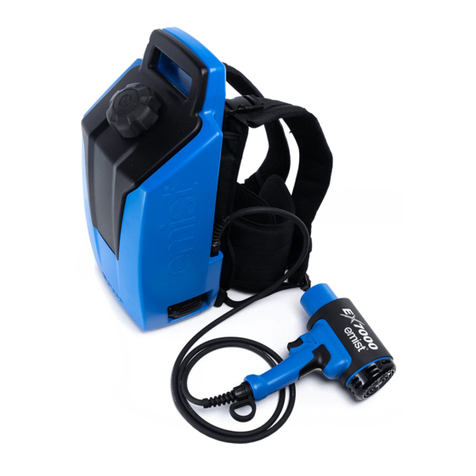
Emist EM360 User manual

1 2 3 4 65 7
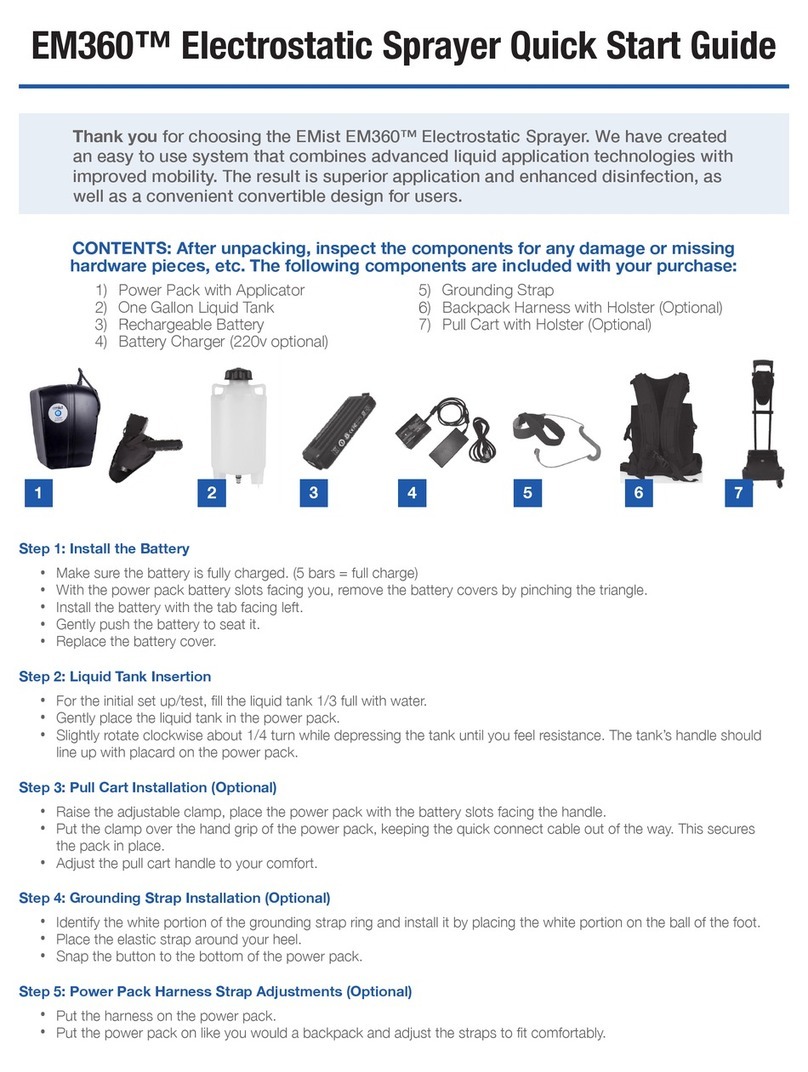
EM360™Electrostatic Sprayer Quick Start Guide
Make sure the battery is fully charged. (5 bars = full charge)
With the power pack battery slots facing you, remove the battery covers by pinching the triangle.
Install the battery with the tab facing left.
Gently push the battery to seat it.
Replace the battery cover.
•
•
•
•
•
Step 1: Install the Battery
Thank you for choosing the EMist EM360™ Electrostatic Sprayer. We have created an easy to use system that
combines advanced liquid application technologies with improved mobility. The result is superior application
and enhanced disinfection, as well as a convenient convertible design for users.
For the initial set up/test, ll the liquid tank 1/3 full with water.
Gently place the liquid tank in the power pack.
Slightly rotate clockwise about 1/4 turn while depressing the tank until you feel resistance. The tank’s handle should
line up with placard on the power pack.
•
•
•
Step 2: Liquid Tank Insertion
Raise adjustable clamp, loosening the two knobs and positioning as desired then re-tightening the knobs.
Put the clamp over the hand grip of the power pack keeping the electro-uid cable out of the way. This secures the
pack in place.
Use the applicator holster when system is not in use.
•
•
•
Step 5: Pull Cart Installation (Optional)
Identify the white or brown portion of the grounding strap ring and install it by placing the white or brown portion on the
ball of the shoe.
Place the elastic strap around your heel.
Snap the button to the bottom of the power pack.
•
•
•
Step 3: Grounding Strap Installation
Put the harness on the power pack.
Put the power pack on like you would a backpack and adjust the straps to t comfortably.
•
•
Step 4: Power Pack Harness Strap Adjustments (Optional)
Push/ip the toggle power switch down and the green LED light will turn on.
Once the applicator trigger switch is depressed, the fan will turn on rst, followed by the liquid spray.
The yellow LED light signies that the high voltage power supply is charging the liquid droplets.
Once the applicator trigger is released, the liquid will stop, and the fan will turn o after a slight hesitation to ensure the
liquid is cleared inside the applicator.
To turn the system o push/ip the toggle power switch up. This will completely turn o the system.
•
•
•
•
•
Step 6: Applicator Function Check
5)
6)
7)
Backpack Harness with Holster (Optional)
Grounding Strap for Harness
Pull Cart with Holster (Optional)
Power Pack with Applicator
One Gallon Liquid Tank
Rechargeable Battery
Battery Charger (220v optional)
1)
2)
3)
4)
CONTENTS: After unpacking, inspect the components for any damage or missing
hardware pieces, etc. The following components are included with your purchase:
Lock
Lock
Tank
Tank
Unlock
Unlock
Step 3: The cable button snaps to the
bottom of the power pack housing. Slide
the toe strap onto the toe of your shoe
with the white or brown area touching the
ball of your shoe.
Step 2: Slightly rotate clockwise about 1/4
turn while depressing the tank. The tank’s
handle should line up with placard.
Step 2: Slightly rotate clockwise about 1/4 turn while depressing
the tank. The tank’s handle should line up with placard.
Step 1: Keep the tab to left when inserting
the battery into the power pack.
Step 1: Keep the tab to left when inserting the battery into the
power pack.
Tab
Tab
Tab
Tab
Strap
Strap
Step 4: Put the harness on the power pack. Put the power
pack on like you would a backpack and adjust the straps to t
comfortably.
Applicator
Trigger
Applicator
Trigger
Green
LED Light
Green
LED Light
Yellow
LED Light
Yellow
LED Light
Power
Switch
Power
Switch
Step 5: Depress the applicator power switch until green LED light
displays. Depress the applicator trigger switch. The yellow LED
light signies the high voltage power supply is charging the liquid.
Step 4: Depress the applicator power switch until green LED light
displays. Depress the applicator trigger switch. The yellow LED
light signies the high voltage power supply is charging the liquid.
Cable Port
Toe Strap
Cable
Button
While using as a backpack, the grounding strap must be worn by the user. If the grounding strap is not
utilized the system can shut down and not operate correctly.
Optimal distance from a target is 3-5 feet.
Applicator will shut o once the power indicator on the battery reaches 1-2 bars.
•
•
•
Step 3: Raise the adjustable clamp and place the power pack
with battery slots facing the handle onto the pull cart. Lower the
clamp onto the power pack and tighten.
Clamp
1000 Forest Park Blvd., Suite 402 | Fort Worth, Texas 76110 | 888.534.7001 | Emist.com
©2020 EMist®is a registered trademark of SanoTech 360, LLC. All rights reserved. EMist-00056-20-2020 - Ver. 4
Backpack Unit Instructions
Pull Cart Unit Instructions

Other manuals for EM360

5

Other Emist Paint Sprayer manuals

Emist EM360 User manual

Emist

Emist EM360 User manual

Emist EM360 User manual

Emist

Emist EM360 User manual

Emist EPIX360 User manual

Emist

Emist EPIX360 User manual

Emist EPIX360 User manual

Emist

Emist EPIX360 User manual

Emist EM360RC User manual

Emist

Emist EM360RC User manual

Emist EPIX360 User manual

Emist

Emist EPIX360 User manual

Emist EM360 User manual

Emist

Emist EM360 User manual

Emist EPIX360 User manual

Emist

Emist EPIX360 User manual

Emist EM360 User manual

Emist

Emist EM360 User manual

Emist EM360 User manual

Emist

Emist EM360 User manual

Emist TruElectrostatic EX-7000 User manual

Emist

Emist TruElectrostatic EX-7000 User manual

Emist TruElectrostatic EX-7000 User manual

Emist

Emist TruElectrostatic EX-7000 User manual

Emist EPIX360 User manual

Emist

Emist EPIX360 User manual

Emist EM360 User manual

Emist

Emist EM360 User manual

Emist EPIX360 User manual

Emist

Emist EPIX360 User manual

Emist Tru Electrostatic EX-7000 User manual

Emist

Emist Tru Electrostatic EX-7000 User manual

Popular Paint Sprayer manuals by other brands

Graco 824910 instructions

Graco

Graco 824910 instructions

Badger Air-Brush 350 Instruction book

Badger Air-Brush

Badger Air-Brush 350 Instruction book

Nordson ColorMax Operator card

Nordson

Nordson ColorMax Operator card

Titan RX-Pro owner's manual

Titan

Titan RX-Pro owner's manual

TransTank WeedMasta Product handbook

TransTank

TransTank WeedMasta Product handbook

The Fountainhead Group FIELD KING 190723W instruction manual

The Fountainhead Group

The Fountainhead Group FIELD KING 190723W instruction manual

Graco GMax 232611 Instruction & repair manual

Graco

Graco GMax 232611 Instruction & repair manual

Earlex SprayStation HV2901P Operating instructions manual

Earlex

Earlex SprayStation HV2901P Operating instructions manual

EUROM Backpack 1809 manual

EUROM

EUROM Backpack 1809 manual

Garland FUM 106 L instruction manual

Garland

Garland FUM 106 L instruction manual

XPOtool 61344 user manual

XPOtool

XPOtool 61344 user manual

Cima PLUS Operation and maintenance instructions

Cima

Cima PLUS Operation and maintenance instructions

Andreoli Engineering ATOM 1000 Operator's manual

Andreoli Engineering

Andreoli Engineering ATOM 1000 Operator's manual

F5 Paint Shaker Installation and instruction manual

F5

F5 Paint Shaker Installation and instruction manual

Sherwin-Williams 820-169 Series B owner's manual

Sherwin-Williams

Sherwin-Williams 820-169 Series B owner's manual

Smithco Spray Star 2000 Parts & Service

Smithco

Smithco Spray Star 2000 Parts & Service

SATA Vario top spray operating instructions

SATA

SATA Vario top spray operating instructions

Rogers Sprayers EcoFoil EF1000 Assembly and operation manual

Rogers Sprayers

Rogers Sprayers EcoFoil EF1000 Assembly and operation manual

manuals.online logo
manuals.online logoBrands
  • About & Mission
  • Contact us
  • Privacy Policy
  • Terms and Conditions

Copyright 2025 Manuals.Online. All Rights Reserved.