8
choose alarm tone close application
vibrations
Procedure for pairing door camera unit with melodic bell:
1. Insert batteries – 3× AA into the bell unit.
2. Long press the„Code“ button for 2 seconds.
3. Press the ring button on the door camera unit.
4. The melodic bell will start ringing after successful pairing.
If you need to reset the pairing of the camera unit with the bell, turn o the bell using the side switch (OFF), then press the
„Code“ button. While the„Code“ button is pressed, turn on the bell using the side switch (ON), then release the„Code“ button
after 2 seconds. The resetting of the pairing is indicated by a„ding-dong“ sound.
FAQ
The device does not work
Check the cables and the connection of the power adapter to the network. If you extended the cable from the power adapter,
check that the polarity is correct. Measure the adapter with a multimeter. The output voltage on the connector should be 12V
DC (+/- 1 V).
The lens steams up
This occurs mainly during cold weather, where condensation occurs due to the temperature dierence between the wall and
the door unit itself. If water condenses on the lens, we recommend thoroughly drying the unit and modifying the installation.
Spontaneous ringing
Spontaneous ringing is caused by moisture entering the camera. Water short-circuits the contacts on the lock switch and the
device will start ringing on its own. We recommend dismounting the door unit, drying it thoroughly and spraying it with water
repellent for electronics.
The device does not open the lock
Check that the cabling is intact.
Measure the voltage on the lock terminals using a multimeter.The lock requires a voltage of 12V to trigger. If the value is lower,
use stronger conductors for the lock control.
Sudden decrease in microphone sensitivity
Check the cleanliness of the microphone opening, or clean it gently with a thin, blunt object.
Be careful not to damage the microphone!
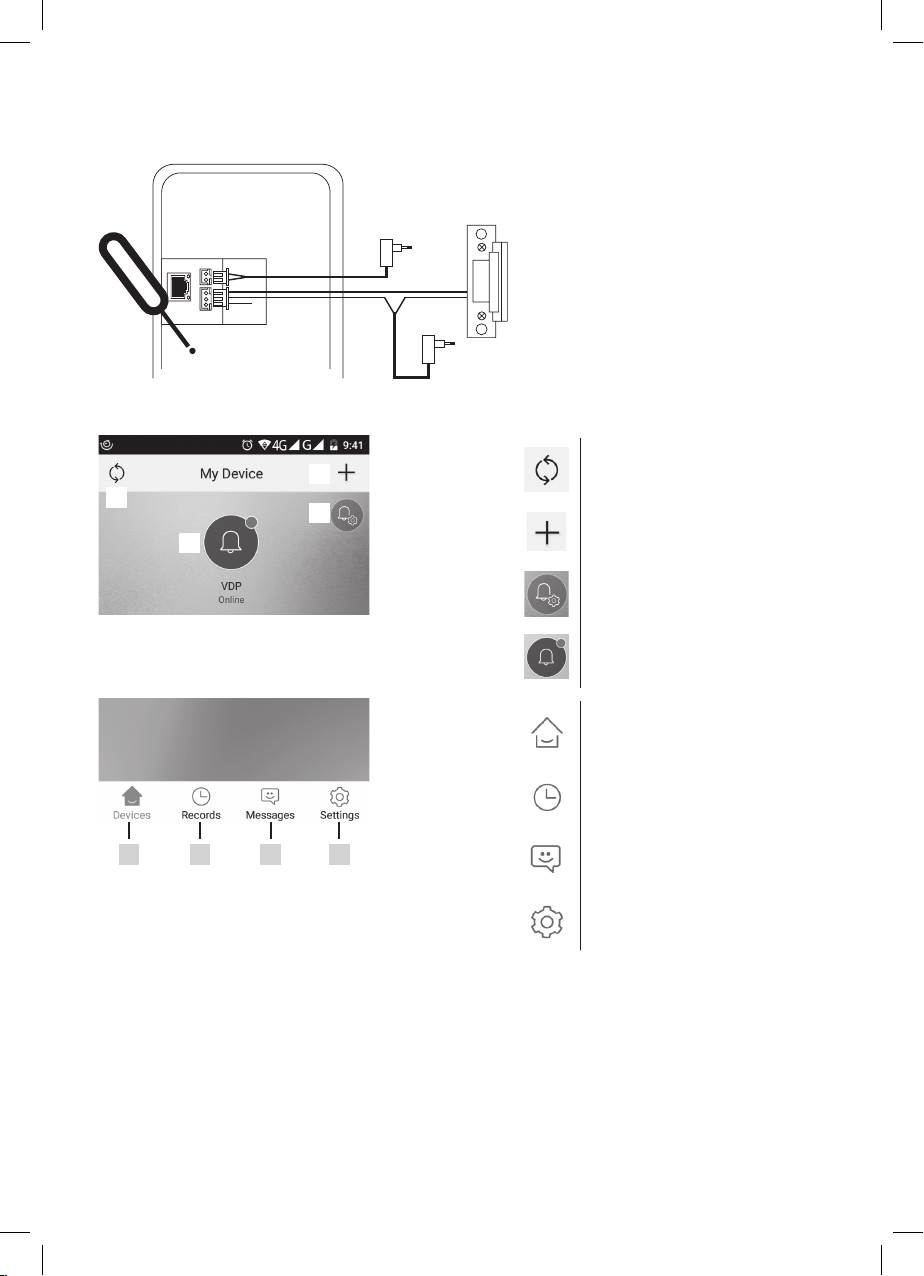
The device does not communicate with the network or cannot be paired
Check the network connectivity, or reset the device (according to point no. 4) and repeat the network pairing process.
Do not dispose with domestic waste. Use special collection points for sorted waste. Contact local authorities for informa-
tion about collection points. If the electronic devices would be disposed in landll, dangerous substances may reach
groundwater and subsequently food chain, where it could aect human health.
Emos spol s.r.o. declares that the H1139 is in compliance with the essential requirements and other relevant provisions of Directive.
The device can be freely operated in the EU.
The Declaration of Conformity can be found at http://www.emos.eu/download.
CZ | IP Dveřní kamerová jednotka
Obsah dodávky
montážní stříška 1 ks
dveřní kamerová jednotka 1 ks
napájecí zdroj 1 ks
melodický zvonek 1 ks
upevňovací šrouby
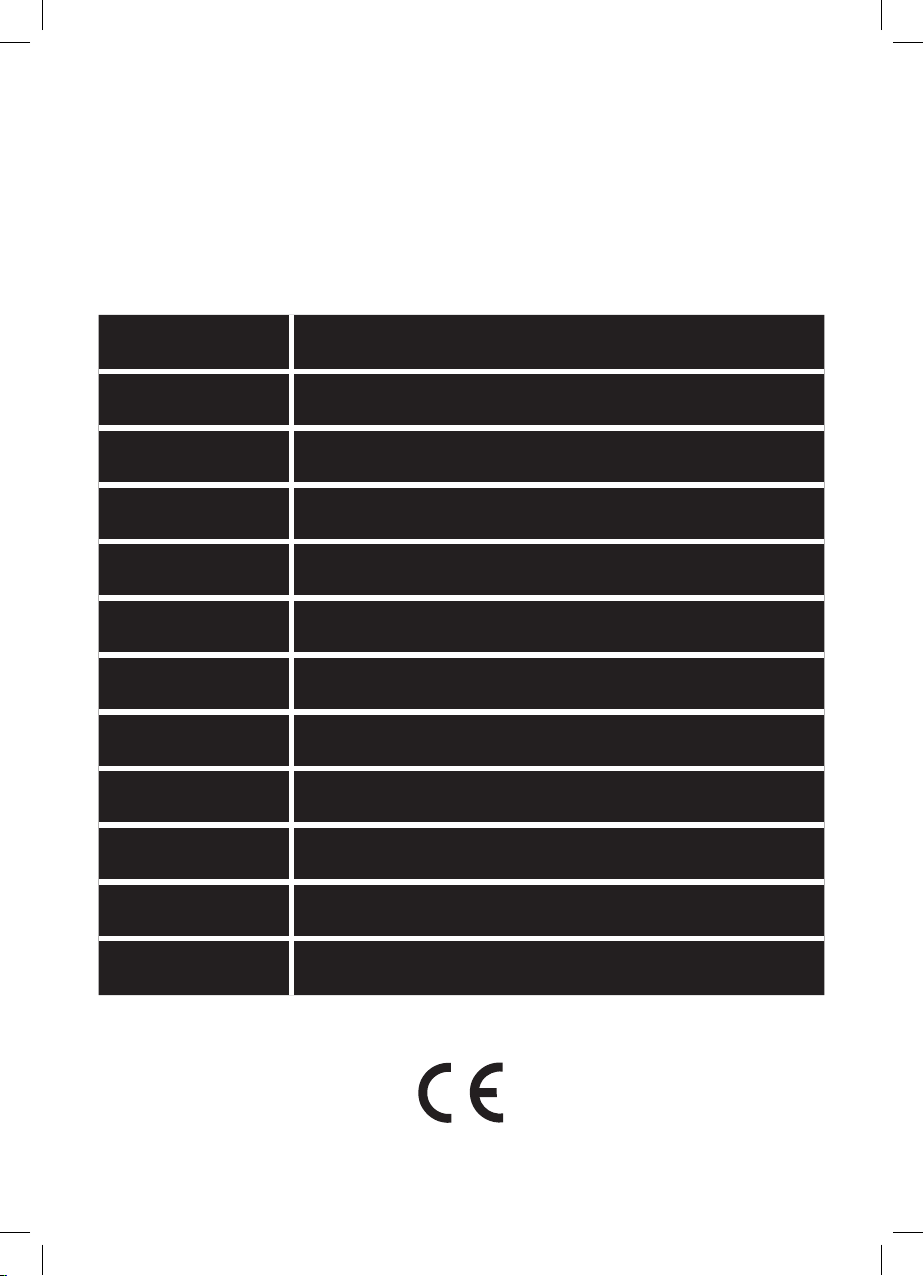
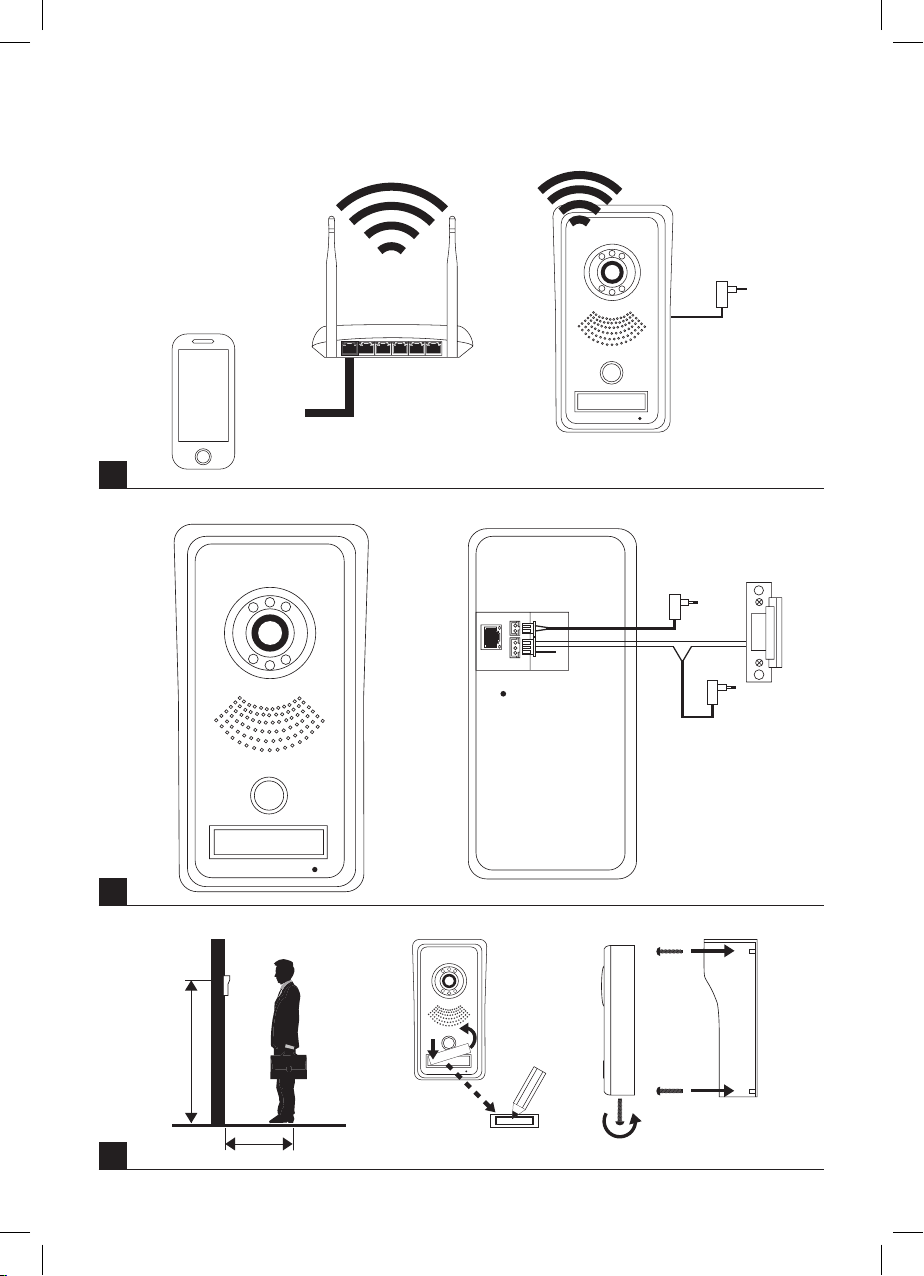
Instalace
viz obr. 3
Pro správnou funkci zařízení je nutný kvalitní signál WiFi sítě.Vpřípadě špatné kvality bezdrátového připojení, propojte zařízení
sdomácí sítí datovým kabelem skonektory RJ45.
1. Vyšroubujte šroub na spodní straně a vysuňte dveřní kamerovou jednotku ze stříšky.
2. Zvolte vhodné místo pro montáž a zde připevněte krycí stříšku.
3. Připojenou dveřní kamerovou jednotku přišroubujte pomocí přiložených šroubů ke krycí stříšce.
Dveřní kamerová jednotka na omítce – mezi zeď a dveřní stanici naneste vrstvu silikonu, která zamezí vnikání vlhka. Silikon
by měl být na horní a bočních stěnách. Spodní stěna musí být volná pro odchod vlhkého vzduchu.