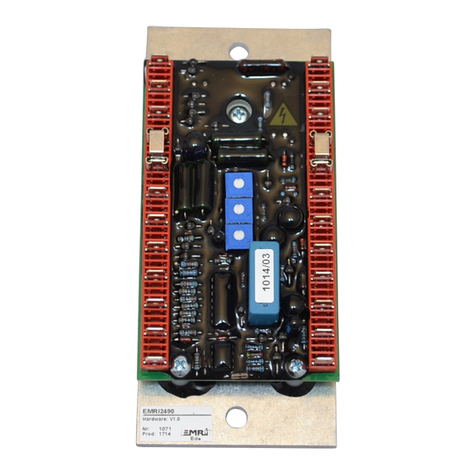
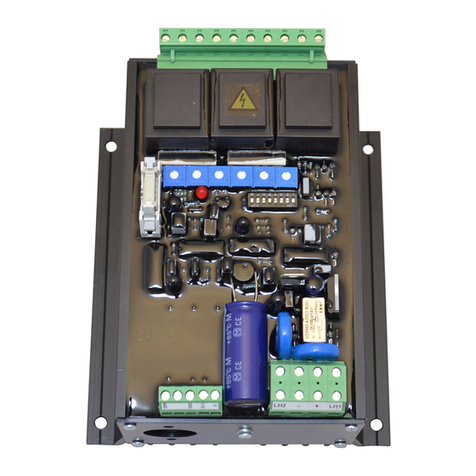
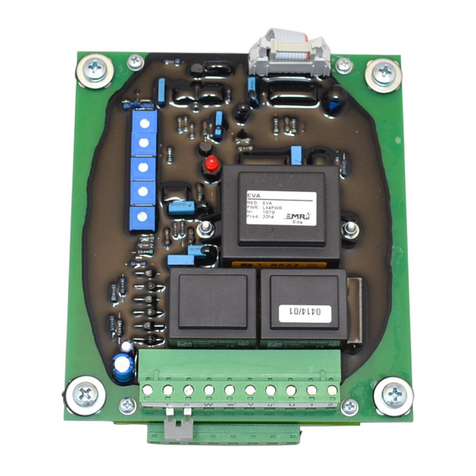
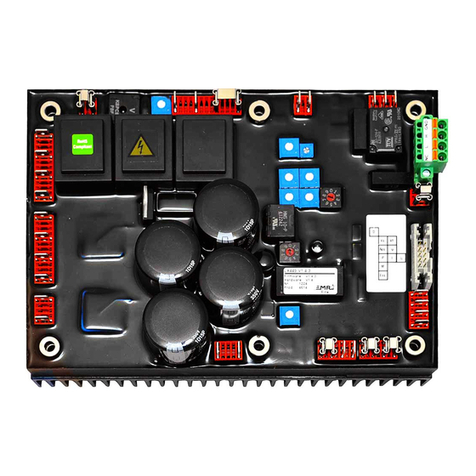
EMRI R10 Series User manual

A
NHALTISCH
E
ELEKTROMOTORENWER
K
DESSAU GMB
H
KAD 30161/E
Edition 04/2010
Read through before initial operation and store carefully for later reference!
Regulator-
operating instructions
for brushless three-phase synchronous generators
with regulator types
R10-K, R10-KA, R10-KC, R10-KF
AEM
Anhaltische Elektromotorenwerk Dessau GmbH
Daheimstr. 18
D - 06842 Dessau - Roßlau
After-sales service
Tel.: 49 (0) 340 203 304 / 305
Fax: 49 (0) 340 203 311
email: aem@aemdessau.de
homepage: www.aemdessau.de

A
NHALTISCHE
ELEKTROMOTORENWERK
DESSAU GMBH
Page 2 of 24 AEM 30161 04/2010
General safety instructions
Notes for use
The notes used in the operating instructions have the following significance:
Danger!
Is used for activities that may cause considerable personal or material damage. Please
read and observe these notes carefully and act particularly cautiously in these cases.
Make other users aware of these notes concerning work safety.
ATTENTION! Concerns the observation of regulations, notes or the correct sequence of working
steps to avoid damaging or destroying the generator, its parts and/or parts of the
equipment.
NOTE General type of notes
______________________________________________________________________________________
General safety instructions
Electrical generators for which these operating instructions were written are designed for use in commer-
cial installations. During operation, these generators have dangerous rotating and non-insulated voltage-
carrying parts. Serious personal and material damage may be caused by improper use, impermissible re-
moval of covers and protective installations, wrong handling and insufficient maintenance.
All work to be carried out on electrical generators such as assembly, connection or maintenance must
only be carried out while the system carries no voltage and is out of operation. Protect the system
against unintended reactivation.
These generators must only be transported, put up, connected, put into operation, maintained and operated by
specialized staff being trained to observe the relevant safety and installation regulations. All processes must be
checked by responsible specialized staff. These specialized staff must have been authorized for their activities
by the security system officer (for specialized staff regulations see DIN EN 50110-1 / DIN IEC 60364).
Operation by non-qualified staff is prohibited!
The person responsible for the installation must make sure
to have safety and operating instructions available and observing them;
to have all safety installations and personal safety equipment available;
that safety installations and personal safety equipment are used;
regulatory maintenance work is carried out;
the maintenance staff is immediately informed or the generator stopped if abnormal voltages, increased
temperatures, oscillations, noises etc. occur so that causes can be determined and damages avoided.
The manufacturer's liability is only maintained if the operating instructions are being observed at any
time!

A
NHALTISCH
E
ELEKTROMOTORENWER
K
DESSAU GMB
H
AEM 30161 04/2010 Page 3 of 24
Table of contents
1 Description of exciter system ...................................................................................................................... 4
1.1 Exciter system ...................................................................................................................................... 4
1.2 Voltage regulator .................................................................................................................................. 5
2 Behaviour during operation and notes on use ............................................................................................ 6
2.1 Excitation, de-excitation ....................................................................................................................... 6
2.2 Setting range for voltages, set-point adjuster ...................................................................................... 7
2.3 Voltage response ................................................................................................................................. 7
2.4 Radio interference suppression ........................................................................................................... 7
2.5 Operation .............................................................................................................................................. 8
2.5.1 Overload resistance ...................................................................................................................... 8
2.5.2 Operation with different temperatures of the cooling agent .......................................................... 8
2.5.3 Operation at power factors p.f. < 0.8 ............................................................................................ 8
2.5.4 Underspeed .................................................................................................................................. 8
2.6 Short-circuit response .......................................................................................................................... 8
2.7 Single operation ................................................................................................................................... 8
2.8 Parallel operation ................................................................................................................................. 8
2.8.1 Practical applications .................................................................................................................... 8
2.8.2 Neutral earthing current ................................................................................................................ 9
2.8.3 Synchronization ............................................................................................................................ 9
2.8.4 Parallel operation with static ......................................................................................................... 9
2.8.5 Parallel operation with compensating line .................................................................................. 10
2.8.6 Parallel network operation .......................................................................................................... 11
2.8.7 Electronic voltage adjustment ..................................................................................................... 11
2.9 Emergency operation without regulator ............................................................................................. 11
3 Power factor regulation .......................................................................................................................... 11
3.1 General information ............................................................................................................................ 11
3.2 Description of functions ...................................................................................................................... 12
3.2.1 Function ...................................................................................................................................... 12
3.2.2 Modifications ............................................................................................................................... 12
3.3 Behaviour during operation and connecting instructions ................................................................... 12
3.3.1 No-load speed behaviour ............................................................................................................ 12
3.3.2 Behaviour under load .................................................................................................................. 12
3.4 Connecting instructions ...................................................................................................................... 13
3.5 Setting instructions ............................................................................................................................. 17
3.6 Adjustment at first startup .................................................................................................................. 18
3.7 Safety instructions for network breakdowns and isolated operation .................................................. 18
3.8 Notes on changing the p.f.-regulator .................................................................................................. 18
4 V/f-control .................................................................................................................................................. 18
4.1 V/f-control ........................................................................................................................................... 18
4.2 Setting instructions of regulator R10-KF ............................................................................................ 19
4.3 R10-KFG adjusting notes ................................................................................................................... 20
5 Troubleshooting ......................................................................................................................................... 20
5.1 Voltage problems ............................................................................................................................... 20
5.2 Checking and replacing the rectifier diode ......................................................................................... 21
5.3 Testing varistors ................................................................................................................................. 21
5.4 Replacing the regulator ...................................................................................................................... 21
5.5 Problems overview ............................................................................................................................. 21
5.6 Troubleshooting for p.f.-regulator R10-KC ......................................................................................... 24

A
NHALTISCHE
ELEKTROMOTORENWERK
DESSAU GMBH
Page 4 of 24 AEM 30161 04/2010
1 Description of exciter system
1.1 Exciter system
Construction
The exciter system consists essentially of the following assembly groups:
choke [6]
current transformer [7]
stationary rectifier stack [8] with step-down resistor
electronic voltage regulator [9]
1 Stator winding
2 Rotor winding
3 Rotor winding of excitation machine
4 Stator winding of excitation machine
5 Rotating rectifier stack
6 Choke
7 Current transformer
8 Stationary rectifier stack
9 Electronic voltage regulator R10-Kx
10 Step-down resistance
11 Static current transformer
A Potentiometer voltage
B Potentiometer static
C Potentiometer stability
D External potentiometer voltage
Figure 1: Basic circuit diagram for
R10-Kx
All units are installed on a panel on the N side end shield. Exciter system and rotating rectifier stack can be
accessed by taking off the hood and opening the clamps or the screw connection.
For generator voltages higher 1 kV, an additional transformer with a secondary voltage of 400 V built in to
separate the AVR from the high-voltage side. The AVR is in a separate connection box. The exciter unit is
protected against unauthorized changes.
Working principle
The remanent voltage produced in the stator winding [1] of the generator causes a small current to flow
through the stator winding [4] of the exciter via choke [6] and rectifier stack [8] thus setting off self-excitation.
The choke [6] limits the exciter current of the exciter. The exact value depends on the air gap between core
and yoke of the choke. The required air gap is adjusted by adding insulating material.
NOTE For generator voltages higher 1 kV, an additional auxiliary winding is built in into the stator.
The voltage of this auxiliary winding serves as remanent voltage and supply the choke.
The load current flows through the current transformer [7]. When load is put on the generator, the secon-
dary current of the current transformer [7] is added to the choke current. After rectification in the stationary
rectifier stack [8] a six-pulse bridge circuit this alternating exciter current flows to the stator winding [4] of
the exciter. In order to protect the diodes against voltage surges, both the stationary rectifier stack [8] and the
rotating rectifier stack [5] are equipped with varistors.
Choke current and secondary current of the current transformer are adjusted such as to permanently main-

A
NHALTISCH
E
ELEKTROMOTORENWER
K
DESSAU GMB
H
AEM 30161 04/2010 Page 5 of 24
tain a generator voltage of approx. 10 % above the rated generator voltage while the generator rotates at its
rated speed and the voltage regulator is disconnected.
Every time the rated generator voltage is exceeded, the voltage regulator (AVR) [9] periodically switches on
step-down resistor that is located in parallel to the stator winding of the exciter [4]. This ensures that the
teminal voltage of the generator is kept at the value set by the set-point adjuster.
NOTE The chosen tappings of the winding to choke and current transformer have been optimally
adjusted to the generator in the manufacturer's test shop. You should therefore always con-
tact the manufacturer prior to making any changes.
1.2 Voltage regulator
Design
The voltage regulator is located in a sealed casing protected against dust and dirt. The casings contains the
potentiometers for setting the various regulator functions.
The potentiometers are equipped with a self-locking multi-speed mandrel drive that is secured against over-
speed by a sliding clutch. The setting range is approximately ± 10 revolutions.
The following regulator types are used:
R10-K Standard type providing voltage regulation and staticization for parallel operation. Designed with
smoothing capacitor CK and varistor.
R10-KAx In addition to the functions of the R10-K, also contains an analogue input via which the setpoint
voltage can be changed within a range of ± 10 % via an analogue signal input, either as 0 10
V signal (R10-KAU) or 4 20 mA signal (R10-KAI).
R10-KC In addition to the R10-K functions, this type contains a p.f.-regulation part. It can be used either
as a staticizing regulator or as a p.f.-regulator. Modifications of regulator R10-KC see section 3.
Power factor regulation
R10-KF/
R10-KFG
In addition to the functions of the R10-K, also contains a secondary frequency-dependent volt-
age regulation.
NOTE The previously used regulator type R10 was functionally identical with the type R10-K but
has no capacitor CK or varistor. It can be replaced without exception by the other type; leave
terminal 12 unoccupied in this case.
All R10 series regulators have the same dimensions.
Connections
The voltage regulator is connected via spring-loaded terminal strips. The generator voltage is connected as
in figure 2 and the enclosed circuit diagram.
Figure 2: Connection for measuring and voltage supply
NOTE For generator voltages between 500 V and 1000 V, the regulator is connected to tappings of
the stator winding at approx. 400 V. For generator voltages higher 1 kV the AVR is con-
nected to a special measuring transformer (400 V).

A
NHALTISCHE
ELEKTROMOTORENWERK
DESSAU GMBH
Page 6 of 24 AEM 30161 04/2010
NOTE For current readings a static current transformer in phase W is used. Only some of the paral-
lel winding branches of the stator winding are put through the converter.
(observe when disassembling the exciter)
The connection of static current transformer to AVR have to be followed according to figure 3 under consid-
eration of section 2.7 and 2.8.
Figure 3: Connection for static current transformer
For all other connections see the circuit diagram of the generator.
2 Behaviour during operation and notes on use
Danger!
Only trained specialized staff are allowed to change settings using a suitable tool.
Observe during all setting and other work to be carried out on exciter and regulator
that all components carry network potential.
2.1 Excitation, de-excitation
Excitation
Self-excitation is provided by the remanent voltage.
Danger!
Measure the generator voltage during the excitation process.
Remove the external voltage source immediately, when the generator voltage rises.
Danger of inverse voltage!
If self-excitation of the generator does not work, excitation can be induced by briefly applying an external
voltage (6 or 12 V battery) to terminals X100:3 (battery plus), :4 (battery minus) in the terminal box of the
generator (figure 4).
Figure 4: Generator excitation and de-excitation circuit
De-excitation
Danger!
After de-excitation and while the drive is running, there is a residual voltage of up to
10 % of the network voltage on the generator terminals.
Special notice for generators with voltage more than 1 kV.

A
NHALTISCH
E
ELEKTROMOTORENWER
K
DESSAU GMB
H
AEM 30161 04/2010 Page 7 of 24
Use a contactor or suitable switch to produce a short-circuit between terminals X100:3 and :4. Current load
on the contacts is < 10 A (figure 4).
2.2 Setting range for voltages, set-point adjuster
Use the "Spannung" potentiometer of the regulator or an external set-point adjuster to set the terminal volt-
age in a range of approx. ± 5 % of the rated value.
Danger!
Incorporate the external set-point adjuster in the protective measures against high
contact voltage.
You may connect an external set-point adjuster to terminals 6 and 8 on the regulator resp. X100:1 and
X100:2 in the terminal box of the generator (rotary resistor 2.5 k (to 5 k admissible), load limit approx.
1 W, test voltage > 2000 V). On the regulator, put jumper 7 - 8 to 6 - 7.
Figure 5: Connection for external set-point adjuster
Legend: Regler - Regulator Spannung - Voltage
Statik - Static Stabilität - Stability
NOTE We recommend using shielded cables!
Put the jumper back to connect 7 - 8 if you are working without external set-point adjuster.
2.3 Voltage response
Static voltage response
The voltage regulator maintains the set terminal voltage between no-load and rated current for power factors
in a range of p.f. = 0.5 (over-excited) to 1.0 with a tolerance value of under ± 1 %. This constant voltage
works for operation without staticization only. Valid speed increases of the generator drive are up to 105 % of
the rated speed between rated output and no-load operation.
Dynamic voltage response
Adding a rated load of a power factor of p.f. = 0.8 causes a voltage drop by approx. 12 to 15 %. Regulation
compensation takes about 0.3 to 0.5 sec. Both nominal values depend on the generator output and its num-
ber of poles. Greater additional loads are possible. However, in this case the voltage drops by up to 30 %.
Please contact the manufacturer for further information.
Voltage stability
The regulator is delivered with optimal settings for static and dynamic voltage response. If the output voltage
oscillates, slowly turn potentiometer "Stabilität" (figure 5) clockwise until the output voltage is stable again.
2.4 Radio interference suppression
Radio interference suppression corresponds to DIN EN 61000-6-4 unless any other arrangements were
made with the manufacturer.

A
NHALTISCHE
ELEKTROMOTORENWERK
DESSAU GMBH
Page 8 of 24 AEM 30161 04/2010
2.5 Operation
2.5.1 Overload resistance
Valid current overloads of the generator at p.f. = 0.5 are 10 % for an hour (once within 6 hours) or 50 % for
2 minutes. Brief overloads at motor starting operations are admissible. During overload conditions, the volt-
age tolerance of ± 1 % is no longer valid.
2.5.2 Operation with different temperatures of the cooling agent
The rated output stated on the type label is only valid in conjunction with the stated temperature of the cool-
ing agent. For other temperatures, the following output changes apply:
T / °C 30 35 40 45 50 55 60
PS / PN 1.06 1.03 1.00 0.96 0.92 0.88 0.84
ATTENTION! Operation in ambient temperatures above 60 °C require manufacturer approval.
2.5.3 Operation at power factors p.f. < 0.8
For power factors p.f.< 0.8, the generator power must be reduced in relation to the power factor.
p.f. 0.7 0.6 0.5 0.4 0.0
PS / PN 0.94 0.89 0.85 0.82 0.80
2.5.4 Underspeed
Particular protection of the generator, the exciter or the regulator against underspeed of the generator drive
(e.g. during warm-up) is not required. Voltages are maintained constant down to speeds of approx. 90 % of
the rated speed. Below this value, the voltage is reduced approximately proportionally to the speed so that
every speed is admissible in no-load without time limitation.
2.6 Short-circuit response
The current surge (15 - 21 x IN) occurring during short-circuit conditions goes down to the sustained short-
circuit current after about 60 to 100 ms. Stable sustained short-circuit current of up to three times the rated
generator current is guaranteed for up to 5 sec. Please refer to the data sheet of the generator for all other
values. The sustained short-circuit current on one pole is approx. 5 - 6 x IN.
2.7 Single operation
To ensure single operation, the static current transformer can be deactivated by putting in a jumper between
terminals 4 - 5 (figure 3). This guarantees optimally constant voltage values for the generator.
NOTE Single operation is possible without limitations if there is no jumper between 4 and 5 (pa-
rallel operation circuit). In this case, voltage tolerances are determined by the static setting
and they are above 2 %.
2.8 Parallel operation
2.8.1 Practical applications
Brushless generators are designed for parallel operation. They are equipped with damper winding, connec-
tion for compensator circuit, static device and set-point voltage adjuster.
The following variations of parallel operation are possible:
Parallel operation with static with other generators as long as these provide parallel operation features
and if practically the same static voltage curves with falling characteristics can be set for all generators;
Parallel operation with compensator circuits of generators of the same type;
Parallel network operation either with regulator R10-K and non-regulated power factor or using regula-
tor R10-KC with power factor regulation.
For parallel operation of several generators, reactive power distribution as well as current and power output
variations must be within the range of applicable regulations. Prerequisites for this kind of operation are that
generator drives, and their speed governors in particular, are designed correspondingly providing the same P
range (speed drop between no-load and full load operation) or that a active power distribution proportional to
the power output is ensured by an automatic active power distribution installation.

A
NHALTISCH
E
ELEKTROMOTORENWER
K
DESSAU GMB
H
AEM 30161 04/2010 Page 9 of 24
Measure Effect during
single operation
Main effect during
parallel operation
Voltage set point of generator Generator voltage Generator supply more reactive power
Generator static -----------
Voltage set point of generator Generator voltage Generator supply less reactive power
Generator static -----------
Speed set point of drive Frequency Generator supply more active power
Speed set point of drive Frequency Generator supply less active power
NOTE Wrong distribution of active power (kW indicator not proportional to power output) is always
caused by the speed regulation of the generator drives.
Wrong distribution of reactive current (kW distribution o.k., different current distribution) is
caused by the voltage and static settings of the regulator.
2.8.2 Neutral earthing current
Connecting the generator star point to the star points of generators of another type or to the network earthed
neutral can cause compensation currents of mainly three times the network frequency to flow in the neutral
earth conductor that have been caused by different voltage curve lines of generators and mains network.
Neutral currents of up to 40 % of the rated current are admissible unless other values have been defined.
Reducing the neutral current can be achieved by inserting a special type of choke coil in the switching circuit
(please contact the manufacturer).
2.8.3 Synchronization
The generators can be synchronized by manual synchronization, automatically quick synchronization or
startup synchronization (please contact the manufacturer).
The following prerequisites must be observed for synchronization processes:
almost identical frequency of the two voltage systems f 0.2 Hz
almost identical terminal voltage of generator and mains network, admissible difference < 6 %
identical phase sequence of the two voltage systems
closing of switching contacts at a phase angle of < 15 degrees in relation to the zero crossover of the dif-
ference voltage of the two voltage systems.
ATTENTION! Wrong synchronization causes extremely high electrical and mechanical loads on the
generator which must be avoided under all circumstances.
Manual synchronization
Use the set-point adjuster to set the generator voltage to the network voltage. After setting smallest fre-
quency and phase differences possible by means of a synchronoscope, the generator can be switched on.
To avoid the occurrence of inverse power after switching on the generator, the generator frequency should
be about 0.2Hz above the network frequency.
Quick synchronization
Use an electronic synchronization device to adjust the system to smallest possible voltage, frequency and
phase differences automatically. The generator will be switched on considering that time element (switch) is
in zero crossover range of the difference voltage.
2.8.4 Parallel operation with static
ATTENTION! Check whether the jumper between terminals 4 and 5 of the regulator have been re-
moved.
Depending on current and power factor, the generator voltage characteristics have a decline. The voltage
drop can be set by the "Statik" potentiometer on the regulator (max. 8 % at p.f. = 0) (figure 5). The voltage
drop is increased by turning the potentiometer clockwise.
In the factory, the static is set to approx. 2 % (in relation to no-load voltage) at rated current and a power fac-
tor of p.f. = 0.8. Constant voltage during parallel operation depends on the static setting. If static setting and
static characteristics are nearly the same, the reactive power (in relation to the rated power of the corre-
sponding generator) is distributed proportionally.
ATTENTION! Make sure to do a generator adjustment before starting operation.
Only specialized staff must do these steps.
Check whether all drives have the same percentage value for speed drop between id-
le speed and full speed while in single operation.
Use the set-point adjuster to adjust the equal values of no-load voltages (±1 V) at all

A
NHALTISCHE
ELEKTROMOTORENWERK
DESSAU GMBH
Page 10 of 24 AEM 30161 04/2010
generators. For this setting please use the same meter.
Put rated load at rated power factor on the generators in single operation possible and
check whether an almost identical voltage drop can be observed for all generators.
If you find larger differences, the static potentiometer must be readjusted. Static values of 2 3 % at rated
power and rated power factor are sufficient for stable parallel operation. This test must not be made with just
using active power as this renders the static inefficient.
NOTE Proceed as follows to make a supplementary test if only active power operation is possible
when changing the setting:
1. Connect the blue cable from phase U to W and the brown cable from phase V to phase
U on the choke terminal strip [6.1].
2. Put load on the generators.
3. The voltage drop corresponds to static setting at p.f. = 0.5 and normal switching condi-
tions.
4. While corrections of the static adjustment using the equivalent circuit is to be noted that
the static adjustment is made with p.f. = 0.5. The static adjustment will be accordingly
smaller with p.f. = 0.8 therefore.
5. Reconnect all devices after the setup procedure.
Figure 6: Terminal connection for static setting at active power
2.8.5 Parallel operation with compensating line
Generators with the same exciter voltage can work in parallel if there is a compensating line (figure 7).
NOTE Put in jumper 4 - 5 on the voltage regulator.
Compensation for static potentiometer is not required. The compensating line is connected to terminals
X100:3 and :4 in the terminal box (make sure to connect only terminals of the same polarity). The max. com-
pensating current is 2 A. Provide auxiliary contacts on the generator power on / off switch to ensure that the
compensating line is only active during parallel operation. Under proportional active load distribution condi-
tions, the compensating line ensures an almost automatically proportional reactive load distribution.
ATTENTION! The open-circuit voltages of the generators must be checked and adjusted at no-load
speed of the drives prior to putting a system into operation.
In order to avoid measuring errors, measurements must be made with the same device.
The difference between the individual open-circuit voltages of the generators must be no greater than 0.5 %.
Figure 7: Parallel operation with compensating line

A
NHALTISCH
E
ELEKTROMOTORENWER
K
DESSAU GMB
H
AEM 30161 04/2010 Page 11 of 24
NOTE The starting synchronization can carry out with any numbers of generators in switching
method compensating line.
2.8.6 Parallel network operation
A prerequisite for parallel operation of an electric device in a fixed network is that overload conditions in vary-
ing network situations are avoided. On the active load side this is ensured by a speed regulator or an elec-
tronic load distribution. On the reactive load side, this condition must be ensured by implementing a load-
dependent modification of the internal generator voltage. This generator voltage adjustment can be realized
either by the static device or by a regulation that depends on the power factor (p.f.-regulation).
The static device lowers the generator voltage if the reactive power increases. Greater static causes small
current changes if the network voltage changes.
A special regulator is required for generators with p.f.-regulation, which keeps the adjustable power factor
constant independent of the mains voltage (see section 3. p.f.-regulation).
NOTE During synchronisation the generator voltage should be approx 1 % higher than the network
voltage in order to avoid under-excited operation with generator reactive current absorption
from the mains.
ATTENTION! Observe the neutral earthing current described in section 2.8.2 and the synchroniza-
tion conditions in section 2.8.3.
2.8.7 Electronic voltage adjustment
In conjunction with the analogue input for the electronic voltage adjustment of regulator R10-KA and R10-KCA,
the electronic voltage adjuster ESA1 can automatically adjust the generator voltage to the mains voltage before
synchronisation (necessary to contact manufacturer).
2.9 Emergency operation without regulator
If the voltage regulator is defect and if no supplementary regulator is available, it is possible to go into emer-
gency mode. To do so, simply disconnect connections 1, 2 (resp. 3), 10.
ATTENTION! Attach and insulate cable ends.
Connect an adjustable resistor of approx. 100 and a load resistance of approx. 2 A to terminals X100:3, :4
in the generator terminal box. The resistor can be used to set the rated generator voltage while the generator
is in no-load.
Danger!
The resistor is under network potential and must therefore be protected against con-
tact.
The voltage can be kept in the required range by readjustment under load. The voltage tolerance value is
approx. 5 % without readjustment.
3 Power factor – regulation
3.1 General information
There is the option of equipping synchronous generators with a p.f.-regulator to ensure optimal use in paral-
lel operation. The manufacturer uses regulators R10-KC for different modifications.
These operating instructions provide you with special information about functions, settings and troubleshoot-
ing for operating the p.f.-regulator. The enclosed circuit diagram is the basis for all work to be carried out.
ATTENTION! Complete generator operation and maintenance requires reference to the mounting
and operating Instructions for S, SE and SEH series brushless three-phase synchro-
nous generators.
Danger!
Work must be carried out by qualified specialized staff only.
The safety instructions given in the mounting and operating instructions for three-
phase synchronous generators must be observed at all times and for all works to be
carried out on the regulator.
Changing settings while the generator is running requires utmost care because of the
presence of rotating and voltage-carrying parts.

A
NHALTISCHE
ELEKTROMOTORENWERK
DESSAU GMBH
Page 12 of 24 AEM 30161 04/2010
3.2 Description of functions
3.2.1 Function
Regulator R10-KC extends regulator type R10-K by the p.f. -regulator component.
NOTE If you do not activate the p.f.-part (see 3.4 Connecting instructions) you can use regulator
R10-KC like the standard regulator R10-K
Use regulator R10-KC to regulate the generator output factor in network environments which are static to a
certain degree independently of the active load in a range of approx. 0.6 inductive (over-excited) to p.f.=1.0
(active load only) in a current range between approx. 10 and 100 %. The set value is maintained with a pre-
cision of 0.05. Under-exited operation is not permitted.
To increase stability and to avoid fast responses to short voltage changes (e.g. when the load is increased),
the regulator responds with a certain delay.
This time constant can be set in a range between 2 and 10 seconds.
NOTE The p.f -regulation only refers to the generator (see documentation of generator).
Contact the manufacturer if you want to regulate power factor at the power feeding point.
3.2.2 Modifications
Several modifications of regulator R10-KC will be delivered for special connection requirements.
R10-KC In this regulator the setpoint voltage is set within a range of 10 % at the regulator internal
potentiometer The voltage can be set too within a range of 5 % via an external potenti-
ometer as 5 k
An external adjustment of the power factor at this regulator is not possible.
R10-KCAx In this regulator the setpoint voltage is set as at the regulator R10-KC. This voltage can be
changed within a range of 10 % via an analogue signal input, either as 0 - 10 V signal
(R10-KCAU) or 4 - 20 mA signal (R10-KCAI).
Optionally, regulator R10-KC can be delivered with supplemental connecting terminals for external p.f.-setting.
R10-KCEXT Adjustment of power factor will be realized via external potentiometer (in panel, control
station and others).
An adjustment of power factor direct on regulator is not possible.
R10-KCEXTAx Adjustment of power factor will be realized via external potentiometer (in panel, control
station and others).
An adjustment of power factor direct on regulator is not possible.
In this regulator the setpoint voltage is set as at the regulator R10-KC. This voltage can be
changed within a range of 10 % via an analogue signal input, either as 0 - 10 V signal
(R10-KCEXTAU) or 4 - 20 mA signal (R10-KCEXTAI).
R10-KCUEXT Adjustment of power factor and voltage will be realized at this regulator only with external
potentiometers. The setting range of voltage is ± 10 %.
An adjustment of power factor and voltage direct on regulator is not possible.
3.3 Behaviour during operation and connecting instructions
3.3.1 No-load speed behaviour
While in no-load speed, the generator is voltage-controlled even if it is in "Power factor regulation" mode be-
cause the transformer [11] provides no signal. Use the "Spannung" potentiometer to set the no-load speed
voltage. Synchronization can be made as usual.
3.3.2 Behaviour under load
In the very small power output range there is no real practical necessity for exact power factor regulation. To
avoid malfunctions in this range, a mechanism inside the regulator automatically switches into power factor
regulation mode only if the current has arrived at approx. 10 % of the rated generator current. This condition
is indicated by the LED on the regulator lighting up. After synchronization and until the switchover current
has been reached, the regulator works in static mode. The power factor in this range can differ from a preset
power factor.
ATTENTION! Operating the generator at full load with a power factor < 0.8 is not allowed.
Use the following table to reduce the power :
p.f. 0.7 0.6 0.5 0.4 0
P / PN 0.94 0.89 0.85 0.82 0.80

A
NHALTISCH
E
ELEKTROMOTORENWER
K
DESSAU GMB
H
AEM 30161 04/2010 Page 13 of 24
3.4 Connecting instructions
All modifications of regulator R10-KC are regarding to external connection only. Function of modifications is
equivalent.
Danger!
Incorporate the external set-point adjuster in the protective measures against high
contact voltage.
NOTE Connection diagram has to be considered before connection.
If there are no external connections, p.f.-regulator R10-KC works as voltage regulator (observe during tests).
p.f. -regulation is activated by putting in a jumper between terminals X100:5 and :6 (inside the terminal box)
or regulator terminals 9 to 11 resp. if the regulator is connected externally (terminals 4 and 5 without
jumper). The connection between X100:5 and :6 resp. the terminals 9 11 for external arrangement of regu-
lator must be set as contact on the switching panel via the generator switch and must be interlocked with the
network coupling switch for safety reasons (see figure 8).
Figure 8: Connection of p.f.-regulator R10-KC
Legend: Regler - Regulator T cos - T p.f.
cos phi - p.f. Spannung - Voltage
Statik - Static Stabilität - Stability

A
NHALTISCHE
ELEKTROMOTORENWERK
DESSAU GMBH
Page 14 of 24 AEM 30161 04/2010
R10-KCAx The analogue signal for voltage adjustment is connected via the additional terminals 13 and
14 on the regulator .
Figure 9: Connection of p.f.-regulator R10-KCAx
Input R10-KCAI: 4 20 mA DC
R10-KCAU: 0 10 V DC
Legend: Regler - Regulator T cos - T p.f.
cos phi - p.f. Spannung - Voltage
Statik - Static Stabilität - Stability

A
NHALTISCH
E
ELEKTROMOTORENWER
K
DESSAU GMB
H
AEM 30161 04/2010 Page 15 of 24
R10-KCEXT Connection of potentiometer for power factor adjustment (resistance 5 k , load value 1 W)
will be realized via shielded cable to terminals C1, C2, C3 of regulator.
Figure 10: Connection of p.f.-regulator R10-KCEXT
Legend: Regler - Regulator T cos - T p.f.
Spannung - Voltage Stabilität - Stability
Statik - Static

A
NHALTISCHE
ELEKTROMOTORENWERK
DESSAU GMBH
Page 16 of 24 AEM 30161 04/2010
R10-KCEXTAx Connection of potentiometer for power factor adjustment (resistance 5 k , load value 1 W)
will be realized via shielded cable to terminals C1, C2, C3 of regulator.
The analogue signal for voltage adjustment is connected via the additional terminals 13
and 14 on the regulator.
Figure 11: Connection of p.f.-regulator R10-KCEXTAx
Input R10-KCEXTAI: 4 20 mA DC
R10-KCEXTAU: 0 10 V DC
Legend: Regler - Regulator T cos - T p.f.
Spannung - Voltage Stabilität - Stability
Statik - Static

A
NHALTISCH
E
ELEKTROMOTORENWER
K
DESSAU GMB
H
AEM 30161 04/2010 Page 17 of 24
R10-KCUEXT Connection of potentiometers (per resistance 5 k , load value 1 W) will be realized via
shielded cable to terminals C1, C2, C3 for power factor adjustment and to terminals U4, U5,
U6 of regulator for voltage adjustment.
Figure 12: Connection of p.f.-regulator R10-KCUEXT
Legend: Regler - Regulator T cos - T p.f.
Statik - Static Stabilität - Stability
3.5 Setting instructions
The potentiometers (figure 8 - 12) are equipped with self-locking multi-geared spindle drives. A sliding clutch
protects them against overturning.
Danger!
Observe the safety instructions when working at the generator in operation.
Potentiometer “cos phi”
Turning right (clockwise) reduces the reactive current delivered down to under-excited operation at
approx. p.f. = 0.9 capacitive.
Turning left (anti-clockwise) increases the reactive current delivered (over-excitation up to approx.
p.f. = 0.6 inductive).
When changing the setting, please take into account that time constant "T cos causes a delay of at least
2 seconds between making the change and taking effect.
Potentiometer "T cos” of the p.f. regulation
Setting the time constant for the p.f.-regulation in a wide range allows you to adapt the generator to your in-
dividual operating conditions. Turning right increases regulation time. Longer regulation times have a stabiliz-
ing effect on oscillating loads.

A
NHALTISCHE
ELEKTROMOTORENWERK
DESSAU GMBH
Page 18 of 24 AEM 30161 04/2010
External potentiometers for adjustment of p.f. and/or voltage
These potentiometers have to be adjusted before putting into operation to avoid uncontrollable operating
condition. For that purpose the 5 k potentiometers have to be adjusted in a ratio of 1.5 to 3.5 k . The
exact adjustment has to be realized in accordance with section 6 afterwards when putting into operation.
3.6 Adjustment at first startup
Generator and drive system have to be adjusted to the network when putting them into operation for the first
time.
The right power factor setting is defined by the planned transmission budget for the mains network. Use
the "Voltage" set-point adjuster to set the generator voltage to the normal local network voltage. First
startup is to be made with the value set in the factory. Should you notice irregular power characteristics
during load tapping, turn the time constant towards the "higher" marking.
If irregular current flows occur when switching from static to p.f.-operations (at approx. 10 % of the rated
generator current), turn the static resistor in the regulator towards the "max." marking.
If voltages are irregular during isolated operation, turn the "Stabilität" potentiometer towards the "max."
marking.
3.7 Safety instructions for network breakdowns and isolated operation
If the network voltage breaks down while in network parallel operation, the generator must be immediately
set to "Voltage regulation" mode (open connection between X100:5 and :6 resp. 9 - 11) and switched off im-
mediately or be unloaded by suitable switching sequences.
ATTENTION! Generators must not be operated with p.f.-regulation in an isolated network because
this may lead to dangers for the network consumers.
If there is no danger of overload, an uninterrupted supply of the isolated network system is possible. Switch-
ing over to voltage regulation mode must be ensured by the network interconnecting switch.
If there is not switchover to voltage regulation, generator regulation of the p.f. would lead to a voltage in-
crease (p.f. set too high) or a voltage decrease (p.f. set too low) in the network. Power factor regulation after
re-establishment of network stability must only be activated after synchronization with the mains network.
3.8 Notes on changing the p.f.-regulator
After replacing a regulator of series R10-KC the basic setting for network operation must be carried out when
putting into service the replacement regulator:
Connect the regulator according to the circuit diagram, taking care to strictly adhere to the given cable
connections.
Start up the generator until the rated frequency is reached and adjust the generator voltage to the net-
work voltage at the voltage potentiometer.
Synchronise the generator to the network and load with an output of less than 10 %.
- The red pilot lamp on the regulator must not light up.
- The generator runs in static mode, p.f. regulation is inactive.
- Use the Statik potentiometer to inductively set p.f. to approx 0.95.
Load the generator so that the pilot lamp uniformly lights up without flickering (at least 30 % of the rated
power).
Use the p.f. potentiometer to adjust to the required power factor.
If current pulsation occurs (red lamp flickers) within the area of the internal changeover to p.f. regulation,
use the Statik potentiometer to increase the static by turning to the right.
4 V/f-control
4.1 V/f-control
In specific application cases, e.g. throwing on consumers being large relative to output of driving machine
(mainly cases of engines with turbochargers) or operation of isolated networks (marine service) with slip fre-
quency, voltage may be controlled as a function of frequency.
Generator voltage drop occurs below a certain break frequency. Voltage is frequency-independent above
this value (see figure 14 an 15).
When load is thrown onto a diesel generating set, a short generator voltage breakdown (some 0.2 to 0.5 sec-
onds) and engine speed reduction occur for physical reasons. Since the correction time of voltage is much
smaller than the speed correction time (the approximate ratio is 1:10), the town-on electric load virtually re-

A
NHALTISCH
E
ELEKTROMOTORENWER
K
DESSAU GMB
H
AEM 30161 04/2010 Page 19 of 24
mains constant without influencing voltage whereas the counter moment of motor is supplementary increased
by speed reduction.
On the other side, frequency-dependent voltage control relieves the motor in the correction phase and reduces
the correction time. The diagram in figure 13 shows the moment gradient at different voltage drop levels.
V Voltage drop during load
thrown-on (%)
MX Moment based on thrown-on
load PX at VN, nN (fN)
(100 - V)²
100 - n
=
M
MX
Admissable to GL code: V = 15%
n = 10%
n Speed reduction in the event of
load thrown-on (%)
M Effective moment M
MX
n / %
1,5
1,0
0
V
n
1,1
1,0
0,9
0,8
105 0
Figure 13: Relative moment loading
Note Operation 20 up to 70 Hz is possible with a generator of special design and the modification
of regulator R10-KFG.
4.2 Setting instructions of regulator R10-KF
The regulator R10-KF permits frequency-proportional voltage control in the range between 40 and 59 Hz and
has two potentiometers on its operation panel for setting of frequency-dependent control (see figure 14).
fKnick
This potentiometer permits setting of the break point below which voltage drop shall occur. This setting is
possible in the range between 40 and 59 Hz. A LED is provided and lights as soon as break frequency falls
below the limit. For setting, the motor speed shall be changed until the desired value is reached and the po-
tentiometer be turned until the LED lights. Manufacturer's setting is 48.5 Hz for 50 Hz service and 58 Hz for
60 Hz service, if not otherwise defined.
U/f (V/f)
This potentiometer is used to set the steepness of voltage drop below the break frequency. The range up to
U/ n = 2 may be set. The manufacturer setting is a ratio of 1, i.e. 1 % of speed (frequency) drop corre-
sponds to 1 % of voltage drop (for instance, on the 400 V generator the voltage is lowered by 8 V per 1 Hz of
frequency reduction).
Figure 14: Voltage-Frequency-Characteristic and description of potentiometers of V/f-regulator R10-KF
Legend: Regler - Regulator Stabilität - Stability
Spannung - Voltage Statik - Static

A
NHALTISCHE
ELEKTROMOTORENWERK
DESSAU GMBH
Page 20 of 24 AEM 30161 04/2010
4.3 R10-KFG adjusting notes
The R10-KFG regulator in conjunction with the compounding system of the SE generator series permits fre-
quency-proportional voltage control within the range of approx. 20 to 70 Hz through a special regulator struc-
ture and design of the input stage. The voltage tolerance is approx. 5 %.
Prerequisite is that the drive motor can be set within the relevant speed limits and the compounding system
including exciter is specially dimensioned for this purpose.
The lowering of the generators voltage takes place below an adjustable break frequency. Above this value
the voltage is frequency independent (see figure 15).
For setting the frequency-dependent control, the R10-KFG regulator has two potentiometers (see figure 3).
The adjustment is made as for the R10-KF regulator.
NOTE The additional potentiometer UKnick serves only for the adjustment in the electronics test facil-
ity. Attention: Do not adjust!
fKnick and U/f (V/f)
The adjustment will be done delivery according to customer arrangement.
Figure 15: Voltage-Frequency-Characteristic and description of potentiometers of V/f-regulator R10-KFG
Legend: Regler - Regulator Stabilität - Stability
Spannung - Voltage UKnick - Vbreak
Statik - Static
5 Troubleshooting
ATTENTION! Immediately switch off the drive if a failure occurs.
Carefully inspect the generator while in a voltage-free condition.
Danger!
While measuring or setting parameters with the generator running, you must be
aware of the fact that all unprotected terminals may carry very dangerous voltages
and that they are in immediate proximity to rotating parts.
The generator must therefore be locked to avoid contact by unauthorized persons.
ATTENTION! Check-ups of exchanging of parts must only be carried out by trained specialized staff
in accordance with IEC 60364 observing all applicable regulations of health care,
safety at work and fire protection.
The references to components correspond to figure 1.
5.1 Voltage problems
If the generator produces no voltage or unusual voltages, try to find the problem in the exciter, unless a wind-
ing has given up. The first step always is to check all connections and cables in the terminal box and on the
exciter components for proper connections and safe contacts.
ATTENTION! Use the circuit diagram for troubleshooting. Observe wire numbers and colours.
This manual suits for next models
5
Table of contents
Other EMRI Controllers manuals
Popular Controllers manuals by other brands
Speaka Professional
Speaka Professional 350712 operating instructions
Bartec
Bartec MAK 3003 manual
Raco
Raco Schwelm T6C2 Translation of the original instruction

Addonics Technologies
Addonics Technologies AD2MS6GPX8-E user guide
A10
A10 Harmony Controller 2000 quick start guide
RADEMACHER
RADEMACHER DuoFern Instruction manual for the electrical connection and for commissioning


