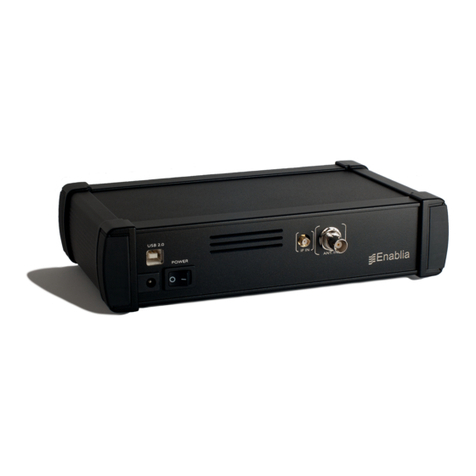
Enablia TitanSDR User manual

TitanSDR Receiver
Installation Manual
v.2.0e

Enablia S.r.l. (Italy) 2014
Before using the receiver, read carefully this Manual.
Correct Disposal of This Product
(Waste Electrical & Electronic Equipment)
The symbol of the crossed out wheelie bin
indicates that in the European Union this
product, and all items marked with this
symbol, can not be disposed of as unsorted
waste but must be disposed of separately at
the end of their useful life.

TitanSDR Receiver –Installation Manual 3
Table of Contents
1. Overview............................................................................ 4
Package contents................................................................... 4
Receiver panels ..................................................................... 4
AC/DC Adapter .................................................................... 5
2. System Requirements ........................................................... 6
3. Installation on Windows 7.................................................... 7
4. Installation on Windows XP ................................................ 17
5. Notes on receiver connection and use................................. 25
Antenna.............................................................................. 25
Cooling fan ........................................................................ 25
Firewall............................................................................... 25
USB Interface ...................................................................... 26
6. License ............................................................................. 27
License File ......................................................................... 27
USB Dongle ........................................................................ 27
7. CE Conformity .................................................................. 30
8. Technical Specifications ..................................................... 31

4 TitanSDR Receiver –Installation Manual
1. Overview
Package contents
The package contains the following items:
TitanSDR receiver
6V linear AC/DC power adapter
USB cable
Installation CD-ROM
USB Dongle
Installation Manual
Receiver panels
The front panel has an indicator green led: the led turns on when
the receiver is switched on (Figure 1).
Figure 1
The rear panel (Figure 2) includes :
1. USB 2.0 port
2. Power input socket
3. On/off switch
4. SMA IF input (IF-IN)
5. BNC antenna input (ANT. IN)

TitanSDR Receiver –Installation Manual 5
Figure 2
The bottom panel includes the cooling fan opening (Figure 3).
Figure 3
AC/DC Adapter
For best performance and safety, please use only the provided 6V
linear AC/DC power adapter (Figure 4).
Figure 4
When the adapter is turned on by the on/off switch, the front red
led turns on.

6 TitanSDR Receiver –Installation Manual
2. System Requirements
Before installing the receiver, ensure that your system meets the
following requirements.
CPU Dual Core 2.5 GHz or equivalent (for TitanSDR)
Intel Core i5 or equivalent (for TitanSDR-Pro)
2GB RAM
150 MB of free hard disk space for software installation (extra
space is required for recording of wideband and
narrowband channels)
Network Interface Card
1 spare USB2.0 Hi-Speed port
Sound card
1024 x 768 minimum resolution video card and monitor
Windows Operating System (Seven, XP, Vista)

TitanSDR Receiver –Installation Manual 7
3. Installation on Windows 7
Please follow the steps below leaving the receiver disconnected
from the PC, unless otherwise specified (i.e. connect it only when
requested). The following installation procedure applies to all
versions of TitanSDR.
1. Insert the installation CD-ROM in your drive and double-click
on X:\TitanSDR_x.y.z_Setup.exe (where “X” is the letter
representing your CD-ROM drive and “x.y.z” is the setup
version).
2. Select the Setup Language and click “OK”.
3. Click “Next” to continue

8 TitanSDR Receiver –Installation Manual
4. Confirm the proposed installation folder (for example,
C:\Program Files\TitanSDR if “C:” is your main drive) by
clicking “Next”.
5. Confirm the default shortcuts folder name by clicking
“Next”.

TitanSDR Receiver –Installation Manual 9
6. Check “Create a desktop icon” and click “Next”.
7. Click “Install” and wait for setup to complete.

10 TitanSDR Receiver –Installation Manual
8. In the last setup window, click “Finish”.
9. Copy the provided license file “license.bin” to the folder
C:\ProgramFiles\TitanSDR\License, assuming that
“C:\ProgramFiles\TitanSDR” is the installation folder). Please
refer to Chapter 6 for further details on license file.
10. Plug the supplied AC/DC power adapter into a wall outlet
and to the receiver power socket. Then turn on the
adapter by the red switch: the adapter red power led will
turn on (please refer to Chapter 5 for further details on
receiver connections).
11. Check that the receiver is switched off (power switch on ‘0’)
and connect it to the PC USB port by the provided USB
cable.
12. Turn on the receiver by putting the power switch on ‘1’: the
green led on the front panel will turn on.
13. Click the Start Button, right-click on “Computer” and click
“Manage”.

TitanSDR Receiver –Installation Manual 11
14. When the “Computer Management” window opens, click
on “Device Manager” (located on the left side,
under System Tools, towards the bottom of the list).

12 TitanSDR Receiver –Installation Manual
15. Expand the “Other Devices” list, right-click on “ENABLIA
DEVICE 002” and click “Properties”
16. In “Properties” window, click the “Driver” tab and then click
“Update Driver”

TitanSDR Receiver –Installation Manual 13
17. In the “Update Driver Software Window”, click “Browse my
computer for driver software”
18. Click “Browse” and navigate to the folder containing the
TitanSDR driver (C:\ProgramFiles\TitanSDR\Driver, assuming
that “C:\ProgramFiles\TitanSDR” is the installation folder).
Then click “Next”.

14 TitanSDR Receiver –Installation Manual
19. In “Windows Security” window , click “Install this driver
software anyway”
20. Allow the installation process to complete and click
“Close”.

TitanSDR Receiver –Installation Manual 15
21. Run the TitanSDR software by double clicking the icon on
your desktop and wait for application to open. Configure
software firewall (if present) to allow TitanSDR processes
communicating through the loopback address (see
Chapter 5 for further details).
22. On TitanSDR application, click the “UsbConnection” button
(the rightmost button of the Panoramic Scope toolbar)

16 TitanSDR Receiver –Installation Manual
23. The message “Connecting to receiver” is displayed : wait for
connection to complete.
24. When receiver connection succeeds, spectrum is displayed
in the Panoramic Scope.

TitanSDR Receiver –Installation Manual 17
4. Installation on Windows XP
Please follow the steps below leaving the receiver disconnected
from the PC, unless otherwise specified (i.e. connect it only when
requested). The following installation procedure applies to all
versions of TitanSDR.
1. Insert the installation CD-ROM in your drive and double-click
on X:\TitanSDR_x.y.z_Setup.exe (where “X” is the letter
representing your CD-ROM drive and “x.y.z” is the setup
version).
2. Select the Setup Language and click “OK”.
3. Click “Next” to continue

18 TitanSDR Receiver –Installation Manual
4. Confirm the proposed installation folder (for example,
C:\ProgramFiles\TitanSDR if “C:” is your main drive) by
clicking “Next”.
5. Confirm the default shortcuts folder by clicking “Next”.

TitanSDR Receiver –Installation Manual 19
6. Check “Create a desktop icon” and click “Next”.
7. Click “Install” and wait for setup to complete.

20 TitanSDR Receiver –Installation Manual
8. In the last setup window, click “Finish”.
9. Copy the provided license file “license.bin” to the folder
C:\ProgramFiles\TitanSDR\License (assuming that
“C:\ProgramFiles\TitanSDR” is the TitanSDR installation
folder). Please refer to Chapter 6 for further details on license
file.
10. Plug the supplied AC/DC power adapter into a wall outlet
and to the receiver power socket. Then turn on the adapter
by the red switch: the adapter red power led will turn on
(please refer to Chapter 5 for further details on receiver
connections).
11. Check that the receiver is switched off (power switch on ‘0’)
and connect it to the PC USB port by the provided USB
cable.
12. Turn on the receiver by putting the power switch on ‘1’: the
green led on the front panel will turn on.
Other manuals for TitanSDR
5
Table of contents
Other Enablia Receiver manuals
