manuals.online logo
Brands
  1. Home
  2. •
  3. Brands
  4. •
  5. ENCLO
  6. •
  7. Lawn And Garden Equipment
  8. •
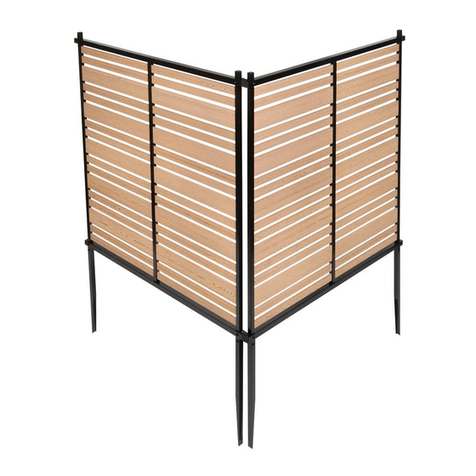
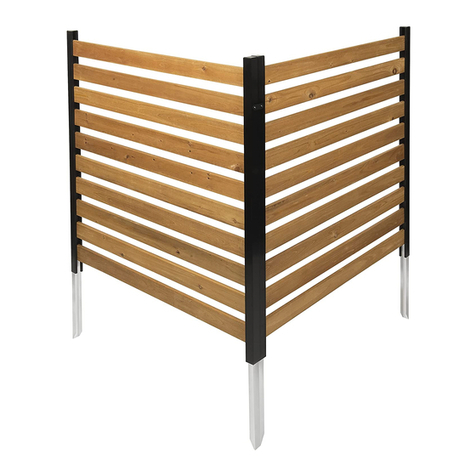
  9. ENCLO Alpine EC18012 User manual

ENCLO Alpine EC18012 User manual

ASSEMBLY
INSTRUCTIONS
EC18012 WHITE COLOR
EC18013 CHARCOAL COLOR
www.encloscreens.com
60 min
Approximate assembly
time for 2 panels
Scan the QR code
for an assembly video
Alpine
Screen Kit
36"W X 54"H
VER. 031622
www.encloscreens.com
ASSEMBLY INSTRUCTIONSEC18012 / EC18013
2
jCheck the inside of the larger pieces in your box for other
materials packed inside.
jWhen assembling components, place on a non-abrasive surface
(i.e. shipping box) to avoid scratching.
jWe recommend an area approximately 5’x 8’for unobstructed
assembling.
jYou should not need to use excessive force when assembling
components.
VISIT OUR WEBSITE FIRST,
SO WE CAN HELP YOU RIGHT AWAY!
Although great care has been taken to ensure proper packaging and
handling of this product, occasionally problems occur. If you discover
any missing, damaged, or defective parts, please visit our website to
order replacement parts. If you experience any further trouble with
your product, please contact our customer service department.
parts.nychbrands.com
suppor[email protected]
704-892-5222 /877-234-6196
Customer service agents are available to take calls weekdays from 9am-5pm EST.
If you call outside of business hours, please leave a voicemail.
To help you quickly and accurately, please have reference item number
EC18012 (WHITE COLOR) and EC18013 (CHARCOAL COLOR) and the
specic part name which can be found on the next page. It is helpful if
you can provide the batch lot which is a stamped number on the end
of the box.
If you are having problems with the assembly or installation of this
product, we are happy to assist you with the process, so please give
us a call at 704-892-5222 / 877-234-6196.
If for some reason you need to return this product, please allow
us to help resolve your issues rst. If you still decide to return the
product, you will need to initiate the return from the company you
originally purchased from.
GENERAL
INFORMATION
MISSING OR
DAMAGED PARTS?
NEED ASSEMBLY
HELP?
NEED TO RETURN?
IMPORTANT

www.encloscreens.com
ASSEMBLY INSTRUCTIONS EC18012 / EC18013
3
0
Detailed Product Dimensions & Specifications
3.5 in
54 in
.9 in
36 in
47.5 in
Ground
14in
47.5 in
36 in
0.9 in
54 in
3.5 in
14 in
www.encloscreens.com
ASSEMBLY INSTRUCTIONSEC18012 / EC18013
4
Ground Stake (4)
¾" x 1 ¼" x 20"
Rail End Cap (8)
(4 installed; 4 loose)
¾" Self-Drilling
Stainless Steel
Screw (28)
Top Rail (2)
1 ½" x 1 ½" x 36"
Bottom Rail (2)
1 ½" x 1 ½" x 36"
Middle Post (2)
⁄" x 1" x 50 ⁄"
Slat (44)
¼" x 1 ¼" x 34"
Post (4)
⁄" x 1 ½" x 53 ⁄"
STEP 1: LAY OUT MATERIALS

B
F
A
D
J
Joiner Clip (2)
I
⁄" Drill Bit (1)
G
C
H
E
Note: Holes
through both
walls.
www.encloscreens.com
ASSEMBLY INSTRUCTIONS EC18012 / EC18013
5
STEP 2: ASSEMBLING THE FIRST PANEL
STEP 2.1
1 2
A
B
1. Insert (22) Slats (B) through the Middle Post (A).
2. Insert (1) Post (C) over one end of the slats until they hit the back
wall of the post.
3. Insert (1) post over the ends of the slats until they hit the back wall
of the post.
3
C
Note: Push the rst
post against a wall
to prevent the slats
from falling out of
the post.
Note: This will
be the top of the
screen.
www.encloscreens.com
ASSEMBLY INSTRUCTIONSEC18012 / EC18013
6
STEP 2.2
1
1. Insert (1) Bottom Rail (E) until the bottom of the middle post hits the bottom
rail wall. Do not install the screws yet.
2. Insert (2) Ground Stakes (F) up the post until the pre-drilled holes in the
anchor and the side of the posts align.
3. Drive (4) total ¾" Self-Drilling Stainless Steel Screws (H) in to the pre-drilled
holes to secure the anchors.
STEP 2.3
2
3
E
F
Align
1. (Optional) Ensure the pre-drilled holes in the bottom rail and the post are aligned and pre-drill (4)
total holes in the ground stakes using the included ⁄" Steel Drill Bit (J).
2. Drive (4) total ¾" self-drilling stainless steel screws through the pre-drilled holes in the bottom rail.
3. Insert (2) Rail End Caps (G) over the ends of the top and bottom rail.
J
G
H
www.encloscreens.com
ASSEMBLY INSTRUCTIONS EC18012 / EC18013
7
STEP 2.4
STEP 3: ASSEMBLING THE SECOND PANEL
STEP 3.1
1
1. Insert (1) Top Rail (D) over the posts until the pre-drilled
holes on the post and the top rail align.
2. Drive (4) total ¾" ¾" self-drilling stainless steel screws into
the pre-drilled holes in the top rail.
D2
Align
Repeat steps 2.1-
2.4 to assemble the
second screen.
www.encloscreens.com
ASSEMBLY INSTRUCTIONSEC18012 / EC18013
8
1 2
Push down
on posts with
both hands.
1. Loosen the top 6" of the ground with a claw
hammer.
2. Add water to loosened soil.
3. Use a block of wood to protect the post and
gently hammer each post into the ground.
2
1
3
1. Move the screen to its nal location and mark where the posts meet the ground.
2. Attempt to push the screen into the ground.
STEP 4: INSTALLING PANELS IN THE GROUND
STEP 4.1
STEP 5.3
1. Loosen the top 6" of the ground with a claw
hammer.
2. Add water to loosened soil.
3. Use a block of wood to protect the post and
gently hammer each post into the ground.
STEP 4.2
www.encloscreens.com
ASSEMBLY INSTRUCTIONS EC18012 / EC18013
9
3
STEP 4.3
Optional in hard ground: If your ground is too hard, or you have more than 3 or 4
panels to install, please consider these options:
1. Use a 1¾” diameter auger bit (commonly used for planting tulips) as illustrated
($15-$20 on Amazon.com).
2. Drill a hole about 12” to 16” deep at the desired location, and ll the holes
with water as illustrated.
3. Push the panel posts into the holes.
1. If your ground is very hard, you may need to dig an 8" by 14" deep hole to accomodate one
post from each panel.
2. Level the screen as necessary, backll excavated dirt, and tamp if needed.
STEP 5.3STEP 4.4
1
1
2
1
1 2
www.encloscreens.com
ASSEMBLY INSTRUCTIONSEC18012 / EC18013
10
STEP 5: CONNECTING THE PANELS
STEP 5.1
1. Straight Line Application: Connect the screens as shown below using the Joiner
Clips (I) and (4) ¾" self-drilling stainless steel screws.
2. Corner Application: Connect the screens as shown below using the Joiner Clips
(I) and (4) ¾" self-drilling stainless steel screws.
2
1
I
I
www.encloscreens.com
704-892-5222
877-234-6196
6935 Reames Rd. Ste. K.
Charlotte, NC 28216
ASSEMBLY
INSTRUCTIONS
EC18012 WHITE COLOR
EC18013 CHARCOAL COLOR
VER. 031622
support@encloscreens.com

This manual suits for next models

1

Other ENCLO Lawn And Garden Equipment manuals

ENCLO Highland ZP19047 User manual

ENCLO

ENCLO Highland ZP19047 User manual

ENCLO EC18031 User manual

ENCLO

ENCLO EC18031 User manual

ENCLO ZP19053 User manual

ENCLO

ENCLO ZP19053 User manual

ENCLO Bedford EC18003 User manual

ENCLO

ENCLO Bedford EC18003 User manual

ENCLO Bedford EC18003 User manual

ENCLO

ENCLO Bedford EC18003 User manual

ENCLO Bedford EC18003 User manual

ENCLO

ENCLO Bedford EC18003 User manual

ENCLO Lincoln Screen Kit User manual

ENCLO

ENCLO Lincoln Screen Kit User manual

ENCLO Bedford EC18003 User manual

ENCLO

ENCLO Bedford EC18003 User manual

ENCLO EC18006 User manual

ENCLO

ENCLO EC18006 User manual

ENCLO Huntersville ZP19036 User manual

ENCLO

ENCLO Huntersville ZP19036 User manual

ENCLO Charleston User manual

ENCLO

ENCLO Charleston User manual

ENCLO EC18024 User manual

ENCLO

ENCLO EC18024 User manual

ENCLO EC18023 User manual

ENCLO

ENCLO EC18023 User manual

ENCLO EC18006 User manual

ENCLO

ENCLO EC18006 User manual

ENCLO Liberty Lattice ZP19054 User manual

ENCLO

ENCLO Liberty Lattice ZP19054 User manual

Popular Lawn And Garden Equipment manuals by other brands

Toro Flex-Force Power System 51810T Operator's manual

Toro

Toro Flex-Force Power System 51810T Operator's manual

SNOWJOE sunjoe SBJ606E-GA-RED-RM Operator's manual

SNOWJOE

SNOWJOE sunjoe SBJ606E-GA-RED-RM Operator's manual

Makita DUM604SFX instruction manual

Makita

Makita DUM604SFX instruction manual

Redexim 7117 Operator and parts manual

Redexim

Redexim 7117 Operator and parts manual

Rowlinson Garden Products Shiplap Patio Chest Assembly instructions

Rowlinson Garden Products

Rowlinson Garden Products Shiplap Patio Chest Assembly instructions

OPCOM Grow Wall 3 instruction manual

OPCOM

OPCOM Grow Wall 3 instruction manual

SNOWJOE Sunjoe GTS4002C-RM Operator's manual

SNOWJOE

SNOWJOE Sunjoe GTS4002C-RM Operator's manual

DANA 2820 parts list

DANA

DANA 2820 parts list

Mania MOSQUITO KILLER instructions

Mania

Mania MOSQUITO KILLER instructions

ryan 544283D Technical manual

ryan

ryan 544283D Technical manual

Bosch AHS 45-16 Original instructions

Bosch

Bosch AHS 45-16 Original instructions

Kerbl HaftKill Instructions for use

Kerbl

Kerbl HaftKill Instructions for use

Scroll Trellis Basket Booster quick start guide

Scroll Trellis

Scroll Trellis Basket Booster quick start guide

Husqvarna AUTOMOWER 420 Operator's manual

Husqvarna

Husqvarna AUTOMOWER 420 Operator's manual

Sealey SSA2 manual

Sealey

Sealey SSA2 manual

Southland SEA528T Operator's manual

Southland

Southland SEA528T Operator's manual

Husqvarna 968999195 Operator's manual

Husqvarna

Husqvarna 968999195 Operator's manual

Vstreet UDP-4812 Assembly instructions

Vstreet

Vstreet UDP-4812 Assembly instructions

manuals.online logo
manuals.online logoBrands
  • About & Mission
  • Contact us
  • Privacy Policy
  • Terms and Conditions

Copyright 2025 Manuals.Online. All Rights Reserved.