manuals.online logo
Brands
  1. Home
  2. •
  3. Brands
  4. •
  5. ENCLO
  6. •
  7. Lawn And Garden Equipment
  8. •
  9. ENCLO EC18006 User manual

ENCLO EC18006 User manual

www.encloscreens.com
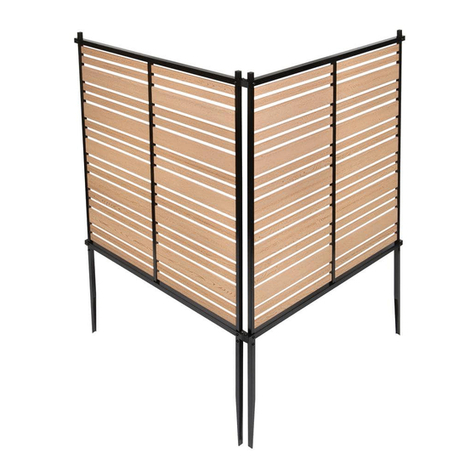
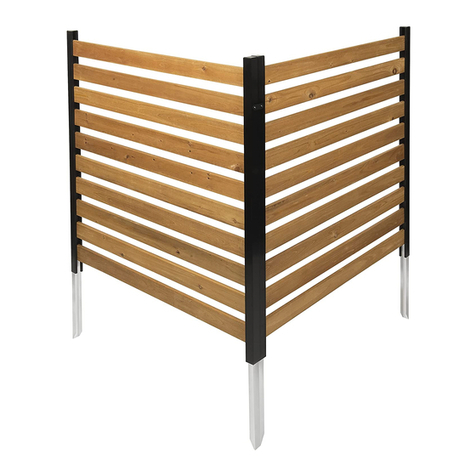
Florence
Screen Kit
W/ Planter Box
45 min
Approximate assembly
time for 1 screen
Scan the QR code
for an assembly video
ASSEMBLY
INSTRUCTIONS
EC18006 CEDAR COLOR
EC18007 ASH COLOR
VER. 022822
www.encloscreens.com
2
ASSEMBLY INSTRUCTIONSEC18006 / EC18007
jCheck the inside of the larger pieces in your box for other
materials packed inside.
jWhen assembling components, place on a non-abrasive surface
(i.e. shipping box) to avoid scratching.
jWe recommend an area approximately 5’x 8’for unobstructed
assembling.
jYou should not need to use excessive force when assembling
components.
VISIT OUR WEBSITE FIRST,
SO WE CAN HELP YOU RIGHT AWAY!
Although great care has been taken to ensure proper packaging and
handling of this product, occasionally problems occur. If you discover
any missing, damaged, or defective parts, please visit our website to
order replacement parts. If you experience any further trouble with
your product, please contact our customer service department.
parts.nychbrands.com
suppor[email protected]om
704-892-5222 /877-234-6196
Customer service agents are available to take calls weekdays from 9am-5pm EST.
If you call outside of business hours, please leave a voicemail.
To help you quickly and accurately, please have reference item number
EC18006/EC18007 and the specic part name which can be found on
page 4. It is helpful if you can provide the batch lot which is a stamped
number on the end of the box.
If you are having problems with the assembly or installation of this
product, we are happy to assist you with the process, so please give
us a call at 704-892-5222 / 877-234-6169
If for some reason you need to return this product, please allow
us to help resolve your issues rst. If you still decide to return the
product, you will need to initiate the return from the company you
originally purchased from.
GENERAL
INFORMATION
MISSING OR
DAMAGED PARTS?
NEED ASSEMBLY
HELP?
NEED TO RETURN?
IMPORTANT
www.encloscreens.com 3
ASSEMBLY INSTRUCTIONS EC18006 / EC18007
46 in
7 1/4 in
44 in
42 3/4 in
42 1/2 in
46 in
3/4 in
44 in
11 in
Detailed Product Dimensions & Specifications
3/4 in
9 1/2 in
www.encloscreens.com
4
ASSEMBLY INSTRUCTIONSEC18006 / EC18007
Short Post (2)
1 ¾" x 1 ¾" x 11"
Short Floor Support (3)
⁄" x 1 ½" x 7 ¼"
Spacer (24)
Corner Post Cap (2)
1½" Black Self-Drilling
Stainless Steel Screw (8)
Left Post (1)
1 ¾" x 1 ¾" x 44"
Thin Horizontal Slat (8)
⁄" x 1 ½" x 44"
Floor Board (1)
⁄" x 7 ¼" x 44"
Long Board (2)
⁄" x 11" x 44"
Right Post (1)
1 ¾" x 1 ¾" x 44"
Wide Horizontal Slat (4)
⁄" x 3" x 44"
Long Floor Support (2)
⁄" x 1 ½" x 29 ½"
Short Board (2)
⁄" x 11" x 7 ¼"
STEP 1: LAY OUT MATERIALS

A B
D
F
H
I
M
L
K
J
C
E
GTop view Top view
⁄" Black Self-Drilling
Stainless Steel Screw (18)
N
www.encloscreens.com 5
ASSEMBLY INSTRUCTIONS EC18006 / EC18007
STEP 2: ASSEMBLING BOARDS
STEP 2.1
1. Lay down (1) Long Board (A) so that the
cut grooves face up as shown.
2. Place (1) Long Floor Support (D) at the
bottom of the long board.
3. Position the long oor support so it
rests in the middle of the long board.
1. Drive (4) 1½" Black Self-Drilling
Stainless Steel Screws (L) into the pre-
drilled holes in the long oor support.
2. Repeat these steps for the second long
board.
STEP 2.2
2
3
2
1
1
A
D
L
7 ¼ in
7 ¼ in
Ensure that the bottom of
the long board and long
oor support are ush
Ensure oor support is
placed on the grooved
edge face of the board.
www.encloscreens.com
6
ASSEMBLY INSTRUCTIONSEC18006 / EC18007
STEP 3: ASSEMBLING THE PLANTER BOX
1. Slide (1) long board into the post channels, ensuring that the tabs on
the posts align with the grooves in the board.
2. Drive (4) ⁄" black self-drilling stainless steel screws (M) into the pre-
drilled holes in the posts, securing the long board.
bOrient (2) Short Posts (K) as
shown, with two post channels
facing each other, and two
channels facing front.
STEP 3.1
STEP 3.2
Preview
Note: Ensure tabs on
posts and notches on
boards align.
Top View
Note: Ensure the bottom of the board is ush to the bottom of the posts.
2
1
K
TabsTabs
1. (E)
www.encloscreens.com 7
ASSEMBLY INSTRUCTIONS EC18006 / EC18007
1. Slide (1) Right Post (G) and (1) Left Post (H) over the short boards so that the
partially covered channel on each post faces the front.
2. Drive (4) ⁄" black self-drilling stainless steel screws into the pre-drilled holes
in the sides of the posts.
STEP 4: INSTALLING REAR POSTS
STEP 3.3
STEP 4.1
Preview
Preview
1. Slide (2) Short Boards (B) into the short post channels,
ensuring that the board bottoms are ush.
2. Drive (4) ⁄" black self-drilling stainless steel screws into the
pre-drilled holes in the sides of the short posts.
2
1
HG
Top View
Ensure that boards are ush
1. (E)
www.encloscreens.com
8
ASSEMBLY INSTRUCTIONSEC18006 / EC18007
STEP 5: COMPLETING PLANTER BOX
STEP 5.1
1. Slide the second long
board into the post
channels. Ensure that this
board rests ush with the
other boards.
2. Drive (4) ⁄" black self-
drilling stainless steel
screws into the pre-
drilled holes in the posts.
1. Fit (3) Short Floor
Supports (J) so that the
notches t over the inner
walls of the long oor
supports as shown.
2. Place (1) Floor Board (C)
into the planter box, so it
rests on the oor supports.
STEP 5.2
2
2
11
Preview
Preview
Align
J
C
Ensure that
boards are ush
Note: For best plant growth, it is reccomended
to drill (2) 3/4" diameter drainage holes in the
oor board roughly 12" apart.
www.encloscreens.com 9
ASSEMBLY INSTRUCTIONS EC18006 / EC18007
STEP 6: ASSEMBLE THE SCREEN
STEP 6.1
2
1
1. Insert (1) Spacer (I) into both the left and right post
channel in the orientation shown below. This will create
even spacing between the horizontal slats.
2. Slide (1) Thin Horizontal Slat (E) into the post channels.
E
Orient as shown
IPreview
www.encloscreens.com
10
ASSEMBLY INSTRUCTIONSEC18006 / EC18007
STEP 6.2
21
Preview
1. Slide (7) additional thin horizontal slats, (4) Wide Horizontal Slats (F) and
(11) aluminum spacers into the post channels in the pattern shown below.
Spacers should be inserted between each horizontal slat.
2. Drive (2) ⁄" black self-drilling stainless steel screws into the pre-drilled holes
in the posts, securing the top horizontal slat.
F
E
E
F
E
E
F
E
E
F
E
www.encloscreens.com 11
ASSEMBLY INSTRUCTIONS EC18006 / EC18007
STEP 7: INSTALL POST CAPS
STEP 6.1
bInsert the (2) Corner Post Caps (N) into the holes
in the top of the posts to nish the assembly.
N
www.encloscreens.com
support@encloscreens.com
704-892-5222
877-234-6196
6935 Reames Rd. Ste. K.
Charlotte, NC 28216
ASSEMBLY
INSTRUCTIONS
EC18006 CEDAR COLOR
EC18007 ASH COLOR
VER. 022822

Other manuals for EC18006

1

This manual suits for next models

1

Other ENCLO Lawn And Garden Equipment manuals

ENCLO Lincoln Screen Kit User manual

ENCLO

ENCLO Lincoln Screen Kit User manual

ENCLO Bedford EC18003 User manual

ENCLO

ENCLO Bedford EC18003 User manual

ENCLO Bedford EC18003 User manual

ENCLO

ENCLO Bedford EC18003 User manual

ENCLO EC18006 User manual

ENCLO

ENCLO EC18006 User manual

ENCLO EC18023 User manual

ENCLO

ENCLO EC18023 User manual

ENCLO Highland ZP19047 User manual

ENCLO

ENCLO Highland ZP19047 User manual

ENCLO Bedford EC18003 User manual

ENCLO

ENCLO Bedford EC18003 User manual

ENCLO Bedford EC18003 User manual

ENCLO

ENCLO Bedford EC18003 User manual

ENCLO Liberty Lattice ZP19054 User manual

ENCLO

ENCLO Liberty Lattice ZP19054 User manual

ENCLO Alpine EC18012 User manual

ENCLO

ENCLO Alpine EC18012 User manual

ENCLO ZP19053 User manual

ENCLO

ENCLO ZP19053 User manual

ENCLO Charleston User manual

ENCLO

ENCLO Charleston User manual

ENCLO Huntersville ZP19036 User manual

ENCLO

ENCLO Huntersville ZP19036 User manual

ENCLO EC18024 User manual

ENCLO

ENCLO EC18024 User manual

ENCLO EC18031 User manual

ENCLO

ENCLO EC18031 User manual

Popular Lawn And Garden Equipment manuals by other brands

Axley 716-001 Assembly instructions

Axley

Axley 716-001 Assembly instructions

Gardena C 14 e operating instructions

Gardena

Gardena C 14 e operating instructions

Fimco BR-15-SP-EC owner's manual

Fimco

Fimco BR-15-SP-EC owner's manual

LI-COR 6400-18 Installation and operational instructions

LI-COR

LI-COR 6400-18 Installation and operational instructions

Gloria WEEDBRUSH user manual

Gloria

Gloria WEEDBRUSH user manual

GÜDE MS1600 3 IN 1 manual

GÜDE

GÜDE MS1600 3 IN 1 manual

Jula Meec TOOL SPS38 operating instructions

Jula

Jula Meec TOOL SPS38 operating instructions

Flymo GARDENVAC Plus MEV750 manual

Flymo

Flymo GARDENVAC Plus MEV750 manual

Rainwater Terrace 3-TIER V2 instructions

Rainwater Terrace

Rainwater Terrace 3-TIER V2 instructions

Metal-Fach Z589 operating & maintenance manual

Metal-Fach

Metal-Fach Z589 operating & maintenance manual

Parker PARKER BRAND PBV-2600 owner's manual

Parker

Parker PARKER BRAND PBV-2600 owner's manual

EarthQuake E43 earth auger powerhead Operator's manual

EarthQuake

EarthQuake E43 earth auger powerhead Operator's manual

Qualcast YT6702) instruction manual

Qualcast

Qualcast YT6702) instruction manual

FRISA PRESEPI LT3 user manual

FRISA PRESEPI

FRISA PRESEPI LT3 user manual

Greenes RC164812PTRE Assembly instructions

Greenes

Greenes RC164812PTRE Assembly instructions

Lesco PLV180L owner's manual

Lesco

Lesco PLV180L owner's manual

Wilo Wilo-Sevio AIR Installation and operating instructions

Wilo

Wilo Wilo-Sevio AIR Installation and operating instructions

Kogan Pestill PTMOSQREPDFA quick start guide

Kogan

Kogan Pestill PTMOSQREPDFA quick start guide

manuals.online logo
manuals.online logoBrands
  • About & Mission
  • Contact us
  • Privacy Policy
  • Terms and Conditions

Copyright 2025 Manuals.Online. All Rights Reserved.