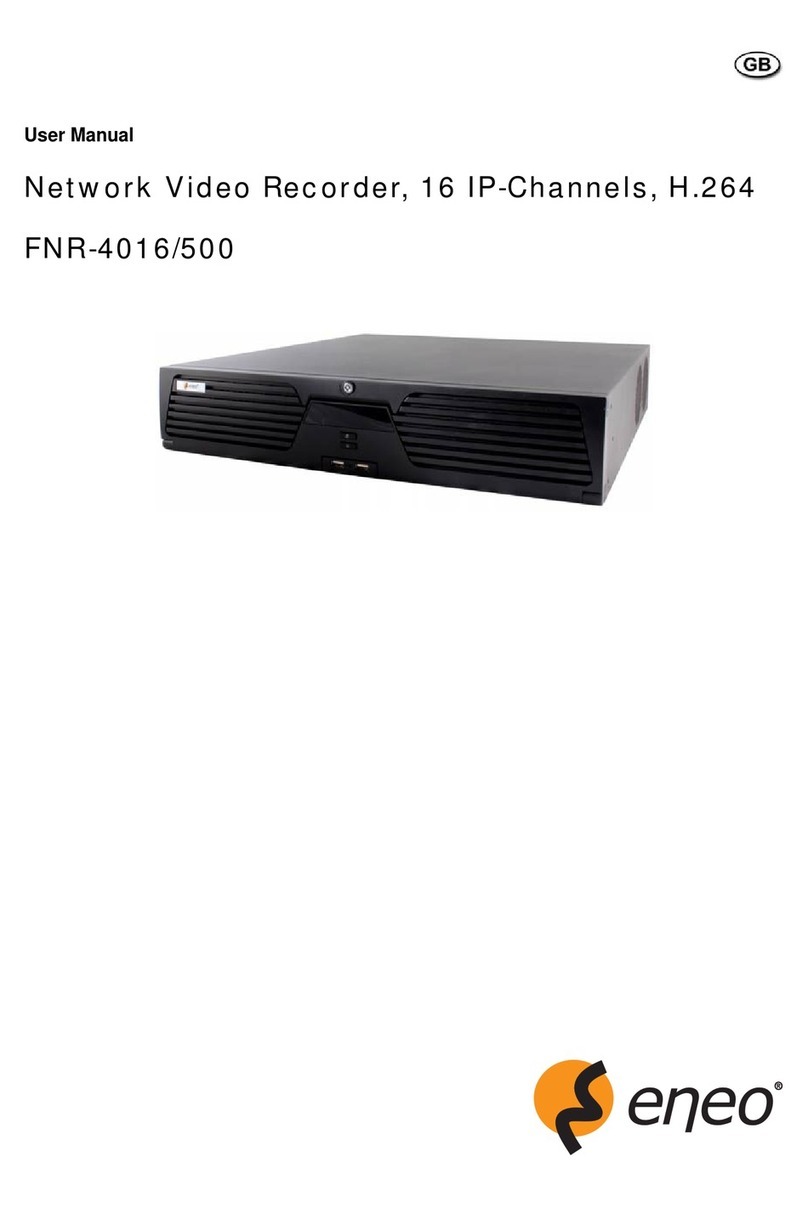
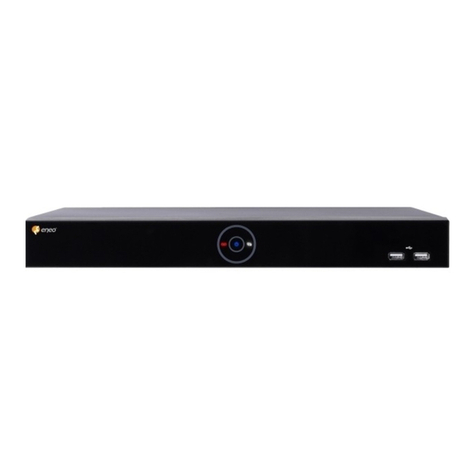
Eneo FNR-4004/500 User manual

User Manual
Network Video Recorder, 4 IP-Channels, H.264
FNR-4004/500

2
Safety Instructions / Maintenance
• Read these safety instructions and the operation manual first before you install and commission the unit.
• Keep the manual in a safe place for later reference.
• The system may only be commissioned and maintained by personnel authorized to do this and it must only be carried
out in accordance with relevant standards and guidelines.
• Never cover the ventilation slots to avoid overheating.
• Never insert metal objects or any other items into the vents. This may permanently damage the unit.
• Protect your unit from contamination with water and humidity to prevent it from permanent damage. Never switch
the unit on when it gets wet.
Have it checked at an authorized service center in this case.
• Never operate the units outside of the specifications as this may prevent their functioning.
• Do not operate the unit beyond their specified temperature, humidity or power ratings. Operate the unit only at a
temperature range of –10°C to +40°C and at a humidity of max. 80%.
• The unit should be protected against excessive heat, dust, damp and vibration.
• Do not place any heavy objects on the unit.
• To disconnect the power cord of the unit, pull it out by the plug. Never pull the cord itself.
• Pay attention when laying the connection cable and observe that the cable is not subject to heavy loads, kinks, or
damage and no moisture can get in.
Do not attempt to disassemble the camera board from the dome.
• Contact your local dealer in case of malfunction.
• The warranty becomes void if repairs are undertaken by unauthorized persons. Do not open the housing.
• Installation, maintenance and repair have to be carried out only by authorized service centers.
Before opening the cover disconnect the unit from mains input.
• Do not use strong or abrasive detergents when cleaning the dome. Use a dry cloth to clean the dome surface. In case
the dirt is hard to remove, use a mild detergent and wipe gently.
NOTE:
This is a class A digital device.
This digital device can cause harmful interference in a residential area; in this case the user may be required to
take appropriate corrective action at his/her own expense.

3
TABLEOFCONTENTS
CHAPTER1Introduction ...............................................................................................................5
Overview ................................................................................................................................6
PreventiveandCautionaryTips ...........................................................................................6
NVRSpecifications.................................................................................................................6
ConnectingYourNVR............................................................................................................8
OperatingYourNVR ..............................................................................................................9
UsingtheFrontPanelControls.............................................................................................9
UsingtheIRRemoteControl .............................................................................................. 11
UsingaUSBMouse ..............................................................................................................12
UsingtheSoftKeyboard......................................................................................................12
CHAPTER2GettingStarted .........................................................................................................14
StartingandShuttingDownYourNVR ..............................................................................15
RebootingandLockingYourNVR ......................................................................................16
SettingDate&Time.............................................................................................................16
CheckingtheStatusofYourNVR........................................................................................18
CHAPTER3LiveFeed ..................................................................................................................19
WatchingaLiveFeed ..........................................................................................................20
UnderstandingLiveFeedIcons ..........................................................................................20
OperatingtheLiveFeed ......................................................................................................21
UsingtheDisplayMenu.......................................................................................................23
ConfiguringLiveFeedDisplays ..........................................................................................25
SettingCameraOrder..........................................................................................................26
CHAPTER4RecordSettings ........................................................................................................27
ConfiguringSettingsforRecording ....................................................................................28
ConfiguringRecordingSettings..........................................................................................28
ConfiguringaQuickRecordingSchedule...........................................................................29
ConfiguringanAdvancedRecordingSchedule .................................................................30
CHAPTER5Playback ...................................................................................................................32
PlayingBackaRecording....................................................................................................33
UnderstandingthePlaybackInterface...............................................................................33
SearchingforRecordedFiles ..............................................................................................33
PlayingBackRecordedFiles...............................................................................................34
CHAPTER6Backup ......................................................................................................................36
BackingUpVideoClips .......................................................................................................37
SelectingVideoClips ...........................................................................................................37
BackingUpVideoClips .......................................................................................................38
BackingUpRecordedFiles .................................................................................................39
CHAPTER7SystemConfiguration ..............................................................................................40
ConfiguringNetworkSettings ............................................................................................41
ManagingUserAccounts.....................................................................................................42
AddingaNewRemoteUser ................................................................................................42
DeletingaUser.....................................................................................................................43
EditingaUser.......................................................................................................................43
ConfiguringPTZCameras ...................................................................................................44
ConfiguringBasicPTZSettings...........................................................................................44
CustomizingPTZPresets,PatternsandPatrols ................................................................45
ConfiguringAlarmsandExceptions...................................................................................47
SettingUpMotionDetection...............................................................................................47
ConfiguringAlarmInputs ...................................................................................................48
ConfiguringExceptions .......................................................................................................49
ConfiguringE‐mailSettings ................................................................................................50
4
CHAPTER8CameraManagement...............................................................................................51
ConfiguringCameras...........................................................................................................52
Tosetupprivacyzones........................................................................................................52
ConfiguringVideoTamperingDetection ...........................................................................53
ConfiguringVideoLossDetection ......................................................................................54
ConfiguringOSDSettings ....................................................................................................55
Add/RemoveCameras ........................................................................................................56
CHAPTER9DiskManagement ....................................................................................................57
ManagingDisks....................................................................................................................58
CheckingDiskStatus ...........................................................................................................58
FormattingDisk ...................................................................................................................58
EnablingDiskOverwrite .....................................................................................................59
ManagingFiles .....................................................................................................................60
SearchingforRecordedFiles ..............................................................................................60
LockingandUnlockingRecordedFiles ..............................................................................60
CHAPTER10NVRManagement..................................................................................................61
ManagingSystem.................................................................................................................62
UpgradingtheSystemFirmware .......................................................................................62
RestoringDefaultSettings ..................................................................................................62
Exporting&ImportingConfiguration................................................................................63
ViewingSystemLogs...........................................................................................................65
LockingandUnlockingSystemMenus...............................................................................66
CHAPTER 11 Specifications................................................................................................................ 67

5
CHAPTER1Introduction

6
Overview
ThankyouforyourpurchaseoftheFNR‐4004EmbeddedDigitalVideoRecorder(NVR).Togetthemostoutof
yourNVR,pleasereadthroughtheInstallation’sManualandthisUser’sManualthoroughly.
FNR‐4004EmbeddedNVR,showninFigure1ushersinthenextgenerationofNetworkvideorecording
technologyfromeneo.FNR‐4004isaNVRmodelwhichonlysupportsIPcamera.Builtonanembeddedplatform
andcombiningthelatestinadvancedH.264videoencodinganddecodingtechnologies,FNR‐4004Embedded
NVRcontainstheperfectcombinationofrock‐solidreliabilityandhighperformance.
Fig1:FNR‐4004EmbeddedNVR
PreventiveandCautionaryTips
BeforeconnectingandoperatingyourNVR,pleasebeadvisedofthefollowingtips:
•Ensureunitisinstalledinawell‐ventilated,dust‐freeenvironment.
•Unitisdesignedforindooruseonly.
•KeepallliquidsawayfromtheNVR.
•Ensureenvironmentalconditionsmeetfactoryspecifications.
•Ensureunitisproperlysecuredtoarackorshelf.Majorshocksorjoltstotheunitasaresultofdroppingitmay
causedamagetothesensitiveelectronicswithintheunit.
•UsetheNVRinconjunctionwithanUninterruptiblePowerSupply(UPS).
•Powerdowntheunitbeforeconnectinganddisconnectingaccessoriesandperipherals.
NVRSpecifications
•Compression:
•Support PAL/NTSC video input.
•Adopt H.264 video compression standard.
•The FNR-4004 only supports IP camera.
•Upto2Megapixel(1920x1080)resolutionissupportedforIPcamera.
•Videoencodingparametersofeachchannelcanbesetseparately,includingresolution,framerate,bitrate,
imagequality.
•Eachchannelsupportsnormalandeventcompressionparameters.
•Supportsbothcompositestreamandvideoonlystream.Audioandvideostreamsarestrictlysynchronized.
•Supportswatermark.
•LocalFunctions(Monitoring):
•Supports1/4/9/16screenliveview,channelsequenceisadjustable.
•Supportsliveviewgroupswitch,manualswitchandautomaticcycle,theintervalofautomaticcyclecanbe
adjusted.
•Supportsdigitalzoominginliveviewmode
•Supportsshieldingofanassignedliveviewchannel.
•SupportsvariousPTZprotocols,PTZpreset,patrolandpattern.
•Supportsmulti‐levelusermanagement,eachusercanhaveindividualNVRaccessrights.
•Supportsmouse,frontpanel,andIRcontrol.
•LocalFunctions(HDDManagement):
•Supportsupto1SATAHDD,eachHDDcansupportmax2TBcapacity.
•SupportsS.M.A.R.T.technology.
•SupportsHDDhibernationfunction.
•SupportsWindowscompatiblefilesystemformatandtechnologyofpre‐allocatingharddiskspacetoavoid
HDDfragments.

7
•RecordingandPlayback:
•Supportsmultiplerecordingtypes,including,continuous,alarm,motionrecording,etc.
•Supports8recordingtimeperiodswithseparaterecordingtypes.
•Supportspre/post‐recordingtimeforalarmandmotiondetection.
•Supportspause,playfast,playslow,skipforward,andskipbackwardwhenplayback,locatinginprogress
barbydraggingthemouse.
•Supportsupto4‐chsynchronousplayback.
•Supportsdigitalzoomfunctioninplayback
•Backup:
•SupportsUSBstoragedevice.
•Supportsbackupdevicemaintenanceandmanagement.
•Alarm&Exception:
•Supportsmotiondetection,networkdisconnectdetection,videooutputstandardmismatchdetection.
•Supportsautorecoveryfromexceptions.
•Network:
•Supports10/100Madaptivenetworkinterface.
•SupportsTCP/IPprotocols,DHCP,DNS,DDNS,NTP,andSADP,etc.
•Supportsunicastandmulticast,supportTCP,UDP,andRTPforunicast.
•Supportsremotesearch,playbackanddownloadvideofiles.
•SupportsremoteconfigurationandimportandexportofNVRsettings.
•Supportsremoteacquisitionofdevicestatus,systemlogandalarmstatus.
•Supportsremoteformatofharddisk,upgrade,reboot.
•Supportseventalarmandexceptionsuploadtoremotemanagementhost.
•Supportremoteusermanagement.Administratorcancreateandmanageremoteusersandsettheir
privilege.
•SupportsremoteinstantaneousJPEGcapture.
•SupportsremotePTZcontrol.
•Supportsvoicetalkandbroadcast.
•Includesbuilt‐inWEBServer.
•Development:
•SDKforWindowsandLinuxenvironmentisavailable.
•Demosoftwaresourcecodesareavailable.
•Developmentsupportandtrainingofapplicationsystemareavailable.

8
ConnectingYourNVR
Youmayfollowthediagrambelow(Figure2)inconnectingyourNVRtoitsperipherals.
Fig2:NVRConnectionDiagram

9
OperatingYourNVR
TherearenumerouswaystonavigateandoperateyourNVR.YoumayusetheFrontPanelControls,the
includedIR(InfraRed)Remote,aMouseandtheSoftKeyboard.
UsingtheFrontPanelControls
YourNVRcomeswithbuilt‐infrontpanelcontrols,asshowninFigure3.
Fig3:FNR‐4004EmbeddedNVR
Thecontrolsonthefrontpanelinclude:
1. USBPorts:UniversalSerialBus(USB)portsforadditionaldevicessuchasUSBmouseandUSB
HardDiskDrive(HDD).
2. ControlButtons:
•MENU/WIPERButton:PressingtheMENU/WIPERbuttonwillreturntheusertotheMain
menu(aftersuccessfullogin).InPTZControlmode,theMENU/WIPERbuttonwillstartwiper
(ifapplicable).InPlaybackmode,italsocanbeusedtoenable/disablesidebarmenu.
•F1/LIGHT:InPTZControlmode,itwillturnon/offPTZlight.InPTZControlmode,the
F1/LIGHTbuttonisusedtozoomthePTZcamerainwheninthePTZControlmenu.
•F2/AUX:Itisusedtocyclethroughtabpages.InPTZControlmode,theF2/AUXbuttonisused
tozoomthePTZcameraoutwheninthePTZControlmenu.
•ESC:TheESCbuttonisusedtoescapetothepreviousmenuandtoarm/disarmtheNVRin
Previewmode.
•EDIT/IRIS+:TheEDIT/IRIS+buttonisusedtoedittextfields.Wheneditingtextfields,itwill
alsofunctionasaBackspacebuttontodeletethecharacterinfrontofthecursor.Oncheckbox
fields,pressingtheEDIT/IRIS+buttonwilltickthecheckbox.InPTZControlmode,the
EDIT/IRIS+buttonopensuptheirisofthecamera.
•PLAY/AUTO:ThePLAY/AUTObuttonisusedtoenterthePlaybackmenu.Itisalsousedto
turnaudioon/offinthePlaybackmenuandautoscaninthePTZControlmenu.
•REC/SHOT:TheREC/SHOTbuttonisusedtoentertheQuickScheduleConfigurationinterface.
IfusedwhencontrollingaPTZ,pressingtheREC/SHOTbuttonandthenaNumericbuttonwill
callaPTZpreset.
•PTZ/IRIS:ThePTZ/IRIS‐buttonisusedtoenterthePTZControlmode.WheninthePTZ
Controlmode,itisusedtoclosetheirisofthePTZ.InPlaybackmode,italsocanbeusedto
enable/disableaudio.
•PREV/FOCUS:ThePREV/FOCUS‐buttonisusedtoswitchbetweensinglescreenand
multi‐screenmode.InPTZControlmode,itisusedtoadjustthefocusinconjunctionwiththe
A/FOCUS+button.
•A/FOCUS+:TheA/FOCUS+buttonisusedtoadjustfocusinthePTZControlmenu.Itisalso
usedtoswitchbetweeninputmethods(upperandlowercasealphabet,symbolsandnumeric
input).
3. SHIFT:TheSHIFTbuttonisusedforswitchbuttonactionbetweennumericbuttonandcontrol
button.
4. DIRECTION/ENTERButtons:
•DIRECTIONButtons:TheDIRECTIONbuttonsareusedtonavigatebetweendifferentfields
anditemsinmenus.InPlaybackmode,theUpandDownbuttonisusedtospeedupandslow
downrecordedvideo.InPreviewmode,thesebuttonscanbeusedtocyclethroughchannels.
•ENTERButton:TheENTERbuttonisusedtoconfirmselectioninanyofthemenumodes.It
canalsobeusedtotickcheckboxfields.InPlaybackmode,itcanbeusedtoplayorpausethe
video.
5. StatusIndicators:StatusindicatorsfordifferentfeaturesoftheNVR.
•Status:StatusindicatorturnsgreenwhenNVRiscontrolledbyanIRremote.

10
•Tx/Rx:Tx/Rxindictorblinksbluewhennetworkconnectionisfunctioningproperly.
6. IRReceiver:operationbyIRremotecontrol.
Note:ItisimportanttonotethatyoumustclicktheEDITbuttononeithertheremoteorfrontpanelonatext
fieldbeforeyou’reabletoedititscontent.Afteryou’redoneenteringtext,youmusthittheENTERbutton
tobeabletomoveontothenextfield.

11
UsingtheIRRemoteControl
YourNVRmayalsobecontrolledwiththeincludedIRremotecontrol,showninFigure4.Batteries(2xAAA)
mustbeinstalledbeforeoperating.
Figure4.IRRemoteControl
Thekeysontheremotecontrolcloselyresembletheonesfoundonthefrontpanel.ReferringtoFigure4,they
include:
1.POWERButton:EnableShutdownmenuoftheNVR
2.DEVButton:Enables/DisablesRemoteControl.
3.AlphanumericButtons:SameasAlphanumericbuttonsonfrontpanel.
4.EDITButton:SameasEDITbuttononfrontpanel.
5.AButton:SameasAbuttononfrontpanel.
6.RECButton:SameasRECbuttononfrontpanel.
7.PLAYButton:SameasPLAYbuttononfrontpanel.
8.INFOButton:Reversed.
9.VOIPButton:Reversed.
10.MENUButton:SameasMENUbuttononfrontpanel.
11.PREVButton:SameasPREVbuttononfrontpanel.
12.DIRECTION/ENTERButtons:SameasDIRECTION/ENTERbuttonsonfrontpanel.
13.PTZButton:SameasPTZbuttononfrontpanel.
14.ESCButton:SameasESCbuttononfrontpanel.
15.RESERVED:Reserved.

12
16.F1Button:SameasF1buttononfrontpanel.
17.PTZCONTROLButtons:Buttonstoadjusttheiris,focusandzoomofaPTZcamera.
18.F2Button:SameasF2buttononfrontpanel.
AimtheremotecontrolattheIRreceiverlocatedatthefrontoftheunittotestoperation.Ifthereisnoresponse:
1.Usingthefrontcontrolpanelorthemouse,gointoMainMenu>SystemCon‐figuration>Display
configuration.
2.CheckandrememberNVRdeviceNo.ThedefaultID#is255.ThisID#isvalidforallIRcontrols.
3.PresstheDEVbuttonontheremote.
4.EntertheNVRID#fromstep2.
5.PresstheENTERbuttonontheremote.
IftheStatusindicatoronthefrontpanelturnsblue,theremotecontrolisoperatingproperly.IftheStatus
indicatordoesnotturnblueandthereisstillnoresponsefromtheremote,pleasecheckthefollowing:
1.Batteriesareinstalledcorrectlyandthepolaritiesofthebatteriesarenotreversed.
2.Batteriesarefreshandnotoutofcharge.
3.IRreceiverisnotobstructed.
UsingaUSBMouse
Aregular3‐button(Left/Right/Scroll‐wheel)USBmousecanalsobeusedwiththisNVR.TouseaUSBmouse:
1.PlugUSBmouseintooneoftheUSBportsonthefrontpaneloftheNVR.
2.Themouseshouldautomaticallybedetected.Ifinararecasethatthemouseisnotdetected,pleasereferto
therecommendeddevicelistfromyourprovider.
Thebuttonsonthemousecorrespondsto:
1.LeftButton:
•SingleClick:Selectacomponentofamenu,suchasabuttonoraninputfield.Thisissimilartopressingthe
ENTERbuttonontheremote/frontpanelcontrols.
•ClickandDrag:ClickinganddraggingtheLeftmousebuttoncanbeusedtocontrolthepan/tiltofaPTZ
cameraaswellastovarytheamountofdigitalzoom.Itcanalsobeusedtosetupthealarmareas.
2.RightButton:
•SingleClick:Showspop‐upmenu.
UsingtheSoftKeyboard
WhenamouseisusedtoperformtaskontheNVR,clickingonatextinputfieldwillbringuptheSoftKeyboard,
showninFigure5.
Figure5.SoftKeyboard
Thebuttonsonthesoftkeyboardrepresents:
SwitchtoLowercase:Switchtolowercaseinput
SwitchtoUppercase:Switchtouppercaseinput

13
Symbols:Switchtosymbolsinput.
Backspace:Deletethecharacterinfrontofthecursor.
Enter:Confirmselection.
ESC:ExitoutofSoftKeyboard.
Figure6.SoftKeyboardButtons

14
CHAPTER2GettingStarted

15
StartingandShuttingDownYourNVR
ProperstartupandshutdownproceduresarecrucialtoexpandingthelifeofyourNVR.
TostartupyourNVR:
1.Ensurethepowersupplyispluggedintoanelectricaloutlet.ItisHIGHLYrecommendedthatan
UninterruptiblePowerSupply(UPS)beusedinconjunctionwiththeunit.ThePowerindicatorLEDonthefront
panelshouldturnred,indicatingtheunitisreceivingpower.
2.ConnecttheNVRtoaVGAmonitor.YouwillonlyseetheNVRmenusystem,whenit’sconnectedtoaVGA
monitor.
3.PressthePOWERswitchonthebackrearpanel.ThePowerindicatorLEDshouldturnblue.Theunitwill
begintostart.
4.Afterstartup,thePowerindicatorLEDwillremainblue.Asplashscreenwillbeshown(Figure7).
Figure7.StartupSplashScreen
TherearetwoproperwaystoshutdowntheNVR.
Option1:StandardShutdown
1. EntertheShutdownmenushowninFigure8bygoingtoMainMenu>Maintenance>Shutdown.
Figure8.ShutdownMenu
2. SelecttheShutdownbutton.
3. ClicktheYesbutton

16
RebootingandLockingYourNVR
WhileintheShutdownmenu(Figure8),youmayalsorebootorlockyourNVR.LockingyourNVRwillreturn
youtotheLiveFeedmode,whichwillrequirethecorrectadministratorpasswordtoexitoutofit.TheReboot
buttonwillrebootyourNVR.
TorebootorlockyourNVR:
1.EntertheShutdownmenubygoingtoMainMenu>Maintenance>Shutdown.
2.SelecttheLockbuttontolocktheNVRortheRebootbuttontoreboottheNVR.
SettingDate&Time
Itisextremelyimportanttosetupthesystemdateandtimetoaccuratelytimestamprecordingsandevents.
Tosetupdateandtime:
1. EntertheSystemConfigurationmenubygoingtoMainMenu>SystemConfiguration,asshowninFigure9.
Figure9.SystemConfigurationMenu
2. ClicktheTime/DatebuttontoentertheTime/Datemenu(Figure10).
Figure10.Time/DateMenu

17
3.Thecurrentsystemtimeanddateaswellasthetimezonewillbedisplayed.Usingthedirectionalbuttonson
thefrontpanel/remoteorthemouse,selectthecorrectdate,timeandtimezone.
4.ToenableDaylightSavingsTime,clickandchecktheEnableDSTcheckbox.
5.ToacquirethetimeanddateoveranNTP(NetworkTimeProtocol)Server,checktheSynchronizeviaNTP
servercheckbox.YoumayenteryourownNTPserverorselectfromoneofthedefaultlocationsfromthelist
ofservers,asshowninFigure11.
Figure11.Time/DateMenu
6.ClicktheSavebuttontosavesettingsandclicktheExitbuttontoexitoutofthemenu.ClickingtheExitbutton
withoutclickingtheSavebuttonwillexitthemenuwithoutsaving.

18
CheckingtheStatusofYourNVR
ThecurrentstatusofyourNVRcanbecheckedatanytimebygoingtotheStatusmenu.Thestatusmenu,shown
inFigure12canbeaccessedbygoingtoMainMenu>Status.
Figure12.StatusMenu
TheitemsthatarefoundontheStatusmenuinclude:
•DeviceInformation:ThemodelnumberoftheNVR,serialNo.,thecurrentfirmwareversioninstalledon
NVR,etc.
•ChanStatus:CamerasworkingstatusinNVRsuchasmotion,tampering,videolossandvideoexception.
•RecordStatus:Recordingstatusofthecameras,including:streamtype,framerate,bitrate,resolution,record
type,etc.
•AlarmStatus:Thestatusofexternalalarmin/outonNVR
•NetworkStatus:NetworkstatussuchasIPaddress,gateway,DNSserver,clientport,etc.
•HDStatus:HarddiskstatusonNVR.

19
CHAPTER3LiveFeed

20
WatchingaLiveFeed
The Live Feed mode is automatically started after the NVR bootsup.Itisalsoattheverytopofthemenu
hierarchy,thushittingtheESCbuttonmultipletimes(dependingonwhichmenuyou’reon)willbringyoutothe
LiveFeedmode.
UnderstandingLiveFeedIcons
There are multiple icons on eachdisplayinLiveFeedmodetoindicate different camera status and settings.
Theseiconsinclude:
EventIcon:Indicatesvideolossortampering,motiondetectionand/orsensoralarm.
Record Icon: Indicates the current channel is recording. There cording may have been started
manually,fromaschedule,and/ortriggeredfrommotionoralarm.
PictureSettingsIcon:Adjustpicturesettingsforselecteddisplay.
PTZControlIcon:EnterPTZcontrolmodefortheselecteddisplay.
PresetIcon:RecallPTZpreset.
PatrolIcon:RecallPTZpatrol.
TourIcon:RecallPTZtour.
ZoomIn/ZoomOut:Zoomin/outwithPTZ.
FullScreen/ExitFullScreenIcon:Enterinto/exitoutoffullscreenmodeforselecteddisplay.
AudioOn/AudioOffIcon:Enable/disableaudioforselecteddisplay.
CloseIcon:Exitoutofcurrentsettingandreturntopreviousmode.
Figure13.LiveFeedIcons
Note:Eventiconswillonlybedisplayedwhenarmed,exceptforthevideolossalarm.
Table of contents
Other Eneo Network Hardware manuals

Eneo
Eneo PNR-5216 User manual

Eneo
Eneo IER-28R040005A User manual

Eneo
Eneo MAM-5MM2203M0A User manual

Eneo
Eneo PNR-5332/3TB User manual

Eneo
Eneo PNR-5316 User manual

Eneo
Eneo IER-38R160005A User manual

Eneo
Eneo PNR-5104 User manual

Eneo
Eneo PNR-5316 User manual

Eneo
Eneo IER-38R160005A User manual

Eneo
Eneo PNR-5416 User manual
Popular Network Hardware manuals by other brands

HP
HP IBRIX X9720 System administrator guide

PCB Piezotronics
PCB Piezotronics 498A30 Installation and operating manual

Panasonic
Panasonic WJ-NXF02 operating instructions

3Com
3Com OfficeConnect Remote 510 user guide

Novus
Novus NVR-7308P8-H2 user manual

ZyXEL Communications
ZyXEL Communications PK5000Z How to configure