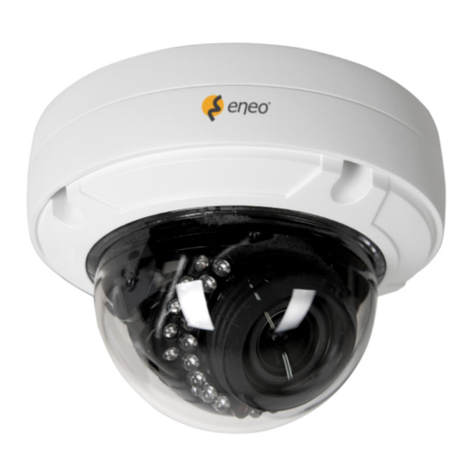
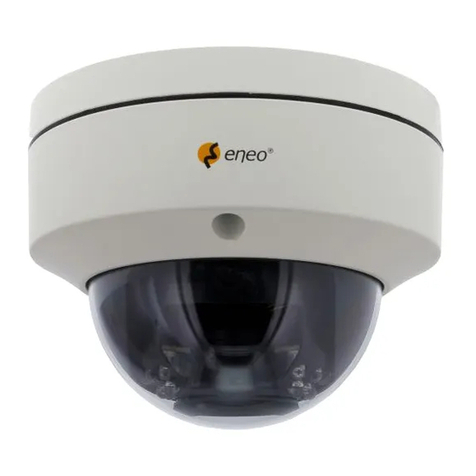
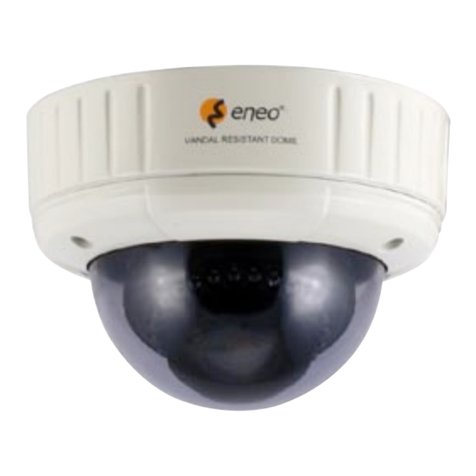
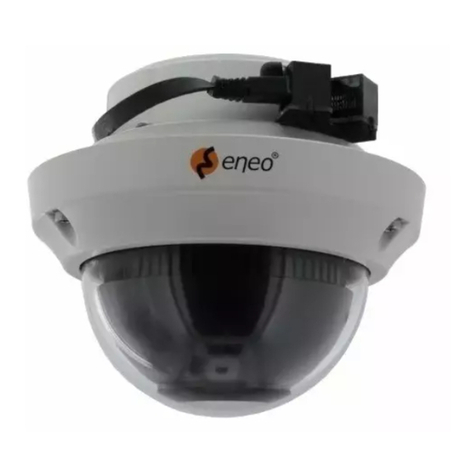
Eneo VKCD-1332SM/3.8 User manual

1
Montage und Betriebsanleitung
1/3” Farb-Domekamera, Fix, Tag/Nacht, VKCD-1332SM/3.8
Installation and Operating Instructions
1/3” Colour Dome Camera, Fixed, Day & Night
VKCD-1332SM/3.8
Mode d’emploi
Dôme Couleur 1/3”, Fixe, Jour & Nuit, VKCD-1332SM/3.8

2
Inhaltsverzeichnis
1. Sicherheitshinweise ........................................... 3
2. Allgemeine Beschreibung................................... 5
3. Installation ......................................................... 6
4. Anschluss .......................................................... 8
5. Fehlersuche ....................................................... 9
6. Technische Daten ............................................ 10
7. Maßzeichnungen.............................................. 31
Contents
1. Safety Instructions ........................................... 13
2. General Descriptions ........................................ 15
3. Installation ....................................................... 16
4. Connection....................................................... 18
5. Troubleshooting................................................ 19
6. Specifications................................................... 20
7. Dimensional Drawings ..................................... 31
Sommaire
1. Consignes de sécurité...................................... 22
2. Description générale ........................................ 24
3. Installation ....................................................... 25
4. Branchement ................................................... 27
5. Dépannage....................................................... 28
6. Caractéristiques techniques ............................. 29
7. Croquis ............................................................ 31
www.videor.com
www.eneo-securitiy.com
⇒
Betriebsanleitung
Installation and Operating Instructions
Mode d’emploi
Instrukcja instalacji i obsługi

3
1. Sicherheitshinweise
• Bevor Sie das System anschließen und in Betrieb nehmen, lesen Sie zuerst diese Sicherheitshinweise und die
Betriebsanleitung.
• Bewahren Sie die Betriebsanleitung sorgfältig zur späteren Verwendung auf.
• Die Kameras gegen Eindringen von Wasser und Feuchtigkeit schützen, Wasser kann die Geräte dauerhaft
schädigen. Sollte dennoch Feuchtigkeit eingedrungen sein, die Kameras nie unter diesen Bedingungen
einschalten,sondern zur Überprüfung an eine autorisierte Fachwerkstatt geben.
• Das System darf nie außerhalb der technischen Daten benutzt werden, das kann die Kamera zerstören.
• Die Kamera nur in einem Temperaturbereich von -10°C bis +45°C und einer Luftfeuchtigkeit bis max. 80%
betreiben.
• Um das System von der Versorgungsspannung zu trennen, ziehen Sie das Kabel nur am Stecker heraus.
Ziehen Sie nie direkt am Kabel.
• Verlegen Sie die Verbindungskabel sorgfältig und stellen Sie sicher, dass die Kabel nicht mechanisch
beansprucht, geknickt oder beschädigt werden und keine Feuchtigkeit eindringen kann.
• Versuchen Sie nicht, das Kameramodul aus dem Dome auszubauen.
• Das Gerät darf nur von qualifiziertem Servicepersonal geöffnet werden.
Fremdeingriffe beenden jeden Garantieanspruch.
• Die Kamera darf nie mit geöffneter Blende gegen die Sonne gerichtet werden (Zerstörung des Sensors).
• Montage, Wartung und Reparaturen dürfen nur von autorisiertem Fachpersonal ausgeführt werden.
Vor Öffnen des Gehäuses ist eine Netztrennung erforderlich.

4
• Falls Funktionsstörungen auftreten, benachrichtigen Sie bitte Ihren Lieferanten.
• Verwenden Sie nur Original-Ersatzteile und -Zubehör von Videor E. Hartig GmbH.
• Zur Reinigung der Gehäuse immer nur ein mildes Haushaltsmittel verwenden.
Niemals Verdünner oder Benzin benutzen, dies kann die Oberfläche dauerhaft schädigen.
• Es müssen alle zur Montage vorgesehenen Öffnungen im Gehäuse geschlossen, bzw. abgedichtet werden.
•
Der Errichter ist für die Aufrechterhaltung der Schutzart lt. Techn. Daten verantwortlich, z.B. durch Ver-
wendung aller beiliegenden Dichtungen und O-Ringen, durch Abdichtung des Kabelaustritts mit Silikon
oder durch Verlegen des Kabels in einer Weise, dass durch das Kabel keine „Wasserrinne” entsteht.
• Bei der Montage muss grundsätzlich darauf geachtet werden, dass vorhandene Dichtungen ordnungs-
gemäß eingesetzt und bei der Montage nicht verschoben werden. Beschädigte Dichtungen dürfen nicht
mehr verbaut werden.
HINWEIS: Dies ist ein Gerät der Klasse A. Dieses Gerät kann im Wohnbereich Funktionsstörungen ver-
ursachen; in diesem Fall kann vom Betreiber verlangt werden, angemessene Maßnahmen
durchzuführen und dafür aufzukommen.

5
2. Allgemeine Beschreibung
• 1/3” Sony Super HAD II CCD
• Lichtempfindlichkeit: 0,22Lux bei F1,2 (Farbe&SW)
• Automatische Verstärkungsregelung (AGC)
• Gegenlichtkompensation (BLC)
• High-Speed Shutterregelung (ESC)
• Automatischer Weißabgleich (AWB)
• Manuelle 3-Achsen Kameraausrichtung
• Integriertes Objektiv: F2,0/3,8mm
• Betriebsspannung: 12VDC
• Kuppel-Durchmesser: 85mm
• Für Decken & Wand-Aufbau
Lieferumfang
1x Farb-Domekamera
2x Befestigungsschrauben
1x Bohrschabline
1x Montage- und Betriebsanleitung
Durch die eingebaute 3-achsige Halteklammer der Ka-
mera kann sie leicht in jede Richtung gedreht werden.

6
3. Installation
Stellen Sie vor der Installation sicher, dass die
Spannungszufuhr unterbrochen ist!
1. Bohrschablone an Wand oder Decke kleben.
2. Anhand der Bohrschablone zwei Löcher bohren
und Dübel in die Löcher stecken.
3. Spannungs- und Videokabel zu den Anschluss-
stellen verlegen.
4. Kamera mit zwei Schrauben am Untergrund
befestigen.
5. Fokus und Richtung mit der 3-achsigen Kamera-
klammer von Hand wie gewünscht einstellen.
6. Dome über die Basis setzen.
7. Dome auf die Basis drücken.
Bohrschablone
Gehäusebasis
Befestigungsschrauben
Gehäuseabdeckung

7
HINWEIS !
Zum Abnehmen des Domes ein
Geldstück in die Öffnung an der
Seite stecken und drehen.

8
4. Anschluss
• Der Anschluss besitzt eine Polung.
• Verwenden Sie eine Spannungsversorgung, die 12VDC (Gleichspannung) liefert.
Videoausgang
GND
Video (gelb)
Spannung
- 12VDC (rot)
Funktion Anschlussfarbe Bemerkungen
#1 Videoausgang Gelb 1,0 Vss
#2 Spannungsausgang Rot 12VDC (9V~15V), 150mA

9
Problem Lösung
Auf dem Bildschirm
erscheint kein Bild.
• Überprüfen Sie die Spannungsversorgung von Monitor und Kamera und stellen
Sie sicher, dass Spannung und Polarität stimmen und die Leitungen auch
stromführend sind.
Das Bild auf dem Bild-
schirm ist zu blass.
• Prüfen Sie, ob das Objektiv verschmutzt ist.
Bei Verschmutzung das Objektiv mit einem weichen, sauberen Tuch reinigen.
• Auflagemaß des Objektivs neu einstellen.
Die Kamera arbeitet nicht
richtig, die Oberfläche des
Kameragehäuses ist heiß,
und auf dem Bildschirm er-
scheint eine schwarze Linie.
• Prüfen Sie, ob die Kamera an die richtige Spannungsversorgung angeschlossen
ist.
Wenn kein Problem mit der Spannungsversorgung besteht, schalten Sie die
Kamera sofort aus und wenden Sie sich an den Kundendienst von
Videor E. Hartig GmbH.
Der Bildschirm blinkt
häufig.
• Prüfen Sie, ob die Kamera auf die Sonne oder eine Leuchtstofflampe gerichtet
ist.
• Winkel oder Anbringungsort der Kamera ändern, wenn zu viel Licht auf sie
gelangt.
5. Fehlersuche
Wenn Sie Schwierigkeiten mit dem Betrieb Ihrer Kamera haben, schauen Sie bitte im Folgenden nach. Wenn diese
Richtlinien Ihnen nicht ermöglichen, das Problem zu lösen, wenden Sie sich an einen autorisierten Techniker.

10
6. Technische Daten
Typ VKCD-1332SM/3.8
Art.-Nr. 92571
System Tag/Nacht
Chipgröße 1/3”
Aufnahmesensor CCD
Lichtempfindlichkeit (bei 50% Videosignal) 0,2 Lux, (Farbe) bei F1,2 (gemessen)
Horizontale Auflösung 600 TVL
Low Speed Shutter nein
Digitale Rauschunterdrückung (DNR) nein
Gegenlichtkompensation ja
Wide Dynamic Range (WDR) nein
IR-Sperrfilter OLPF (Overlay Low Pass Filter)
Videoausgänge Composite (FBAS)
Objektiv-Mount Objektiv integriert
Objektiv Typ Festbrennweite

11
Brennweite 3,8 mm
Bildwinkel horizontal 65°
Blendensteuerung nein
MOD (Minimum Object Distance) 0,1 m
Filtergewinde Nicht vorhanden
Steuer-Schnittstellen nein
Heizung nein
Schutzart IP44
Betriebsspannung 12VDC
Vandalismusgeschützt nein
Farbe (Kuppel) Klar
Montageart Deckenmontage, Wandmontage
Gehäuse Innen
Gehäusematerial Kunststoff
Farbe (Gehäuse) Hellgrau
Zertifizierungen CE

12
7. Maßzeichnungen
Siehe S. 31
Optionales Zubehör
Das aktuelle optionale Zubehör finden Sie auf unserer Homepage: www.videor.com

13
1. Safety Instructions
• Read these safety instructions and the operation manual first before you install and commission the camera.
• Keep the manual in a safe place for later reference.
• Protect your camera from contamination with water and humidity to prevent it from permanent damage.
Never switch the camera on when it gets wet. Have it checked at an authorized service center in this case.
• Never operate the camera outside of the specifications as this may prevent the camera functioning.
• Do not operate the cameras beyond their specified temperature, humidity or power ratings.
• Operate the camera only at a temperature range of -10°C to +45°C and at a humidity of max. 80%.
• To disconnect the power cord of the unit, pull it out by the plug. Never pull the cord itself.
• Pay attention when laying the connection cable and observe that the cable is not subject to heavy loads, kinks,
or damage and no moisture can get in.
• Do not attempt to disassemble the camera board from the dome.
• The warranty becomes void if repairs are undertaken by unauthorized persons.
Do not open the camera housing.
• Never point the camera towards the sun with the aperture open. This can destroy the sensor.
• Installation, maintenance and repair have to be carried out only by authorized service centers.
Before opening the cover disconnect the unit from mains input.
• Contact your local dealer in case of malfunction.
• Only use original parts and original accessories from Videor E. Hartig GmbH.

14
• Do not use strong or abrasive detergents when cleaning the dome.
Use a dry cloth to clean the dome surface.
In case the dirt is hard to remove, use a mild detergent and wipe gently.
• All openings provided in the housing for assembly purposes must be closed and/or sealed.
• The installer is responsible for ensuring that the degree of protection as per the technical specifications
is upheld, e.g. by using all enclosed gasket seals and O-rings, by waterproofing the cable exits with
silicon or through laying the cable in such a way that the cable does not act as a „gutter”.
• During assembly, care must be taken to ensure that existing seals are correctly inserted and are not
displaced as a result of assembly.
You must not continue to use damaged seals.
NOTE: This is a class A digital device. This digital device can cause harmful interference in a residential
area; in this case the user may be required to take appropriate corrective action at his/her own
expense.

15
2. General Descriptions
• 1/3” Sony Super HAD II CCD
• Sensitivity of 0.22Lux at F1.2 (Colour & B/W)
• Automatic Gain Control (AGC)
• Backlight compensation (BLC)
• High Speed Shutter Control (ESC)
• Automatic White Balance (AWB)
• Manual 3-axis Camera Gimbal
• Integrated Fix Lens: F2.0/3.8mm
• Supply Voltage: 12VDC
• Dome Bubble Size: 85mm Diameter
• For Wall and Ceiling Surface Mount
Built-in 3-axis camera bracket makes it much easier
to rotate in any direction.
Supplied Items
1x Colour dome camera
2x Mounting screws
1x Guide pattern
1x Installation and Operating Instructions

16
3. Installation
Make sure the power is removed before the
installation !
1. Stick the guide pattern on the wall or ceiling.
2. Drill two holes according to the the guide pattern,
then insert anchors into the drilled holes.
3. Draw out power / video wires to the connecting
places.
4. Fix the camera to the ceiling using two screws.
5. Adjust desired focus and scene by turning and
moving the 3-axis camera bracket by hand.
6. Put the dome cover over the base.
7. Fix the dome cover on the base by covering.
Guide pattern
Dome base
Mounting screw
Dome cover

17
NOTE !
Insert coin to the side hole
and remove the dome cover
by twist coin.

18
4. Connection
• The wire is polarized
• Use 12VDC power source
Video Output
GND
Video (yellow)
Power - 12VDC
(red)
Function Terminal Colour Remark
#1 Video output Yellow 1.0 Vp.p
#2 Power input Red 12VDC (9V~15V), 150mA

19
5. Troubleshooting
If you have trouble operating your camera, refer to the following.
In the guidelines do not enable you to solve the problem, contact an authorized technician.
Problem Solution
The image does not appear
on the screen.
• Check the power source for the monitor and camera and ensure that the
voltage and polarity are properly connected and being supplied correctly.
The image on the screen
is dim.
• Check if the lens is stained. If dirty, clean the lens with a soft, clean cloth.
• Adjust the Back Focus of the lens again.
The camera does not work
properly, the surface of the
camera case is hot, and
a black line appears on the
screen.
• Check if you have connected the camera to a proper power source and if there
is no problem with the power, turn the unit off immediately and seek assistance
from Videor E. Hartig GmbH.
The screen blinks a lot. • Check if the camera is pointed towards the sun or a fluorescent lamp.
• Adjust the angle or location of the camera if too much light is coming into the
screen.

20
6. Specifications
Type VKCD-1332SM/3.8
Art. No. 92571
System Day&Night
Sensor size 1/3”
Imager CCD
Sensitivity (at 50% video signal) 0.2 Lux (colour) at F1.2 (measured)
Horizontal resolution 600 TVL
Low Speed Shutter no
Digital Noise Reduction (DNR) no
Backlight compensation yes
Wide Dynamic Range (WDR) no
IR cut filter OLPF (Overlay Low Pass Filter)
Video outputs Composite (CVBS)
Lens mount Integrated lens
Lens type Fixed focal length
Focal length 3.8 mm
Horizontal angle of view 65°
Table of contents
Languages:
Other Eneo Security Camera manuals

Eneo
Eneo ICB-73M2712MWA User manual

Eneo
Eneo DOME-S1 User manual

Eneo
Eneo HDD-20 User manual

Eneo
Eneo IPP-88A0030MIA User manual

Eneo
Eneo IPP-82A0030MHA User manual

Eneo
Eneo PXD-2018PTZ1080 User manual

Eneo
Eneo IED-62M2812MCA User manual

Eneo
Eneo SPD-62V2810P0A User manual

Eneo
Eneo HDD-2110M1080 User manual

Eneo
Eneo IND-32F0016P0A User manual

Eneo
Eneo NXC Series User manual

Eneo
Eneo INP-54M2812M0A User manual

Eneo
Eneo IPP-83A0036MIA User manual

Eneo
Eneo MED-62V2812M0B User manual

Eneo
Eneo VK-1322 User manual

Eneo
Eneo VKCD-1327WFM/MF User manual

Eneo
Eneo VKC-1378/IR-316 User manual

Eneo
Eneo MPD-62M2812P0A User manual

Eneo
Eneo ICB-68M3611M0A User manual

Eneo
Eneo INP-58M2812M0A User manual