manuals.online logo
Brands
  1. Home
  2. •
  3. Brands
  4. •
  5. Enerpac
  6. •
  7. Water Pump
  8. •
  9. Enerpac E Series Use and care manual

Enerpac E Series Use and care manual

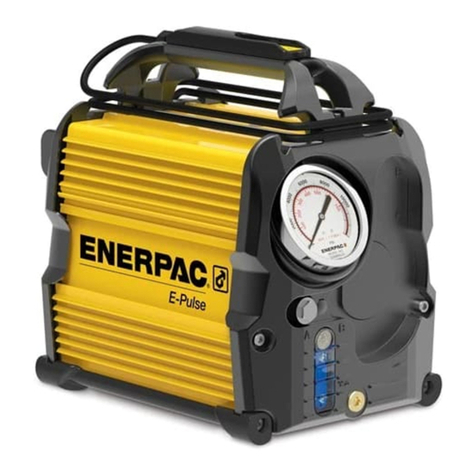
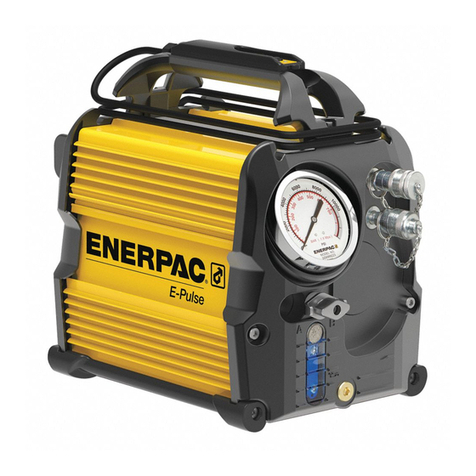
E-Series Electric Pump
Dump and Hold, Solenoid Valve
Document
Number
Document
Revision
Document
Revision Date
Product Date Code
Beginning With
L4352 B 10/2019 A
Repair Parts Sheet
WARNING
Fully relieve hydraulic pressure, disconnect hydraulic hoses and unplug AC power cord from electrical
outlet before beginning any inspection, maintenance or repair procedures. Failure to observe these precautions
could result in death or serious personal injury. Appropriate shop safety procedures are to be followed during
disassembly and reassembly to minimize any possibility of injury.
To Protect Your Warranty, Use Only ENERPAC Hydraulic Oil.
Enerpac recommends that all kit components be installed to ensure optimum performance of the repaired product.
Models:
• EP3304SB and EP3304SB-G (100-120 VAC - NEMA 5-15 plug)
• EP3304SI and EP3304SI-G (200-250 VAC - NEMA 6-15 plug)
• EP3304SE and EP3304SE-G (200-250 VAC - Schuko CEE 7/7 plug)
2
Notes:
• Parts lists indicate the total quantity of each part used in a figure.
• The quantity of a part supplied in a repair kit or service assembly may be less than the total quantity shown in the
parts list.
• Information contained in this document is subject to change without notice due to design variables, product
improvements and other factors. Copyright © 2019 Enerpac. All rights reserved.
Table of Contents:
Figure 1 - Pump Exterior . . . . . . . . . . . . . . . . . . . . . . . . . . . . . . . . . . . . . . . . . . . . . . . . . . . . . . . . . . . . . . . . . . . . . . . . . . . 3
Figure 1A - Speed Control Potentiometer and Cable Kit . . . . . . . . . . . . . . . . . . . . . . . . . . . . . . . . . . . . . . . . . . . . . . . . . 4
Figure 2 - Miscellaneous Assemblies .............. . . . . . . . . . . . . . . . . . . . . . . . . . . . . . . . . . . . . . . . . . . . . . . . . 5
Figure 2A - DC Power Cable Assembly.............. . . . . . . . . . . . . . . . . . . . . . . . . . . . . . . . . . . . . . . . . . . . . .. . . 6
Figure 2B - Serial Communications Cable Assembly ... . . . . . . . . . . . . . . . . . . . . . . . . . . . . . . . . . . . . . . . . . . . . . . . . 6
Figure 2C - Jumper Connection ................... . . . . . . . . . . . . . . . . . . . . . . . . . . . . . . . . . . . . . . . . . . . . . . . . 6
Figure 2D - Pump Handle Kit ..................... . . . . . . . . . . . . . . . . . . . . . . . . . . . . . . . . . . . . . . . . . . . . . . . . 7
Figure 2E - 2 Button, Pendant Assembly ............ . . . . . . . . . . . . . . . . . . . . . . . . . . . . . . . . . . . . . . . . . . . . . . . . 8
Figure 3 - Motor Controller Cover Assembly . . . . . . . . . . . . . . . . . . . . . . . . . . . . . . . . . . . . . . . . . . . . . . . . . . . . . . . . . . . . 9
Figure 4 - Power/App Assembly . . . . . . . . . . . . . . . . . . . . . . . . . . . . . . . . . . . . . . . . . . . . . . . . . . . . . . . . . . . . . . . . . . . . 10
Figure 5 - Motor Stator and Pump Assembly . . . . . . . . . . . . . . . . . . . . . . . . . . . . . . . . . . . . . . . . . . . . . . . . . . . . . . . . . . . 11
Figure 5A - Flareless Tube Kit - A Port . . . . . . . . . . . . . . . . . . . . . . . . . . . . . . . . . . . . . . . . . . . . . . . . . . . . . . . . . . . . . . . . 13
Figure 5B - Motor Replacement Kit . . . . . . . . . . . . . . . . . . . . . . . . . . . . . . . . . . . . . . . . . . . . . . . . . . . . . . . . . . . . . . . . . . 13
Figure 5C - Bulkhead Fitting Kit . . . . . . . . . . . . . . . . . . . . . . . . . . . . . . . . . . . . . . . . . . . . . . . . . . . . . . . . . . . . . . . . . . . . . 14
Figure 6 - Reservoir and End Cap Assembly . . . . . . . . . . . . . . . . . . . . . . . . . . . . . . . . . . . . . . . . . . . . . . . . . . . . . . . . . . 15
Figure 7 - Rear End Cap Assembly . . . . . . . . . . . . . . . . . . . . . . . . . . . . . . . . . . . . . . . . . . . . . . . . . . . . . . . . . . . . . . . . . . 17
Figure 7A - Power Cord Replacement Kit . . . . . . . . . . . . . . . . . . . . . . . . . . . . . . . . . . . . . . . . . . . . . . . . . . . . . . . . . . . . . 18
Figure 8 - Front End Cap Assembly . . . . . . . . . . . . . . . . . . . . . . . . . . . . . . . . . . . . . . . . . . . . . . . . . . . . . . . . . . . . . . . . . . 19
Figure 8A - Water Ingress Seal Kit . . . . . . . . . . . . . . . . . . . . . . . . . . . . . . . . . . . . . . . . . . . . . . . . . . . . . . . . . . . . . . . . . . . 20
Figure 9 - Housing Assembly . . . . . . . . . . . . . . . . . . . . . . . . . . . . . . . . . . . . . . . . . . . . . . . . . . . . . . . . . . . . . . . . . . . . . . . 21
Figure 9A - Eccentric Kit . . . . . . . . . . . . . . . . . . . . . . . . . . . . . . . . . . . . . . . . . . . . . . . . . . . . . . . . . . . . . . . . . . . . . . . . 22
Figure 9B - Pump Housing Kit . . . . . . . . . . . . . . . . . . . . . . . . . . . . . . . . . . . . . . . . . . . . . . . . . . . . . . . . . . . . . . . . . . . . . . 23
Figure 9C - Piston Block Assembly Kit . . . . . . . . . . . . . . . . . . . . . . . . . . . . . . . . . . . . . . . . . . . . . . . . . . . . . . . . . . . . . . . . 24
Figure 9D - Piston Block Seal Kit . . . . . . . . . . . . . . . . . . . . . . . . . . . . . . . . . . . . . . . . . . . . . . . . . . . . . . . . . . . . . . . . . . . . 25
Figure 9E - Intake Suction Filter Kit . . . . . . . . . . . . . . . . . . . . . . . . . . . . . . . . . . . . . . . . . . . . . . . . . . . . . . . . . . . . . . . . . . . 25
Figure 10 - Direct Drive Pump Assembly . . . . . . . . . . . . . . . . . . . . . . . . . . . . . . . . . . . . . . . . . . . . . . . . . . . . . . . . . . . . . . 26
Figure 10A - Rebuild Kit, User-Adjustable Relief Valve . . . . . . . . . . . . . . . . . . . . . . . . . . . . . . . . . . .. . . . . . . . . . . . . . . . . 27
Figure 11 - 3/2 Solenoid Valve Assembly . . . . . . . . . . . . . . . . . . . . . . . . . . . . . . . . . . . . . . . . . . . . . . . . . . . . . . . . . . . 28
Figure 11A - 3/2 Solenoid Valve Kits . . . . . . . . . . . . . . . . . . . . . . . . . . . . . . . . . . . . . . . . . . . . . . . . . . . . . . . . . . . . . . . . . . 29
Figure 12 - Hydraulic Pressure Gauge Kit . . . . . . . . . . . . . . . . . . . . . . . . . . . . . . . . . . . . . . . . . . . . . . . . . . . . . . . . . . . . . . 30
Figure 13 - Hydraulic Schematic Diagram . . . . . . . . . . . . . . . . . . . . . . . . . . . . . . . . . . . . . . . . . . . . . . . . . . . . . . . . . . . . . 31
Figure 14 - Electrical Wiring Diagram . . . . . . . . . . . . . . . . . . . . . . . . . . . . . . . . . . . . . . . . . . . . . . . . . . . . . . . . . . . . . . . . . 32
Figure 15 - Pump Cover Removal/Installation Instructions . . . . . . . . . . . . . . . . . . . . . . . . . . . . . . . . . . . . . . . . . . . . . . . . 33
Page
3
Notes:
Torque to 13-16 ft-lbs [18-22 Nm].
2
Torque to 10-12 ft-lbs [14-16 Nm].
5
7
6
1
See Figure 1A
5
8
13
10
9
2
5
3
Figure 1 - Pump Exterior
Repair Parts List for Figure 1
Item Part Number Qty. Description
1kDC7887026 1 CE Safety Label Read Instructions
3DD6799026 1 Decal, Product Specification
5DD7248009 1 Plug, Dome, 7.5 Dia
6DD7350026 1 Decal, Pendant, Momentary/Continuous
7DD7355026 1 Decal, Gauge Cap
8kDD7417026 1 Decal, Unplug Cord
9DD7443026 1 Decal, Valve Schematic, 3/2E
10 DD7557006 1 Plug, SAE #8, Zero-Leak
13 R515245-2 1 Plug
k - Included in Pump Cover Kit DD6792098SR.
4
Notes:
Remove nut. Insert potentiometer through endcap, aligning
orientation tab. Reinstall nut and
torque to 8-10 in-lbs [0.9-1.1 Nm].
1
Apply decal, turn potentiometer shaft fully clockwise.
Align knob with max line and push on to install.
2
Wiring Diagram
J3 CONNECTOR POTENTIOMETER
END
END
CONTROLLER
APPLICATION
BLACK
WHITE
RED
1
2
3
SPEED
BLACK
WHITE
RED
POT 1 POT 1
1
2
3
See Figure 14 for main electrical wiring diagram. Orientation tab
Orientation Holes
31
2
1
2
Figure 1A - Speed Control Potentiometer and Cable Kit:
DD7060960K
Repair Parts List for Figure 1A
Item Part Number Qty. Description
1DD6798026 1 Decal, Potentiometer, Speed Control
2DD7029020 1 Knob Potentiometer
3DD7060960 1 Cable Assembly, Potentiometer
Note: Speed Control Potentiometer and Cable Kit DD7060960K includes all items listed in the table above.
5
See Figure 4
See Figure 3
See Figure 2D
See Figure 2E
Refer to Figures 2A through 2D
for electrical cable assemblies.
Figure 2 - Miscellaneous Assemblies
6
V+
V-
Red
Black
Red
Black
J2 Connector
2
J2
A
ASection A-A
1
1
2
Figure 2A - DC Power Cable Assembly: DD7061960
Serial Communication Port
Black 1
Red 2
White 3 J6
Black 3
Red 2
White 1
A
A
Section A-A
B
BSection B-B
1
2
3123
Figure 2C - Serial Communications Cable Assembly: DD7064960
Figure 2C - Jumper Connection: DD7125960
Repair Parts List for Figure 2A, 2B and 2C
Item
Part Number
Qty.
Description
--- See Figure 2A 1 Cable Assembly, DC Power Supply
--- See Figure 2B 1 Cable Assembly, Serial Communications
--- See Figure 2C 1 Cable, Jumper, J8 and J9 Connection
--- DC9876647 3 Black Cable Tie 6" (not shown)
7
4
1
2
3
1
Note:
Torque to 42-47 in-lbs [4.7-5.3 Nm].
1
Figure 2D - Pump Handle Kit: DD6789800SR
Repair Parts List for Figure 2D
Item
Part Number
Qty.
Description
1CAE1050108-1A 2 Flat Washer DIN125A M5
2CCE523028-1A 2 Screw-SHCS, Hex, M5 x 0.8 x 25, 12.9, Zinc
3DD6789800 1 Casting Handle Pump
4DD7167026 1 Decal, Troubleshoot
Note: Pump Handle Kit DD6789800SR includes all items listed in the table above.
8
1
2
3
See Figure 14 for main electrical wiring diagram.
Note:
Torque to finger tight plus an additional 1/4 turn.
1
1
Figure 2E - 2 Button, Pendant Assembly: DD7278900SR2
Repair Parts List for Figure 2E
Item
Part Number
Qty.
Description
1DD7278900 1 Pendant and Cable Assembly, 2 Button
2DC9538021 1 Locking Nut 20mm
3DD7350026 1 Decal, Pendant
Note: 2 Button, Pendant Assembly DD7278900SR1 includes all items listed in the table above.
9
7
1214
10
1
5
131
11 2
4
6A
6B
8
7
4
5
Notes:
Install ground cable with ring terminal between star washers.
Torque to 8-10 in-lbs [0.9-1.1 Nm].
1
2
Remove adhesive backing before installation.
3
Torque to 6-7 in-lbs [0.7-0.8 Nm].
4
See parts list (items 6A & 6B)
for voltage options.
5
Torque to 5-6 in-lbs [0.6-0.7 Nm].
6Apply Loctite 243.
7
• Attach all wires including ground wire!
• Remove lip seal from old cover and attach to new
cover if applicable (only one side has a lip seal).
• See wiring diagram Figure 14 for wire connections.
• See pump cover removal/installation instructions
Figure 15.
15
11 2
6
7
6
13 3
16
5
Figure 3 - Motor Controller Cover Assembly
Repair Parts List for Figure 3
Item Part Number Qty. Description
1 BF1607027AX 2 Set Screw, #8-36 x 0.438, Cup Point, Zinc
3 CCE1040108-7A 2 Lock Washer, External Tooth For M4
5 kDD6792098-P03 1 Pump Cover
6A DD6987827K 1 Motor Controller Kit, 120V (Model EP3304SB)
6B DD7318827K 1 Motor Controller Kit, 230V, 240V (Models EB3304SI and EP3304SE)
7 sDD7513001 2 Screw, Thread Forming, M4.55 x 10 Long
8 kDD7462037 2 Gasket, 4.0mm Dia x 5.50mm L Cord Stock
--- kSee Figure 1 1 CE Safety Label Read Instructions
10 kCBE411028-1A 3 Screw-SHCS, Hex, M4 x 0.7 x 6, 8.8, Zinc
11 DD7516122 2 Nut-Hex Full, #8-36, GRD 2, Zinc
12 DD7609111 1 Bracket, Motor Controller Restraint
13 kDD7326217 3 Cable Tie, Screw Mount
14 kDC9922026 1 Decal High Voltage
15 DD7325217 1 Wire Lock, Stando
16 DD7697111 1 Bracket, Motor Controller
s- Each motor controller kit (items 6A and 6B) includes two thread forming screws (item 7).
k - Included in Pump Cover Kit DD6792098SR.
10
5
6
9
15
8
73 4 12 12 1 11
3111 2 2
Notes:
Install ground cable with ring terminal between star washers.
Torque to 8-10 in-lbs [0.9-1.1 Nm].
Remove adhesive backing before installation.
Torque to 6-7 in-lbs [0.7-0.8 Nm].
1
2
3
4
Torque to 5-6 in-lbs [0.6-0.7 Nm].
5
Apply Loctite 243.
6
13
65 5
14
See Figure 14
for DIP switch
settings.
Figure 4 - Power/App Assembly
Repair Parts List for Figure 4
Item Part Number Qty. Description
1BF1607027AX 1 Set Screw, #8-36 x 0.438, Cup Point, Zinc
2kCBE411028-1A 3 Screw-SHCS, Hex, M4 x 0.7 x 6, 8.8, Zinc
3CCE1040108-7A 2 Lock Washer, External Tooth For M4
4DC9876647 3 Black Cable Tie 6"
5kDD6792098-P03 1 Cover, Machined, 1 Gal, Yellow
6DD7298900 1 Power App Board Assembly
7kDD7326217 3 Cable Tie, Screw Mount
8DD7448037 1 Lip Seal, E-Pulse
9kDD7462037 2 Gasket, 4.0mm Dia x 5.50mm L Cord Stock
11 DD7516122 1 Nut-Hex Full, #8-36, GRD 2, Zinc
12 DD7609111 1 Bracket, Motor Controller Restraint
13 DD7513001 2 Screw, Thread Forming, M4.55 x 10 Long
14 DD7325217 1 Wire Lock, Stando
15 DD7697111 1 Bracket, Motor Controller
--- kSee Figure 1 1 Decal, Unplug Cord (not shown)
k- Included in Pump Cover Kit DD6792098SR.
11
1
2
4
17
SEE CROSS
SECTION ‘A’
11
2
2
5
3
7
1
4
See Figure 5B
See Figure 5A
SEE DETAIL ‘A’
6
Align notch in
counterweight
with keyhole
in shaft.
Notes:
Insert tubes and torque to 200-220 in-lbs [23-25 Nm].
(At manifold end prior to installing pump into reservoir)
Apply Loctite 243.
Torque to 42-47 in-lbs [4.7-5.3 Nm].
Bend tube vertical while installing pump into reservoir.
1
2
3
4
Align mark on counterweight with mark on shaft. (See detail A)
5
Torque to 100-120 in-lbs [11-14 Nm].
6
Torque to 50-60 in-lbs [5.6-6.8 Nm].
7
DETAIL ‘A’ - COUNTERWEIGHT ORIENTATION
Figure 5 - Motor Stator Assembly
12
Repair Parts List for Figure 5
Item Part Number Qty. Description
1CAE1060108-1A 6 Washer-Flat, M6, 6.4 ID x 12 OD x 1.6, Din 125A, Zinc
2CBE619028-1A 9 Screw-SHCS, Hex, M6 x 1 x 16, 8.8, Zinc
4DD6763101 1 Plate, Counterweight
11 DD7319037 1 Gasket, Manifold
17 S3037 3 Gasket (See Figure 9D for seal kit)
CROSS SECTION ‘A’ (Figure 5)
ORIENT FERRULE FOR COMPRESSION
FITTING WITH SMALL OD TOWARD
TUBE END
See Figure 5D
13
1
1
Item pre-assembled
prior to shipment.
(Assembled View)
{
32
1
Note:
Torque to 200-220 in-lbs [23-25 Nm].
1
Figure 5A - Flareless Tube Kit - A Port: DD7038268SR
Repair Parts List for Figure 5A
Item Part Number Qty. Description
1CU421096 1 Ferrule, Ferulok, 0.25 Tube
2DD7038268 1 Tube, Flareless, A Port
3F100093-21 1 Nut, Ferulok, 7/16-20 THD, 0.25
Note: Flareless Tube Kit - A Port DD7038268SR includes all items listed in the table above.
1
2
3
2
6
3
Notes:
Apply Loctite 243.
Torque to 42-47 in-lbs [56.9-63.7 Nm].
Torque to 100-120 in-lbs [11-14 Nm].
2
3
6See Figure 14 for electrical wire connections.
Figure 5B - Motor Replacement Kit: DD6770259K
Repair Parts List for Figure 5B
Item Part Number Qty. Description
1DD6770259 1 Motor Stator Assembly
2DD6771257 1 Motor Rotor
3DD7003021 1 Nut, Flange M10 x 1.25, With Counterbore
Note: Motor Replacement Kit DD6770259K includes all items listed in the table above.
14
1
3 21 2
3
Note:
Torque to 200-220 in-lbs [23-25 Nm].
7
7
Figure 5C - Bulkhead Fitting Kit: DD7105093K
Repair Parts List for Figure 5C
Item Part Number Qty. Description
1DD7105093 1 Bulkhead Fitting, 3/8" NPT x 0.25 Flareless
2DD7106044 1 Retaining Ring, External, 13/16" Shaft
3DD7447037 1 Gasket, Bulkead, E-Pulse
Note: Bulkhead Fitting Kit DD7105093K includes all items listed in the table above.
15
1
1
2
5
2
2
9A
10
9B
4
3
2
Notes:
Torque to 50-60 in-lbs [5.7-6.8 Nm].
Torque to 95-105 in-lbs [11-12 Nm].
1
2
Figure 6 - Reservoir and End Cap Assembly
16
Repair Parts List for Figure 6
Item Part Number Qty. Description
1CAE1060055-1A 2 Acorn Nut M6
2CBE823028SR 8 Screw-SHCS, Hex, M8 x 1.25 x 25, 8.8, Zinc
3DDD6788025-P03 1 Reservoir, Machined, 1 Gal, Yellow
4DD6795870 2 Foot, Rubber
5DDD7164108 2 Washer, Rubber Sealing, M6
9A See Figure 8 1 Endcap Assembly, Front
9B See Figure 7 1 Endcap Assembly, Rear
10 DDD7290026 2 Decal, Enerpac Logo, Die-cut
--- DS3037 3 Gasket (See Figure 5, item 20)
D- Included in Reservoir Kit DD6788025SR.
17
4
10
11
1
3
See Figure 7A
9
1
Notes:
Torque to 25-30 in-lbs [2.8-3.4 Nm].
Torque to 16-20 in-lbs [1.81-2.26 Nm].
1
2
See Figure 8A
See Figure 1A
2
2
2
1
Figure 7 - Rear End Cap Assembly
18
1
3
4
240V 230V
115V
Notes:
2
Torque to finger tight plus an additional 1/4 turn.
2
Power cord varies depending on voltage and region.
See parts list for details.
3
2
3
3
3
See Figure 14 for electrical wiring connections.
Figure 7A - Power Cord Replacement Kit
Repair Parts List for Figure 7A
Item Part Number Qty. Description
1DC9538021 1 Locking Nut 20mm
2DD7044960SR 1 Power Cord, 115 VAC, 50/60 Hz, NEMA 5-15 (Model EP3304SB)
3DD7045960SR 1 Power Cord, 208/230 VAC, 50/60 Hz, NEMA 6-15 (Model EP3304SI)
4DD7046960SR 1 Power Cord, 208/240 VAC, 50/60 Hz, CEE 7/7 EHUK (Model EP3304SE)
Note: Item 1 included in power cord kits.
Repair Parts List for Figure 7
Item Part Number Qty. Description
1CCE1040108-7A 5 Lock Washer, External Tooth For M4
3DD6786020 1 End Cap, Rear, Machined, Black
4 DDD7017037 1 Gasket, Endcap
9DD7060960 1 Cable Assembly, Potentiometer
10 DD7328001 5 Screw, Thread Forming, M4 x 12 Long
11 DD7331217 3 Cable Tie, Screw Mount
D- Included in Reservoir Kit DD6788025SR.
19
2
4
6
9 5
8
7
See Figure 8A
12
13
14
10 1
3
5
1 4
2
Notes:
Apply Loctite 2760.
Torque to 8-10 in-lbs [0.9-1.1 Nm].
Install to full depth.
Torque to 16-20 in-lbs [1.81-2.26 Nm].
1
2
4
5
See Figure 12 for optional pressure gauge assembly.
Figure 8 - Front End Cap Assembly
20
2
3
1
Note:
Remove adhesive backing before installation.
Press item 2 into
ends of covers
4
4
Figure 8A - Water Ingress Seal Kit:
EPWISK1
Repair Parts List for Figure 8
Item Part Number Qty. Description
1B1240503 1 O-Ring, 2-1/8 ID, 0.070 W
2DC8228009 1 Dome Plug 1/2"
3DD3883028 2 Screw M4 x 10 Thread FRM, TRX
4DD6784020-1 1 End Cap, Front, Machined, Black
5DD7264808 1 Grommet, Valve, Rubber, 3/2E
6DD6997020 1 Cap, Gauge
7DD7002646 2 Hose, Rubber, 9.52 x 15.88 x 50L
8DDD7017037 1 Gasket, Endcap
9DD7021223 1 Sight Gauge
10 DD7022225 1 Insert, Sight Gage
12 DD7107305 2 Threaded Rod, M6 x 1.0 x 300 Long
13 DD7328001 1 Screw, Thread Forming, M4 x 12 Long
14 DD7331217 1 Cable Tie, Screw Mount
D- Included in Reservoir Kit DD6788025SR.
Repair Parts List for Figure 8A
Item Part Number Qty. Description
1DD7448037 1 Lip Seal, E-Pulse
2DD7462037 4 Gasket, 4.0mm Dia x 5.50mm L Cord Stock
3DD7030037 1 Gasket Tape, 3/16" THK x 1/4" W x 12.25" L
Note: Water Ingress Seal Kit EPWISK1 includes all items listed in the table above.

Other manuals for E Series

4

This manual suits for next models

6

Other Enerpac Water Pump manuals

Enerpac EP3104D User manual

Enerpac

Enerpac EP3104D User manual

Enerpac WU Series User manual

Enerpac

Enerpac WU Series User manual

Enerpac 15000-P User manual

Enerpac

Enerpac 15000-P User manual

Enerpac E-Pulse EP3204JB User manual

Enerpac

Enerpac E-Pulse EP3204JB User manual

Enerpac Spartan PMU10022 User manual

Enerpac

Enerpac Spartan PMU10022 User manual

Enerpac Ultima P-39 User manual

Enerpac

Enerpac Ultima P-39 User manual

Enerpac P-392 Operating instructions

Enerpac

Enerpac P-392 Operating instructions

Enerpac B13211710 Installation guide

Enerpac

Enerpac B13211710 Installation guide

Enerpac ZA4T User manual

Enerpac

Enerpac ZA4T User manual

Enerpac of 150 User manual

Enerpac

Enerpac of 150 User manual

Enerpac PUD-1100B User manual

Enerpac

Enerpac PUD-1100B User manual

Enerpac ZA4 User manual

Enerpac

Enerpac ZA4 User manual

Enerpac PA133U103 User manual

Enerpac

Enerpac PA133U103 User manual

Enerpac P-392FP User manual

Enerpac

Enerpac P-392FP User manual

Enerpac ZG Series User manual

Enerpac

Enerpac ZG Series User manual

Enerpac P Series User manual

Enerpac

Enerpac P Series User manual

Enerpac XC-Series User manual

Enerpac

Enerpac XC-Series User manual

Enerpac DC8143900 Use and care manual

Enerpac

Enerpac DC8143900 Use and care manual

Enerpac EQUALIZER HP350SMINEX Assembly instructions

Enerpac

Enerpac EQUALIZER HP350SMINEX Assembly instructions

Enerpac PAM-1000 Series User manual

Enerpac

Enerpac PAM-1000 Series User manual

Enerpac PTE-3404B User manual

Enerpac

Enerpac PTE-3404B User manual

Enerpac P Series User manual

Enerpac

Enerpac P Series User manual

Enerpac PME10022 User manual

Enerpac

Enerpac PME10022 User manual

Enerpac XC Series User manual

Enerpac

Enerpac XC Series User manual

Popular Water Pump manuals by other brands

Koshin PONSTAR PX Series Operation manual

Koshin

Koshin PONSTAR PX Series Operation manual

Profactor PF PU 1051 instruction manual

Profactor

Profactor PF PU 1051 instruction manual

T.I.P. Clean Jet 800 Plus + Kit operating instructions

T.I.P.

T.I.P. Clean Jet 800 Plus + Kit operating instructions

superior pump 92570 owner's manual

superior pump

superior pump 92570 owner's manual

BUSCH DOLPHIN VL 0100 A Instruction manual supplement

BUSCH

BUSCH DOLPHIN VL 0100 A Instruction manual supplement

Gardena 1500/1 1498 operating instructions

Gardena

Gardena 1500/1 1498 operating instructions

Homa CR 252 W Original instruction manual

Homa

Homa CR 252 W Original instruction manual

Xtreme Power 76045 Owner's manual and safety instructions

Xtreme Power

Xtreme Power 76045 Owner's manual and safety instructions

Quanics P-SE-13T Installation and operation manual

Quanics

Quanics P-SE-13T Installation and operation manual

JABSCO 1285O SERIES manual

JABSCO

JABSCO 1285O SERIES manual

HYCON HWP2 operating manual

HYCON

HYCON HWP2 operating manual

Fusion SCOT MOTORPUMP C56 manual

Fusion

Fusion SCOT MOTORPUMP C56 manual

Wilo BAC Installation and operating instructions

Wilo

Wilo BAC Installation and operating instructions

GÜDE GS 1103 PI Original instructions

GÜDE

GÜDE GS 1103 PI Original instructions

Kerr Pump Corporation KT-3350 Parts & service manual

Kerr Pump Corporation

Kerr Pump Corporation KT-3350 Parts & service manual

Ozito PSCW-400RB instruction manual

Ozito

Ozito PSCW-400RB instruction manual

Pentair Fleck 3150 Downflow Service manual

Pentair

Pentair Fleck 3150 Downflow Service manual

Larius NOVA 45:1 Operating and maintenance instructions

Larius

Larius NOVA 45:1 Operating and maintenance instructions

manuals.online logo
manuals.online logoBrands
  • About & Mission
  • Contact us
  • Privacy Policy
  • Terms and Conditions

Copyright 2025 Manuals.Online. All Rights Reserved.