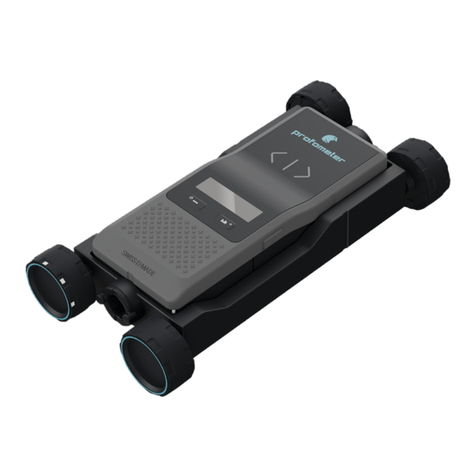
Engineering Solutions OMNIGUARD 5 User manual

Owner's Manual V1.60
OMNIGUARD™CELLULAR
Manometer / Differential Pressure Recorder
with Cellular and WiFi Communication
ENGINEERING
SOLUTIONS INC

Serial #:
Dealer:
The serial number is located inside the case, by the USB ports.
OMNIGUARD™CELLULAR
Manometer / Differential Pressure Recorder
with Cellular and WiFi Communication
1201 Monster Rd SW, Suite 240
Renton, Washington USA 98057
(206) 241-9395 • (206) 241-9411 fax
www.omniguard.com
ENGINEERING
SOLUTIONS INC
Purchase Date:
Registered To:
Name
Address
Telephone
© 1995-2018 Engineering Solutions Inc. Omniguard™ is a trademark of
Engineering Solutions Inc. Product specifi cations subject to change without
notice. First Printing 6/2018. Printed in the USA.
P/N OG-MAN.160

Page 1
Engineering Solutions Inc
P/N OG-MAN.160
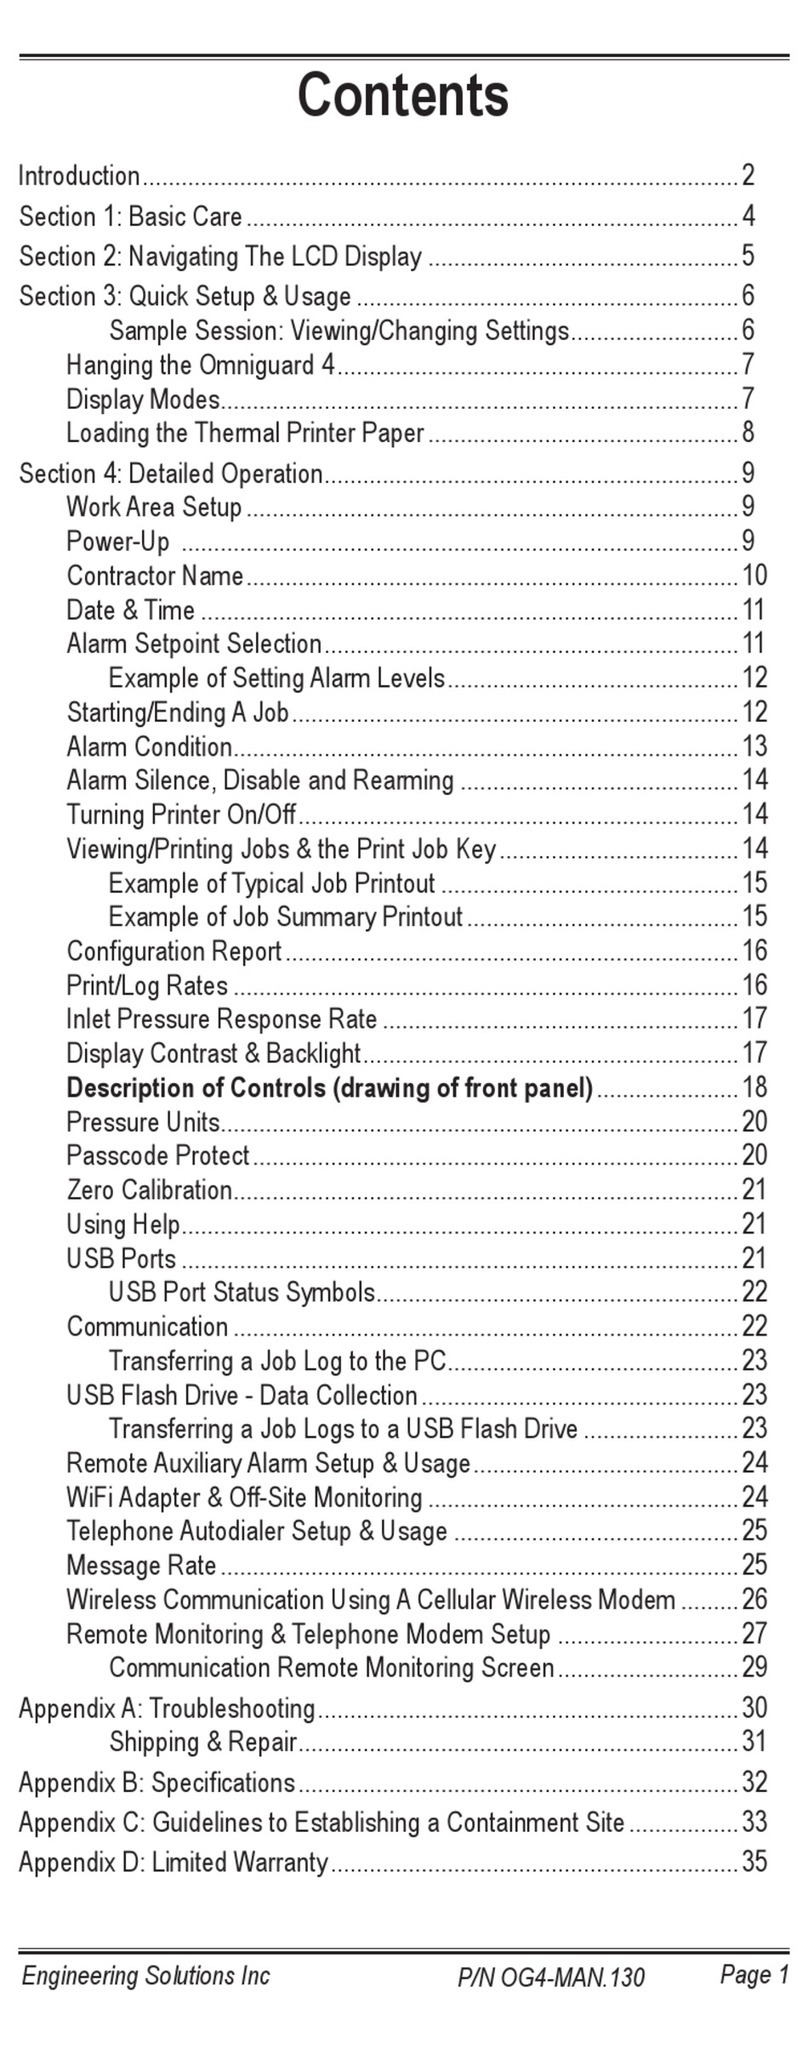
Contents
I
ntroduction ............................................................................................2
Section 1: Basic Care ............................................................................4
Section 2: Navigating the LCD Touchscreen .........................................5
Tutorial Screens .............................................................................5
Screen Icons, Front Panel Icons, USB Port Status Icons ..............6
Section 3: Quick Setup & Usage ...........................................................7
Hanging the Omniguard .................................................................8
Loading the Thermal Printer Paper ................................................8
Section 4: Detailed Operation ................................................................9
Work Area Setup ............................................................................ 9
Power-Up .......................................................................................9
Starting/Ending a Job .....................................................................11
Example of Job Summary Report .......................................11
Alarm Settings Screen ...................................................................11
Alarm 1 & Alarm 2 Settings ...................................................... 11
Alarm Settings & Operating Window ...................................12
Pressure Units .........................................................................12
Response Rate ........................................................................12
Alarm Condition..............................................................................12
Audible Alarm Mute, Disable & Re-arming .....................................13
Printer Settings & Reports Screen .................................................14
Example of Typical Job Log Printout ...................................14
General Settings Screen ................................................................15
Contractor Name .....................................................................15
Time & Date .............................................................................15
Log Rates ................................................................................16
Screen Settings ..............................................................................16
Touchscreen Calibration ..........................................................16
Zero Calibration..............................................................................17
Passcode Protection ......................................................................17
Erase Job Logs ..............................................................................18
Restore Factory Defaults ...............................................................18
Using Help......................................................................................19
USB Ports ......................................................................................19
Communication ..............................................................................19
Transferring a Job Log to a PC ................................................20
USB Flash Drive - Data Collection .................................................20
Transferring the Job Logs to a USB Flash Drive ..................... 20
Message Rate ................................................................................21
Cellular Communication Set up and Operation ..............................21
WiFi Communication Set up and Operation ...................................22
Section 5: Accessories ..........................................................................25
Remote Auxiliary Alarm ..................................................................25
Telephone Autodialer......................................................................25
Cellular Wireless Modem for non-Verizon Wireless Networks .......25
Appendix A : Troubleshooting ................................................................28
Shipping & Repair ..........................................................................29
Appendix B: Specifi cations ....................................................................30
Appendix C: Establishing a Containment Site .......................................31
Appendix D: Limited Warranty ...............................................................33
Battery Disposal Information................................................................. 34
FCC Certifi cation information.................................................................35

Page 2 Omniguard Cellular™ Owner’s Manual Page 3
Engineering Solutions Inc
pressure level.
• Extremely simple to setup and use, with on screen help.
• Log and track by Jobs. Stores multiple jobs, each with unique Job
Name and starting/ending dates.
• Remote communication of Alarms and Job Logs to off site
personell
Contractor name appears in all Job Logs.•
• Programmable high and low alarm settings.
• Large window in the case lid allows viewing pressure reading and
monitoring status with lid closed to prevent damage to unit.
• Touchscreen controls, extremely easy to use & set up.
• Internal memory stores pressure readings and alarm occurrences
with a date/time-stamp for up to 6 months, complete record of
operation available for printing and transfer to computer.
• Built-in hanging clip keeps the Omniguard away from possible
damage while allowing easy viewing of the screen.
• Totally self-contained unit, all necessary parts store securely inside
the lid.
• Temperature compensation circuitry ensure accuracy of measured
pressure readings under all job site conditions.
• Pressure readings displayed in Inches WC, Millimeters WC or
Pascals.
• USB Type A port supports multiple peripherals and accessories
including USB flash drive, cellular wireless modem, remote
auxiliary alarm and telephone autodialer.
• USB Type B port supports PC communication for transferring job
logs to a computer.
• Audible and visual alarm systems with Alarm Mute function.
• Operating temperature range 30°- 130°F.
• 85 - 240VAC, 50-60 Hz, power supply operation (10W max).
• Internal rechargeable 3.7 volts Li-ion type battery provides 4-6
hours of portable operation.
• 1 Year Limited Warranty.
Accessories
• Remote auxiliary alarm with high intensity strobe light and 95db
alarm & 25 ft. cable (requires USB Port Adapter).
• Cellular Wireless Modem for non-Verizon Wireless networks
alerts off-site personnel via e-mail or text message during alarm
conditions. It can also send daily status reports (requires USB
Port Adapter).
Introduction
The Omniguard Cellular is the latest version in the Omniguard™ series
of differential pressure recorders (manometers) first introduced over
20 years ago by Engineering Solutions Inc.
The Omniguard’s newest enhancements and features:
• Built-in Cellular Wireless Modem and WiFi Module
automatically sends Status reports & Job Logs to off-site
personnel via email and text messaging using the Verizon
Wireless network.
• Advanced pressure measurement technology with NIST
Certificate of Accuracy.
• 4.3” Color LCD with touchscreen, easy to read and even
easier to use.
• Multilingual - English, French and Spanish language
operation (French and Spanish Owner’s Manuals
available at www.omniguard.com).
• 4MB of secure log space.
• Internal rechargeable 3.7 volts Li-ion type battery provides
4-6 hours of portable operation.
• International power supply, 85-240 VAC 50-60Hz 10W
max.
Unpacking
The Omniguard is shipped complete and ready to use. When
unpacking the unit, please check for the following items:
• Roll of thermal paper (installed)
• USB Cable 6 ft A-B Male-Male
• 10 ft. inlet pressure tubing
• Owner’s Manual
• NIST Certificate of Accuracy
Save the shipping box and packing material, in the event the unit
must be shipped to another location or for service. If you are missing
any items shown on the packing list, or if you have any questions
regarding your Omniguard, please call your dealer or Engineering
Solutions at (206) 241-9395.
The Registration Card must be filled out and returned to activate the
12 month limited warranty.
Features
• Real-time differential monitoring of containment vacuum or
Omniguard Cellular™
Manometer / Differential Pressure Recorder
with Cellular and WiFi Communication

Page 4 Omniguard Cellular™ Owner’s Manual Page 5
Engineering Solutions Inc
Tutorial Screens
The Omniguard display is now a touchscreen! Touch the screen where
indicated to view and change settings, or to see Help.
Section 1: Basic Care
The Omniguard is built and engineered to provide you with dependable
performance for years to come. Following these basic guidelines will
insure that you get maximum use from your Omniguard. Once the
unit is set up, field operation is easy. Complete reports are virtually
automatic, providing the most accurate records of your job site
conditions available.
• This unit is designed to measure differential pressure only from
+0.250” to -0.250” WC (optional pressure ranges are available).
Caution: Never apply pressure to the inlet port by
mouth or with any other strong pressure device.
High pressure will permanently damage the sensor!!
• Use only Omniguard thermal printer paper (other thermal paper
will not work).
• Always store the unit away from sources of excessive temperature,
dust and moisture.
* When in use, close the lid to protect the Omniguard from damage.
Route the pressure tubing & power cord through the slot on the
side of the case.
• Never attempt to repair or modify any of the internal components
of the unit.
• Protect the unit from strong shocks or vibrations. Be sure the lid
is securely closed whenever transporting or hanging the unit.
• Be sure to plug your Omniguard into a power supply that complies
with the National Electrical Code. Keep all connections dry. As
with any electrical device, this unit has the potential to cause an
electrical shock hazard.
• If your unit must be shipped at any time to another location or for
service, use the original packing material and shipping box for
optimum protection during shipping.
Section 2: Navigating the LCD Touchscreen
Home Screen
-Indicates monitoring
status.
-Touch the icons to
access or change the
individual settings.
Main Menu
-Touch the menu item to
access system settings.
-Start or End a Job.
-View Tutorial screens &
enable/disable showing
tutorial when turned On.

Page 6 Omniguard Cellular™ Owner’s Manual Page 7
Engineering Solutions Inc
Section 3: Quick Setup & Usage
This section is a quick reference for using your Omniguard.
1. Find a safe place for the Omniguard outside the containment area.
Plug the power cord into an AC power outlet.
2. Connect one end of tubin
g to
the nozzle.
Secure the other end
of pressure tubing inside the containment area
.
3. Press the button to turn on the Omniguard.
4. A quick start tutorial will explain how to use the touchscreen. Touch
anywhere on the screen to go to tutorial screen 2. Touch the
icon to exit the tutorial and go to the Home screen.
5. To get a printed copy of the Job Log, touch the icon.
6. Touch START JOB at the bottom of the screen to begin a new
job. On the next screen, confirm Start New Job and enter a job
name, then touch the icon.
7. Check Alarm 1 & 2 settings by touching the Alarm settings
displayed on the Home screen. Adjust as needed by touching the
arrows to change the value up or down.
8. On any screen touch to get help about that screen. Touch
again to go to the general Help menu.
Once a job has been started, the status will indicate WAITING FOR
PRESSURE until containment pressure reaches the normal operating
window (a pressure reading that is between the Alarm settings). When
reached, the status will change to NORMAL and a green border will
appear indicating that the Omniguard is now in its normal operation
mode. The logging & printing pressure readings begins when the
NORMAL status is achieved.
During normal operation, the highest and lowest pressure readings
will be logged into memory and printed with a time/date stamp every
15 minutes (the default Normal Operation Log Rate).
If the monitored pressure then goes outside the operating window,
the unit will go into alarm mode. The alarm will sound, the status will
change to >>ALARM<< and a red border will appear on the screen.
The log and print rate of the pressure readings will increase to every
15 seconds (the default Alarm Condition Log rate).
To mute the alarm during an alarm condition, touch the icon once.
The icon will change to and the alarm will remain muted until the
alarm condition is over.
Power On/Off
Inlet Nozzles
Ambient (Reference)
Containment
Front Panel Icons
USB Port Status Icons
Analyzing
device.
USB Flash Drive
connected.
USB Flash Drive error -
full or write protected.
Connected to PC
USB Port Adapter
connected.
Screen Icons
Touch for item specific
Help. Touch again for
Help menu.
Touch to arm or disarm the
audible alarm - mutes during
an Alarm condition.
Touch to exit or return
to previous screen.
Touch for
Alarm settings.
Touch for Main Menu.
Touch to scroll thru menu,
Job Logs, reports or Help.
Indicates the battery
life remaining &
charging status.
Monitoring Status:
Printer On
Printer Off
Printer Off
(battery powered)
Touch for Printer settings.
Paper Jam
START JOB
WAITING FOR PRESSURE
NORMAL
APPROACHING ALARM
ALARM
Network Communication Settings Icons
Cellular Modem connected.
Cellular Modem error - not
activated or network not
detected.
Cellular Modem off.
WiFi connected
with full signal
WiFi error - can not
connect to wifi network
WiFi ON - No Wifi
log in informaiton, or
no signal in range

Page 8 Omniguard Cellular™ Owner’s Manual Page 9
Engineering Solutions Inc
Hanging the Omniguard
The Omniguard can be hung on a wall for easy viewing and to keep it
off of the floor, away from possible damage. Hanging the Omniguard
by the clip allows the cover to close, protecting the unit from water
damage while allowing the monitoring screen to be viewed through
the window on the cover. The pressure tubing and AC cord should exit
the case thru the foam slot, then the cover should be latched closed
to protect the unit from damage.
Caution: Only hang the Omniguard from a sturdy hook. A
fall could damage the unit and disrupt accurate pressure
measurements.
Loading the Thermal Printer Paper
Caution : Only use Omniguard thermal printer paper!
Thermal paper prints on one side only. If the paper roll
is installed incorrectly, the printer will be able to advance
the paper but will not be able to print on it.
1. Remove the paper lid and
thumbscrew. Cut the end of the
paper to a tapered point.
2. Place the paper roll, marked A,
into the paper lid so the paper
unrolls from the bottom.
3. Insert the tapered point of the
paper into the front panel slot
marked B, feed through the
printer until tapered point can be
pulled from the top of the front
panel at slot marked C.
Do not use the Paper Feed
function to advance the
paper.
4. From C, gently pull the paper until
the tapered portion is completely
exposed.
5. Replace the paper lid onto the
front panel and secure with the
thumbscrew.
A
B
C
C
BA
Section 4: Detailed Operation
The Omniguard monitors and records (logs) the differential pressure
between the nozzle and the nozzle (Reference).
In abatement applications, the Omniguard should be located outside
the containment area and not in any antechambers (i.e. shower or
changing room). This allows a supervisor or hygienist to monitor
pressure readings without entering the containment area.
Work Area Setup (see Appendix C for more details)
The Omniguard should be placed on a solid (non-vibrating) surface,
excessive vibrations disrupt accurate pressure measurement.
1. The intake end of the pressure tubing must be located a minimum
of 5 feet away from any openings or HEPA fan/filter units. Choose
a location away from excessive dust or moisture.
2. Cut a 1/2” slit in the polyethylene barrier and feed approximately
1 ft. of pressure tubing through it. Tape the tubing securely to the
polyethylene.
3. Connect the free end of the tubing securely over the nozzle.
Be careful not to turn the nozzle.
4. Route the tubing and AC cord through the foam notch area on
the upper right corner of the case. Close the lid to protect the
Omniguard from damage, (be careful to not pinch the tubing or
AC cord).
5. The maximum hose length is limited to 70 ft (for 3/16”ID hose).
Lengths beyond 70 ft can degrade reading accuracy.
Caution: It is important that there be no kinks or
sharp bends in any part of the tubing. Any blockage
could inhibit accurate recording of the pressure in the
containment area.
Power-Up
To use the Omniguard, plug the power cord into a standard wall outlet
providing 115-230 VAC, 50-60 Hz and press the power button.
The first time that a new Omniguard is turned on, the settings will be
at default values.
Initial Power-Up
Note: The first time the Omniguard is turned on, the
touchscreen will need to calibrated. The screen will
display a small box with an X in the middle of it. Touch
the X and continue until the calibration is completed.
Touchscreen calibration will need to be done if the
Omniguard is reset to factory default settings.

Page 10 Omniguard Cellular™ Owner’s Manual Page 11
Engineering Solutions Inc
A quick start tutorial will explain how to use the touchscreen.
Touch anywhere on the screen to go to tutorial screen 2. Touch
the icon to exit the tutorial and go to the Home Screen.
Set the Time & Date and Alarm 1 & Alarm 2 settings because
they are set at the factory defaults. The Time & Date will only
need to be set once. The Alarm 1 & Alarm 2 settings may need
to be adjusted for each Job’s requirements. For asbestos
removal, the Alarm 1 & Alarm 2 settings should be in negative
units when used to monitor a negative (vacuum) containment
area. For positive pressure applications, use positive units for
the Alarm settings.
Note: The Alarm 1 & 2 settings and the Time & Date
are displayed in yellow on the Home screen until
they have been changed from factory defaults.
Normal Power-Up Sequence
A diagnostic test will automatically run and the Omniguard will then
immediately begin to monitor containment pressure. The status will
indicate START JOB. Touch START JOB to begin actively monitoring
a new job.
Note: If the Omniguard was actively monitoring a Job when
it was turned off, it will automatically resume monitoring the
current Job. POWER OFF followed by the time-stamp will
print. Otherwise AC MODE or POWER FAIL will print,
indicating that an AC power failure occurred. Either message
will be followed by the time-stamp.
Once the Omniguard is actively monitoring a Job, the status will
indicate WAITING FOR PRESSURE until the containment pressure
has reached the operating window. The Job Name, time-stamp and
Alarm settings will be printed.
Note: Logging and printing of monitored pressure readings
does not begin until the containment pressure has reached the
operating window and the status indicates NORMAL.
Reminder: Be sure the Alarm 1 and Alarm 2 settings are
correct for your job site requirements!
Once the containment pressure reaches the operating window (the
area between the Alarm 1 and Alarm 2 settings) the status changes
from WAITING FOR PRESSURE to NORMAL and a green border
will appear around the screen. NORMAL OP is then printed along
with a time-stamp.
The screen border will change from green to yellow and the status
changes to APPROACHING ALARM to warn of an impending
Alarm condition when the pressure is within 0.005”WC of the Alarm
settings.
Starting/Ending A Job
Pressing START JOB will not erase any previous job logs, nor will it
alter any other settings (such as the Alarm settings). The log for the
previous job can be printed at any time.
Note: It is a good idea to print a report of the previous
job before starting a new job. A report for the previous
job may be printed at a later time by touching on
the Home screen, choose the report you want and touch
Print.
To start a new job --
1. If the Omniguard is not currently monitoring a job, the status will
indicate START JOB at the bottom of the Home screen. Touch
START JOB, then confirm you want to start a new job.
2. Enter the new Job Name, then touch to save it and start
monitoring. The Job Name, time-stamp and current alarm settings
will be logged and printed.
To end the current job --
1. From the Home screen, touch in the upper left-hand corner
to go to the Main menu.
2. From the Main Menu, touch End Job, then confirm you want to
end the job by touching End Job again.
Example of Job Summary Report,
after End Job is pressed --
Alarm Settings Screen
Alarm 1 & Alarm 2 Settings: The operating window is the area between
the Alarm 1 and Alarm 2 settings. These settings can be set anywhere
within the operating range of the unit; +/- 0.250” WC in increments
of 0.005”WC. The Omniguard can also operate in units of mmWC or
Pascals. (See Pressure Units.)
Job Summary Report

Page 12 Omniguard Cellular™ Owner’s Manual Page 13
Engineering Solutions Inc
armed. If the containment pressure rises or falls outside the operating
window, the following will occur:
1. Internal alarm and the Remote Auxiliary Alarm (if present) will
sound and will remain active until the alarm is muted by touching
the icon on the Home screen. The icon will change to to
indicate it is muted. Once the alarm condition is over and the
Omniguard returns to Normal operation the alarm will automatically
re-arm.
2. Any other accessory devices (Telephone Autodialer or Cellular
Wireless Modem) will also activate and will remain active until
the containment pressure is restored and the Omniguard returns
to Normal operation.
3. As the containment pressure nears the alarm settings, the
Omniguard will indicate that it is nearing an alarm condition. The
border around the screen will change from green to yellow, and
the status will change to APPROACHING ALARM.
4. As the pressure continues to move outside the operating window
(Alarm settings), the alarm will sound and a red border will appear
around the screen and the status will change to >>ALARM<<.
5. The Omniguard will log & print which Alarm, 1 or 2 was exceeded.
The Log Rate will increase to the Alarm Condition rate. Pressure
readings will be time-stamped as they are saved and printed.
When the containment pressure returns to within the normal operating
window, the Omniguard will log and print NORMAL OP with a time-
stamp. The alarm and accessories (if present) will turn off (or re-arm
if they have been muted), also a Normal Operation status message
will be sent to off-site personnel if the Cellular Wireless Modem is
present. The screen border will change back to green and the status
will indicate NORMAL.
Audible Alarm Mute, Disable & Re-arming
The speaker icon on the Home screen indicates if the internal audible
alarm (and optional Remote Auxiliary Alarm if present) is armed,
disabled or muted. The audible alarm is automatically armed when the
Omniguard is turned On. Touch the speaker icon to change between
armed and disabled, and to mute during an ALARM condition.
Audible Alarm Armed (and Remote Auxiliary Alarm)
Armed, speaker sounds during an ALARM condition.
Audible Alarm Disabled (and Remote Auxiliary Alarm)
Disabled, speaker will not sound during an ALARM condition.
Audible Alarm Muted (and Remote Auxiliary Alarm)
Muted during the ALARM condition, automatically re-arms
when containment pressure returns to operating window, status
NORMAL.
Alarm 1: Upper limit of operating window. (default is -0.025” WC)
Alarm 2: Lower limit of operating window. (default is -0.050” WC)
The Omniguard can be used in both positive and negative pressure
monitoring applications.
Negative Pressure Application -- Asbestos or lead abatement
Example settings: Alarm 1 @ -0.020” WC
Alarm 2 @ -0.050” WC
Positive Pressure Application -- Clean room or HVAC system
Example settings: Alarm 1 @ +0.050” WC
Alarm 2 @ +0.025” WC
Alarm Settings & Operating Window
This is an example of a setting for negative containment with an
operating window of -0.020” to -0.050” WC (Alarm 1 & 2 settings).
-0.050"
Alarm 2
-0.020"
0.000"
NORMAL OPERATING WINDOW
Alarm 1
INCREASING
VACUUM LEVEL
Negative Pressure
(containment)
Application
Pressure Units: (default is Inches WC)
• Choices are Inches WC (“ WC), millimeters WC (mmWC) or
Pascals (Pa).
Response Rate: (default is Medium)
• Choices are Slow, Medium, Fast.
• Determines how quickly the Omniguard will react to pressure
changes. Reduce this setting if the job site conditions are
fluctuating rapidly and can cause false alarms, such as high
wind.
To change the settings --
1. To change the Pressure Units or the Response Rate, tap the
current setting to scroll through the choices until the desired setting
is shown.
2. To change the Alarm 1 or Alarm 2 settings, touch the arrows
beneath the appropriate setting. Hold the arrow to go faster. New
values are automatically saved.
Touch to return to the Main Menu.
Once the containment pressure reaches the operating window, the
status will indicate NORMAL and logging will begin.
Alarm Condition
Once the containment pressure reaches the operating window, the
Omniguard status will indicate NORMAL and the alarms will be

Page 14 Omniguard Cellular™ Owner’s Manual Page 15
Engineering Solutions Inc
Printer Settings & Reports Screen
The Omniguard maintains a log of all recorded data, alarm messages
and changes in operational settings. The current Job or any previous
Job (or portions of those jobs) and the Omniguard’s Configuration
Report can be viewed or printed at any time.
Touch the printer icon at the Home screen to go to the Printer
Settings & Reports screen.
Note: If a printer error is detected, the printer
stops automatically and the printer Jammed
icon appears. Touch the Jammed icon to view
instructions on how to remove jammed paper.
Once the jam is cleared, you will need to go to the
printer settings screen to turn on the printer. Printer
jams are logged with a time-stamp.
Note: The icon indicates that the printer is disabled
while it is powered by the battery. Plug the AC
cord of the Omniguard into an electrical outlet to
re-enable the printer.
To view or print the current Job Log --
1. Touch the icon at the Home screen.
2. Touch the Job Name & Duration (white text) to change the report’s
duration, then touch Print or View.
3. Scroll thru the report using the arrows (if viewing).
4. Touch to return to the Home screen.
To view or print a previous Job Log or the Confi guration Report --
1. From the Printer Settings screen, touch Other Report/Log. Use
the arrows to scroll through the available reports & logs. Tap the
Name of the report to view it or print it.
2. The selected item will appear on the screen to view, use the arrows
to scroll thru the report. Touch Print at any time to print it.
Cancel printing by touching anywhere on the screen.
General Settings Screen
In the General Settings screen the following can be set:
- Contractor Name
- Time & Date
- Log Rates
To go to the General Settings screen touch the icon in the upper
left-hand corner of the Home screen, then touch General Settings.
Contractor Name: The Omniguard can store the name of the Contractor
that is using the unit. The Contractor Name is shown in all Job logs
and printed reports. Only one name can be stored.
To set the Contractor Name --
1. Go to the General Settings screen from the Home screen as
described above.
2. To the right of Contractor Name will be “Your Name” or the
previously entered contractor name in white text.
3. Touch “Your Name” and the Keyboard screen will appear.
4. Use the alpha-numeric keyboard to enter the contractor name.
5. When the entire name has been entered, touch to return to
the previous screen. The new contractor name will be shown.
Touch to return to the Main Menu.
Time & Date: The time and date are used as a reference time-stamp
for all logged events.
To change the Time & Date --
1. Go to the General Settings screen by touching the icon in
the Home screen, then touch General Settings.
2. Touch the arrows to adjust the time minute by minute. Hold the
arrow to increase the speed of adjustment.
3. To set the date, simply touch the white text indicating the month,
Example of Typical Job Log Printout
Typical startup sequence
Setting changes print for verification
Containment pressure reached
operating window... status is NORMAL
Alarm Condition (Alarm 1 tripped)
Back into NORMAL operation
New Date prints at midnight
Sign-off header

Page 16 Omniguard Cellular™ Owner’s Manual Page 17
Engineering Solutions Inc
day, or year. The value will change each time you tap. Once the
desired value is shown, the change is automatically saved.
Touch to return to the Main Menu.
Log Rates: The logging and printing of pressure readings begins once
the pressure reaches the normal operating window (status indicates
NORMAL). There are two rates at which logging occurs
Normal Operation: (default is 15 min.)
• Setting choices are 5, 15, 30 minutes of Off.
• When set to Off, Omniguard will only log & print pressure
readings during an Alarm Condition.
Alarm Condition: (default is 15 sec.)
• Setting choices are 15 sec, 30 sec, 1 min or 2 min.
To change the Log Rates --
1. Go to the General Settings screen by touching the icon in
the Home screen, then touch General Settings.
2. Touch the current Log Rate setting (white text) to change value.
3. The value will change each time you tap. Once the desired value
is shown, the change is automatically saved.
Touch to return to the Main Menu.
Screen Settings (including Touchscreen Calibration)
To adjust the Screen Brightness --
1. From the Home screen, touch to go to the Main menu.
2. From the Main menu, touch Screen Settings.
3. Touch the current Screen Brightness setting to adjust to the
desired brightness level.
To Calibrate the Touchscreen --
1. From the Home screen, touch to go to the Main menu.
2. From the Main menu, touch Screen Settings.
3. Touch Calibrate Touchscreen to begin the calibration process.
4. A white box with an X in the middle of it will appear. With the tip
of the finger or by pressing gently with a stylus, touch the X. The
get closer to touching the center of X, the better.
5. Repeat this process 3 more times, until the Omniguard shows the
calibration is completed.
Zero Calibration
The Omniguard does not require calibration between jobs. Internal
temperature compensation and other circuitry provides unsurpassed
accuracy over a 30°- 130° Fahrenheit range.
Note: A soft clicking sound is made by the
Omniguard as it is constantly compensating for
zero offset drift due to changes in barometric
(atmospheric) pressure. Annual NIST calibration
verification is recommended.
To manually reset the zero point --
1. Disconnect the pressure tubing from both inlet nozzles.
1. From the Home screen, touch to go to the Main menu.
2. From the Main menu, touch Zero Calibration.
4. Touch Calibrate Now. (If Passcode Protection is On, Omniguard
will prompt for the Passcode.)
5. When the calibration is complete the screen will read Calibrate
Zero Done.
6. Touch to return to the Main menu.
Note: Allow the Omniguard to warm up for 15
minutes prior to zero calibrating. This permits the
pressure sensor to stabilize its readings. Zero
calibration can only be done when the pressure
tubing is not attached to the unit.
Passcode Protection
The passcode protection feature allows the site manager to assign
a passcode that prevents unauthorized changes to the Omniguard’s
settings. Once enabled, the passcode must be entered to change any
setting. Settings may be viewed without the passcode.
Passcode Protection : (default is Off)
Passcode : (default is 0 0 0 0)
• A passcode is always required to Erase Job Logs and
Restore Factory Defaults.
• Master passcode is 5 5 5 5
To set and activate Passcode Protection --
1. From the Home screen, touch to go to the Main menu.
2. From the Main menu, touch Passcode Protection.
3. Touch Off to enable or On to disable Passcode Protection.
Note : Disabling Passcode Protection requires
knowing and entering the Passcode.

Page 18 Omniguard Cellular™ Owner’s Manual Page 19
Engineering Solutions Inc
To change the Passcode --
1. From the Passcode Protection screen, touch the **** to go to
the passcode entry screen.
2. Type in the current passcode followed by , to be allowed to
create a new passcode.
3. Type in the new passcode using the alpha-numeric keypad an
press when done.
4. Re-enter the passcode and press to confirm it.
Note : In case the passcode is lost or forgotten, it can be changed
using the Master passcode.
Erase Job Logs
This function will completely erase all Job Logs, the Passcode is
required to use this function.
To Erase Job Logs --
1. From the Home screen, touch to go to the Main menu.
2. From the Main menu, touch Erase Job Logs.
3. Touch Clear Log Now and enter the Passcode (required).
4. Screen shows Clearing job logs..., then Done when completed.
5. Touch to return to the Main menu.
Restore Factory Defaults
This function will completely erase all Job Logs and restore all settings
to the factory defaults (except Time & Date), including the Passcode.
The Passcode is required to use this function.
To Restore Factory Defaults --
1. From the Home screen, touch to go to the Main menu.
2. From the Main menu, touch Restore Factory Defaults.
3. Touch Factory Default and enter the Passcode (required).
4. Screen goes blank, then shows Omniguard and Initializing (the
power on screen).
5. Touchscreen calibration is required. A white box with an X in the
middle of it will appear. With the tip of the finger or by pressing
gently with a stylus, touch the X. The closer to touching the center
of X, the better.
6. Repeat this process 3 more times, until the Omniguard shows the
calibration is completed.
Note: The Alarm 1 & 2 settings are displayed in
yellow on the Home screen until they have been
changed from factory defaults.
Using Help
To obtain help for a specifi c screen --
1. If the screen has an icon in the corner, the touch the icon to
see Help about the current screen.
2. Touch to return to the previous screen.
To go to the general Help menu --
1. If the screen has an icon in the corner, the touch the icon to
see Help about the current screen. Touch the icon again to go
to the general Help menu.
3. Use the arrows to scroll thru the Help topics.
4. Touch the topic title to view detailed Help about it.
5. Touch to return to the previous screen.
USB Ports
The Omniguard has two USB ports located by the icon. A chart
showing all of the USB device icons is on page 6.
The top port supports the following devices:
• USB Flash Drive
• Remote Auxiliary Alarm (requires USB Port Adapter)
• Telephone Autodialer (requires USB Port Adapter)
• Cellular Wireless Modem (requires a USB Port Adapter)
The bottom port, is used to communicate between a PC and the
Omniguard.
Communication
The Omniguard has a built-in USB port to connect to a PC. Before a
PC can communicate with an Omniguard, download and install the
Windows® compatible Omniguard Communication software from our
web site at www.Omniguard.com. Detailed instructions for installation
and operation of the software are included with the download.
Plug the flat rectangular end of the USB cable into a PC and the
square end into the bottom USB port of the Omniguard.
Once connected, you can --
• Transfer the current Job Log or all Job Logs to the PC.
• Configure and set up multiple Omniguards, using the software to
upload configuration settings
Transferring a Job Log to a PC
The Job Logs stored in the Omniguard’s memory can be transferred
to a PC for permanent storage, statistical analysis and summary
report generation. Job Logs transferred to a PC can be reviewed and
reprinted any number of times.

Page 20 Omniguard Cellular™ Owner’s Manual Page 21
Engineering Solutions Inc
To transfer a Job Log --
1. Install the Communication program on your computer.
2. Plug the USB cable (included with your Omniguard ) into the lower
USB port on the Omniguard
3. Plug the other end of the cable into the appropriate USB port on
your PC.
4. Follow the instructions in the Communication program to transfer
the Job Log.
5. Once transferred to the PC, Job Logs can be exported in a tab
separated format so they can be imported into Microsoft Excel for
charting and analysis.
USB Flash Drive – Data Collection
The upper USB port on the Omniguard allows a Supervisor to gather
Job Logs at the job site using a USB Flash Drive. The logs can be
viewed later on a PC using the Omniguard Communication software
available free @ www.Omniguard.com.
Transferring the Job Logs to a USB Flash Drive
The Job Logs stored in the Omniguard’s memory are copied as a
single Log file to a USB Flash Drive. The Omniguard Communication
software can read the Log file and separate it back into individual Job
Logs for storage on your PC. Each time a USB Flash Drive is inserted
into an Omniguard, all Job Logs are copied to the drive.
To transfer Job Logs --
1. The Omniguard must be turned on and displaying the current
pressure (at Home screen).
2. Plug the USB Flash Drive into the upper USB port on the
Omniguard. The flash drive icon should appear and the Omniguard
will automatically begin to download all job logs. This could take
several minutes before completing.
3. When the transfer is complete the screen will show the name of the
new Log file created on the flash drive. The file name will consist
of the last 6 digits of the Omniguard serial number followed by a
letter. Each file also has the time & date it was copied onto the
flash drive.
Example: If the Omniguard 5 serial number is
G506932, the fi rst Log fi le will be 506932.OGL. The
second fi le will be 506932A.OGL, the third fi le will be
506932B.OGL, etcetera. The Log fi les are stored in
the folder OMNIGUARD in the sub-folder LOGS.
To complete the transfer to the PC, insert the USB Flash Drive into
an open USB port on the PC. Using the Omniguard Communication
software, select “Open Log...” from the “File” menu. Navigate to the
USB Flash Drive, select the “OMNIGUAR\LOGS” folder and open
the appropriate Log file.
Message Rate
The Message Rate setting is the minimum amount of time the
Telephone Autodialer or Cellular Wireless Modem must wait between
multiple alarms before dialing or sending an new alert message in
response to a new alarm condition. This setting is to prevent multiple
alert messages from being when the job site is experiencing rapid
alarm occurrences due to windy (or other) conditions.
The setting can only be viewed and changed when a USB Port Adapter
is connected to an Omniguard.
Message Rate: (default is 10 min.)
• Choices are 5 min, 10 min or 15 min.
To change the Message Rate --
1. Plug the Autodialer into the USB Port Adapter, then connect the
USB Port Adapter to the Omniguard with the USB cable provided.
The screen should display the USB Port Adapter icon on the
Home Screen.
2. Press to go to the Message Rate screen.
3. Touch the current rate (white text) to toggle through the Message
Rate choices.
4. Touch to save the setting return to the Home screen.
Cellular Communication Set Up and Operation
The Omniguard Cellular has a built-in Cellular Wireless Modem that
will automatically send status report updates (including Power, Alarm,
Normal Operation and Job Logs) to off-site personnel via cell phone
text messaging and email. 24 Hour Job Logs are sent on a daily
basis, eliminating the need to visit the job site to manually download
logs. Job Logs are received via email as an attachment and can be
viewed with any text editor.
2 years of cellular connectivity on the Verizon network is included
with the purchase of a new Omniguard Cellular. After the initial 2
year subscription period, there is an annual subscription available to
continue the service.
To activate your cellular communication service, or renew your
annual service, log in to www.engsolinc.com and fill out and submit
the Cellular Activation Form, or call 206-241-9395 and contact the
sales department. Please allow 24-48 hours for activation or renewal
to take effect.
After the Omniguard Cellular is activated with Verizon, the cell modem
will automatically connect to the Verizon network when the Omniguard
is turned on. If the Omniguard has never connected with the network,
a prompt will be displayed during the initial start up. At the prompt,

Page 22 Omniguard Cellular™ Owner’s Manual Page 23
Engineering Solutions Inc
4) Press Option to choose which type of Status Updates
will be emailed. Touch the box to select. Status
Update emails have the Status Message + Job Name
+ Omniguard Serial Number in the email Subject. This
allows receiving personnel to easily automatically sort
incoming emails into appropriate inboxes.
a. Power Status
b. Waiting for pressure (every 60 min)
c. Alarms and Alarm Updates (every 15 min)
d. Normal Operation Updates (every 60 min)
5) Touch to choose when the 24 Hour Job Log will be
sent.
6) Touch to return to the Cellular Communication screen.
Touch again to return to Home Screen.
press Connect to connect your Omniguard’s cell modem to the
network, or you can press to skip connecting to the cellular
network.
To set up Cellular Communication
1) From the Home Screen, touch to go to the Network
Communication screen.
2) The network status is in the top left corner of the screen.
Touch Off to toggle through the Network options untill you
reach Cellular.
3) On the top right corner of the screen, Initializing... is
displayed while attempting to connect to the Verizon
cellular network. When connected the Signal strength
percentage will display.
5) Touch to return to the Cellular Communication screen.
Touch again to return to Home Screen.
WiFi Communication Set Up and Operation
The Omniguard Cellular has a built in Wifi Module that will that will
automatically send status report updates (including Power, Alarm,
Normal Operation and Job Logs) to off-site personnel via cell phone
text messaging and email. 24 Hour Job Logs are sent on a daily
basis, eliminating the need to visit the job site to manually download
logs. Job Logs are received via email as an attachment and can be
viewed with any text editor.
To set up WiFi Communication
1) From the Home Screen, touch to g o to t h e Network
Communication screen.
2) The network status is in the top left corner of the screen. Touch
Off to toggle through the Network options untill you reach WiFi
or WiFi+
3) To enter the Wifi Network information, press the WiFi button in the
lower left hand corner. You will need to enter the Network Name
and Password to connect to the local Wifi network.
4) On the top right corner of the screen, Initializing... is
displayed while attempting to connect to the WiFi network.
When connected the Signal strength percentage will
display.
5) Touch to return to the Cellular Communication screen.
Touch again to return to Home Screen.
Entering Contact information for Remote Communication Recipients
To send text messages to Cell Phones, use the 10
digit wireless number without dashes combined
with the domain for the phones’s network to create
an email address as shown below.
Domains for major wireless network providers are listed
below. Domains for networks not shown can be found online.
Alltel Wireless @sms.alltelwireless.com
AT&T Wireless @txt.att.net
Boost Mobile @myboostmobile.com
Consumer Cellular @txt.att.net
Cricket @sms.mycricket.com
Metro PCS @mymetropcs.com
Sprint (PCS) @messaging.sprintpcs.com
@pm.sprintpcs.com
Sprint (Nextel) @page.nextel.com
Straight Talk @vtext.com
T-Mobile @tmomail.net
US Cellular @email.uscc.net
Verizon @vtext.com
Verizon @vtext.com
Virgin Mobile @vmobl.com
1) From the Network Communication Screen, enter an
E-mail Address (or Cell Phone Number texting address)
plus an optional Name for up to 4 personnel to be
remotely notified.
2) Check the boxes to the left of the Email Address for each
email address to receive Status Updates or Job Logs or
both.
3) Press Test to send emails, confirm emails were received
by all personnel listed. Test emails have the Subject:
‘Testing

Page 24 Omniguard Cellular™ Owner’s Manual Page 25
Engineering Solutions Inc
Section 5: Accessories
Remote Auxiliary Alarm
The Remote Auxiliary Alarm is a combination high-intensity strobe
light and 95db audible alarm on a 25 foot cable that connects to the
Omniguard USB connector using the optional USB Port Adapter. The
Remote Auxiliary Alarm plugs into the Aux Alarm port on the USB
Port Adapter which in turn is connected to the USB port using the
USB cable (included with the Omniguard).
In an alarm condition, the Remote Auxiliary Alarm will activate. It may
be muted by touching the icon. The Remote Auxiliary Alarm will
only re-arm once the unit has returned to normal operation.
Telephone Autodialer
The Telephone Autodialer is supplied with a 25 foot cable that connects
to the Omniguard USB port using the optional USB Port Adapter. The
Telephone Autodialer plugs into the Autodialer port on the USB Port
Adapter which in turn is connected to the USB port using the USB
cable (included with the Omniguard). The Autodialer also requires a
working land line telephone connection box with an RJ11 jack.
In an alarm condition, the Autodialer will call the pre-programmed
phone numbers (up to 4) and play a pre-recorded message alerting
the off-site personnel of an alarm condition at the job site.
The Autodialer only activates once in a given time period (5, 10 or 15
minutes – the Message Rate setting). This prevents the Autodialer
from calling more than once if there are multiple alarms occurring
within a short period of time. After the 5, 10 or 15 minute period has
elapsed, the Autodialer will dial out again if the unit is still in an alarm
condition or when the next alarm condition occurs.
Cellular Wireless Modem for non-Verizon Wireless
NetworksBy using the optional Cellular Wireless Modem and USB
Port Adapter, the Omniguard Cellular can access cellular wireless
networks other than Verizon to automatically send alarm and job
reports to cell phones and email accounts. In addition, the Omniguard
can respond to requests for information from wireless cell phones
and via e-mail.
Wireless communication requires a specially configured MultiTech
MultiModem cellular wireless modem. This modem is similar to a
cell phone. It has a phone number and requires an active cell phone
account with SMS texting support, using either a traditional plan with
monthly payments or a prepaid plan. Contact Engineering Solutions
for more information on acquiring a cellular wireless modem.
JOB: Job A
20:38 0.000 0.000
Omniguard: # C501234
Normal
Job A
BATTERY POWERED
BATTERY 97%
Omniguard: #
C501234
JOB: Job A
AC POWERED
BATTERY 10%
Omniguard: #
C501234
Power Change
Waiting for Pressure
JOB: Job A
STATUS: Waiting Pressure
PRESSURE: 0.079" WC
Omniguard # C501234
** ALARM **
JOB: Job A
ALARM 1: 0.040" WC 15:19:11
0.045" WC Omniguard: # C501234
Alarm
You will be receiving Logs Messages
for job “Job A.”
Omniguard # C501234
Status Messages:
Job Log Test
Test Messages:
Status Message Test
You will be receiving Status
Messages from this Omniguard.
Omniguard # C501234
E-mail Message Examples

Page 26 Omniguard Cellular™ Owner’s Manual Page 27
Engineering Solutions Inc
To confi gure and test the Cellular Wireless Modem setup --
1. Connect the modem’s serial cable to the SERIAL port on the USB
Port Adapter and to the modem.
2. Connect the USB Port Adapter to the Omniguard USB port using
the USB cable (included with the Omniguard ).
3. Plug in the modem power adapter to turn the modem on. The
Wireless Modem icon should appear on the screen of the
Omniguard (it may take 2 minutes to connect).
4. Touch to access the Wireless Modem set up menu.
5. Use the keyboard to enter in the Master Cell Phone Numbers.
6. If a Notify List has been uploaded to the Omniguard by the
Omniguard Communication Software, choose which Notify List
to use by touching the List Name to toggle though the available
Lists (if a Notify List has not been uploaded, the Text/Email list
will say “None”).
7. Set the Text/Email Notification Rate by touching the current
rate.
The Default is set to 10 minutes. (The choices are 5, 10,
and15 minute intervals).
8. After the setting have been entered, touch Test Modem to ensure
the Wireless Cellular Modem is communicating properly with the
Master cell phone numbers and personnel on the Notify List. After
confirmation of receiving the Test text message, touch anywhere
on the screen to exit to the Home Screen.
Master Cell Phone Numbers –
Two cell phone numbers can be programmed directly into the
Omniguard. A text message will be sent to each phone number when
the Omniguard enters Normal operation and when an Alarm condition
occurs. The Message Rate setting determines the minimum time
between Alarm notification messages, this is to prevent frequent
messages if the unit is going in and out of the Alarm condition.
Phone numbers programmed directly into the Omniguard will also
receive a Daily Summary report, indicating how long the Omniguard
was in Normal operation, the number of alarms and the total time the
unit was in the Alarm condition. The Daily Summary is sent at 5:30pm
each day unless a Notify List has been selected (see below).
Notify Lists –
In addition to the two Master Cell Phone Numbers, the Omniguard can
also send alerts to personnel contained in a Notify List. The Omniguard
can store up to four Notify Lists, only one can be active at a time.
A Notify List contains a list of wireless phone numbers and e-mail
addresses for a specific group of off-site personnel. Each Notify List
allows different phone numbers and/or e-mail addresses for Alarm
and Normal Operation notification and for Reports. The Lists also
allow the report notification time to be changed.
Notify Lists can only be created and programmed into
the Omniguard using the Omniguard Communications
PC software. See the Help that comes with the
software for more information on setting up Notify
Lists.
Request Job Site Status via Cell Phone or E-mail –
It is possible to request status information from an Omniguard
connected to a cellular wireless modem. A text message or e-mail is
sent to the Omniguard which replies with the report type requested.
The available reports include a Daily Summary, overall Job Summary,
Current Status and Settings.
To get a complete list of reports the Omniguard can provide send a text
message or e-mail with a “0” (zero) in the body of the message.
Text messages sent to the Omniguard must be in
the “short message” (SMS) format and are sent to
the phone number of the wireless modem. E-mail
messages sent to the Omniguard must be in plain
text format and should be sent to the e-mail address
provided by the wireless service provider. The
message format is shown below, where “nnnnnnnnnn”
is the 10-digit phone number of the cellular modem,
with area code first (no hypens or spaces).

Page 28 Omniguard Cellular™ Owner’s Manual Page 29
Engineering Solutions Inc
Problem: OMNIGUARD status does not indicate NORMAL
operation when turned on, and does not print.
Solution: For normal operation, the monitored pressure must be
between the Alarm 1 and Alarm 2 settings. When the Omniguard is
first turned on, the containment pressure will not likely be between
the Alarm 1 & 2 settings, and the Omniguard will not log or print the
pressure readings. The Omniguard will begin logging and printing
the pressure readings only after the containment pressure has
reached the Normal operating window.
Shipping & Repair
Please call the Engineering Solutions technical support department
for a return authorization. A Return Material Authorization number
(RMA #) will be assigned to aid in tracking your unit.
You may also e-mail [email protected].
Send the entire unit, enclosing a brief explanation of the problem
along with your company name, address, phone number and
name of the individual responsible for the unit. The RMA# must
be clearly marked on the outside of the box. No COD’s will
be accepted. If the original packing materials are not available,
package the unit securely in a sturdy container with enough
padding to surround the unit on all sides. The unit should not be
able to be shift after packing. Engineering Solutions will not be
responsible for any damage which may occur.
Ship To: Engineering Solutions, Inc.
1201 Monster Rd SW, Suite 240
Renton WA, 98057 USA
(206) 241-9395
Appendix A : Troubleshooting
If you experience problems with your Omniguard, use this section
to try to resolve the problem. For additional information consult with
your dealer or call Engineering Solutions at (206) 241-9395 (8:00
a.m.-12:00 noon, 12:30-4:30 p.m. Pacific Time) and ask for Technical
Support, or e-mail [email protected].
Problem: The unit does not display the proper pressure.
Solution: Check to see that the tubing is connected properly to the
top nozzle. The bottom nozzle should not be connected.
Solution: Make sure that the tubing does not have a kink or a sharp
bend.
Solution: Make sure that you are using the correct 3/16” ID tubing
size, and the end of the tubing on the inlet nozzle is not worn. If
it is worn or loose, cut off 1” of the tube using a sharp knife and
reinsert on the inlet nozzle.
Solution: Make sure that the tubing connection into the containment
area is properly placed and secured as described in Section 4:
Work Area Setup.
Problem: Excessive momentary alarms.
Solution: Adjust Alarm 1 &2 settings to allow for normal air pressure
fluctuations caused by entries into work area or other equipment.
Make sure that you are within the minimum negative air pressure
requirements.
Remedy: If you suspect that wind may be causing rapid pressure
fluctuations, reduce the setting for Response Rate (see Section
4: Detailed Operation).
Problem: Printer is not working properly or a paper jam occurs.
Solution: The icon indicates printer is disabled. Turn On the printer
by touching the icon and then touching Off.
Solution: The icon indicates printer is disabled because Omniguard
is unplugged and powered by battery. Plug the Omniguard power
cord into an AC outlet, printer will activate automatically.
Solution: Icon indicates paper jam. After the paper jam is removed,
turn On the printer by touching the icon and then touching
Off.
Caution: Do not apply oil or grease to the printer, as this will attract
dirt and debris and could damage the printer mechanism.
Solution: Thermal paper allows printing on only one side. If incorrectly
installed, the printer will be able to advance paper but cannot
print on it. Make sure that paper is loaded properly as described
in Section 3: Loading the Thermal Printer Paper.

Page 30 Omniguard Cellular™ Owner’s Manual Page 31
Engineering Solutions Inc
Appendix C: Establishing a Containment Site
The Omniguard monitors and records the differential pressure
between the top inlet nozzle and the bottom inlet nozzle
(Reference).
In abatement applications the Omniguard should be located outside
the containment area and not in any antechambers (i.e. shower or
changing room). This allows a supervisor or hygienist to monitor
pressure readings without entering the containment area.
This section of general guidelines to establishing a containment
site is provided by Engineering Solutions Inc for informational
purposes only. Engineering Solutions Inc is not responsible for
its accuracy nor conformance with specific regulations for your
area. Engineering Solutions Inc specifically advises all users
to obtain the advice of qualified professionals for each use and
application of the Omniguard. Engineering Solutions Inc makes
no claims as to the proper usage or interpretation of the data
provided by the Omniguard.
General Guidelines to Establishing a Containment Site
1. The contractor and hygienist are to be certified prior to qualifying
to bid on an abatement job.
2. All workers are to have undergone specific training in abatement
procedures.
3. Typical abatement requirements:
a. Containment area to be sealed within a double layer of
8 mil plastic or equivalent.
b. Before beginning work within the containment area and at
the beginning of each shift, the containment area must be
inspected for breaches and smoke-tested for leaks, and
any leaks sealed.
c. Air volume within containment must be changed 4 times
per hour, i.e. the entire air volume must be evacuated
every 15 minutes.
d. Minimum pressure in containment is -0.020”WC, i.e. the
differential pressure between containment pressure and
ambient/outside pressure must be at least -0.020”WC as
measured by a manometer.
e. The containment area must be kept under negative pressure
throughout the period of its use.
f. Air movement must be directed away from employees within
containment and toward a HEPA filtration unit.
g. Fiber levels within the containment area must be sampled
at a specific interval and be less than a proscribed level,
i.e. sampled 1 time a day or more and fiber levels below
“5 fibers/100 fields”.
Appendix B: Specifi cations
Differential Pressure Range: +/-0.250”WC (+/-6.35 mmWC,+/-62.5
Pascals)
Accuracy: +/-0.003” WC or +/-1 % of reading, whichever is greater
Resolution: +/-0.001” WC, (+/-0.05mm WC, 0.5 Pascals)
Burst Pressure: 3 psi (20 kPa) on either inlet nozzle
Pressure Units: “ WC (inches Water Column), mmWC (millimeters
Water Column), or Pa (Pascals)
Date (Log) Storage: 4 MB non-volatile memory
Display: 4.3” Color Touchscreen LCD (480 x 272 pixels)
Internal Clock: The internal clock is powered by a self-charging
lithium-ion battery that provides clock operation when AC power
is not present
Printer: 20 character wide thermal printer (uses 2.2” wide thermal
printer paper)
Pressure Reading Log Rates (Log Rate):
Normal Operation -- Highest and lowest pressure readings are
logged & printed at intervals of 5, 15, 30 minutes or OFF
Alarm Condition -- Highest and lowest pressure readings are
logged & printed at intervals of 15, 30, 60 or 120 seconds for first
10 minutes of alarm condition, increasing to 15 minute intervals
thereafter
Alarms: Two programmable alarm settings, 95db audible alarm and
red bordered on-screen warning indicate alarm condition
Pressure Inlet Nozzles: Two 3/16” OD barbed hose connectors, 10
ft of pressure hose provided
USB Port: USB V1.1 Type-A
USB Port: USB V1.1 Type-B
AC Power: 85-240 VAC 50-60Hz 10W (with 6 ft power cord)
Battery Power: Internal rechargeable 3.7 Volt Li-ion type battery
internal provides 4-6 hours of portable operation, recharges
in 4 hours when AC power is available (printer is disabled
when powered by battery)
Case: Dimensions 9.25” x 7.5” x 4.5”, Shipping Weight 8 lbs., case &
handle is copolymer polypropylene with polycarbonate window in
the lid, and stainless steel hanging hook
Warranty: One Year Limited Warranty

Page 32 Omniguard Cellular™ Owner’s Manual Page 33
Engineering Solutions Inc
Appendix D: Limited Warranty
Engineering Solutions warrants that all products, component parts
and accessories will, for a period of twelve (12) months from date of
purchase, be free from defects in material and workmanship under
normal use and service.
PURCHASER’S SOLE AND EXCLUSIVE REMEDY UNDER THIS
WARRANTY IS LIMITED TO THE REPAIR OR REPLACEMENT OF
DEFECTIVE PARTS F.O.B., ENGINEERING SOLUTIONS, INC., 1201
MONSTER RD SW, SUITE 240, RENTON, WA 98057 USA.
To keep this warranty valid, the purchaser must (a) have promptly
informed Engineering Solutions’ customer service department of any
defects in writing, (b) properly used, maintained and repaired the
Product, and (c) have proof of purchase.
This warranty does not cover normal wear and tear or defects due to
(a) improper or negligent handling or unauthorized modifications, (b)
defective or improper premises, chemical, electrochemical or electrical
influences, (c) weather or other influences of nature.
LIMITATIONS OF WARRANTY - THIS WARRANTY IS EXPRESSLY IN
LIEU OF ANY AND ALL OTHER WARRANTIES AND OBLIGATIONS
OF ENGINEERING SOLUTIONS OR ITS SUPPLIERS, EXPRESS
OR IMPLIED. ENGINEERING SOLUTIONS INC EXPRESSLY
DISCLAIMS ANY WARRANTY OF MERCHANTABILITY OR
FITNESS FOR ANY PARTICULAR PURPOSE.
LIMITATION OF REMEDY- Under no circumstances shall Engineering
Solutions or any of its suppliers be liable for any loss or damage,
including, but not limited to, loss or damage arising out of failure of
the Product to operate for any period of time, inconvenience, use of
rental or replacement equipment, loss of profit or other economic
loss, or general, direct, special, indirect, incidental or consequential
damages or property damages.
PRODUCT SUITABILITY - Many states and localities have codes
and regulations governing sales, construction, installation, and/or
use of products for certain purposes, which may vary from those in
neighboring areas. While Engineering Solutions attempts to assure
that its Products comply with such codes, it cannot guarantee
compliance, and cannot be responsible for how the Products are
installed or used. Engineering Solutions recommends that, before
purchasing and using a Product, purchasers review the Product
application, and federal, state and local regulations, to be sure that
the Product, installation, and use will comply with them.
4. Calculating site airflow requirements:
A typical heavy duty HEPA fan/filter unit has a 1000 CFM (cubic
feet per minute) capacity with a new filter. Units are typically
derated by 25%, so a 1000 CFM unit is derated to 750 CFM by
the hygienists when calculating actual site airflow requirements.
Example #1: A room measuring 20 x 20 ft with a 10 ft ceiling
encloses 4000 CF of air. To meet the 4X per hour change
rate the fan/filter unit must be capable of pulling 267 CFM
of air (4000 x 4/60) from the containment area and maintain
a minimum negative pressure of -0.020”WC.
Example #2: Room size is 20 x 50 with 12 ft ceiling. Requires
(20 x 50 x 12) CF x 4 / 60 = 800 CFM or 2 units (of a 1000
CFM fan/filter unit... remember the fan/filter unit is derated
to 750 CFM).
Example #3: Room size is 100 x 100 with 16 ft ceiling.
Requires (100 x 100 x 16) CF x 4 / 60 = 10667 CFM or
15 fan/filter units (of a 1000 CFM unit).
5. The containment area pressure should be monitored at various
points to confirm adherence to abatement requirements.
Remember that air is a medium, and air pressure is not identical
throughout the containment area. The pressures at specific
locations within the containment area vary due to distance, room
temperature, proximity to openings, room geometry, etc. Typically
one manometer is used for every two “rooms” that have a doorway
and attached hallway, up to 1000 square ft.
5. Using a manometer that provides highly accurate pressure
readings, time stamped logging of all readings, and audible alarm
and printouts of all logged readings protects workers and the
public from accidental exposure to airborne hazards and provides
proof of containment to protect employers from environmental
contamination lawsuits
NOTE: It is important that there be no kinks or sharp
bends in any part of the tubing. Any blockage could
inhibit accurate recording of the pressure in the
containment area.

Page 34 Omniguard Cellular™ Owner’s Manual Page 35
Engineering Solutions Inc
FCC Certifi cation Information
Note: This equipment has been tested and found to comply
with the limits for a Class A digital device, pursuant to part
15 of the FCC Rules. These limits are designed to provide
reasonable protection against harmful interference when the
equipment is operated in a commercial environment. This
equipment generates, uses, and can radiate radio frequency
energy and, if not installed and used in accordance with the
instruction manual, may cause harmful interference to radio
communications. Operation of this equipment in a residential
area is likely to cause harmful interference in which case the
user will be required to correct the interference at his own
expense.
Contains FCC ID:RI7ME910C1NV and FCC ID:2AHMR-
ESP12F.”
Batteries containing heavy metals may contaminate the environment
if improperly discarded. When incinerated, certain chemicals are
released into the air or concentrated in the ash residue from the
combustion process; this may lead to a health risk to humans,
animals and the environment in general.
Batteries marked with the symbol of a ‘crossed-out wheeled bin’ are
strictly prohibited from being discarded with household waste.
Batteries must be disposed of by separate collection and recycling
means.
End users are obligated by law to comply with the discarding procedure
for waste batteries.
Battery Disposal Information
The battery included with this product contains
heavy metals that may contaminate the environment
if improperly discarded. Please follow the battery
recycling guidelines as directed by the E.P.A.
(http://www.epa.gov/osw/conserve/materials/battery.htm)
To fi nd your local recycling location please visit:
http://www.call2recycle.org/
This product contains a
Lithium-ion Battery
-Please Recycle-
EU Battery Disposal
Table of contents
Other Engineering Solutions Measuring Instrument manuals
