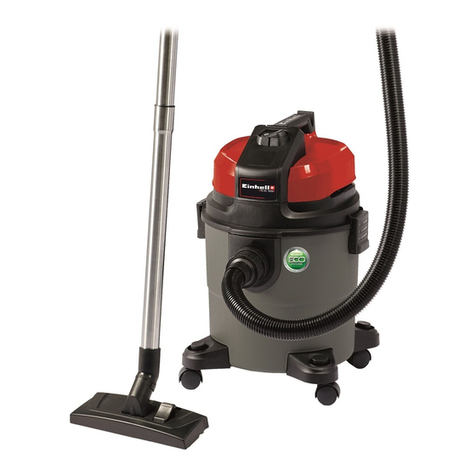
Enke BERT User guide

Original Instruction Manual
Manuale d’uso
BERT
Wet Vacuum Cleaner
Aspirapolvere solo polvere
English pag.2
Italiano pag.6

DEAR CUSTOMER
Congratulations on the purchase of your new ash vacuum
cleaner.
Prior to using the appliance for the first
time, be sure to read this document
through and keep it ready to read
instructions of use.
PURPOSE AND INTENDED USE
This vacuum cleaner is designed, developed and
rigorously tested to function efficiently and safely!
when properly maintained and used in accordance with
the following instructions.
The ash vacuum cleaner is intended for indoor household
use only and not for commercial purposes.
The device is suitable for picking up:
– cold ashes from fireplaces, chimneys, ovens, ashtrays
and similar places where ashes accumulate.
– Coarse dirt of all types, such as sand or rubble.
CAUTION: READ AND FOLLOW ALL SAFETY
INSTRUCTIONS.
1. IMPORTANT SAFETY INSTRUCTIONS
•Warning and information plates on the machine
provide important directions for safe operation.
•Apart from the notes contained herein the general
safety provisions and rules for the prevention of
accidents of the legislator must be observed.
1.1 HAZARDS LEVELS:
DANGER
Pointer to immediate danger, which leads to severe
injuries or death.
WARNING
Pointer to a possibly dangerous situation, which can
lead to severe injuries or death.
CAUTION
Pointer to a possibly dangerous situation, which can
lead to minor injuries.
ATTENTION
Pointer to a possibly dangerous situation, which can lead
to property damage.
1.1 ELECTRICAL COMPONENTS
DANGER
Risk of electric shock.
•Turn off the appliance and remove the mains plug
prior to any care and maintenance works.
•Repair work and work on the electrical components
may only be performed by an authorised customer
service.
•Never touch the mains plug and the socket with
wet hands.
•Check the power cord with mains plug for damage
prior to every use. Immediately have damaged
power cord replaced by an authorized customer
service / electrician.
•Do not operate an appliance if the power cord is
damaged.
•Do not use scouring agents, glass or multi-purpose
cleaners!
•Do not immerse the appliance into water!
•Do not carry / transport the appliance on the
mains cable.
•Do not scrape the power cord across sharp edges
and ensurethat it does not get pressed.
•Do not remove the mains plug from the socket by
pulling on the power cord.
WARNING
•The appliance may only be connected to an
electric supply that has been installed by an
electrician in accordance with IEC 60364.
•If the supply cord is damanged, it must be
replaced by the manufacturer, its service agent
or similarly qualified persons in order to avoid a
hazard
•The appliance may only be connected to
alternating current. The mains voltage must
correspond with the voltage indicated on the type
plate.
•For safety reasons, it is recommended that you
operate the appliance only via a residual current
device (max. 30 mA).
•Completely pull the power cord out of the
appliance or completely uncoil it upon operation.
•In case of visible smoke development: Pull out the
mains plug and bring the device into the open.
1.2 SAFE HANDLING
DANGER
•Keep packaging films away from children, there is
a risk of suffocation!
WARNING
•This device must not be used by children or
persons with restricted physical, sensory or mental
abilities or those lacking in experience and/or
lacking in knowledge.
•Children must not play with this appliance.
•Supervise children to prevent them from playing
with the appliance.
•Cleaning and user maintenance shall not be made
by children without supervision.
•This appliance can be used by children aged from 8
years and above and persons with reduced
physical, sensory or mental capabilities or lack of
experience and knowledge, if they have been given
supervision or instruction concerning use of the
appliance in a safe way and under the hazards
involved.
CAUTION
•In case of extended breaks, switch the appliance
off at the main switch / appliance switch or pull
the mains plug.
•Never leave the appliance unattended as long as it
is in operation.
•Switch off the appliance after every use and prior
to every cleaning / maintenance and pull the mains
plug.
•ATTENTION
•Never vacuum without inserting a flat fold filter
and the optional associated frame, otherwise the
device can be damaged.
•Protect the appliance from extreme weather
conditions, moisture and heat.
•1.3 OTHER RISK
DANGER
•Risk of explosion!
•Certain materials may produce explosive vapors or
mixtures when agitated by the suction air!
pag. 2

•Never vacuum up the following materials:
•Explosive or combustible gases, liquids and dust
particles (reactive dust particles)
•Reactive metal dust particles (such as aluminium,
magnesium, zinc) in combination with highly
alkaline or acidic detergents
•Hot, burning or smoldering objects with
temperatures greater than 40°C. Temperatures
above 40°C represent a fire hazard.
•Not suitable to separate health-hazardous dust
(dust classes L, M, H).
•The appliance may not be operated in explosive
atmospheres. In addition, these substances may
cause the appliance materials to corrode.
WARNING
•Risk of fire!
•Do not pick up hot, glowing or burning ash. Pick up
only cold ash.
•The dust container must be emptied and cleaned
before and after each use.
•Do not use dust collection bags made of paper or
bags made of similarly combustible materials.
•Do not use customary vacuum cleaners to vacuum
ashes.
•Do not store the ash vacuum on combustible or
polymeric surfaces such as carpet or vinyl tiles.
•Only ashes from permissible fuels (e.g. natural
wood, wooden briquets, wood pellets,
•lignite and hard coal) must be vacuumed.
•Do not vacuum up soot.
•Vacuuming material which appears to have cooled
down from the outside may still be very hot inside.
Hot ash particles may ignite again in the air flow.
•Stir up the ashes with a metal object to check
whether the ashes are still hot.
•Please make sure that the oven is cold before you
vacuum clean ovens.
•Wait until the ashes have cooled down before you
begin with the cleaning. We do not recommend
extinguishing the fire rapidly with water. The
chimney material will not withstand the quick
temperature changes and may crack.
•Continuously check hoses and vacuum cleaner for
heat while vacuuming ashes. If you notice a
temperature rise, switch off the vacuum cleaner
immediately. Pull out the mains plug. Remove the
vacuuming material from the ash and dry vacuum
cleaner. Allow device to cool down outsideunder
supervision.
WARNING
•Risk of injury!
•Do not vacuum in the vicinity of the head when
using the nozzle and suction pipe.
CAUTION
•In order to prevent accidents or injuries, mind
the weight of the appliance during transport (see
technical data).
1.4 STABILITY
CAUTION
•Create stability for the appliance prior to any
work on or with the appliance to prevent
accidents or damage.
1.5 SAFETY DEVICES
CAUTION
•Safety installations serve the protection of the
user and may not be modified or bypassed.
2. OVERVIEW
Fig. 1
1.Handle
2. On/off button
3. Nozzle holders
4. Inlet
5. Tank
6. Power cord
7. Head fig.2
8. Buckle
9. Wheel chassis (optional)
10. Metal filter Screen (optional)
11. Protection foot
12. Filter
13. Aluminum nozzle
14. Hose
15. Brush nozzle (optional)
16. Crevice nozzle (optional)
17. Disposal bag (optional)
Some of these accessories are packed inside the tank
3. FIRST TIME SET UP INSTRUCTIONS
Read chapter 1 – IMPORTANT SAFETY INSTRUCTIONS of
this manual thoroughly before setting up and using this
vacuum cleaner.
3.1 ACCESSORIES
The nozzles and accessories for the machine are during
shipping stored in tank. To open the tank disengage the
buckles (A) and take off the head (B). Take out the items
(C) and put on the head again. Secure the head with the
buckles
Fig.
3
Model name
BERT
Voltage
220-240V
Frequency
50Hz/60Hz
Power IEC
600W
Protection Class
II
Vibration
< 2.5 m/s2
Tank si z e
15L
pag. 3

4. USING THE VACUUM CLEANER
Read chapter 1 – IMPORTANT SAFETY INSTRUCTIONS of
this manual thoroughly before setting up and using this
vacuum cleaner.
4.1 WORKING WITH DISPOSAL BAGS
To empty the tank for debris/dust in a dustless way a
disposal bags can beneficially be used. Any plastic bag
that fits can be used.
Add the bag into the tank (A). Fix the bag over the edge
of the tank (B). Make sure the two holders (C) inside the
tank goes through the bag securing same pressure inside
as outside of the bag. If not, the bag will be sucked into
the filter and suction will be gone.
Fig.4
4.2 VACUMING - INSERTING THE HOSE
To vacuum insert the nozzle (A) into the suction hose cuff
as on Fig. 5. Insert the hose with the cuff in the inlet of
the vacuum cleaner (B).
To remove the hose twist and pull out as seen on Fig. 6
Fig.5
Fig.6
4.3 TURNING THE MACHINE ON
The machine is turned on/off by pressing the start/ stop
button (A).
Fig.7
4.4 EMPTYING THE TANK USING DISPOSAL BAG
To empty the tank, take off the head. If using a disposal
bag carefully connect the bag and close it with cable tie
or similar (A). Take our carefully the disposal bag (B)
Fig.8
4.5 FILTER CLEANING SYSTEM
The vacuum cleaner is equipped with a built-in filter
cleaning system. Fine dust and ash will easily clog the
filter. In order to clean the filter and restore suction
performance do as on Fig. 9. Put the nozzle into the
holder (A) thereby closing for suction. Turn the machine
on (B). Wait few seconds until motor has full speed and
vacuum is highest. Push the filter cleaning button 5 times
(C).
If suction is not restored the
filter maybe damaged and
need to be replaced. See next
chapter for more information
Fig.9
4.6 REMOVING AND CLEANING FILTER
Take off the head and put it upside down
Remove the 4 screws and take off the parts (A). If filter is
damaged replace with new and fix in reverse way. Be
careful not to overtighten the screws.
If filter is dirty wash it under cold water (B) and let is dry
(C). When dry fix the filter again.
This
vacuum cleaner can be equipped with a built-in thermal
overload protector to protect the motor from high
temperatures. This can occur under heavy use. If the
motor temperature shuts off during operation, turn the
pag. 4

switch off and allow the motor to cool for 15-30 minutes.
Turn switch on and resume operation.
5. TROUBLE SHOOTING
Repair or service of electrical components such as cord or motor, must only be carried out by an authorized service
center.
6. WARRANTY
Warranty covers:
This vacuum cleaner is warranted for 2 years. This warranty includes spare parts and labor costs, and covers
manufacturing and material defects that may occur during normal use. This warranty does not include normal wear and
tear.
Service under this warranty will only be performed with proof that the defect occurred within the warranty period and
that the vacuum cleaner was purchased as a new product. Proof would be a cash register receipt with date and product
type.
Warranty does not cover:
•Normal wear and tear of accessories and filters.
•Defects or damage occurring as a direct or indirect result of incorrect use
•Abuse due to failure to follow instructions in the user manual.
•Incorrect or poor configuration, i.e. setting up or improper connection, fire-damage, fire, lightning strike or
unusual voltage fluctuations or any other electrical disturbances. Electrical disturbances include a defective
circuit breaker or defective electrical installations on the supply grid.
Warranty becomes void:
•If a failure is caused by the use of non-original filters.
•If the model, item or any identity/serial number is removed from the vacuum cleaner.
•If the vacuum cleaner has been repaired by a non-authorized dealer.
•If the machine has been used for commercial purpose.
WARNING
If any of the motor housing parts should become detached or broken, operations should be discontinued
immediately to avoid personal injury. Repairs should be made before reuse.
Note: FOR TECHNICAL ASSISTANCE, CONTACT OUR CUSTOMER SERVICE DEPARTMENT.
Vacuum does not start:
•Check to see that the plug is correctly inserted in the electrical outlet and that there is
power at receptacle.
•A circuit breaker may have tripped. Check the circuit breaker box.
•The cord or plug may be damaged. Call the Customer Service Department to get the
nearest authorized service center.
Motor stops:
•A thermal overload protector will shut off the motor if the motor temperature is too high.
If this occurs, turn the switch off. Wait 15-30 minutes for the motor to cool. Turn switch on
and resume operation.
Suction power is
reduced:
•The tank may be full and needs to be emptied. See Fig. 8
•The hose and nozzle may be clogged and need to be cleaned.
•Any of the above may be damaged and need to be replaced.
•The filter may be clogged. Use the Filter Cleaning System (see Fig 9), to clean the filter.
•Replace the filter or make sure the filter is installed properly.
•The hose connection is loose and need to be tightened.
Static shocks:
•If the environment is too dry, add moisture to air. If possible, use a humidifier.
•In case the relative humidity of air is low, please note that this situation will not have any
effect on use of the vacuum cleaner.
pag. 5

Congratulazioni per aver scelto il nostro aspirapolvere
per le ceneri.
Prima di utilizzare l'apparecchio per la
prima volta, assicurarsi di leggere questo
documento e tenerlo pronto per leggere le
istruzioni per l'uso.
MODALITA’ D’USO
Questo aspirapolvere è progettato, sviluppato e
sottoposto a rigorosi test per funzionare in modo
efficiente e sicuro quando sottoposto a manutenzione e
uso adeguati secondo le seguenti istruzioni.
L'aspirapolvere per cenere è destinato esclusivamente
all'uso domestico e non commerciale.
Il dispositivo è adatto per aspirare:
- ceneri fredde da caminetti, camini, forni, posacenere e
luoghi simili in cui si accumulano le ceneri.
- sporco grossolano di tutti i tipi, come sabbia o detriti.
AVVERTENZE: LEGGERE E SEGUIRE TUTTE LE
ISTRUZIONI DI SICUREZZA
1. ISTRUZIONI DI SICUREZZA
•Le targhette di avvertimento e informazione sulla
macchina forniscono indicazioni importanti per un
funzionamento sicuro.
•Oltre alle note in esso contenute devono essere
osservate le disposizioni generali di sicurezza e le
norme per la prevenzione degli incidenti del
legislatore.
1.1 LIVELLI DI PERICOLO:
PERICOLO
Puntatore al pericolo immediato, che porta a lesioni
gravi o alla morte.
AVVERTIMENTO
Puntatore a una situazione potenzialmente
pericolosa, che può portare a lesioni gravi o alla morte.
ATTENZIONE
Puntatore a una situazione potenzialmente
pericolosa, che può portare a lesioni lievi.
1.1 COMPONENTI ELETTRICHE
PERICOLO
Pericolo di folgorazione.
•Spegnere l'apparecchio e rimuovere la spina di
alimentazione prima di qualsiasi intervento di cura
e manutenzione.
•Le riparazioni e i lavori sui componenti elettrici
possono essere eseguiti solo da un servizio clienti
autorizzato.
•Non toccare mai la spina e la presa con le mani
bagnate.
•Controllare il cavo di alimentazione con spina di
rete prima di ogni utilizzo. Sostituire
immediatamente il cavo di alimentazione
danneggiato da un servizio di assistenza clienti /
elettricista autorizzato.
•Non utilizzare un apparecchio se il cavo di
alimentazione è danneggiato.
•Non usare agenti abrasivi, detergenti per vetro o
multiuso!
•Non immergere l'apparecchio in acqua!
•Non trasportare / trasportare l'apparecchio sul
cavo di alimentazione.
•Non raschiare il cavo di alimentazione attraverso
spigoli vivi e assicurarsi che non venga premuto.
•Non rimuovere la spina dalla presa tirando il cavo
di alimentazione.
AVVERTIMENTO
•L'apparecchio può essere collegato solo a
un'alimentazione elettrica che è stata installata da
un elettricista in conformità con IEC 60364.
•Se il cavo di alimentazione è danneggiato, deve
essere sostituito dal produttore, dal suo agente di
assistenza o da personale qualificato per evitare
rischi
•L'apparecchio può essere collegato solo a corrente
alternata. La tensione di rete deve corrispondere
alla tensione indicata sulla targhetta.
•Per motivi di sicurezza, si raccomanda di utilizzare
l'apparecchio solo tramite un dispositivo a corrente
residua (massimo 30 mA).
•Estrarre completamente il cavo di alimentazione
dall'apparecchio o srotolarlo completamente dopo
l'uso.
•In caso di sviluppo di fumo visibile: estrarre la
spina di alimentazione e portare il dispositivo
all'aperto.
1.2 SICUREZZA ED UTILIZZO
PERICOLO
•Tenere i film di imballaggio lontano dai bambini,
c'è il rischio di soffocamento!
ATTENZIONE
•Questo dispositivo non deve essere utilizzato da
bambini o persone con capacità fisiche, sensoriali o
mentali limitate o con esperienza e / o mancanza
di conoscenza.
•I bambini non devono giocare con questo
apparecchio.
•Sorvegliare i bambini per impedire loro di giocare
con l'apparecchio.
•La pulizia e la manutenzione dell'utente non
devono essere eseguite da bambini senza
supervisione.
•Questo apparecchio può essere utilizzato da
bambini di età pari o superiore a 8 anni e persone
con ridotte capacità fisiche, sensoriali o mentali o
mancanza di esperienza e conoscenza, se hanno
ricevuto supervisione o istruzioni sull'uso
dell'apparecchio in modo sicuro e sotto i pericoli
coinvolti.
PRECAUZIONI
•In caso di rotture prolungate, spegnere
L'apparecchio con l'interruttore principale/
l'interruttore dell'apparecchio o staccare la spina.
•Non lasciare mai l'apparecchio incustodito finché è
in funzione.
•Spegnere l'apparecchio dopo ogni utilizzo e prima
di ogni pulizia / manutenzione e staccare la spina.
ATTENTIONE
•Non aspirare mai senza inserire un filtro a piega
piatta e il telaio associato opzionale, altrimenti il
dispositivo potrebbe danneggiarsi.
•Proteggi l'apparecchio da condizioni climatiche
estreme, umidità e calore.
•1.3 ALTRI RISCHI
PERICOLO
Rischi di esplosione!
•Alcuni materiali possono produrre vapori o miscele
esplosive quando agitati dall'aria di aspirazione!
pag. !6

•Non aspirare mai i seguenti materiali:
•Gas esplosivi o combustibili, liquidi e particelle di
polvere (particelle di polvere reattiva)
•Particelle di polvere metallica reattiva (come
alluminio, magnesio, zinco) in combinazione con
detergenti altamente alcalini o acidi
•Oggetti caldi, bruciati o fumanti con temperature
superiori a 40 ° C. Temperature superiori a 40 ° C
rappresentano un pericolo di incendio.
•Non adatto per separare le polveri nocive per la
salute (classi di polveri L, M, H).
•L'apparecchio non può essere utilizzato in
atmosfere esplosive. Inoltre, queste sostanze
possono corrodere i materiali dell'apparecchio.
ATTENZIONE
•Rischi di incendio!
•Non raccogliere cenere calda, incandescente o
bruciata. Raccogli solo ceneri fredde.
•Il contenitore della polvere deve essere svuotato e
pulito prima e dopo ogni utilizzo.
•Non utilizzare sacchetti per la raccolta della
polvere fatti di carta o sacchetti fatti di materiali
simili combustibili.
•Non usare aspirapolveri abituali per aspirare le
ceneri.
•Non conservare l'aspiratore di ceneri su superfici
combustibili o polimeriche come moquette o
piastrelle in vinile.
•Solo ceneri di combustibili ammessi (ad esempio
legno naturale, bricchette di legno, pellet di legno,
•lignite e carbon fossile) devono essere aspirati.
•Non aspirare la fuliggine.
•L'aspirapolvere che sembra essersi raffreddato
dall'esterno può ancora essere molto caldo
all'interno. Le particelle di cenere calda possono
incendiarsi di nuovo nel flusso d'aria.
•Mescolare le ceneri con un oggetto di metallo per
verificare se le ceneri sono ancora calde.
•Assicurati che il forno sia freddo prima di pulire i
forni.
•Attendere fino a quando le ceneri si sono
raffreddate prima di iniziare la pulizia. Non
raccomandiamo di spegnere rapidamente il fuoco
con l'acqua. Il materiale del camino non resisterà
alle rapide variazioni di temperatura e potrebbe
rompersi.
•Controllare continuamente i tubi e l'aspirapolvere
per il calore mentre si aspirano le ceneri. Se si
nota un aumento di temperatura, spegnere
immediatamente l'aspirapolvere. Estrarre la spina
di alimentazione. Rimuovere il materiale di
aspirazione dalla cenere e dall'aspirapolvere a
secco. Lasciare raffreddare il dispositivo al di fuori
della supervisione.
ATTENZIONE
•Rischi di infortunio!
•Non aspirare nelle vicinanze della testa quando si
utilizza l'ugello e il tubo di aspirazione.
PRECAUZIONI
•Per evitare incidenti o lesioni, prestare
attenzione al peso dell'apparecchio durante il
trasporto (vedere i dati tecnici).
1.4 STABILITA’
CAUTION
•Creare stabilità per l'apparecchio prima di
qualsiasi intervento su o con l'apparecchio per
evitare incidenti o danni.
1.5 SICUREZZA
ATTENZIONE
•Le disposizioni di sicurezza servono alla
protezione dell'utente e non possono essere
modificate o ignorate.
2. SOMMARIO DEL PRODOTTO
Fig. 1
1.Maniglia
2. Pulsante di on/off
3. Supporti per lancia
4. Ingresso
5. Serbatoio
6. Cavo di !
alimentazione
7. Testa
8. Fibbia
9. Telaio della ruota (opzionale) Fig.2
10. Schermo filtro metallico (opzionale)
11. Piede di protezione
12. Filtro
13. Ugello in alluminio
14. Tubo flessibile
15. Spazzola (opzionale)
16. Bocchetta per fessure (opzionale)
17. Borsa per lo smaltimento (opzionale)
Alcuni di questi accessori sono imballati all'interno
del serbatoio
3. PRIMA DEL PRIMO UTILIZZO
Leggere il capitolo 1 - ISTRUZIONI IMPORTANTI PER LA
SICUREZZA di questo manuale prima di installare e usare
questo aspirapolvere.
3.1 ACCESSORE
Gli ugelli e gli accessori per la macchina sono posizionati
nel serbatoio. Per aprire il serbatoio, disinnestare le
fibbie (A) e togliere la testa (B). Estrarre gli elementi (C)
e rimetterli in testa. Assicurare la testa con le fibbie
Fig.3
Model name
BERT
Voltaggio
220-240V
Frequenza
50Hz/60Hz
Potenza IEC
600W
Classe di protezione
II
Vibrazioni
< 2.5 m/s2
Dimensione del contenitore
15L
pag. !7

4. UTILIZZO DELL’ASPIRAPOLVERE
Leggere il capitolo 1 - ISTRUZIONI IMPORTANTI PER LA
SICUREZZA di questo manuale prima di installare e usare
questo aspirapolvere.
4.1 LAVORARE CON IL SACCO POLVERE
Per svuotare il serbatoio da detriti / polvere in modo
indolore, è possibile utilizzare in modo vantaggioso i
sacchetti di smaltimento. Può essere utilizzato qualsiasi
sacchetto di plastica che si adatta.
Aggiungi la borsa nel serbatoio (A). Fissare la borsa sul
bordo del serbatoio (B). Accertarsi che i due supporti (C)
all'interno del serbatoio passino attraverso la sacca
fissando la stessa pressione all'interno come all'esterno
della borsa. In caso contrario, la sacca verrà aspirata nel
filtro e l'aspirazione non sarà più disponibile.
Fig.4
4.2 ASPIRAZIONE - INSERIMENTO DEL TUBO
Per aspirare inserire l'ugello (A) nella cuffia del tubo di
aspirazione come in Fig. 5. Inserire il tubo con il
bracciale nell'entrata dell'aspirapolvere (B).
Per rimuovere la torcia del tubo flessibile ed estrarla
come mostrato nella Fig. 6
Fig.5
Fig.6
4.3 ACCENSIONE DELL’ASPIRAPOLVERE
La macchina viene accesa / spenta premendo il pulsante
di avvio / arresto (A).
Fig.7
4.4 SVUOTAMENTO DEL CONTENITORE UTILIZZANDO IL
SACCO POLVERI
Per svuotare il serbatoio, togliere la testa.
Se si utilizza una borsa di smaltimento,
collegare con cura la busta e chiuderla
con una fascetta o simile (A). Prendi con
cura la borsa per lo smaltimento (B)
Fig.8
4.5 SISTEMA DI PULIZIA DEL FILTRO
L'aspirapolvere è dotato di un sistema di pulizia del filtro
incorporato. La polvere fine e la cenere ostruiscono
facilmente il filtro. Per pulire il filtro e ripristinare le
prestazioni di aspirazione fare come in Fig. 9. Mettere
l'ugello nel supporto (A) chiudendo così per l'aspirazione.
Accendere la macchina (B). Attendere alcuni secondi
finché il motore non ha raggiunto la massima velocità e il
vuoto è massimo. Premere il pulsante di pulizia del filtro
5 volte(C).
Se l'aspirazione non viene
ripristinata, il filtro potrebbe
essere danneggiato e deve essere
sostituito. Vedi il prossimo
capitolo per maggiori informazioni
Fig.9
4.6 RIMUOVERE E PULIRE IL FILTRO
Togli la testa e mettila sottosopra
Rimuovere le 4 viti e rimuovere le parti (A). Se il filtro è
danneggiato, sostituirlo con uno nuovo e fissarlo in senso
inverso. Fare attenzione a non serrare eccessivamente le
viti.
Se il filtro è sporco, lavarlo sotto l'acqua fredda (B) e
lasciarlo asciugare (C). Quando asciutto ripari il filtro
ancora.
Questo aspirapolvere può essere dotato di un dispositivo
di protezione da sovraccarico termico incorporato per
proteggere il motore dalle alte temperature. Questo può
accadere con un uso intenso. Se la temperatura del
motore si spegne durante il funzionamento, spegnere
l'interruttore e lasciare raffreddare il motore per 15-30
minuti. Accendi l'interruttore e ripristina il
funzionamento.
pag. !8

5. RISOLUZIONE DI PROBLEMI
La riparazione o l'assistenza di componenti elettrici come cavo o motore devono essere eseguite esclusivamente da un
centro di assistenza autorizzato.
6. GARANZIA
Garanzia:
Questo aspirapolvere è garantito per 2 anni. Questa garanzia include parti di ricambio e costi di manodopera e copre
difetti di fabbricazione e materiali che possono verificarsi durante il normale utilizzo. Questa garanzia non include la
normale usura.
Il servizio sotto questa garanzia verrà eseguito solo con la prova che il difetto si è verificato durante il periodo di
garanzia e che l'aspirapolvere è stato acquistato come nuovo prodotto. Prova sarebbe una ricevuta del registratore di
cassa con data e tipo di prodotto.
La garanzia non copre:
•Normale usura di accessori e filtri.
•Difetti o danni che si verificano come conseguenza diretta o indiretta di un uso errato
•Abuso a causa della mancata osservanza delle istruzioni nel manuale utente.
•Configurazione errata o inadeguata, vale a dire installazione o collegamento errato, danni da incendio, incendio,
fulmine o oscillazioni di tensione insolite o altri disturbi elettrici. I disturbi elettrici includono un interruttore
automatico difettoso o installazioni elettriche difettose sulla rete elettrica.
Perdita della garanzia:
•Se un errore è causato dall'uso di filtri non originali.
•Se il modello, l'articolo o un'identità / numero di serie vengono rimossi dall'aspirapolvere.
•Se l'aspirapolvere è stato riparato da un rivenditore non autorizzato.
•Se la macchina è stata utilizzata per scopi commerciali.
ATTENZIONE
Se una qualsiasi delle parti del corpo motore dovesse staccarsi o rompersi, le operazioni dovrebbero
essere interrotte immediatamente per evitare lesioni personali. Le riparazioni dovrebbero essere fatte
prima del riutilizzo.
Note: PER ASSISTENZA TECNICA, CONTATTARE IL NOSTRO SERVIZIO ASSISTENZA CLIENTI.
L’aspirapolvere non si
accende:
•Controllare che la spina sia inserita correttamente nella presa elettrica e che vi sia
alimentazione alla presa.
•Potrebbe essere scattato un interruttore automatico. Controllare la scatola
dell'interruttore automatico.
•Il cavo o la spina potrebbero essere danneggiati. Chiamare il servizio clienti per ottenere
il centro di assistenza autorizzato più vicino.
Arresto del motore:
•Un dispositivo di protezione da sovraccarico termico spegne il motore se la temperatura
del motore è troppo alta. In tal caso, spegnere l'interruttore. Attendere 15-30 minuti che
il motore si raffreddi. Accendi l'interruttore e ripristina il funzionamento.
Perdita della potenza
di aspirazione:
•Il serbatoio potrebbe essere pieno e deve essere svuotato. Vedi Fig. 8
•Il tubo e l'ugello potrebbero essere ostruiti e devono essere puliti.
•Qualsiasi dei precedenti può essere danneggiato e deve essere sostituito.
•Il filtro potrebbe essere ostruito. Utilizzare il sistema di pulizia del filtro (vedere Fig. 9)
per pulire il filtro.
•Sostituisci il filtro o assicurati che il filtro sia installato correttamente.
•La connessione del tubo flessibile è allentata e deve essere serrata.
Static shocks:
•Se l'ambiente è troppo secco, aggiungi umidità all'aria. Se possibile, utilizzare un
umidificatore.
•Nel caso in cui l'umidità relativa dell'aria sia bassa, si prega di notare che questa
situazione non avrà alcun effetto sull'uso dell'aspirapolvere.
pag. !9

pag. !10
CE DECLARATION OF CONFORMITY
CE DICHIARAZIONE DI CONFORMITA’
ENKE SRL
CONTRADA CHIARAVALLE 25C
62010 TREIA MC
ITALY
TEL. +39 0733 843518
MODEL
APS09 BERT
The design of the unit corresponds
to the following pertinent
regulations:
EC - Machinery Directive 2006/42/EC
EC - Directive EMC 2004/108/EC
EC - RoHS Directive 2011/65/EC
Applied international standards and
technical specifications:
EN 60335-2-2:2010+ A11:2012 + A1:2013
EN 60335-1:2012+AC:14+A11:14
EN 62233: 2008
the Low Voltage Directive 2006/95/EC
Identity and signature of the person
empowered to draw up the
declaration on behalf of the
manufacturer:
Date:
15/03/2019
"
Giuseppe Nardi#
General Manager#
17
We / Noi:
ENKE srl
Località Chiaravalle
I – 62010 TREIA (MC)
dichiariamo sotto la nostra responsabilità che il prodotto
declare under our responsibility that the products
ENKE DRY VACUUM CLEANER MODELS
al quale si riferisce questa dichiarazione, è conforme alle seguenti norme:
to which this declaration relates is in conformity with the following standards or other normative
document(s):
•IEC 60335 -1:2010+A1:2013
•IEC 60335 - 2 - 69:2012
•IEC 62233: 2008
•EN 55014 - 1:2006+A1:2009+A2:2011
•EN 55014 - 2:1997+A1:2001+A2:2008
•EN 61000 - 3 - 2: 2014
•EN 61000 - 3 - 3: 2013
in base a quanto previsto dalle Direttive: 2006/42/CE (Direttiva macchine)
2014/30/UE (Compatibilità elettromagnetica EMC) 2011/65/CE (Direttiva RoHS II)
following the provisions of the Directives: 2006/42/EC (Machinery directive)
2014/30/UE (Electromagnetic compability EMC) 2011/65/EC (Directive RoHS II)
Treia, 14/06/2016
Rappresentante Legale
Legal Representative
Persona autorizzata a compilare il fascicolo tecnico
Person authorised to compile the technical file
ENKE srl
Località Chiaravalle
I – 62010 TREIA (MC)
CE DICHIARAZIONE DI CONFORMITA’
EC DECLARATION OF CONFORMITY
2006/42/CE - 2014/30/UE - 2011/65/CE

WEEE - Waste of Electric and Electronic Equipment
English
The symbol on the product or on its packing indicates that this
product may not be treated as household waste. Instead it shall
be handed over
To the applicable collection point for the recycling of electrical
and electronic equipment. By ensuring this product is disposed
of correctly, you will help prevent potential negative
consequences for the environment and human health, which
could otherwise be caused by inappropriate waste handling of
this product. For
more detailed information about recycling of this
product, please contact your local city office, your household
waste disposal service or the shop where you purchased the
product.
Deutsch
Das Symbol auf dem Produkt bzw. auf der Produktverpackung
deutet an, dass das Produkt nicht mit dem Haushaltsmüll
entsorgt werden darf. Stattdessen ist es zur Entsorgung an eine
geeignete Sammelstelle für das Recycling von elektrischen und
elektronischen Geräten zu bringen. Durch die korrekte
Entsorgung helfen Sie mit, potenziellen negativen Einflüssen auf
die Umwelt und die Gesundheit vorzubeugen, die
durch eine unangemessene Entsorgung dieses Produkts
entstehen könnten. Genauere Informationen zur
Wiederverwertung dieses Produkts erhalten Sie von Ihrer
Stadtverwaltung, der Müllabfuhr vor Ort oder dem Geschäft, in
dem Sie dieses Produkt erworben haben.
Français
Le symbole sur le produit ou sur son emballage indique que ce
produit ne doit pas être traité comme un déchet ménager. Il
doit au contraire être remis au point de collecte correspondant
pour le recyclage du matériel électrique et électronique. En
procédant de cette manière, vous aiderez à prévenir les
conséquences otentiellement négatives pour l’environnement
et la santé humaine que pourrait causer un traitement
inadéquat du rejet de ce produit . Pour plus ample information
sur le recyclage de ce produit, veuillez prendre contact avec
votre bureau municipal, votre service de collecte de déchets
ménagers ou le magasin où vous avez acheté le produit.
Português
Símbolo no produto ou na embalagem indica que
esse produto não deve ser tratado como um resíduo doméstico.
Ao contrário, deve ser levado ao local de recolha adequado
para a reciclagem de equipamentos electroelectrónicos. Ao se
assegurar que o tratamento deste equipamento foi adequado,
estará a ajudar a prevenir consequências potenciais ao meio
ambiente e à saúde humana que poderiam ser causadas pelo
manejo inapropriado do produto. Para mais informações sobre a
reciclagem deste produto, entre em contacto com as
autoridades locais, com o órgão responsável pela recolha de lixo
ou a loja onde o produto foi adquirido.
Italiano
Il simbolo sul prodotto o sulla confezione indica che questo
prodotto non può essere smaltito fra i rifiuti domestici. Deve
invece essere consegnato a un centro di raccolta autorizzato
per il riciclaggio dei dispositivi elettrici ed elettronici.
Smaltendo questo prodotto in modo corretto, si contribuisce a
ridurre l’impatto ambientale e sull’uomo. Per maggiori
informazioni sul riciclaggio di questo prodotto, contattare il
proprio comune, il centro di raccolta dei rifiuti urbani locale o
il rivenditore.
Nederlands
Het symbool op het product of de verpakking geeft aan dat
dit product niet als huishoudelijk afval mag worden behandeld.
Het apparaat moet bij een verzamelpunt voor het recyclen van
elektrische en elektronische apparatuur worden ingeleverd.
Door dit product op de juiste manier af te danken, helpt u bij
het voorkomen van mogelijke negatieve consequenties voor het
milieu en de menselijke gezondheid. Deze zouden kunnen
ontstaan als dit product niet op de juiste manier wordt
behandeld. Voor uitgebreide informatie over het
recyclen van dit product kunt u contact opnemen met uw
plaatselijke stadskantoor, uw afvalverwerkingsdienst of de
winkel waar u het product hebt gekocht.
Español
El símbolo que aparece en el producto o en su embalaje indica
que este producto no puede ser tratado como residuo
doméstico. En su lugar, debe ser entregado en el
correspondiente punto de recogidapara el reciclado de equipos
eléctricos y electrónicos. Al garantizar la adecuada eliminación
de este producto, ayudará a evitar las posibles consecuencias
negativas para el medio ambiente y la salud de las personas
quese producirían a causa de una inadecuada manipulación de
los residuos de este producto. Para obtener información más
detallada acerca del reciclaje de este producto, póngase en
contacto con la oficina local de su ciudad, el servicio de
recogida de residuos domésticos oel establecimiento en el que
ha adquirido el producto.
Svenska
Symbolen på produkten eller emballaget anger att produkten
inte får hanteras som hushållsavfall. Den skall i stället lämnas in
p å u p p s a m l i n g s p l a t s f ö r å t e r v i n n i n g a v e l - o c h
elektronikkomponenter. Genom att säkerställa att produkten
hanteras på rätt sätt bidrar du till att förebygga eventuellt
negativa miljö- och hälsoeffekter som kan uppstå om produkten
kasseras som vanligt avfall. För ytteligare upplysningar om
åt e r vi n n in g b ö r du k o n ta k t a lo k a la m y n di g h et e r,
sophämtningstjänst eller affären där du köpte varan.
Dansk
Symbolet, som findes på produktet eller emballagen, viser, at
produktet ikke må bortskaffes sammen med almindeligt
husholdningsaffald. Det skal derimod afleveres på en
miljøstation, som er godkendt til håndtering af elektrisk og
elektronisk udstyr.Sørg
for at bortskaffe produktet korrekt, så du kan være med til at
forebygge skader på miljøet
og menneskers sundhed. Hvis du ønsker yderligere oplysninger
om, hvordan produktet genvindes, kan du henvende dig hos
kommunen, en miljøstation eller forretningen, hvor du købte
produktet.
Suomi
Tuotteessa tai pakkauksessa oleva symboli ilmaisee, että
tuotetta ei voi hävittää
talousjätteen mukana. Sen sijaan tuote on vietävä sähköisten
ja elektronisten laitteiden kierrätykseen tarkoitettuun
keräyspisteeseen. Kun huolehdit tuotteen asianmukaisesta
hävittämisestä, autat edistämään ympäristön ja ihmisten
hyvinvointia, jonka tuotteen virheellinen hävittäminen voi
vaarantaa. Lisätietoa tämän tuotteen kierrättämisestä saat
jätteenkäsittelypisteistä tai samasta liikkeestä, josta ostit
tuotteen.
Norsk
Symbolet på produktet eller
emballasjen indikerer at dette produktet ikke kan behandles
som husholdningsavfall. I stedet skal det leveres til aktuelt
innsamlingspunkt for resirkulering av elektrisk og elektronisk
utstyr. Ved å sørge for at dette produktet kasseres korekt,
bidrar du til å forebygge mulige negative følger for miljøet og
folks helse, hvilket ellers kan forårsakes ved feilaktig
avfallshåndtering av dette produktet. For nærmere informasjon
om resirkulering av dette produktet, vennligst kontakt din
lokale representant, renholdsverket eller butikken der du
kjøpte produktet
!11
Table of contents
Languages:
Other Enke Vacuum Cleaner manuals

