manuals.online logo
Brands
  1. Home
  2. •
  3. Brands
  4. •
  5. Epson
  6. •
  7. All In One Printer
  8. •
  9. Epson Stylus Photo PX700W Manual

Epson Stylus Photo PX700W Manual

PRODUCT REVIEW KIT
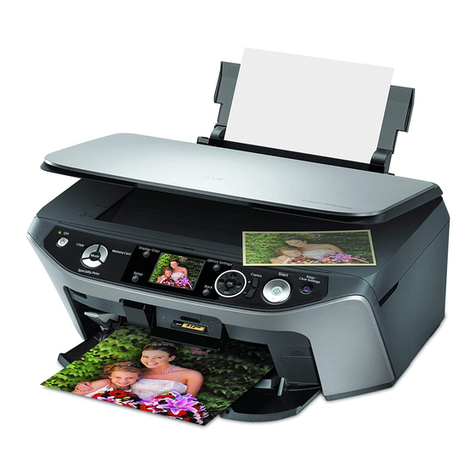
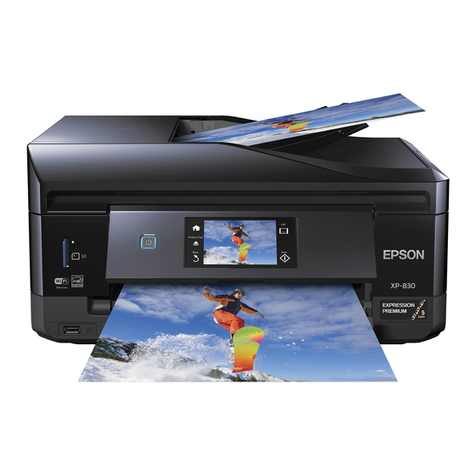
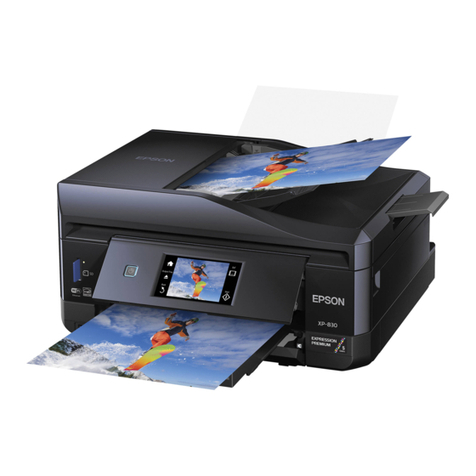
The All-in-one for the serious photographer
Epson Stylus Photo PX700W
Contents
Achieving the best results using the Epson Stylus PX700W .............................................................2
Driver Settings.....................................................................................................................................3
Softw are..............................................................................................................................................5
Epson Scan.........................................................................................................................................7
Features ............................................................................................................................................11
Wi-Fi and Ethernet ............................................................................................................................14
Ink Cartridges and ISO Yields ..........................................................................................................16
Full Product Specifications ...............................................................................................................17
•
Print photos that exceed lab quality w ith Epson Claria Photographic Ink
.
•Integrated w ireless and Ethernet for shared printing and sc anning.
•Dedic ated dual A4 and photo paper trays.
•Print directly onto suitable CDs and D Ds.
•Print from memory c ards or Pic tBridge w ithout using a PC
•Save money with individual inks – only replace the colour you use.
PRODUCT REVIEW KIT
Page 2 of 17
Achieving the best results using the Epson Stylus Photo PX700W
Make sure you sele t the orre t driver and media settings.
Sele t Text mode for printing high-quality text do uments, or Photo for high-quality
photos.
Choose the orre t paper settings - e.g. sele t 'Premium Glossy Photo Paper' for the best
photo quality on glossy paper.
To a hieve high quality photo prints, it is re ommended that Epson media is used.
Choose the 'Borderless' photo setting to get true edge-to-edge printing without any
white borders.
This Epson printer in ludes a permanent Mi ro Piezo
TM
print head. This means that a
head alignment should not be required during the set-up pro ess.
PRODUCT REVIEW KIT
Page 3 of 17
Settings
Short uts
The Short ut menu below an be used to make a qui k and easy sele tion of the pr int settings r equir ed.
When ea h pr inting pr eset is sele ted, a brief des ription of the setting is given.
Driver Settings
The driver settings an be ontr olled manually too. It is important to sele t the appr opr iate settings
before printing, to a hieve the best results. Start by sele ting the Main tab in the dr iver .
Text Printing
Sele t Dr aft on the pr inter dr iver for e onomi al high
speed text pr inting.
Sele t Text mode for printing high-quality text
do uments.
Sele t Text & Image for pr inting high-quality olour
do uments with images.
Photo Printing
Sele t Dr aft mode for printing photo pr oofs.
Sele t Photo mode for standard day-to-day photographi
printing.
Sele t Best Photo mode for high-quality photographi
printing, su h as album images.
Media Settings
PRODUCT REVIEW KIT
Page 4 of 17
To get the best fr om an Epson pr inter , it is impor tant to
hoose the or r e t media setting.
This an be done by sele ting the appropriate media fr om the
drop-down menu (see image to the left).
For optimum photo quality, Epson Pr emium Glossy Photo Paper
is r e ommended
Epson PhotoEnhance
When sele ted, Epson PhotoEnhan e automati ally adjusts olour and ontr ast to your photos to ensure
per fe t r esults. It is a default setti ng for pr inting photos on glossy media, however as you an see below,
it an be turned off by li king on the ti k box.
Before After
PRODUCT REVIEW KIT
Page 5 of 17
Software
Epson Easy Photo Print
Epson Easy Photo Print is a software whi h is i n luded with all Epson inkjet pr inter s. It offers easy-to-use
fun tions su h as PhotoEnhan e, r ed-eye removal and adding fr ames.
To a ess, go to Start, All Programs, Epson Softw are and sele t Epson Easy Photo Print.
Sele t the i mage or images then li k the Next Step button on the bottom r ight
Red-Eye Removal
You an li k on Red-Eye Fix All
( ir led here in blue) for automati
red-eye removal.
Please note that this fun tion will not
show a pr eview on your s r een;
however , the image wi ll be pr inted
without r ed-eye.
You an also manually or automati ally
remove red-eye, with a preview, by
li king on the Image Corre t button
( ir led in red).
Image Corre t will take you to the
s reen shown here. You an then
hoose to remove red-eye manually
( ir led in Green) or automati ally
( ir led in Yellow).
PRODUCT REVIEW KIT
Page 6 of 17
PhotoEnhance
PhotoEnhan e an also be a essed via Epson Easy Photo Print as you an see below ( ir led in r ed).
On e it is sele t ed, you an then hoose the pr eferred Scene Correction
( ir led in blue).
With PhotoEnhan e and Red-Eye Fix
(Auto) sele ted, the image an be
previewed befor e pr inting.
This is also availab le as a stand-alone feature
PRODUCT REVIEW KIT
Page 7 of 17
Epson Scan
Epson S an is a TWAIN Dr iver that an be a essed as a stand-alone desktop appli ation or through a
thir d par ty imaging progr am.
It an be used for s anning do uments and images and there ar e three modes.
The fir st option is Full Auto Mode whi h is the default
setting, ensur ing that s anning is simp le.
The driver automati ally re ognises the type of media and
s ans to an ideal pre-set r esolution with one pr ess of the
“S an” button. Additionally, the driver pinpoints the media
on the flatbed and aut omati ally rops and adjusts the
image.
Another option is Home Mode whi h features s an settings
su h as automati sizing and do ument type.
This is ideal for advan ed amateur s.
You will be ab le to a ess Epson Easy Photo Fix™ ( ir led
here in red) via this mode. It onsists of Colour
Restoration, Ba klight Corre tion and Dust Removal.
These fun tions an be used to restor e olour, r emove dust
and orr e t ba klight to damaged images.
PRODUCT REVIEW KIT
Page 8 of 17
The thir d option is Professional Mode whi h allows
omplete user ontrol of s an settings and advan ed
ontr ols, su h as histogram adjustment and tone
orr e tion.
Other features in lude automati exposur e, multiple r op
frames, densitometer and a do ument mode avai lab le for
more advan ed user s.
Images and do uments an also be pr eviewed first before
s anning.
As you s r oll down, Epson Easy Photo Fix™ is also avai lab le
in this mode.
Preview S reen
PRODUCT REVIEW KIT
Page 9 of 17
The Epson S an driver allows you to pr eview images or do uments before s anning in both the Home and
Professional modes. This an be done by pr essing the Preview button and it is espe ially useful when
using the olour r estoration fun tion as an be seen below.
Preview without Colour Restor ation: Preview with Colour Restor ation turned on:
PRODUCT REVIEW KIT
Page 10 of 17
S anning Multiple Images
Multiple images an be s anned by pla ing them appr oximately 2mm apart on the s an bed (number of
images will depend on the size).
To do this, make sure that Thumbnail ( ir led in red below) is sele ted befor e pro eeding.
The image or images an then be pr eviewed as you an see above and then s anned. These wi ll
automati ally be saved into separate files.
PRODUCT REVIEW KIT
Page 11 of 17
Features
PC-Free (Standalone) Fun tions In lude:
•Print photos via a memory ard or Pi tBridge
•Print photos fr om movies
•Copy do uments, photos and CD/DV D artwork
•Restore, repair or enhan e photos with red-eye removal and PhotoEnhan e
•Print onto suitable DVDs/CDs
•Print photo gr eeting ards
•Print bespoke stationery
•Print an index sheet
•Crop and enlarge images fr om memory ard
Copying:
To make a opy, make sure the LCD menu shows “Copy”, (use the Home butt on to hange to Copy if
ne essary). Pla e the original fa e down on the flat bed then pr ess Start.
If you want to make a opy qui kly and do not need high quality, you an pr int using the “dr aft” setting.
The print quality is marginally redu ed, but the speed in r eases. To do this you must:
- Press the Home button to enter main menu, s roll to Copy then pr ess OK.
- Press the Menu button to enter the settings s reen
- Sele t Paper and Copy Settings pr ess OK .
- S r oll to Quality, pr ess OK, press the right arr ow on the ontrol panel to hange to the sele tion
and then use the up and down arrows to hoose “Draft”
Loading Media – CD/D Ds:
You an pr int on suitab le CDs and DV Ds. Unlike pr evious Epson models t his CD/DVD holder is fully
automated. Do not pull or hand le the CD/DV D holder manually. Follow the below instru tions to load a
CD/DVD.
PRODUCT REVIEW KIT
Page 12 of 17
Printing on CDs/D Ds
Printing on a CD/CVD ouldn’t be easier with the Epson Sty lus Photo PX700W
-S r oll to pr efered print layout press OK.
-Sele t r equired photo pr ess OK
-Adjust inner and outer diameter s with s roll ontrols to suit the CD/DVD printable
surfa e area.
-Sele t Test print on A4 paper to have an idea of end produ t (optional)
-On e happy sele t Print on a CD/D D.
Loading Media - Paper
The Epson Stylus Photo PX700W has a media paper tr ay whi h gives the advantage of being ab le to hold
two media types simultaneously. This means that you an easily sele t the opied media for your pr int
job from the driver without manually swapping the media. See below for lear instru tions for loading
paper into the tr ay.
PRODUCT REVIEW KIT
Page 13 of 17
Other Modes
Ther e ar e a number of other interesting modes outside the key Photo, Fax, Copy and S an fun ti ons.
These are:
Print Ruled Papers:
This fun tion allows you to pr int bespoke stationery
-Sele t Home
-S r oll to Print Ruled Paper
-Sele t pr efered output. If the Note Pad fun tion is sele ted then you an hoose the
photo required as ba kgr ound befor e printing.
-Ensure that A4 paper is loaded into the paper tr ay.
-Sele t number of opies
-Press Start.
Integrated Wi-Fi and Ethernet
PRODUCT REVIEW KIT
Page 14 of 17
Wi-Fi and Ether net ar e now integr ated within t he pr inter r emoving the need for an exter nal
dongle. This allows you to shar e the printer between several user s in your home.
Ther e is an easy installation pr o ess alled EpsonNet EasyInstall whi h guides you step by step
when setting up the wireless onne tion between your pr inter and omputers.
Your fir ewall or anti-spyware software may display warnings dur ing installation. Cr eate an
ex eption for EpsonNet EasyI nstall to allow it to arry out network onfigurations:
For W indows XP Service Pack 2 or later
Confir m that the pub lisher is SEIKO EPSON, and then li k Unblo k.
For Mac OS X 10.5.1 or later
Configure the Appli ation Firewall to allow a ess for EpsonNet EasyInstall.
It is ne essar y to have an Ethernet (wired) onne tion during installation to onfigure your
printer to ommuni ate via Wir eless LAN. Sele t the fir st method, onne t an Ethernet ab le,
swit h on the printer and li k Next
- Sele t a printer
PRODUCT REVIEW KIT
Page 15 of 17
- Sele t a onne tion type
- Choose a wir eless network
- Enter your WEP Key or WPA password – both ar e ase sensitive
- Che k that Obtain an IP address Start is set to Automati
- Confirm settings ar e omplete
ISO Yield
PRODUCT REVIEW KIT
Page 16 of 17
Epson Stylus Photo PX700W
INK CARTRIDGES
Codes
ISO Yield
Re ommended Inks
Bla k T0801 Approx. 355 pages
Cyan T0802 Approx. 890 pages
Magenta
T0803
Approx. 435 pages
Yellow T0804 Approx. 660 pages
Light Cyan T0805 Approx. 335 pages
L
ight
Magenta
T0806
Approx. 660 pages
Also Available
Bla k T0791 Approx. 570 pages
Cyan T0792 Approx. 1475 pages
Magenta
T0
793
Approx. 720 pages
Yellow T0794 Approx. 1070 pages
Light Cyan T0795 Approx. 540 pages
Light Magenta T0796 Approx. 1020 pages
The above page yields wer e based on ISO/IEC 24711 and 24712 and measured using the following olour
page test suite.
Full Product Specifications
PRODUCT REVIEW KIT
Page 17 of 17

Other manuals for Stylus Photo PX700W

6

Other Epson All In One Printer manuals
Epson XP-810 User manual

Epson

Epson XP-810 User manual

Epson Stylus Office BX630FW User manual

Epson

Epson Stylus Office BX630FW User manual

Epson RX500 - Stylus Photo Color Inkjet Instruction Manual

Epson

Epson RX500 - Stylus Photo Color Inkjet Instruction Manual

Epson WF-6590 series User manual

Epson

Epson WF-6590 series User manual

Epson Stylus CX4900 Series Guide

Epson

Epson Stylus CX4900 Series Guide

Epson Stilus CX9300F Series User manual

Epson

Epson Stilus CX9300F Series User manual

Epson Artisan 710 Series User manual

Epson

Epson Artisan 710 Series User manual

Epson WorkForce Enterprise WF-M20590 Series User manual

Epson

Epson WorkForce Enterprise WF-M20590 Series User manual

Epson NX115 - Stylus Color Inkjet User manual

Epson

Epson NX115 - Stylus Color Inkjet User manual

Epson STYLUS CX3700 SERIES User manual

Epson

Epson STYLUS CX3700 SERIES User manual

Epson Stylus Photo RX600 User manual

Epson

Epson Stylus Photo RX600 User manual

Epson Stylus CX5700 User manual

Epson

Epson Stylus CX5700 User manual

Epson XP-850 User manual

Epson

Epson XP-850 User manual

Epson Small-in-One XP-520 User manual

Epson

Epson Small-in-One XP-520 User manual

Epson AcuLaser CX11NF User guide

Epson

Epson AcuLaser CX11NF User guide

Epson ET-7700 User manual

Epson

Epson ET-7700 User manual

Epson Stylus Scan 2500 User manual

Epson

Epson Stylus Scan 2500 User manual

Epson Stylus SX420W Series Assembly instructions

Epson

Epson Stylus SX420W Series Assembly instructions

Epson AcuLaser C2900N Original instructions

Epson

Epson AcuLaser C2900N Original instructions

Epson Stylus PX810FW SERIES Instruction Manual

Epson

Epson Stylus PX810FW SERIES Instruction Manual

Epson WorkForce WF-2850 User manual

Epson

Epson WorkForce WF-2850 User manual

Epson WF-C20590 Series User manual

Epson

Epson WF-C20590 Series User manual

Epson XP-760 series Instruction Manual

Epson

Epson XP-760 series Instruction Manual

Epson ET-3843 User manual

Epson

Epson ET-3843 User manual

Popular All In One Printer manuals by other brands

Xerox WorkCentre 5325 Quick use guide

Xerox

Xerox WorkCentre 5325 Quick use guide

Konica Minolta BIZHUB 600 Product guide

Konica Minolta

Konica Minolta BIZHUB 600 Product guide

Lexmark CX725 Series user guide

Lexmark

Lexmark CX725 Series user guide

QMS SC-100 user manual

QMS

QMS SC-100 user manual

BERTHOLD TECHNOLOGIES NightSHADE evo LB 985N operating manual

BERTHOLD TECHNOLOGIES

BERTHOLD TECHNOLOGIES NightSHADE evo LB 985N operating manual

Canon MP-C545 user manual

Canon

Canon MP-C545 user manual

Minolta DI450 Service manual

Minolta

Minolta DI450 Service manual

Canon imageCLASS LBP6780x manual

Canon

Canon imageCLASS LBP6780x manual

Toshiba e-STUDIO163 Service handbook

Toshiba

Toshiba e-STUDIO163 Service handbook

Canon G4000 series Online manual

Canon

Canon G4000 series Online manual

Toshiba e-studio 900 Operator's manual

Toshiba

Toshiba e-studio 900 Operator's manual

Kodak 5300 - EASYSHARE All-in-One Color Inkjet Start here

Kodak

Kodak 5300 - EASYSHARE All-in-One Color Inkjet Start here

Brother MFC-J425W Quick setup guide

Brother

Brother MFC-J425W Quick setup guide

Lexmark 6200 Series Service manual

Lexmark

Lexmark 6200 Series Service manual

Samsung MultiXpress M537x series Service manual

Samsung

Samsung MultiXpress M537x series Service manual

Sharp AR-C360P Software installation guide

Sharp

Sharp AR-C360P Software installation guide

Brother MFC-8880DN user guide

Brother

Brother MFC-8880DN user guide

Brother MFC4450 owner's manual

Brother

Brother MFC4450 owner's manual

manuals.online logo
manuals.online logoBrands
  • About & Mission
  • Contact us
  • Privacy Policy
  • Terms and Conditions

Copyright 2025 Manuals.Online. All Rights Reserved.