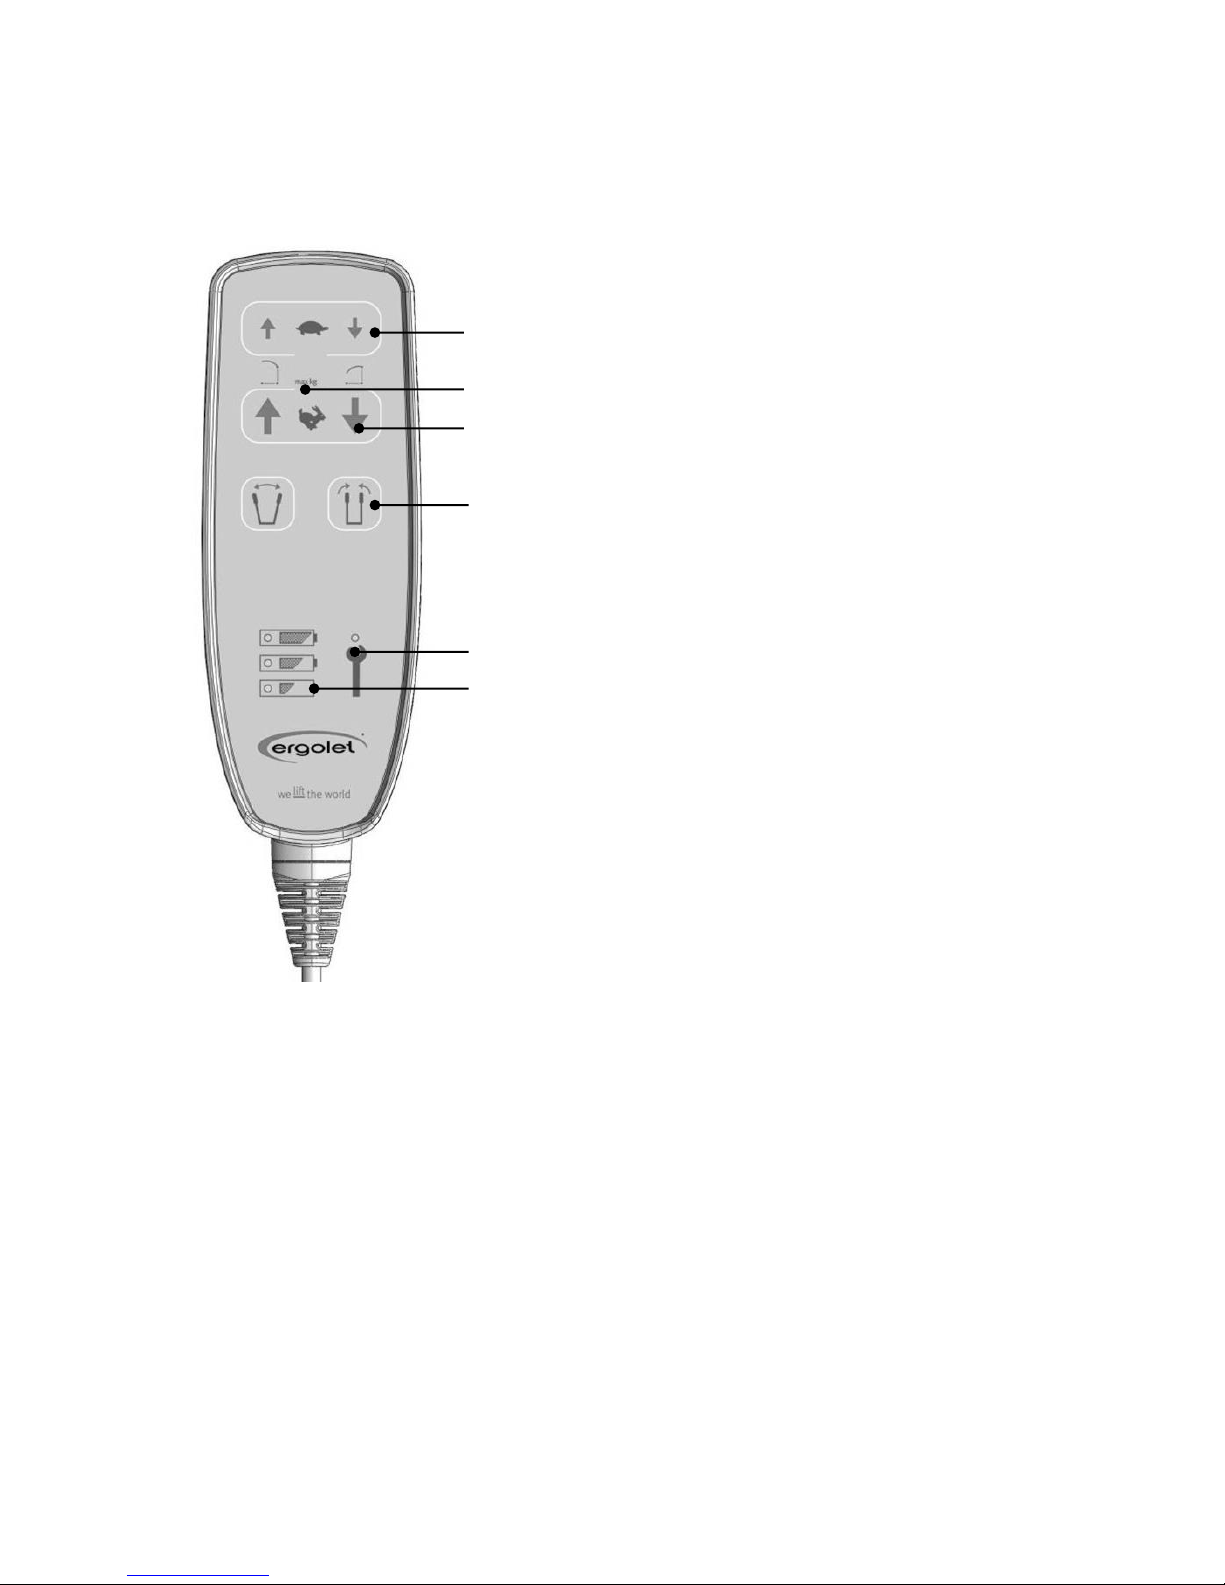
ergolet Stellar/160 Installation instructions

Stellar/160
Stand-aid lifter
User instruction
Important information
This user instruction must be read
before the mobile lifter is used.
This user instruction is intended
for technicians, installers,
therapists and other personnel, in
connection with the use, servicing
and maintenance of the Stand-aid
lifter.
Date: 01.10.2013 - Version 02
!
Scan the QR-code for further information

2

3
Contents
1. Aim and use
1.1 Purpose 4
1.2 Safety instructions 4
1.3 Daily check 5
1.4 Terminology 5
1.5 Unpacking 6
1.6 Assembling instruction 6
1.7 Mounting of lifting slings 8
2. Functions
2.1 Pictograms and functions –control box 9
2.2 Pictograms and functions –hand control 10
2.3 Safety functions 11
2.4 Charging 12
2.5 Transport 12
3. Use
3.1 Adjusting the knee support 13
3.2 Using the lifting slings 13
3.3 Using the control box 15
4. Maintenance
4.1 Cleaning 16
4.2 Storage 16
4.3 Special environments 16
5. Check and trouble shooting
5.1 Annual check 16
5.2 Trouble shooting 17
6. Technical data and dimensions
6.1 Technical specifications 18
6.2 Dimensions 19
7. Environment and quality
7.1 Disposal 20
7.2 Battery 20
7.3 Quality 20
7.4 Symbols and abbreviations 21
8. Accessories 22

4
1. Aim and use
1.1 Purpose
Stellar/160 is a mobile stand-aid lifter designed to transfer persons in institutions such as
nursing homes, hospitals, care centres and in home care. Stellar can be used for transfer
between bed and chair/wheelchair, from chair to another chair and from wheelchair to a
toilet/commode.
Stellar is approved to transfer with a maximum load on 160 kg.
Before using the Stellar please follow these instructions:
Personnel have received qualified instruction by Ergolet in using the stand-aid lifter.
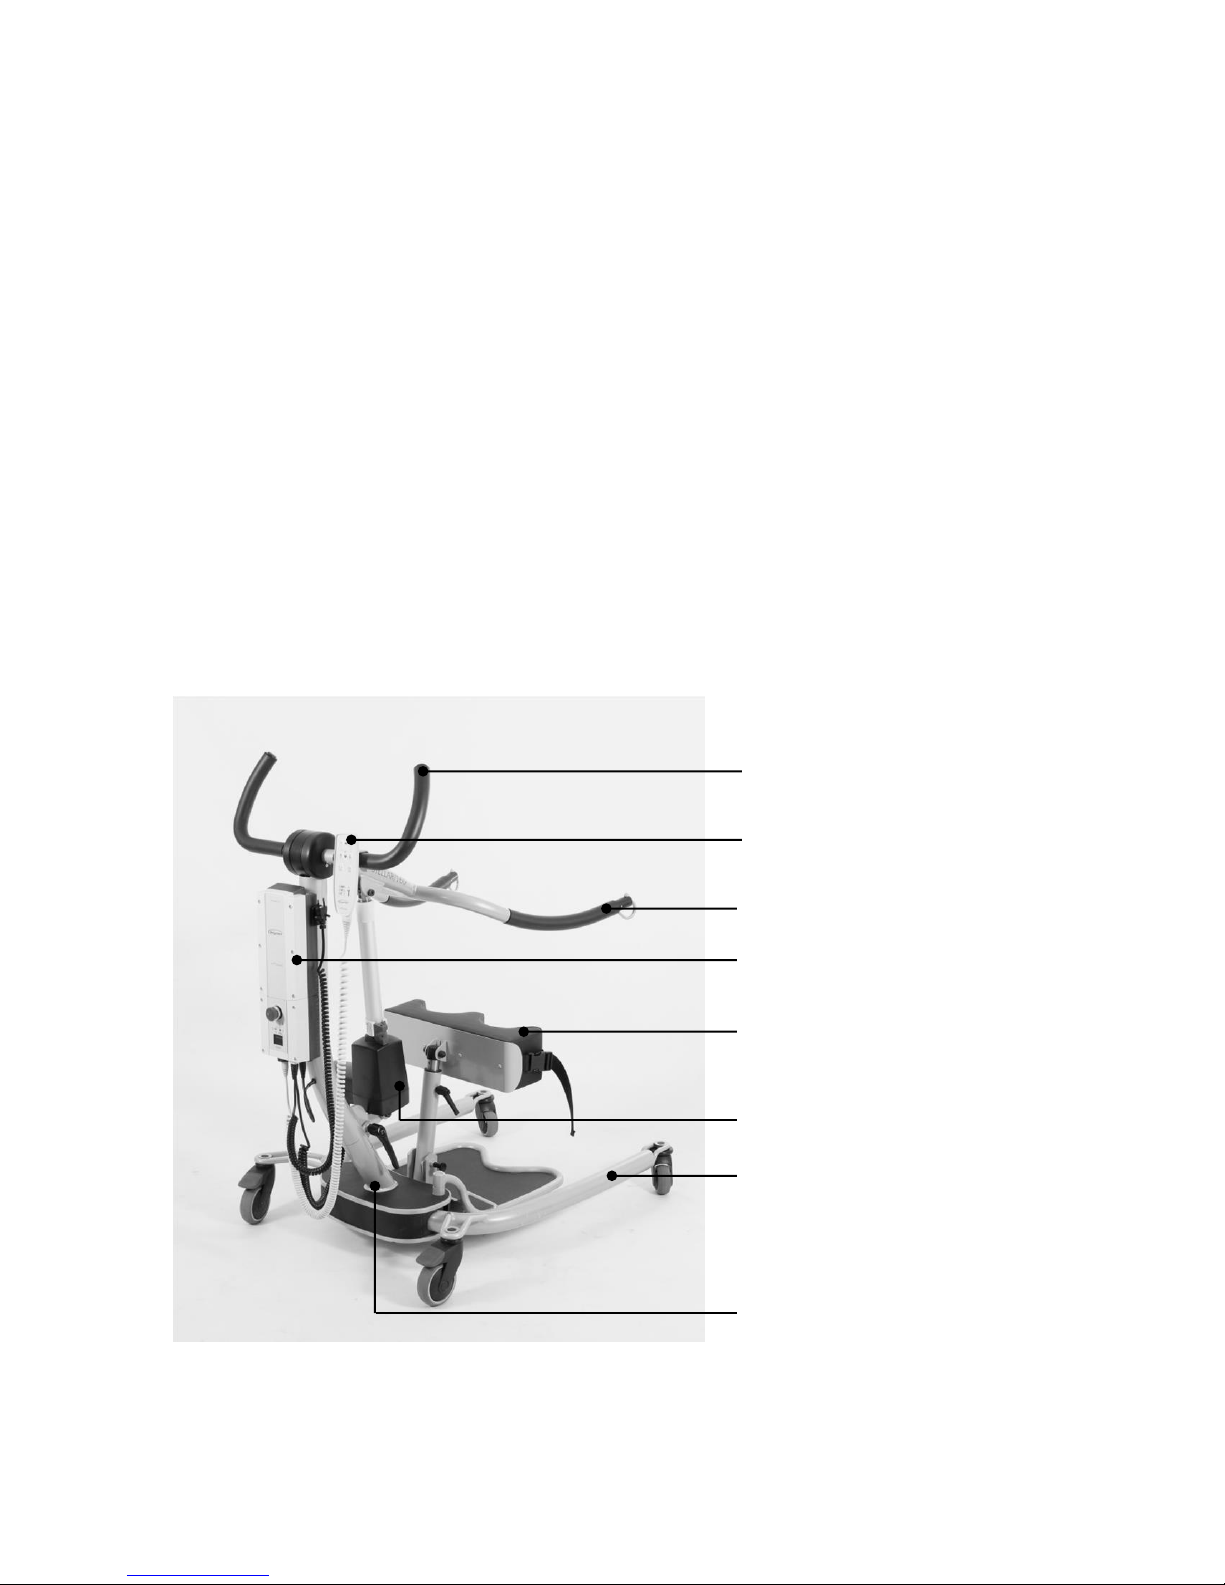
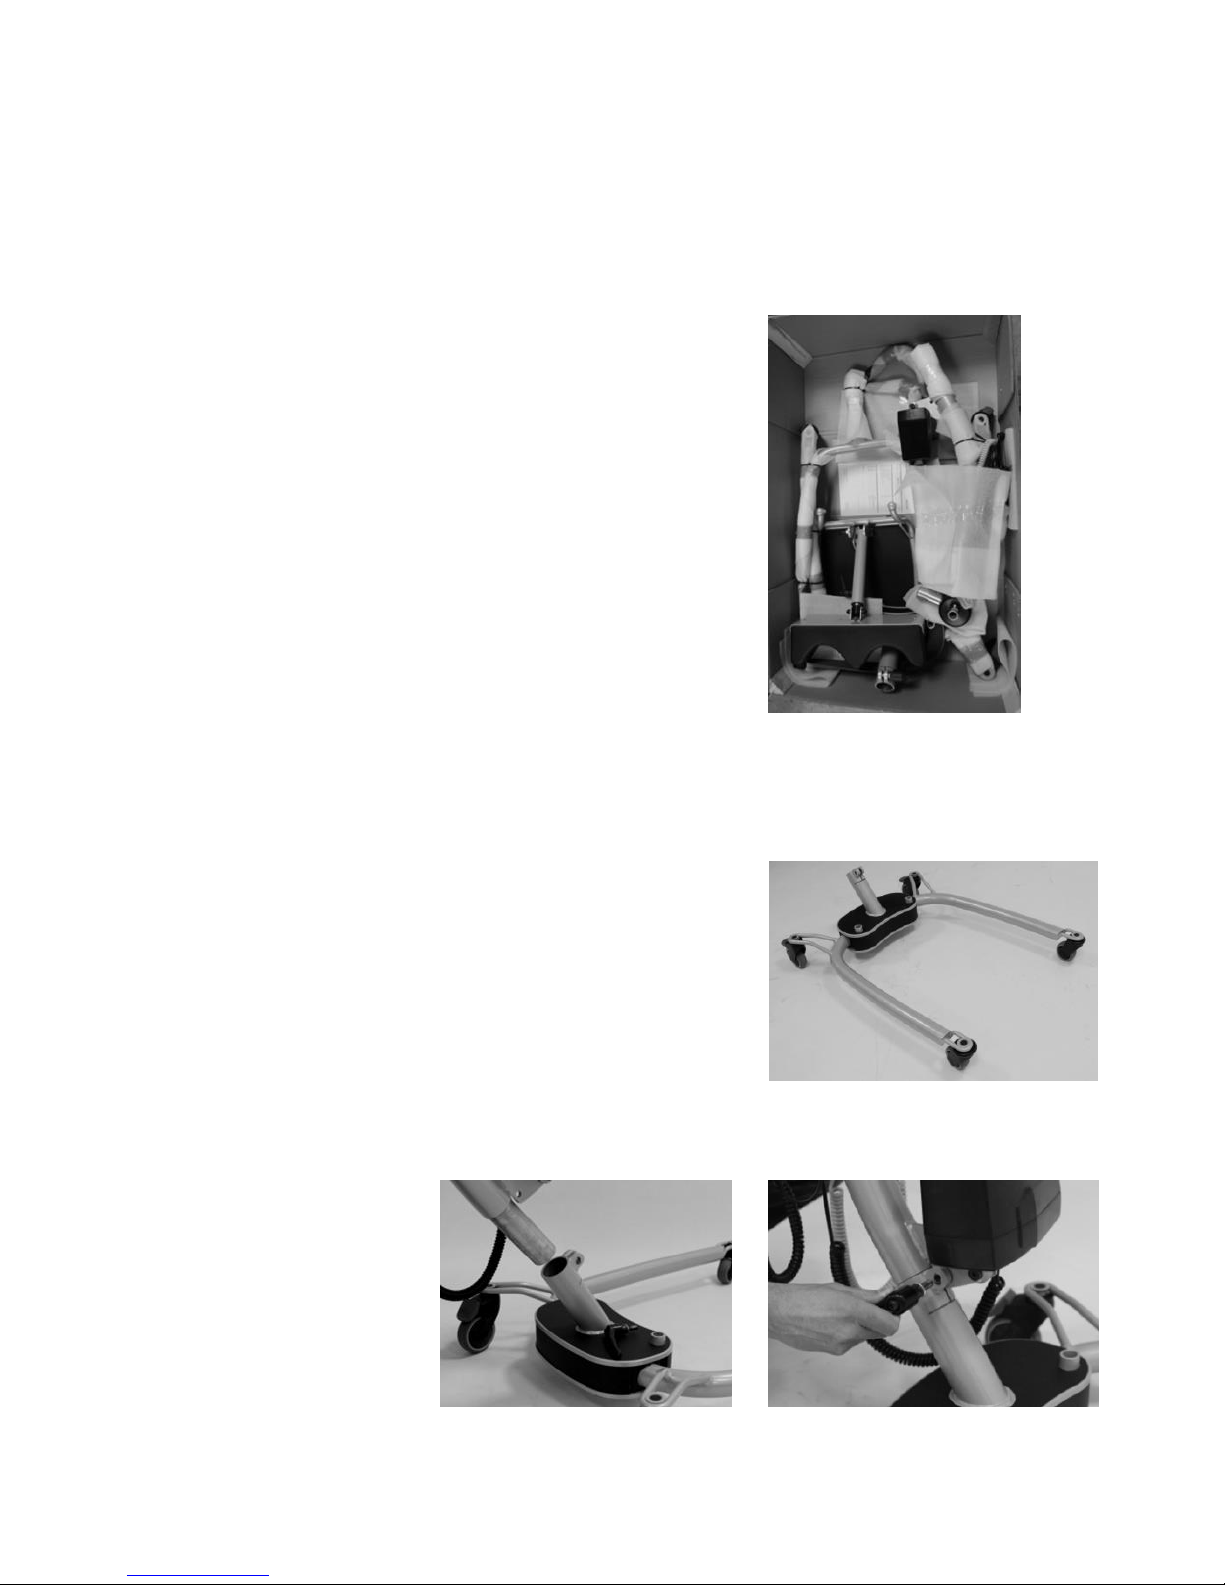
The stand-aid lifter has been assembled correctly and according to this user instruction.
NEVER use the stand-aid lifter for other purposes than described in this user instruction.
Ensure the user cannot be squeezed or restricted in the lifting situation.
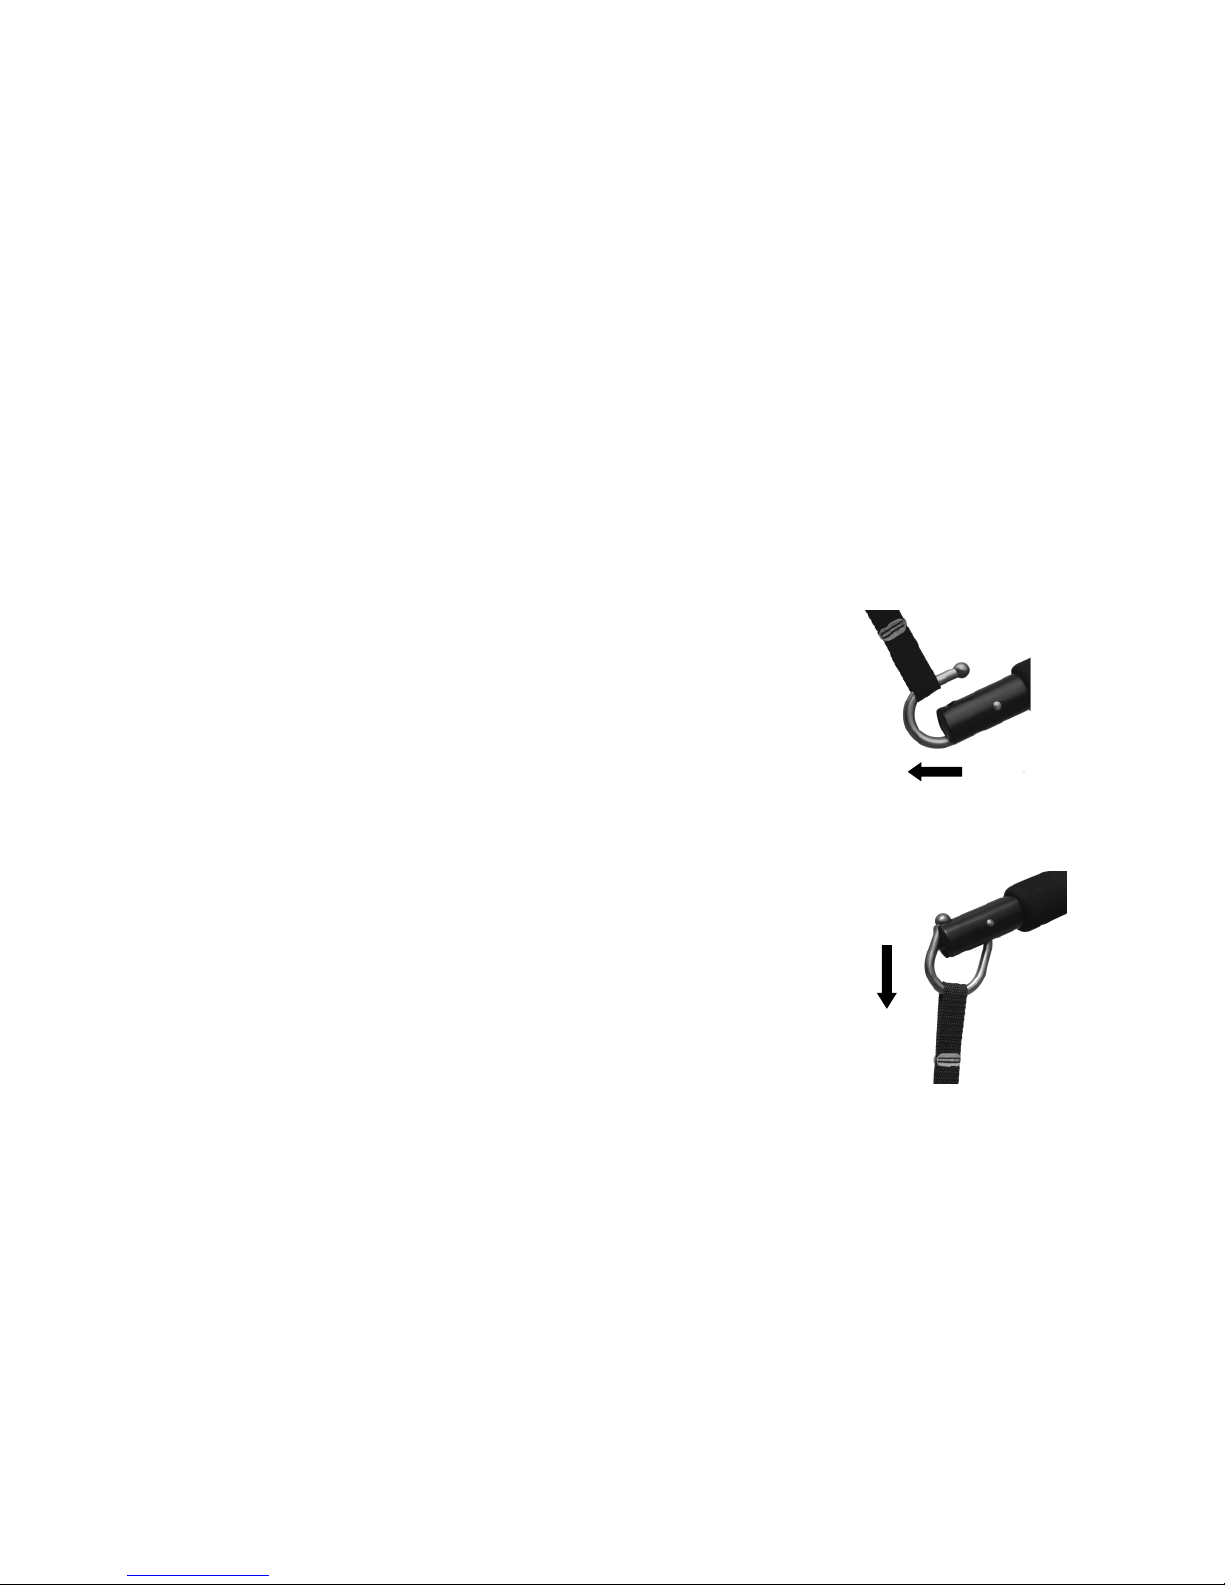
The stand-aid lifter has been developed for use with Ergolet lifting slings and other sling
products authorized by Ergolet. See Ergolet’s user instruction for slings for specific
information about which models that can be used.
The stand-aid lifter is intended for indoor use under normal temperatures (+2 –+40 C°)
and relative humidity (40-90%).
1.2 Safety instructions
This user instruction must be read thoroughly before the stand-aid lifter is taken into use.
All parts must be mounted correctly according to this user instruction.
There must be no indication of wear and tear on the stand-aid lifter or the lifting sling.
NEVER begin lifting if there is suspicion of any defect (abnormal sound, loose brackets
etc.). In such cases it is important to find the cause and to take the stand-aid lifter out of
service and your dealer or Ergolet contacted.
The lifting capacity must never be exceeded. When using the stand-aid lifter in
connection with other components e.g. slings it is always the component with the
LOWEST weight capacity that decides the maximum lifting capacity.
Ensure that neither carers/helpers nor patients/users can be hurt during the lifting.
Using the lifter may not run on uneven surfaces or threshold.
Never lift higher than necessary in the actual lifting situation.
See section 5.1 (annual check) for further information.
!
Important –Warning!

5
1.3 Daily check
The carer/helper is responsible for ensuring that a daily check is carried out BEFORE the
stand-aid lifter and accessories are used, including the following:
1) Check that the stand-aid lifter is complete and no parts are missing.
2) Check that there are no signs of rust, wear and tear or other defects. If there is any sign
of a defect the stand-aid lifter must be taken out of service.
3) If any abnormal sound is heard from the stand-aid lifter, the lifter must not be used
before personnel authorised by Ergolet have carried out a safety check on the unit.
4) Check the lifting slings for any damages especially as regards to the lifting straps for
tears in the material. The slings must not be used if defects are detected.
5) If in any doubt concerning the use of stand-aid lifter or lifting slings, contact Ergolet for
advice and guidance.
1.4 Terminology
Fig. 1.4
Hand control
Actuator (lifting motor)
Mast
Handles
Lifting arms
Leg / electrical leg spreading
Control box, emergency stop
and battery
Knee support

6
1.5 Unpacking
Check that all the parts are present and undamaged. Any suspicion of damage or shortage
should be reported to your dealer or Ergolet. We recommend that the box packaging is kept if
the stand-aid lifter is to be used on other sites or for return shipment in case of repair or annual
check.
Content of the box:
1. Leg with base for leg spreading
2. Mast and lifting arm
3. Actuator
4. Hand control with battery
5. Control box
6. Handles
7. Knee support
8. Tools (Allen key, spanner)
9. User instruction
1.6 Assembling instruction
Following step by step the assembly guidance:
1. Place the leg part on the floor and brake the
wheels. Fig. 1.6A
2. Assembly the mast/lifting arm with the leg part
and tighten the hand screw. (Fig 1.6B + 1.6C)
Fig. 1.6C
Fig. 1.6B
Fig. 1.6A

7
Fig. 1.6F
3. Mount the foot plate into the corresponding
holes on the leg base.(Fig. 1.6D)
4. Fit the actuator piston rod to the lifting arm.
Use the Allen key and the spanner to tighten
the bolt/nut. (Fig. 1.6E). Put the cap on the
nut.
5. Fit the handle on the mast with a screw and
tighten with the Allen key. (Fig 1.6F)
6. The hand control, lifting arm and electrical leg
spreader are connected to the control box.
(Fig 1.6G)
(See section 2.1 –functions / connection).
Fig. 1.6D
Fig. 1.6G
Fig. 1.6E
(a)

8
( 1 )
Fig. 1.7A
1.7 Mounting of lifting slings
The stand-aid lifter is equipped with lifting arms where there in the end is a hook, which is
designed for use with Ergolet lifting slings. Ergolets lifting slings have 4-6 lifting straps and are
designed for lifting hooks larger than ø8mm.
If using non-authorized slings Ergolet will have no responsibility for faults and accidents.
Ergolet can assist in choosing slings and their correct use.
Fitting slings on the Ergolet lifting hook
Ergolet accepts no responsibility if slings are placed incorrectly, it is always the onus of the
carer/helper to ensure that the sling is correct for the situation needs and is correctly fitted.
(1) The sling strap is placed over the hook in its open position.
(Fig. 1.7A)
(2) The strap is pulled downwards so that the hook closes.
(Fig. 1.7B)
The design of the lifting hook is such that the weight of the
patient/user will help close the hook.
To release the strap after lifting simply pull upwards to open
the hook.
Note: Risk of finger entrapment - ensure that patients’ fingers cannot get trapped.
(2)
Fig. 1.7B

9
2. Functions
2.1 Pictograms and functions –control-box
(1) Connecting plug - hand control
(2) Connecting plug - lifting actuator
(3) Connecting plug - electrical leg spreading
(4) Connecting plug - power supply
(5) Battery
(6) Emergency stop –See section 2.3
(7) Lift up/down –Press and the lifting arm
is lifted up. Press and the lifting arm is
lowered. Stop movement by releasing the
button.
(8) Leg spreading in/out –Press and the
leg spreading move together. Press and the
leg spreading will spread. Stop movement by
releasing the button.
(9) Charge –indicates charging on the battery
(see section 2.4).
(10) ON –indicates that main supply is on.
(11) Display –(See section 3.3)
(5)
(6)
(7)
(8)
(9)
(10)
(1)
(2)
(3)
(4)
(11)

10
2.2 Pictograms and functions –hand control
(1) Turtle –This function operates the lifting arm
up/down in a low speed.
(2) Max Kg –indicates an overload (see section
3.3)
(3) Hare –This function operates the lifting arm
up/down in a high speed.
(4) Leg spreading –Press and the leg
spreading move together. Press and the leg
spreading will spread.
(5) Service –See section 3.3
(6) Battery –indicates the state of the battery
(see section 2.4)
(1)
(2)
(3)
(4)
(5)
(6)

11
2.3 Safety functions
Emergency stop: This function is only to be used in an
emergency e.g. if the stand-aid lifter does not react or
does not stop after releasing the hand control operation.
If the emergency button has been activated all functions
immediately stops. The emergency stop can be released
by turning the red button a ¼ turn to the right. (Fig 2.3A)
Emergency lowering: This function is only to be used in
an emergency, where it is necessary to safely lower a
patient. The emergency lowering is placed on the lifting
actuator and is activated by pulling in the red handle and
the lifting arm is lowered slowly. (Fig 2.3B)
For both functions; If the emergency button/lowering has been activated due to an
emergency the stand-aid lifter must not be used again before a check has been made and any
defect repaired.
In any doubt, please contact Ergolet.
Fig. 2.3A
Fig. 2.3B

12
2.4 Charging
The stand-aid lifter is equipped with a battery that requires regular charging. Ergolet
recommends that the battery is charged when the stand-aid lifter is not in use or every
night. The stand-aid lifter can be charged from the mains (wall outlet).
There are 3 batteries symbols on the hand control, which indicate the power level of the
battery.
Low battery
The battery must IMMEDIATELY be put on charge. In this situation
remain on charge for 24 hours.
Battery 25%
An audible battery alarm will alert when there is a 25% capacity
remaining in the battery.
Battery 50%
Recommend charging to avoid low battery.
Full battery
The lifter is ready for use.
Note: The stand-aid lifter cannot be overcharged.
Charge directly from the wall outlet
1) Remove the plug, placed on the side of the control box and
plug into the mains.
2) The cable from the charger to the mains must be loose.
3) The “charge” diode lights yellow on the control box and the
display shows a plug symbol during charging.
2.5 Transport
The stand-aid lifter is most safely transported using the original packing.
Symbols are printed on the packaging to ensure the best information to carrier companies.
Fig. 2.4

13
3. Use
Stellar/160 is ready for use if all assembly instructions have been followed and the
emergency stop has been released.
3.1 Adjusting the knee support
Height adjustment:
The knee support is adjusted by loosening the hand screw (1).
The knee support adjusted up or down. The upper edge
of the knee support should be under the user’s
kneecap.
Tighten the hand screw when settings fit.
Note: The knee support must never press on the knee-caps.
Angle adjustment:
The angle of the knee support can be adjusted in 5 positions.
Pull the click lock (2) out and set the angle to the user
when the user stands up.
Release the click lock and ensure that the mechanism is
locked.
Note: As additional support, the calf belt (3) can be tightened around the knee support.
3.2 Using the slings
Lifting from sitting position:
Place the sling behind the user by pushing the back
support as low down on the users back as possible.
Close the safety belt. Lock the clasps on the belt
and pull the straps tight. Straps must be pulled
tight.
Note: Be aware that the clasps located under the
user’s ribs.
Fig. 3.1A
(1)
(2)
(3)

14
Fit the side pieces under the user’s arms and fasten the
sling loops on the sling hooks on the lifting arm.
The user may have their arms outside as illustrated or if
the user is semi-paralyzed, it may be necessary to keep
the arm inside the lifting arm/sling.
Apply the brakes on the wheelchair. Move the stand-aid
lifter to the user and place the user’s feet on the foot
plate.
Start lifting until the sling sits tightly around the back. Re-
tighten the sling belt around the waist once more if it is
not tight enough.
The user may hold the foam padded part of the handle
and is asked to participate (co-operate) in the lifting
action, as much as possible.
Ensure that the patient feels no discomfort.
Ask the user to press their feet down onto the plate and
to stretch both knee-and hip-joints.
The carer may help by placing a hand on to the knee and
press the knee lightly downwards. Continue the lifting
process according to the user’s ability, until he stands as
upright as possible. Never lift higher than is necessary.
From standing to sitting position:
Move the lifter to the secured (braked) wheel chair.
Note: Do not apply the brakes on the stand-aid lifter
when lifting the user.
The user is best lowered with his buttocks placed on the
bottom half of the chair’s back-rest. This will tilt the chair
slightly backwards and the user will then slide down into
the back of the chair when lowered. This movement
demands the utmost care and attention from the carer.

15
3.3 Using the control box
Display information’s:
To activate the display press up and down at the same time on the hand control
Total cycles –lifting actuator
Total work (Amp/sec)
Number of overloads
Day since last service/days between services
Service indicator:
When it is time for a service on the lifting actuator the diode lights
on the hand control and the wrench symbol will be shown on the
display. Service interval is 8000 cycles/12months by default, this
interval can be adjusted.
Resetting of service is done by pressing up/down on the hand
control at the same time for 5 sec. The counter will reset to zero and
start counting a new service period.
Overload:
The safety working load (SWL) on 160kg has been exceeded!
Charge:
See description in section 2.4.
Battery:
See description in section 2.4

16
4. Maintenance
4.1 Cleaning
The stand-aid lifter may be cleaned using a slightly damp cloth with a standard household
cleaning agent. Chemicals and other strong/abrasive agents must not be used.
The stand aid lifter cannot under any circumstance be autoclaved.
It is recommended that the stand-aid lifter be cleaned after each use to avoid infection. The
stand-aid lifter can be disinfected with household alcohol.
4.2 Storage
The stand-aid lifter must be stored in a dry environment with relative humidity under 90%.
If the stand-aid lifter is not to be used over a longer period of time it is best to fully charge
the unit and activate the emergency button to save battery before putting in storage.
4.3 Special environments
The stand-aid lifter is not intended for use in aggressive environments e.g. leisure centres or
swimming pools. For these situations please contact your local dealer or Ergolet.
5. Check and trouble shooting
5.1 Annual check / inspection
The stand-aid lifter must always be maintained by qualified and authorised personnel who
have been approved by Ergolet.
The manufacturer Ergolet stipulates that this lifter MUST be checked by a qualified and
authorised person at least once a year. This annual check is also recommended in the
Standard (EN/ISO 10535) for lifters.
It is the customer’s / dealer’s responsibility to ensure that the annual service inspection is
carried out.
If it is necessary to replace any parts due to wear or damage these must be
obtained/purchased from Ergolet or your local dealer.

17
5.2 Trouble shooting
Fault:
The lifter does not
react when the hand
control buttons
UP/DOWN are used.
Possible cause:
Emergency stop is activated.
Solution:
Release the emergency stop (see section 2.3)
Possible cause:
Defect hand control.
Solution:
Try using another hand control. Alternative is
to get a new hand control from the dealer.
Possible cause:
Flat battery.
Solution:
Charge battery (see section 2.4).
Fault:
The lifting arm can
travel up or down not
both.
The electrical leg
spreading can only
move in or out not
both.
Possible cause:
Fault in the control box.
Solution:
Replace the control box.
Possible cause:
Defect hand control.
Solution:
Try using another hand control. Alternative is
to get a new hand control from the dealer.
Fault:
The lifting actuator is
noisy or vibrates
abnormally
Possible cause:
Lifting actuator is defective.
Solution:
Replace the lifting actuator.
Fault:
Does not charge
Possible cause:
Charger is not connected to the main supply.
Solution:
Connect charger.
Possible cause:
Defective control box.
Solution:
Try another control box. Order a new control
box from Ergolet or your dealer.
Possible cause:
Defective battery.
Solution:
Replace battery.

18
6. Technical data and dimensions
6.1 Technical specifications
Lifting properties:
Load capacity: 160 kg
Number of lift movements: 60-80 lift with 80kg / 0,5 m
Duty cycle: 10%, max, 2 min/18 min
Manually emergency lowering: Yes
Electronically lowering: Yes
Electrical details:
Power supply (Input): 100-240 VAC 50/60 Hz, max 0,35 A
Output voltage: 24V
Control box (Output): 250 VA
Battery capacity: 2,9Ah
IP-class: IPx4
Noise:
Lwa during lifting/lowering without load is 49dB(A)
Lwa during lifting/lowering at maximum load is 52dB(A)
Material:
Powder coated steel
More test results may be available by contacting Ergolet.

19
1. Highest point
2. Maximum reach point
3. Lowest position
a) Maxi. reach at 600 mm
(reference height): 89mm
b) Maxi. reach from base 553mm
c) Reach from base with
legs spreading to 700 mm 232mm
d) Min. Dist. from wall to CSP*
at maxi. height 616mm
e) Min. Dist. from wall to CSP*
at maxi. reach (legs spread) 98mm
f) Min. Dist. from wall to CSP*
at min. height (legs spread) 136mm
i) Min. Height of CSP* 697mm
k) Maxi. height of CSP *: 1683mm
m) Hoisting range 986mm
p) Maxi. internal width 828mm
q) Internal width at maxi.
reach: 893mm
r) Min. internal width 535mm
* CSP = Central suspensions point
Turning radius: 1060mm
Weight:
Weight in total: 54 kg
Mast incl. battery: 21 kg (battery 2,8kg)
Base/legs: 23 kg
Foot plate: 10 kg
6.2 Dimensions

20
7. Environment and quality
Stellar/160 has an expected life time of minimum 10 years under the assumption that all
recommended service checks have been carried out and that the normal maintenance and
care instructions have been followed.
7.1 Disposal
Disposal of this stand-aid lifter can be made through Ergolet. After useful lifetime Ergolet will
receive the stand-aid lifter back and dispose of the individual parts in an environmentally
friendly way either through reuse or recycling.
Parts that contain aluminum, lead acid batteries, electrical component, ABS plastic, steel
may damage the environment if not handled in an environmentally responsible way.
7.2 Battery
The stand-aid lifter is equipped with one battery which may be returned either to a local
recycling station or to Ergolet at the end of their lifetime.
7.3 Quality
Ergolet is certified according to the quality standard ISO 9001 and ISO 13485.
These certifications mean that the products and the company comply with international
standards for quality management and standards for traceability of medical products.
Stellar/160 is classified as a Medical device class 1 product.
Table of contents
Other ergolet Fitness Equipment manuals