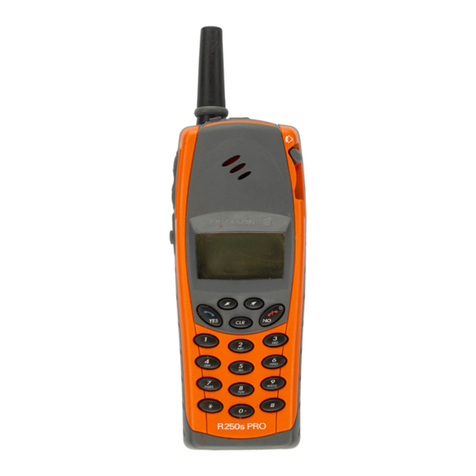
Ericsson R250s Pro Guide

Standard Trouble Shooting Instructions
4/00021-2/FEA 209 544/18 D Approved according to 1776-2/FEA 209 544
Standard Trouble Shooting Instructions
Applicable for R250s PRO

Standard Trouble Shooting Instructions
4/00021-2/FEA 209 544/18 D 2(35)
Contents
1 Explanations........................................................................................................................3
2 Network problems...............................................................................................................6
3 On/Off problems.................................................................................................................9
4 Audio problems.................................................................................................................13
5 Display/ Illumination problems.......................................................................................18
6 Capacity/ Charging problems..........................................................................................22
7 Sim Problems.....................................................................................................................24
8 Key problems.....................................................................................................................27
9 Alert problems...................................................................................................................32
10 Data communication problems........................................................................................33
11 Other problems.................................................................................................................34
12 Revision History................................................................................................................35

Standard Trouble Shooting Instructions
4/00021-2/FEA 209 544/18 D 3(35)
1 Explanations
1.1 Component placement reference
For component placement see doc.1078-2/FEA 209 544/18
1.2 Pin placement

Standard Trouble Shooting Instructions
4/00021-2/FEA 209 544/18 D 4(35)

Standard Trouble Shooting Instructions
4/00021-2/FEA 209 544/18 D 5(35)
1.3 Abbreviations
B: Crystal.
C: Capacitor.
D: Digital circuit.
F: Over voltage protection.
H: Buzzer, LED, pads for display.
J: Connector.
L: Coil.
N: Analogue circuit, power amplifier at some phones.
R: Resistor.
S: Keyboard pads.
V: Transistor, diode.
X: Contact surface at the circuit board.
Z: Filter.
DCIO: DC voltage through the system connector for charging.
GND: Ground.
LED: Light emitting diode e.g. the background illumination.
LO: Local oscillator.
RTC: Real Time Clock, the clock that keeps track of time.
SIMCONCLK: Signal from the processor used for communication to SIM, clock signal.
SIMCONDAT: Signal from the processor used for communication to SIM, data signal.
SIMCONRST: Signal from the processor used for communication to SIM, reset signal.
SIMVCC: Feed voltage for SIM.
VBATT: Battery voltage.
VDIG: DC voltage for the processor and memory.
VDSP: DC voltage for the DSP (Digital Signal Processor).
VLCD: DC voltage for the display that controls the contrast.
VRAD: DC voltage for the radio part except the synthesizer.
VVCO: DC voltage for the synthesizer.
I2C: Two line serial communications standard using one clock and one data
line.
PWM: Pulse Width Modulation

Standard Trouble Shooting Instructions
4/00021-2/FEA 209 544/18 D 6(35)
2 Network problems
2.1 Find out if the fault is RX or TX related
Connect the phone, with the signalling program, to a GSM test instrument and try to get serv at -
68,5 dbm signal strength.
If the phone gets serv, go to the section 2.1.2.
If the phone does not get serv, the fault probably is dependent on the LO part,
or the losses in the signal path are too great, go to section 2.1.1.
2.1.1 The phone does not get SERV
Disassemble the phone and check for liquid damage.
No further action should be taken for a liquid damaged telephone.
Check visually the antenna connector X101, checks if it is damaged, bad soldered or dirty.
If necessary, replace X101.
Check for bad soldering at C314, C318, C319, N301, N302 and N303.
Measure the resistance and replace the faulty component of C530, C531, C532, C533, C534 and
C535, all >200 kohms.
Measure the resistance and replace the faulty component of
C850>100 kohms, C851>1kohm, C833>1kohm, C853>100kohms.
Check for bad soldering at Z250, Z500, Z201 GSM900, Z202 GSM1800 and Z205.
Give the board power and start it up.
• Measure VRAD (3,8V) at C433.
If the voltage is incorrect, go to the section On/ Off problems.
• Measure the DC voltage at N303 pin4 and pin6.
Pin 4 = variable control voltage between 0,8-2,8V (usually 1,7V at the start).
Pin 6 = variable feed voltage (3,3V usually at the start of the board).
If N303 pin 6, the feed voltage is too low or missing.
Check the soldering at D105, D103 and D600 pin8 and pin102.
Measure VVCO 3,8VDC at N410 pin5.
If not, replace N410.
If yes 3,8V at N410 pin 5, measure the level 3,8V at V305 pin 2.
If yes 3,8V at pin 2, replace V305 and C321.
If no 3,8V at pin 2, replace R301.
If N303 pin4, the control voltage is too high (3,6V).
Replace N301.
Standard Trouble Shooting Instructions
4/00021-2/FEA 209 544/18 D 7(35)
If pin4, the control voltage is too low or missing.
Measure the resistance of R312~22 kohms.
If R312 is ok, measure the control- voltage 1,7V at N301 pin5, at the start of
the board.
If the control voltage is too low or missing, replace N301 and C317.
If the control voltage is ok at N301pin5 and too low at N303 pin4,
replace C319 and C314.
If the fault still remains, send the unit on according to the local company directives.
2.1.2 The phone gets serv
Set the GSM test instrument at power level 5 and the signal strength -68,5dBm,
for GSM900.
To try GSM1800, set the power level 0 and the signal strength of -68,5dBm
Set up a call to a GSM test instrument.
If it works.
Go to the section 2.1.3,read the RX level from the GSM instrument while the call is connected.
If it does not work.
Probably the fault is located at the TX.
If calls cannot be connected at the lower channels only, then the fault is N570,
and the phone can not be repaired at this level, send the unit on according to the local company
directives.
Disassemble the phone and check for liquid damage.
No further action should be taken for a liquid damaged telephone.
Check visually the antenna connector X101, if it is damaged, bad soldered or dirty.
If necessary, replace X101.
Measure the resistance from the P401 test point, to ground >10 kohms.
If the resistance is too low, usually 200 ohms, then N401 is damaged, and the phone can not be
repaired at this level, send the unit on according to the local company directives.
Check that L403 not is burned.
Check the soldering at Z205, Z203, GSM900 and Z204 GSM1800.
Check the soldering at N560 and N570.
Measure the resistance at C853 >100 kohms, L560 and L223~0 ohm.
If the fault still remains send the unit on according to the local company directives.

Standard Trouble Shooting Instructions
4/00021-2/FEA 209 544/18 D 8(35)
2.1.3 Read the RX level value from the GSM instrument while the call
is connected
If the RX-level is at 40-46 steps, make sure the output power is 31-35 dBm for GSM 900(power
level 5) or 28-32dBm for GSM1800 (power level 0).
If it is correct, lower the signal strength to -102dBm for GSM 900 and make sure the RX-level
is 6-12 steps and that the RX-quality value is at 0-2steps.
For GSM 1800 the signal strength should be -100,5dBm,the RX-level value 7-13 steps and the
RX-quality value 0-2 steps
Make a call to the public net and check the audio part.
If it is ok, the phone has passed the test.
If the phone can not connect a call to the public net:
Check if the phone is locked out of the system due to theft.
If it not is locked out, replace D600.
• If the phone can’t connect a call at any of the lower channels (GSM900) but at other higher
channels, or if it can not switch from another high channel to channel 1 (or several lower
channels) it means that N570 is faulty and the phone can not be repaired at this level, send
the unit on according to the local company directives.
Disassemble the phone and check for liquid damage.
No further action should be taken for a liquid damaged telephone.
Make sure the antenna connector X101 is not damaged, badly soldered or dirty.
If the RX-level value is below 40 steps at -68.5dBm signal strength there is an RX-related fault.
Measure the resistance of C530-C535 >200 kohms.
Check the soldering at Z250, Z500, Z201 GSM900, Z202 GSM1800 and Z205.
If the fault remains send the unit on according to the local company directives.
If the RX level value is above 45 steps at input signal -68,5 dBm or the RX quality is high, the
phone needs to be calibrated. Send the unit on according to the local company directives.
If the output power is too low, check the soldering at N560, N570, Z205, Z203 and Z204.
If the fault remains, send the unit on according to the local company directives.

Standard Trouble Shooting Instructions
4/00021-2/FEA 209 544/18 D 9(35)
3 On/Off problems
3.1 Starting the phone pressing the On/Off key
1. Remove the battery and make a visual check of the battery connectors,
make sure they are intact.
2. Insert a dummy battery into the phone, start it up by pressing the On/Off key and check the
current consumption.
3. If the phone starts, check the charging function by connecting a charger at the system
connector. If it does not charge go to chapter Charging problems.
4. If the phone does not consume any current when the On/Off key is pressed, go to 3.2.
5. If the phone consumes 1-200 mA, starts (and request for SIM, seeks net, etc....) and works
as long as you keep the On/Off key pressed, go to 3.3.
6. If the phone starts but consumes more than 200mA go to 3.4.
7. If the phone does not start try to reprogram it in the flash programmer.
8. If the phone does not start in the flash programmer go to 3.5.
9. If the phone is programmable but not start afterwards go to 3.6.
3.2 The phone does not consume any current when the
On/Off key is pressed
Disassemble the phone and check for liquid damage.
No further action should be taken for a liquid damaged telephone.
Make sure the battery screws are correctly tightened.
Make sure the system connector pads-J602, not are damaged or burned.
Remove the domefoil, according to mechanical Instructions, and make sure that the keypads are
not broken, liquid damaged or dirty especially the On/Off key.
No further action should be taken for a liquid damaged telephone.
Give the board power.
• Make sure there is VBATT voltage at the pad of the On/Off keypads.
If VBATT is missing there is a foil damage, send the unit on according to the local
company directives.
If VBATT is correct, measure the resistance from the other pad, ONSRQ, to V702 pin
1~0ohms.
If the resistance is incorrect there is a foil damage, send the unit on according
to the local company directives.
If the resistance is correct, replace V702.
If the fault remains, send the unit on according to the local company directives.

Standard Trouble Shooting Instructions
4/00021-2/FEA 209 544/18 D 10(35)
3.3 The phone runs as long as the On/Off key is pressed
Disassemble the phone and check for liquid damage.
No further action should be taken for a liquid damaged telephone.
Make sure the system connector pads-J602 not are damaged or burned.
Mount the board in the fixture. Start it up and keep it running by keeping DCIO high.
• Measure the voltage at C692 >3V.
If it is correct, check the soldering at D600 pin 119, measure the resistance of C692
>200 kohms
If the resistance is incorrect replace the capacitor.
If the resistance is correct, measure the input voltage at N706 pin 2 (VBATT),
and the output voltage at pin 3 ~3.5V. Make sure that there is ground at N706
pin 1.
If VBATT or ground is missing there is a foil damage, send the unit on
according to the local company directives.
If VBATT and ground are correct but not the output voltage, replace
N706.
If they are all correct, measure the voltage at the positive side of the
backup capacitor, C720 ~3.2V.
If it is incorrect, measure the resistance of R720 ~180 kohms,
and R719 ~47kohms.
If they are correct, replace V711.
If the voltage is correct, measure the resistance from the
positive side of C720 to C692 ~0 ohms.
If it is incorrect then there is a foil damage, send the unit on
according to the local company directives.
3.4 The phone consumes more than 200 mA
Disassemble the phone and check for liquid damage.
No further action should be taken for a liquid damaged telephone.
Make sure the system connector pads not are damaged or burned.
Mount the board in the fixture. Start it up and keep it running by keeping DCIO high.
• Check the current consumption again.
If it is more than 200mA, replace the display and the elastomer and try again.
• Check the resistance from VBATT to ground >1 Mohms.
If it is less, send the unit on according to the local company directives
• Check VDIG on N702 pin5 and VDSP-N701 pin5 voltage ~3.2V.

Standard Trouble Shooting Instructions
4/00021-2/FEA 209 544/18 D 11(35)
If any of the voltage are too low, measure the resistance from it to ground (VDIG -
>500 ohms, VDSP - >25 kohms).
If the resistance is correct, replace the corresponding regulator.
If it is too low, send the unit on according to the local company directives.
If any of the voltages are too high, replace the corresponding regulator.
• Measure VRAD on N412 pin5, VVCO-N410 pin5 and VRPAD-N411 pin5 volt-ages ~3.8V.
If any of the voltage are incorrect, measure the resistance from it to ground (>50
kohms).
If the resistance is correct, replace the corresponding regulator.
If that does not help, or the resistance still is too low, send the unit on
according to the local company directives.
3.5 The phone does not start in the flash programmer
Disassemble the phone and check for liquid damage.
No further action should be taken for a liquid damaged telephone.
Make sure the system connector pads are not damaged or burned.
• Measure the resistance of R421 ~ 0.1 ohm.
If R421 is replaced, the charging function has to be verified. If it’s incorrect, send the
unit on according to the local company directives.
Mount the board in the fixture. Start it up and keep it running by keeping DCIO high.
• Check VDIG-N702 and VDSP-N701 voltage 3.2V.
If any of the voltage are too low, measure the resistance from it to ground (VDIG >500
ohms, VDSP >25 kohms).
If the resistance is correct, replace the corresponding circuit, VDIG - N702,
VDSP - N701.
If the resistance is too low, send the unit on according to the local company
directives.
If any of the voltages are too high, replace the corresponding circuit.
• Check the power reset (PWRRST) voltage at C710 >3V
If it is lower, check R704 ~0 ohms and R725 ~100 kohms.
If they are ok, first replace C710 and if it does not help, replace N703.
• Measure the voltage VRAD-N412 pin5, VVCO -N410 pin5 and VRPAD-N411 pin5 voltage
~3.8V, fig.
If any of the voltages are incorrect, measure the resistance from it to ground >50
kohms.
If it is correct, replace the corresponding circuit.
If the resistance is too low, send the unit on according to the local company
directives.

Standard Trouble Shooting Instructions
4/00021-2/FEA 209 544/18 D 12(35)
• Check the amplitude of the 13MHz system clock at B510 pin 1 ~1V t-t.
Measure it by using an oscilloscope, spectrum analyser, frequency counter or diode probe.
If the amplitude is too low, send the unit on according to the local company directives.
Make sure there aren’t any faulty soldering at D600 or D610.
If it looks good, replace D600 first and then D610.
NOTE! Do not replace any of the components unless you have established the fact that
B510 is functional. Try programming the phone in between.
If the fault still remains send the unit on according to the local company directives.
3.6 The phone does not start after flash programming
Disassemble the phone and check for liquid damage.
No further action should be taken for a liquid damaged telephone.
Make sure the system connector pads are not damaged or burnt.
• Measure the resistance of R421 ~0.1 ohms.
If R421 is replaced, the charging function has to be verified. If it is incorrect, send the
unit on according to the local company directives.
Mount the board in the fixture. Start it up and keep it running by keeping DCIO high.
• Measure VDIG-N702 pin5 and VDSP-N701 pin5 voltage ~3.2V.
If any of the voltage is too low, measure the resistance from it to ground (VDIG - >500
ohms, VDSP - >25 kohms).
If the resistance is correct, replace the corresponding circuit.
If it is too low, send the unit on according to the local company directives.
If any of the voltages are too high, replace the corresponding circuit.
• Check the power reset (PWRRST) voltage at C710 >3V.
If it is less, measure the resistance of R704 ~0 ohm and R725 ~100 kohms.
If they are correct, replace C710first and then N703.
If that does not help measure VRAD-N412 pin5, VVCO-N410 pin5 and
VRPAD-N411 pin5 voltage ~3.8V.
If any of the voltages are incorrect, measure the resistance from it to
ground (>50 kohms).
If the resistance is correct, replace the corresponding circuit.
If the resistance is too low, send the unit on according to the
local company directives.
Make sure there are not any faulty soldering at D600 or D610.
If it looks good, replace D610 first and then D600.
NOTE! Program the phone in between.

Standard Trouble Shooting Instructions
4/00021-2/FEA 209 544/18 D 13(35)
4 Audio problems
4.1 Type of fault
Make a call to another phone.
Check which part is faulty, (microphone, and earphone).
Switch ON manually the loudspeaker.
Check which part is faulty (microphone, loudspeaker).
If the microphone is faulty, go to the section 4.1.1 microphone problems.
If the earphone is faulty, go to the section 4.1.2 earphone problems.
If the loudspeaker is faulty, go to the section 4.1.2 earphone problems.
Connect a handsfree to the phone.
Make a call to another phone.
Check which part is faulty, the external microphone or the external earphone.
If the microphone is faulty, go to the section 4.1.3 hands free problems (microphone).
If the earphone is faulty, go to the section 4.1.4 hands free problems (earphone).
If the hands free is not detected, go to the section 4.1.5 hands free can not be detected.
If you can communicate with a handsfree, but you can not communicate without a handsfree, go
to the section 4.1.6 microphone and earphone problems.
If the sound is disturbed or noisy, go to the section 4.1.7 noisy sound.
If the mute function does not operate, proceed the section 4.1.8 mute problems.
4.1.1 Microphone problems
Disassemble the phone and check for liquid damage, especially around X830.
No further action should be taken for a liquid damaged telephone.
Replace the microphone and the elastomer.
Check the soldering of N800 pin 13 to pin 18.
• Check the soldering and measure the resistance of R809, R810, R811, R812, R813, R814,
R816, R817 and R820.
Replace the faulty component.
If the resistance of R820 is too low after it has been replaced, replace V805 and C832.
If the fault remains:
Check the resistance of R818>10 kohms, if not replace R818 and C820.
If all the resistances are OK. Check the soldering and measure the resistance of C815.It
should be > 50 kohms.

Standard Trouble Shooting Instructions
4/00021-2/FEA 209 544/18 D 14(35)
If not replace C815 and C816.
If the fault remains:
Check the soldering and measure the resistance of C850 >100 kohms
and C851>1 kohm.
Replace the faulty component.
If the fault remains:
Check the soldering and measure the resistance of C801,
C808, C814, C818, C819, C829, C830, C831, and C834. They
should be > 100 kohms each.
Replace the faulty component.
If the fault remains:
Replace V803.
If the fault still remains send the unit on according to the local company directives.
4.1.2 Earphone problems
Disassemble the phone and check for liquid damage.
No further action should be taken for a liquid damaged telephone.
Check the speaker pogo pin contact (connection between J900 at the board and the earphone).
• Measure the resistance of the earphone in the front cover; it should be 8 ohms.
If the resistance is higher replace the front cover.
If the fault remains: Check the soldering of N800 pin26.
• Measure the resistance between J900 pin1 and ground ~56 kohms,
pin2 and ground ~56 kohms.
If the resistance is lower, replace C909 (and C927).
If the resistance was ok.
Measure the resistance and check the soldering of R906 ~100 ohms, R914~0 ohm
R917~10 kohms, R919~10 kohms, C914~56 kohms, C913~150 kohms.
Replace the faulty component.
If all the measurements are ok:
Check the soldering of N900 and N901.
If the soldering is ok: Give the board power and start it up.
• Measure the DC voltage 3,2V (VANA) at N901 pin1,18,3,2.
If VANA is missing at pin1,18,3,2, send the unit on according to the local company
directives.
If VANA is correct at N901 pin1,18,3,2: Measure the DC voltage 4,6V at N900 pin1.
If the level at N900 pin1 is too low or missing:
Check the soldering and the resistance of R916~33 kohms and R918~33
kohms.
Replace the faulty component.

Standard Trouble Shooting Instructions
4/00021-2/FEA 209 544/18 D 15(35)
If R916 and R918 are ok:
Replace the components C919, V901, N900 one by one. After each
replacement, give the phone power and start it up and check the DC
voltage 4,6V at N900 pin1
If the DC voltage 4,6V at N900 pin1 is correct:
Replace N900 and N901.
If the fault still remains send the unit on according to the local company directives.
4.1.3 Hands free problems (microphone)
Check visually the system connector of the phone (if its damaged, dust...).
Disassemble the phone and check for liquid damage, especially at the system connector-pads.
No further action should be taken for a liquid damaged telephone.
Check the soldering of N800, pin19.
• Measure the resistance of R825~3,3 kohms, R830~470 ohms, R802~3,9 kohms, and
R805~15 kohms.
Replace the faulty component.
If all the resistances are ok:
Measure the resistance of C835 >1kohm,C817 >100 kohms, C810 >10 kohms and
C812 >100 kohms.
Replace the faulty component.
If the fault remains send the unit on according to the local company directives.
4.1.4 Hands free problems (earphone)
Check the system connector of the phone visually (if its damaged, dust...).
Disassemble the phone and check for liquid damage, especially at the system
connector-pads.
No further action should be taken for a liquid damaged telephone.
Check the soldering of N800, pin22.
• Measure the resistance of R804.
If it is lower than 50 kohms, replace F601 and R804.
If the fault remains, measure the resistance of R806~100 ohms.
If R806 is ok, measure the resistance of C813 >100 kohms.
If the fault remains send the unit on according to the local company directives.

Standard Trouble Shooting Instructions
4/00021-2/FEA 209 544/18 D 16(35)
4.1.5 The hands free can not be detected
Check visually the system connector of the phone (if its damaged, dust...).
Disassemble the phone and check for liquid damage, especially at the system connector-pads.
No further action should be taken for a liquid damaged telephone.
Check the soldering of D600, pin67 and pin70.
• Measure the resistance of R636 ~22 kohms, R635~22 kohm, R601~1 kohm and
R605~1kohm.
Replace the faulty component.
If the fault remains, replace D600.
If it does not help, send the unit on according to the local company directives.
4.1.6 Microphone and earphone problems
Check visually the system connector of the phone (if its damaged, dust...).
Disassemble the phone and check for liquid damage, especially at the system connector-pads.
No further action should be taken for a liquid damaged telephone.
Check the soldering of D600, pin67and pin70.
• Measure the resistance of EXTAUD to ground. It should be >10 kohms.
If the resistance is lower than 10 kohms, replace F600.
• Measure the resistance of PORTHF to ground. It should be >10 kohms.
If the resistance is lower than 10 kohms, replace F602.
• Measure the resistance of R636~22 kohms, R635~22 kohmsR601~1 kohm
and R605~1 kohm.
Replace the faulty component.
If the fault remains:
Replace D600.
If it does not help, send the unit on according to the local company directives.
Noisy sound
Disassemble the phone and check for liquid damage.
No further action should be taken for a liquid damaged telephone.
Give the board power and start it up.
• Measure VDIG at C600 and VDSP at C900, both should be 3,2V.
If one of the values is incorrect, go to section On/ Off problems.
• Measure VDSPC =2,5V, at R727.
If the VDSPC is low, switch off the board, measure the resistance between VDSPC
and ground.

Standard Trouble Shooting Instructions
4/00021-2/FEA 209 544/18 D 17(35)
If the VDSPC is low and the resistance between VDSPC and ground is
<10kohms, replace the components one by one and check the resistance after
each replacement: C903, C904, C905, R727, N701 and D900.
If the VDSPC is low and the resistance between VDSPC and ground is
>10kohms, replace the components one by one and check the 10 kohms after
each replacement of V703, R727 and N701.
If the VDSPC is correct
Switch off the board, check the soldering of D600 and D900,
if they are ok, replace D600 and D900.
If the fault still remains send the unit on according to the local company directives.
4.1.7 Music mute problems
Check the system connector of the phone visually (if its damaged, dust...).
Disassemble the phone and check for liquid damage, especially at the system connector-pads.
No further action should be taken for a liquid damaged telephone.
Check the soldering of D600 pin69.
• If the soldering is ok, measure the resistance of R602~470 ohms.
If R602 is ok, measure the resistance between J602 pin6 (MUTE) and ground.
If the resistance is <100 kohms, replace F605.
If the resistance is nearly 100 kohms, replace D600.
If the fault remains, send the unit on according to the local company directives.

Standard Trouble Shooting Instructions
4/00021-2/FEA 209 544/18 D 18(35)
5 Display/ Illumination problems
5.1 Display problems
5.2 Type of fault
Insert a fully charged battery into the phone and start it up.
If the display is missing some of the segments, go to 5.1.1
If the display is empty, go to 5.1.2.
5.2.1 Segments are missing
Disassemble the phone and check for liquid damage.
No further action should be taken for a liquid damaged telephone.
Replace the display according to mechanical repair guide.
5.2.2 The display is empty
Disassemble the phone and check for liquid damage.
No further action should be taken for a liquid damaged telephone.
Replace the display according to mechanical repair instructions.
Give the board power and start it up with a display mounted. If the fault still remain, check
if the current consumption is less than 200 mA.
Remove the display from the holder.
Give the board power and start it up without the display mounted.
• Measure the voltage at the display pads at H623.
1. RESETO (3.2V) is incorrect, measure the resistance from the pad to pin 77 of D600 ~0
ohm. Also check the soldering at that pin. If the resistance is substantially higher there is a
foil damage, send the unit on according to the local company directives. If the resistance is
correct, replace D600.
2. I2CCLK (3.2V) is incorrect, measure the resistance from the pad to pin 4 of D600 ~10
kohms. If it is higher, measure the resistance of R615 ~10 kohms.
If the resistance of R615 is correct there is a foil damage, send the unit on according to
the local company directives. Check VDIG (3.2V) at R620~2.2 kohms.
If all of the above is correct, replace D600.
3. GND is incorrect, i.e. there is too high resistance from the pad to ground, there is a foil
damage, send the unit on according to the local company directives.

Standard Trouble Shooting Instructions
4/00021-2/FEA 209 544/18 D 19(35)
4. VDLCD (3.2V) is incorrect, measure the resistance from the pad to pin 45 of D600 ~0
ohm. If it is higher there is a foil damage, send the unit on according to the local
company directives. If it is correct, measure the resistance from the pad to ground (>2.5
Mohms). If it is incorrect, replace C615 and C674.If that does not help, replace D600.
5. VLCD (-2.7V) is incorrect, make sure that VDIG at N702 pin 5 is 3.2V.
Measure the resistance from the pad to pin 1 of V611 ~0 ohm. If it is too high there is a
foil damage, send the unit on according to the local company directives.
Check the soldering at D600 pins 95 and 96.
Measure the voltage at V611 (pin 1: -2.7V, pin 2: -1.6V, pin 3: -2.5V) and V608 (pin 1:
-1.6V, pin 2: 0V, pin 3: -1.0V).
If any of the voltages are incorrect, replace the corresponding diode and try again. If the
problem still remains, measure the resistance of C632, C634, C636 >2.5 Mohms, C631,
C633 >100 kohms and C824 >25 kohms.
If any of the resistances are incorrect, replace the corresponding capacitor.
Also measure the resistance of R616, R639 ~100 kohms, R807 ~82 kohms
and R808 ~33 kohms.
If any of the resistances are incorrect, replace the corresponding resistor. If the fault
remains, replace D600.
6. I2CDAT (3.2V) is incorrect, measure the resistance from the pad to pin 3 of D600 ~10
kohms. If it is higher, measure the resistance of R614 ~10 kohms.
If it is correct there is a foil damage, send the unit on according to the local company
directives. Check if there is VDIG voltage (3.2V) at R619 ~2.2 kohms.
If the voltage is lower, go to chapter On/ Off problems.
If all of the above is correct, replace D600.
7. If the fault is not fixed, send the unit on according to the local company directives.
5.3 Illumination problems
Disassemble the phone and check for liquid damage.
No further action should be taken for a liquid damaged telephone.
Make sure that all 15 LED’s are correct mounted and soldered.
Replace the faulty component.
Give the board power and start it up.
The LED’s H651-H654 and H662 are for the display light (group D LED’s).
The LED’s H655-H660 and H663-H666 are for the keyboard illumination (group K LED’s).
At the start all the LED’s should LIT for 10 sec.
Replace the faulty LED.

Standard Trouble Shooting Instructions
4/00021-2/FEA 209 544/18 D 20(35)
5.3.1 If all the LED’s in group D are not lit
• Check the soldering and measure the resistance of R609, R660, R607 and R608.
Replace the faulty component.
If the fault remains, give the board power only, do not switch it on.
• Measure 3,4VDC at V613 pin3.
If it is above 3,4VDC,replace the LED’s in group D one by one until the fault is gone.
If the 3,4V is ok, start up the board.
Measure1,7V DC at V613 pin1.
If yes 1,7VDC,replace V613.
If no 1,7VDC,replace C656.
• If the fault remains, measure the resistance between V613 pin1 and D600 pin92. It should
be 1 kohm.
If it is ok (1 kohm) replace D600.
If the resistance is high, send the unit on according to the local company directives.
5.3.2 If all the LED’s in group K are not lit
• Check the soldering and measure the resistance of R610, R607 and R608.
Replace the faulty component.
If the fault remains, give the board power only, do not switch it on.
• Measure 3,4VDC at V614 pin3.
If it is above 3,4VDC,replace the LED’s in group K one by one until the fault is gone.
If the 3,4V is ok, start up the board.
• Measure1,7V DC at V613 pin1.
If it is correct, replace V614.
If it is incorrect, replace C656.
• If the fault remains, measure the resistance between V614 pin1 and D600 pin92. It should
be 1 kohm.
If it is ok, 1 kohm replace D600
If the resistance is higher, send the unit on according to the local company directives.
Other manuals for R250s Pro
2
Table of contents
Other Ericsson Cell Phone manuals

Ericsson
Ericsson A1228d User manual

Ericsson
Ericsson T65 User manual

Ericsson
Ericsson S868 User manual

Ericsson
Ericsson SH888 User manual

Ericsson
Ericsson R380E User manual

Ericsson
Ericsson 688 User manual

Ericsson
Ericsson T20E User manual

Ericsson
Ericsson T18d User manual

Ericsson
Ericsson S868 User manual

Ericsson
Ericsson T18s Guide

Ericsson
Ericsson R250s Pro User manual

Ericsson
Ericsson CF337 User manual

Ericsson
Ericsson A2628S User manual

Ericsson
Ericsson T28z User manual

Ericsson
Ericsson EF738 User manual

Ericsson
Ericsson EH 237 User manual

Ericsson
Ericsson SH888 Guide

Ericsson
Ericsson T68m User manual

Ericsson
Ericsson GF788 User manual

Ericsson
Ericsson T28s User manual