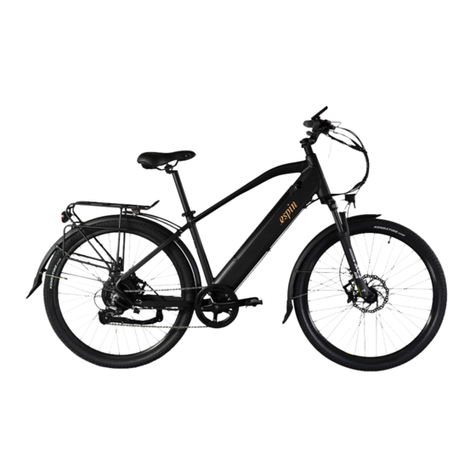
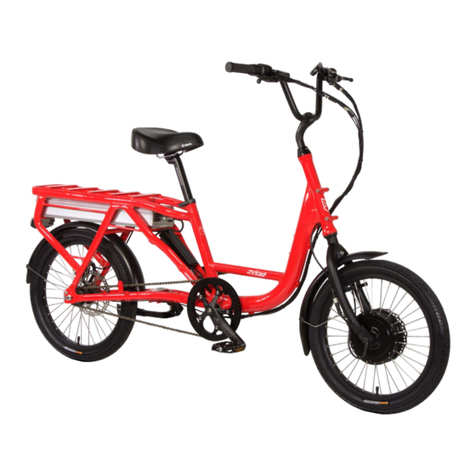
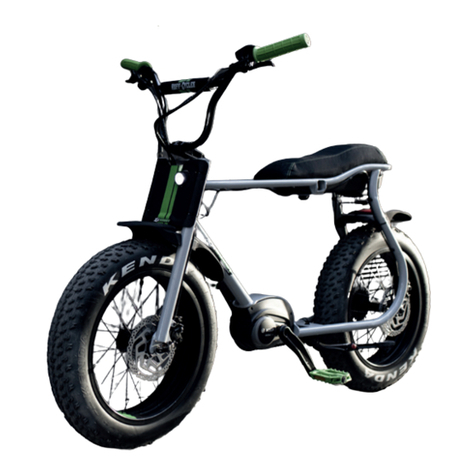
Espin Reine 2019 User manual

1
Espin Reine
User Manual

2

3
TABLE OF CONTENTS
Foreword.........................................................................................................................6
Guide to Safe Operation.................................................................................................8
A Word About Bicycles, Accidents, and Safety.........................................................8
Bicycle Type and Use Condition...............................................................................10
Before a First Ride........................................................................................................13
Checklist: Check Before Each Ride.............................................................................17
Rules to ride safely.......................................................................................................22
Riding instructions........................................................................................................26
Use Your Brakes Carefully .......................................................................................26
Change Gears Correctly ............................................................................................27
Use Pedal Systems Carefully ....................................................................................27
Charging Your Battery..............................................................................................28
Operation of Your Display........................................................................................30
Adjustment ...................................................................................................................34
Handlebar and stem...................................................................................................34
Headset......................................................................................................................36
Saddle and seatpost ...................................................................................................36
Pedals.........................................................................................................................38

4
Chain .........................................................................................................................39
Rear Derailleur ..........................................................................................................40
Shift-levers ................................................................................................................42
Brake .........................................................................................................................43
Brake-levers...............................................................................................................46
Wheels.......................................................................................................................47
Suspension.................................................................................................................50
Maintenance .................................................................................................................52
Prevent Theft of Your Bicycle ..................................................................................52
Write down your serial number.................................................................................52
Park your bicycle carefully........................................................................................52
Keep the bicycle clean...............................................................................................53
Only Install Compatible Accessories ........................................................................53
Battery maintenance and charging ............................................................................54
Battery disposal.........................................................................................................55
Lubrication ...................................................................................................................56
Stem...........................................................................................................................56
Seatpost .....................................................................................................................56
Chain .........................................................................................................................57
Pedals.........................................................................................................................57

5
Derailleurs .................................................................................................................57
Headset......................................................................................................................58
Brakes and Brake-levers............................................................................................58
Wheels.......................................................................................................................58
Suspension Forks.......................................................................................................58
Motor.........................................................................................................................59

6
Foreword
This manual shows how to ride your new Espin electric bicycle safely. Even if you
have ridden a bicycle for years, it is important for EACH person to read this manual
before you ride this electric bicycle!
This manual also shows you how to do basic maintenance. This bicycle you have
purchased is not a complex object, however, it is recommended that you consult your
local dealer if you have concerns as to your ability to assemble, repair, or maintain this
product.
Keep this Manual with the Bike
This manual is considered a part of the bicycle that you have purchased. If you sell the
bike, please make sure this manual is transferred to the new owner as part of the sale.
Please note, however, that warranties are not transferred with the sale.
Meaning of Safety Signs and Language
INFO
The signal word "INFO" alerts the reader to information which is particularly important.
CAUTION
The signal word "CAUTION" designates a hazard with low degree of risk, which may lead
to minor or moderate injury if not avoided.
WARNING
The signal word "WARNING" designates a hazard with moderate degree of risk which may
lead to death or severe injury if not avoided.

7
If You Have Questions
There are many models of bicycles with a variety of equipment, so this manual might
contain some instruction that does not apply to your bicycle. Some illustrations might
be different from your bicycle. If you have questions after you read this manual, speak
to your dealer.

8
Guide to Safe Operation
AWord About Bicycles, Accidents, and Safety
A bicycle can be fun when used for transportation, recreation, exercise, or competition.
But riding a bicycle can also be dangerous, especially if you try to ride beyond the
limits of your ability or the limits of your bicycle. The skill of bicycle riders can vary
greatly, just like the skill of an automobile driver or a skier. Do not ride in a manner
that exceeds your ability.
Each bicycle also has limits because of many properties:
Design and material of the bicycle
Maintenance and use of the bicycle
Surface of the road or trail
And more
Mid Drive System
A pedelec (from pedal electric cycle) is a bicycle where the rider's pedal power is
assisted by a motor. A Mid-Drive System installed on a pedelec can provide strong
supplemental power when riding. When you ride a bicycle with a mid-drive system,
the output power of motor is proportional to the rider's force on the pedal. The
mid-drive system is composed of four parts: Lithium battery; Mid motor; Sensor,
Cycle computer.
A Crash can Weaken your Bicycle
If you crash or apply force that is higher than the limits of your bicycle, you are very

9
likely to cause damage to the bicycle or its parts. If your bicycle has damage and you
crash or load it again later, the previous impact can cause your bicycle to break at a
much lower load.
A Bicycle Cannot Protect You in an Accident
Bicycles are not designed to withstand every situation. In a crash or impact, it is not
uncommon for the bicycle to have damage and for you to fall. If you fall, your bicycle
can not prevent injury. Cars have bumpers, seat belts, air bags, and crumple zones.
Bicycles do not, so even a small crash at slow speed can cause injury or death.
Changes to Your Bicycle Can Make it Unsafe
Each and every part of your new bicycles has been carefully chosen and approved.
The safety of accessory or replacement parts, and especially how those parts attach
and interface with other parts of the bicycle, is not always apparent. For this reason,
you should only replace parts with original equipment or parts that are approved. If
you are not sure what parts are approved, ask your dealer.
Think Safety
Always “Think Safety” and avoid dangerous situations, which are usually obvious.
But not all dangerous situations are obvious.
Some of the high-risk stunts and jumps seen in magazines or videos are very
dangerous; even skilled athletes get severe injuries when they crash (and they do

10
crash).
Bicycle Type and Use Condition
There are many types of bicycles. Each bicycle type is made for a specified use. If
your use of a bicycle applies more stress than the limit of its use condition, this could
cause breakage of the bicycle (or a part of the bicycle).
This section shows the Use Condition for different types of bicycles. If you are not
sure of what type of bicycle you have, speak to your dealer.
Condition 1
A bicycle made to ride on a paved surface where the tires are always on the ground:
Weight limit of rider: 300 lbs (136 kg)
Condition 2
A bicycle made to ride on Condition 1, plus smooth gravel roads and groomed trails
with low-angle grades where the tires are always on the ground:
Weight limit of rider: 300 lbs (136 kg)

11
Condition 3
A bicycle made to ride on Conditions 1 and 2, plus rough trails, small obstacles, and
smooth technical areas, and also areas where tires momentarily are not on the ground;
NOT for jumps.
Any mountain bike that does not have rear suspension is Condition 3. Any mountain
bike with short-travel rear suspension is also Condition 3:
Short-travel rear suspension (3”/75 mm or less)
Weight limit of rider: 300 lbs (136 kg)
A bicycle made to ride on Conditions 1, 2, and 3; plus rough technical areas, obstacles
of moderate height, and small jumps:
Medium-travel rear suspension (4”/100 mm or more)
Weight limit of rider: 300 lbs (136 kg)

12

13
Before a First Ride
Make Sure Your Bicycle is the Correct Size
Your dealer will help you find a bicycle that has the correct dimensions for your body.
There should be at least 1” (25 mm) clearance between the top tube and you when you
stand over your bicycle. For a mountain bicycle, we recommend 2-3” (50-75 mm)
clearance.
You can adjust the saddle and handlebar to offer the best comfort and performance.
Know How Your Bicycle Operates
The properties of your bicycle, if not used correctly, can decrease your control of the
bicycle. Before you ride fast or in conditions that are a problem, learn the operation
and performance of all the mechanisms of your bicycle, especially brakes and steering
components. Practice the use of your bicycle at slower speeds in a flat, empty parking
area. Repeat this step after any change to your bicycle.
If your bicycle does not operate as necessary, or if different parts are necessary for the
safe operation of your bicycle, speak to your dealer.

14
Learn the Power of Your Brakes
The power of bicycle brakes changes with the Use Condition of the bicycle. If you
think it is necessary for your bicycle to have more—or less—power to
stop, speak to your dealer about brake adjustments or other brake options for your
bicycle.
Prevent Toe-clip Overlap
Some modern, high-performance bicycles, especially smaller sizes, use a
short-wheelbase design with the front wheel close to the pedals. Increasing the
distance between the front wheel and pedals could place the handlebar too far away or
make the steering unwieldy. On bicycles where this distance is short, when the
handlebar is turned during very slow speeds your foot or toe-clips could overlap or
touch the front wheel or fender.
This overlap is affected by the size of your feet, the length of the crankarms, and the
pedals you choose. At usual speeds, the handlebar does not turn sufficiently for
overlap to occur. When you ride slowly, do not pedal when the handlebar is turned.
WARNING
If your foot or toe-clip touches the front wheel or fender, toe-clip overlap could decrease
your control and cause you to fall. Do not pedal when you turn at slow speed.
WARNING
If you do not use the brake system correctly or you apply too much force with the
front-wheel brake, the brakes could decrease your control and cause you to fall. Practice
to correctly apply your brakes as shown in this manual.

15
If Your Frame or Fork has a Problem, Stop Riding
Frame problems are not common, but as an example, some riders could get a
“shimmy” or “harmonic oscillation” or “frame wobble” at some speeds. If you get a
shimmy or any other problem, decrease your speed immediately and do not ride the
bicycle. Transport your bicycle directly to a dealer for inspection and repair.
Life span of a bicycle and its parts
Bicycles are not indestructible, and their parts will not last forever. If you ride in
extreme conditions, if it is involved in an accident, if it is used for rentals or for
commercial purposes, or if it is used in other ways that apply high stress or fatigue
loads, your bike will fail quicker. With damage, the life of the frame, fork, or other
parts can be drastically reduced and may fail without warning.
The safe life of a part is determined by its construction, materials, use, maintenance,
rider weight, speed, terrain, and environment (humidity, salinity, temperature, etc.), so
it is not possible to give an accurate timetable for replacement. Any form of crack,
WARNING
A frame or fork problem could decrease your control and cause you to fall. If your bicycle
gets a shimmy or any other problem, decrease your speed immediately. Transport your
bicycle to your dealer for inspection and repair.

16
scratch, or change of color in a high-stress area indicates that the life of the part
(including the frame or fork) has been reached and the part should be replaced. If you
are not sure if you should replace a part, consult your dealer.
In some cases, a lighter frame or part has a longer life than a heavier one. However,
better maintenance, more frequent inspections, and more frequent replacement are
necessary for a light-weight, high performance bicycle and its parts.
WARNING
A bicycle is subjected to wear and high stress. Different materials and parts may react to
wear or stress fatigue in different ways. If the design life of a part has been exceeded, it
may suddenly fail, possible causing injuries to the rider.

17
Checklist: Check Before Each Ride
The checklist that follows shows critical areas for you to examine. If a part of your
bicycle does not have the correct function, use the instructions in this manual to repair
your bicycle or transport your bicycle to your dealer for repair. Do not ride a bicycle
with a part that is damaged; replace the part.
Check the saddle (seat) and Seat post
Make sure the saddle is correctly attached. Try to turn the saddle and seat post in the
frame and try to move the front of the saddle up and down. The saddle should not
move or be loose.
Check the handlebar and stem
Make sure the stem is correctly attached. It should be in alignment with the front
wheel and correctly attached to the fork and handlebar. To check the attachment, try to
turn the handlebar from side to side while you hold the front wheel between your
knees.
To check the connection of the handlebar, try to twist it in the stem. The handlebar
should not move or be loose. Make sure that no cables are pulled or caught when you
turn the wheel from side to side.
Make sure grips are secure and that the ends of the handlebar are covered or that plugs
WARNING
A bicycle that does not operate correctly can decrease your control and cause you to fall.
Fully examine all of your bicycle before each ride, and do not ride your bicycle until you
correct any problem.

18
are correctly inserted into the ends of the handlebar.
Check the frame and fork
Closely examine your frame and fork, especially near junctions of the tubing, and
clamping or attachment areas. Look for signs of fatigue stress:
• Dents • Cracks
• Scratches • Deformation
• Discoloration • Unusual noises
Check the wheels
Check the tire inflation. Inflate the tires to the air pressure recommended on the
sidewall of the tire. If a lower recommendation applies to the rim, inflate to the lower
value.
Make sure the wheels are straight. Turn the wheel and check the rim when it goes
through the brake-pads or the frame. The rim should not wobble up and down or from
side to side.
Make sure the wheels are attached correctly. Lift your bicycle and hit the top of the
tire with a solid blow. The wheel should not come off, be loose, or move from side to
side.

19
Your bicycle may use one or more systems to attach the wheels to the frame.
Check the brakes
Use the inspection instructions for the type of brakes on your bicycle:
Hand-Rim Brake: a cable connects a hand lever to the brake. The lever causes the
WARNING
A brake system that has damage or is not adjusted correctly could decrease your control
and cause you to fall. Make a full inspection of the brakes before each ride. If your brakes
do not operate correctly, do not ride your bicycle. Adjust the brakes or transport your
bicycle to your dealer for repair.
WARNING
A wheel attachment device that is not correctly adjusted and closed can allow the wheel
to be loose or come off, suddenly stop the wheel, decrease your control, and cause you to
fall.

20
brake-pads to apply pressure to the rim.
Pull the brake-lever to make sure the brake moves freely and stops your bicycle. If the
brakelever can be pulled to the handlebar, the brake is too loose. When the brakes are
not applied, the brake-pads should be 1 to 2 mm from the rim. If the brake-pads are
too near the rim, the brake is too tight. The brake-pads should be in alignment with the
rim surface.
Disc Brake: a cable or hydraulic hose connects a hand lever to the brake. The lever
causes the brake to apply pressure to a disc attached to the wheel hub.
Pull the brake-lever to make sure the brake moves freely and stops your bicycle. If the
brake lever can be pulled to the handlebar, the brake is too loose. When the brakes are
not applied, the brake-pads should be 0.25-0.75 mm away from the disc. If the pads
are too near the disc, the brake is not in alignment or it is too tight.
Check the suspension
Adjust your suspension for your use, and make sure that no suspension component can
CAUTION
A disc brake and disc gets very hot during use and could burn skin. Also, the disc edges
can be sharp and could cut skin. Do not touch the disc or disc brake when the disc turns
or when it is hot.
Table of contents
Other Espin Bicycle manuals
