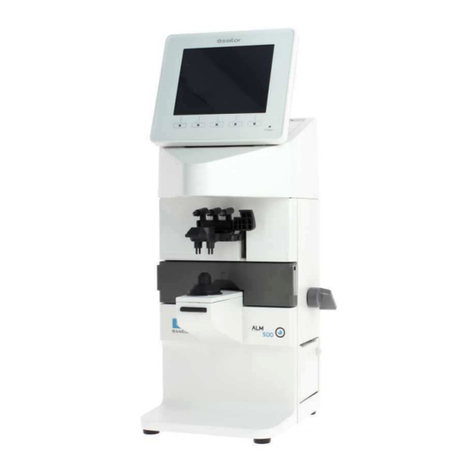
Essilor Instruments ALM 800 User manual

USER MANUAL

CONTENTS
I. INTRODUCTION 4
1. About this manual 5
II. SAFETY CONSIDERATION 6
1. Symbols in this manual 7
2.General cautions 7
III. ACCESSORIES 8
IV. DEVICE 10
1. General description of product 11
2. Parts identification 11
V. INSTRUCTIONS FOR USE 13
1. Installation 14
2. Connection / Wiring 14
3. Maintenance / Inspection 14
4. Disposal 15
VI. OPERATING INSTRUCTIONS OF DEVICE 16
1. Lens holder 17
2. Lens plate 17
3. Marking lever 17
4. Printer 18
VII. BEFORE MEASUREMENT 21
1. Check up before measurement 22
2.Description of measurement screen 23
3. Preparation for measurement 24
a. Device setting 24
b. [Setup] screen 25
c. [ID] screen 28
d. [Data Output] screen 29
e. [Date/Time] screen 31
f. [Prism center] screen 32
g. [Default Setting] screen 34
VIII. MEASUREMENT 36
1. Measurement of single lens 37
2. Measurement of eyeglass lens 39
3. Pupillary distance [PD] measurement 41
a. Device setting 41
b. Measurement procedure (Right lens > Left lens) 41
4. Measurement of multifocal lens 42
5. Measurement of progressive lens 43
6. Measurement of ultraviolet [UV] transmission and blue light cut percentage /transmittance 46
a. Device setting 47
b. [UV] cut measurement after measuring degree 47
c. UV and BV cut percentage and CB transmittance measurement 47
7. [Lab / ECP] Mode 49
8. Prism measurement 49
USER MANUAL > CONTENTS
ALM800 - Auto lensmeter > V1 - 05-2020 2

9. Measurement of contact lens 50
a. Preparation 50
b. Procedure 50
IX. MARKING 52
1. Lens without astigmatism 53
2. Lens with astigmatism 53
3. Prism lens 54
X. OTHER FUNCTIONS 56
1. Auto memory 57
2. Power saving 57
XI. ERROR DISPLAY 59
1. Type of errors 60
2. Error handling procedure 60
XII. STORAGE AND MAINTENANCE 62
1. Storage 63
2. Maintenance 63
a. Replacement of marking pen 63
b. Reloading printer paper 64
c. Fuse replacement 64
XIII. SPECIFICATIONS 66
XIV. GUIDANCE AND MANUFACTURER'S DECLARATION 68
1. Electromagnetic emission 69
2. Electromagnetic immunity 69
XV. QR CODE 72
USER MANUAL > CONTENTS
3ALM800 - Auto lensmeter > V1 - 05-2020

I. INTRODUCTION

The complete user manual is available on a web space.
To access other available languages, please scan the QR code at the end of this user manual > Chapter
QR code (p.72).
This devise is possible to measure the spherical power / cylindrical power / cylindrical axis / prism / PD / UV cut
percentage / blue light cut (transmittance) percentage of glass lens and contact lens.
1. About this manual
Please read this manual thoroughly so that safe and effective operation is ensured.
1. The information contained in this manual is subject to change without notice.
2. While reasonable efforts have been made in the preparation of this document to ensure its accuracy, you
should contact your local distributor immediately if any quarries arise due to editorial errors or omissions
etc.
3. If you find any imperfect collating or missing pages, contact your local distributor for replacement.
This manual contains important contents to prevent users or others from harms and to use this device safely.
Read this manual after understanding the symbols below and follow the instructions in use.
This manual contains the information about basic operation, inspection and
maintenance etc. of ALM800
USER MANUAL > INTRODUCTION
5ALM800 - Auto lensmeter > V1 - 05-2020

II. SAFETY CONSIDERATION

1. Symbols in this manual
Warning This symbol indicates that mishandling as a result of
failure to comply with the indications can result in
“personal death” or “serious injury”.
Denotes general ban or prohibition
General mandatory action
Additional information which is important to the text
or useful/ convenient to know
Number on the left is the lower limit and the one on
the right is the upper limit of the temperature
Number on the left is the lower limit and the one on
the right is the upper limit of the humidity
Avoid direct sunlight
Manufacturer
Symbol for Compliant with CE marking i.e. with
applicable European directives
Special collection for this type of electrical and
electronic device
2. General cautions
It affects its measurement accuracy if fingerprints or dust etc. are on the optical parts, such as glass parts
under the lens stand. Do not touch them with hands and avoid dust.
If fingerprints or dust are adhered on the optical parts, such as lens, wipe it gently with a soft cloth.
The device is not intended to be used in conjonction with oxygen rich environment.
Never attempt to modify or disassemble this product yourself. It can result in malfunction or fire.
In case of disposal, comply with the regulations and recycle plan of the local government. Inappropriate
disposal causes a negative effect on environment.
No dew condensation
Avoid installation near TV or radio. The reception can be disturbed by electrical noise.
If liquid is spilled on this device or a foreign substance is entered in it, unplug the power cord and contact
your local distributor.
Cut the power immediately and contact your local distributor if malfunction (noise, smoke etc.) occurs. It
can result in fire or injury if you keep using it.
If malfunction occurs, do not touch the inside of this device. Unplug the power cord and contact your local
distributor.
No contraindication.
USER MANUAL > SAFETY CONSIDERATION
7ALM800 - Auto lensmeter > V1 - 05-2020

III. ACCESSORIES

Power cord: 1
(2.5m)
Printer paper: 1
(Width: 58mm)
Contact lens: 1
Dust cover: 1
Operation manual: 1
Use only the accessories specified by us.
Avoid direct sunlight, high-temperature and humidity when storing the printer paper because it is a
thermal paper.
USER MANUAL > ACCESSORIES
9ALM800 - Auto lensmeter > V1 - 05-2020

IV. DEVICE

1. General description of product
This device aims to take the measurements of SPH, CYL, AXIS, prism refractive power and optical axis
coordinate of unprocessed lens, processed eyeglass lens and contact lens, and to put dots on them to find its
axis.
It also performs automatic discrimination of progressive lens, pupillary distance (PD) measurement of glass lens,
UV cut percentage measurement, blue light which harmful to eyes cut percentage measurement, blue light
transmittance measurement which necessary to adjust the circadian rhythm.
Refer to [Instructions for use] about the operating precautions of this device.
The interval from -5D to + 4D covers 97% of the glasses used.
Performance is optimized for use in a room lit between 300 to 1000 Lux.
The performances of the BV (Blue Violet) and CB (Circadian Blue) measurements are:
Repeatability: <1% (for -5D to + 4D, or 97% of the lenses)
Reproducibility: <3% (for -5D to + 4D, or 97% of the lenses)
Precision: < 5% (flat lenses)
Precision: <7% (for -5D to + 4D, i.e. 97% of lenses)
2. Parts identification
1. LCD (with touch panel)
Color LCD with 640 X 480 dots.
User-friendly LCD which is adjustable vertically within operating range (60°).
Touch panel is adopted.
2.Pilot lamp
Lamp to indicate ON (light on)/ OFF (light off) and power saving mode (blink).
3.Marking lever & Lens holder
The marking lever and lens holder are integrated.
Marking lever: puts the dots by pressing the lever down.
Lens holder: fixes the eyeglass glass on the lens stand by moving the lever up and down.
4.Nose pad (x2)
Used for measuring PD of the eyeglass lens.
Set the eyeglass lens so as that the nose pad is placed on it. The judgment of right and left and PD
measurement are performed based on the position of the nose pad.
USER MANUAL > DEVICE
11 ALM800 - Auto lensmeter > V1 - 05-2020

5. Nose pad
6.Lens stand
Take a measurement by placing the eyeglass lens on the lens stand.
7.Lens plate
The plate to be reference of the cylindrical axis and specified direction of the prism.
For the eyeglass lens, take a measurement so as that the lens frame contacts with the lens plate.
8.Lens plate lever
Moves the lens plate back and forth.
9.Memory/Add switch
The switch to store the measurement values on the measurement screen of single focus lens, multifocal
lens and contact lens.
Freezes the display of the measurement values and store them.
The switch to execute the near and far points in case of manual measurement on the progressive lens
measurement screen
10.Communication connector
The communication connector to transfer the measurement data to the other devices and computers.
11.Power inlet
The inlet to connect the power cord supplied to supply power.
1. Power supply switch
The switch to turn on/ off the power of the device.
2.Printer
Prints out the measurement values.
USER MANUAL > DEVICE
ALM800 - Auto lensmeter > V1 - 05-2020 12

V. INSTRUCTIONS FOR USE

1. Installation
1. Do not expose the device to sunlight or bright light from lighting equipments.
Take extra caution to avoid strong light because it may cause the failure of measurement.
2. Do not install the device in places where either dust or rubbish may accumulate.
Also, the environments with extremes in heat and humidity should be avoided.
In case of using the device, ensure to comply with the environmental conditions of unpacking and usage before
starting a measurement.
Temperature Humidity Atmospheric pressure
Use [5°C ; 40°C] [30% ; 95%] [50 kPa ; 106 kPa]
Storage [-10°C ; 55°C] [10% ; 95%] [50 kPa ; 106 kPa]
Transport [-40°C ; 70°C] [10% ; 95%] [50 kPa ; 106 kPa]
3. Keep away from inflammable or explosive gases as well as storage area of the medical supplies and
chemicals.
4. Keep away from the sites that experience strong vibrations or sudden shocks.
5. The device might be broken if it falls down. Also, it might cause injury if dropping it. Therefore, do not store it
at an unstable place or in high, ‘out of reach' place.
6. Keep this device away from water (liquid).
Degree of protection: IP20
2. Connection / Wiring
1. The earth cable of the power code should be connected to the earth terminal.
2. Avoid damaging the power cord (such as bending it in an extremely small size, pulling, placing a heavy
object on it etc.). Also, do not fabricate the cord.
3. When the power cord is damaged, (breaks, damage of cover etc.), replace it to the new one. Fire or
electric shock may occur if you keep using it.
4. Insert the power cord firmly into the outlet and device. If not, fire or electric shock may occur.
5. Keep the power cord clean without any dust or oil etc. on it. The dirty terminal may cause malfunction or
fire.
6. When the power cord gets hot after use, check for the dirt of the terminal unit. If you find no dirt, replace
the power cord to the new one. Fire or electric shock may occur if you keep using it.
7. Use it with the correct power-supply voltage. Fire or electric shock may occur if using it with more than
the rated supply voltage.
8. Always hold the plug when plugging or unplugging the power cord.
9. Do not touch the plug with wet hands. You may get an electric shock.
10. If the device is not used for a long time, unplug the power cord from the outlet.
3. Maintenance / Inspection
1. This is the precision optical device. Make sure not to mishandle or drop it.
2. Do not touch or allow dust to adhere on the optical parts (i.e. lenses), as the measurement accuracy could be
adversely affected by fingerprints and dust etc.
When fingerprints or dust are adhered onto the optical parts, gently wipe them with the
accompanying dust cloth or a soft cloth. In this instance, make sure not to scratch them.
3. If the main unit cover or operation panel is dirty, gently wipe it with a dry cloth. For hard to remove stains, a
damp cloth or neutral cleanser is recommended.
USER MANUAL > INSTRUCTIONS FOR USE
ALM800 - Auto lensmeter > V1 - 05-2020 14

Avoid using organic solvent such as thinner which may damage the water based paint finish or
device.
4. If the device is not used for any length of time, unplug the power cord.
5. When the device is not in use, protect it with the accompanying dustproof cover. The measurement accuracy
could be affected by dust.
6. Never attempt to fix or remodel the device. When the device fails to function properly, do not touch the
inside. Contact us or your local distributor.
4. Disposal
In case of disposal, comply with the regulations and recycle plan of the local government.
Inappropriate disposal causes a negative effect on environment.
USER MANUAL > INSTRUCTIONS FOR USE
15 ALM800 - Auto lensmeter > V1 - 05-2020

VI. OPERATING INSTRUCTIONS OF DEVICE

2
1
1
1. Lens holder
Raise the lever to the operational direction until it is unlocked.
Lower the lens holder slowly and fix the lens.
Do not give strong impact to a lens when lowering the lens holder. When rising the lens holder,
make sure to move to the top.
2. Lens plate
The lens plate is the reference of the cylindrical axis.
Place the eyeglass lens and rotate the lens plate lever to the direction of the arrow so that the bottom of the lens
touches the lens plate. After that, lower the lens holder and fix the lens.
1. Lens plate
2. Lens plate lever
3. Marking lever
Turn and lower the marking lever.
USER MANUAL > OPERATING INSTRUCTIONS OF DEVICE
17 ALM800 - Auto lensmeter > V1 - 05-2020

2
3
4
Place the tips of the marking pens on the lens surface softly.
Do not mark several times at the same point.
The marking pen may be worn out quickly.
Release the finger after marking.
The marking lever returns to the initial position.
Avoid the followings since they may damage the tips of the marking pens.
Perform marking roughly
Operate the marking lever without a lens set
Touch a tip of the marking pen during cleaning
4. Printer
The measurement values can be printed out by touching after taking a measurements.
USER MANUAL > OPERATING INSTRUCTIONS OF DEVICE
ALM800 - Auto lensmeter > V1 - 05-2020 18

1. Name
Distributor's name, comment etc. (printed out only when ID is set)
Number of characters input: 44 characters (22 characters X 2 lines)
2.<R>
Measurement value of right lens
3.[P]
The unit of the prism value is different according to the setting.
4.[Add]
Add measurement values are displayed only at the time of measurements of multifocal lens and
progressive lens.
(Left: ADD1, Right: ADD2)
5.[UV] & [BV] cut & [CB] trans
[UV] cut percentage
[BV] cut percentage
[CB] transmittance
6.Graph
When the assessment graph is printed.
[Graph Print] is set as [On] at the time of progressive lens measurement
7.<L>
Shown the measurement value of the left lens
USER MANUAL > OPERATING INSTRUCTIONS OF DEVICE
19 ALM800 - Auto lensmeter > V1 - 05-2020

(Same as that for a right lens)
8.PD
PD of right eye and left eye
Printout sample when unprocessed lens is measured Printout sample in case of measurement error
[Measurement error]. Other error can be displayed:
SPH Over
CYL Over
Prism Over
USER MANUAL > OPERATING INSTRUCTIONS OF DEVICE
ALM800 - Auto lensmeter > V1 - 05-2020 20
Table of contents
Other Essilor Instruments Measuring Instrument manuals
