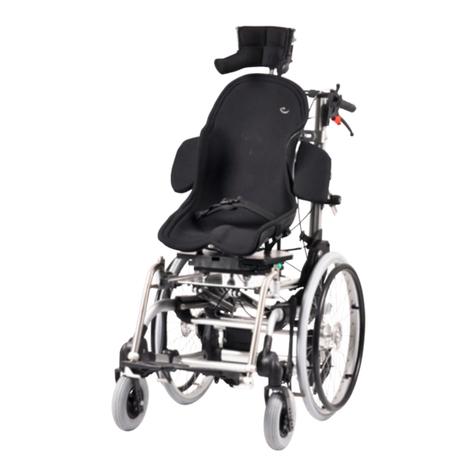
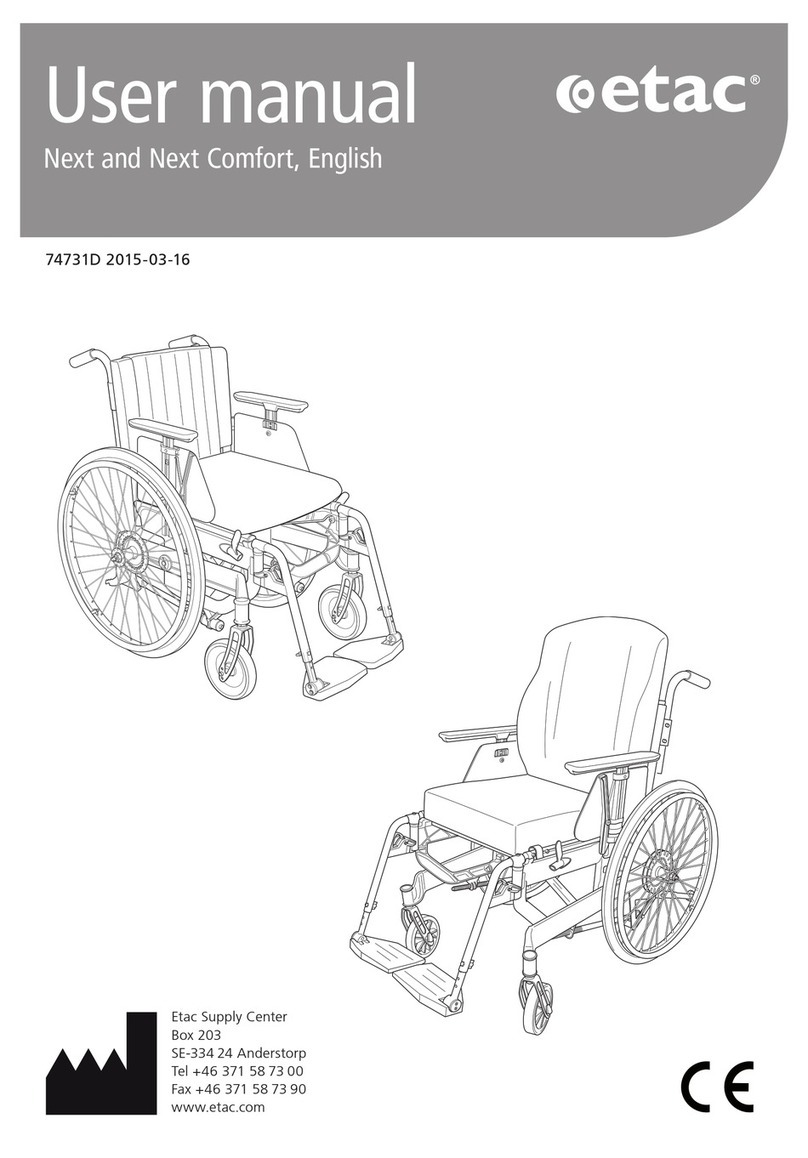
Etac Convaid Safari Tilt Troubleshooting guide

Safari Tilt
Tilt-In-Space Position Tilting Chairs
ENGLISH
User and Service Manual
SAVE THIS BOOK FOR FUTURE REFERENCE
READ INSTRUCTIONS BEFORE USING

i
CONVAID USER’S GUIDE
Customer Service Support
Toll Free: 1-844-US Mobility (844-876-6245)
Phone: (310) 618-0111
Fax: (310) 618-8811
Email: conv[email protected]
Website: www.etac.us.com
Technical assistance or repair information hours are:
Monday-Friday, 6 a.m. to 4:30 p.m. PST
Notice:
The information contained in this document is subject to change without notice.
No part of this document may be photocopied, reproduced, transmitted, transcribed, stored in
a retrieval system or translated to another language or computer language, in any form or by
any means, electronic, mechanical, magnetic, optical, chemical, manual or otherwise without
the prior written consent of Convaid.
Use only Convaid accessories and parts on Convaid products. Convaid parts are not
interchangeable with other manufacturers’ products. Replace any worn parts immediately.
© Copyright 2020 by Convaid. All rights reserved.
Before Calling:
Please ll in the following. Customer Service will be able to help you more
quickly if the information indicated below is readily available.
Serial number of chair:__________________________________________
Model of chair:_________________________________________________
Date purchased:________________________________________________

ii
CONVAID USER’S GUIDE
Setting Up
Denition Of Symbols ...............................................................1
Unpacking ........................................................................3
Unfolding ......................................................................... 3
Folding ...........................................................................5
Tilt And Recline .................................................................... 7
Fitting And Positioning Guide
Seat Back Height ..................................................................8
Seat Width........................................................................ 8
Seat Depth .......................................................................9
Armrest Height Adjustment .......................................................... 9
Seat-To-Back Angle Adjustment ......................................................10
Three-Point Positioning Belt .........................................................11
Depth Adjustable Crotch Strap. . . . . . . . . . . . . . . . . . . . . . . . . . . . . . . . . . . . . . . . . . . . . . . . . . . . . . . 11
Cushioned Shoulder Harness .......................................................11
Full Torso Swing-Away Vest Support ..................................................12
Footplate Adjustment ..............................................................12
Seat-To-Footplate Height Adjustment .................................................12
Footplate Depth Adjustment ........................................................13
Legrest Adjustment................................................................13
Foam Wedges ....................................................................14
Angle Adjustable Footplates.........................................................14
Foot Positioner ...................................................................15
Footplate Securement Strap ........................................................15
Calf Panel .......................................................................15
Anatomic Back Support Frame ......................................................16
Swing-Away Lateral Support–Single Flap ..............................................16
Swing-Away Lateral Support–Double Flap .............................................16
Lateral Thigh Support (Adductor).....................................................17
Medial Thigh Support (Abductor).....................................................17
Heavy-Duty Reinforced Upholstery. . . . . . . . . . . . . . . . . . . . . . . . . . . . . . . . . . . . . . . . . . . . . . . . . . . . 17
Padded Headwings. ...............................................................18
Headrest Extension................................................................18
Table of Contents

iii
CONVAID USER’S GUIDE
Seat Cushions
Sensiform Seat Cushions...........................................................19
Cushion Types ....................................................................20
Safari Support: General Use Cushion .................................................20
Safari Position: Medial Thigh Support And Anti-Thrust Cushion ............................20
Safari Align: Lateral Pelvis And Thigh Support Cushion ...................................20
Fitting Guide .....................................................................21
Caution .........................................................................21
Accessories
Upper Extremity Support Surface (Tray) ...............................................22
Headrest Cover (Canopy) ...........................................................23
Utility Bag........................................................................23
Transit Models
Bus Transport Models..............................................................24
Fabric Removal ...................................................................25
Miscellaneous Wheels
Locking And Unlocking .............................................................26
Wheel Specications ..............................................................27
Wheel Lock Adjustment ............................................................28
Anti-Shimmy .....................................................................28
Important Information
Operating And Safety Instructions ....................................................29
Warranty .................................................................Back Cover

1
CONVAID USER’S GUIDE
READ BEFORE USE
Read the user’s guide completely before use and fully understand its content. Familiarize yourself with
the handling and functions of the product before use and practice them. Any caregiver that is going to
operate this chair should also read the user’s guide in full.
You are responsible for the safety of the user. The safety of the user could be affected if you do
not follow the instructions in this user’s guide. Nevertheless, not all possible circumstances and
unpredictable situations can be covered by this user’s guide. Reason, care, and circumspection are
not features of the product; they are required of persons who use the product. If instructions are not
clear and further explanation is necessary, please contact your Convaid provider. If you do not follow
all instructions and warnings, serious injury or damage to the chair may occur. The latest version of all
instructions and product safety notices are available on the Convaid website (www.etac.us.com) and
can be printed in larger sizes. Additional video instructions are also available for reference purposes.
DEFINITION OF SYMBOLS
Indicates the need for the user to
consult the instructions for use for
important cautionary information such
as warnings and precautions that
cannot, for a variety of reasons, be
presented on the medical device itself.
Indicates a medical device that need
to be consulted with the instruction for
user
This symbol indicates potential nger
entrapment..
This symbol indicates correct lifting
points for safe moving and handling.
This symbol indicates maximum user’s
weight.
Indicates the manufacturer’s serial
number so that a speci c medical
device can be identi ed.
This symbol is a mandatory marking
for devices entering the European
market to indicate conformity
with the essential health and
safety requirements set out in
European Directives. The symbol
may be accompanied by a four-digit
identi cation number of the noti ed
body. The vertical dimensions may
not be less than 5 mm high.
Indicates the Authorized
representative in the European
Community.
This symbol indicates the
manufacturer’s catalogue number
so that the medical device can be
identi ed.
Indicates the medical device
manufacturer.
Indicates the date when the medical
device was manufactured.
2
CONVAID USER’S GUIDE
CHOOSE THE RIGHT CHAIR & SAFETY OPTIONS
There are several options available to meet the needs of the wheelchair user. Make sure that your
(and your health care provider’s) choice of chair and other added options takes into account the user’s
comfort, positioning, physical limitations, and hazards that may be encountered during daily use.
Operating the manual wheelchair outside of the recommendations provided by the manufacturer can
lead to a dangerous situation.
The wheelchair is not suitable for jogging, running, skating or similar activities. Swiveling front wheels
tend to wobble at higher speeds and can cause a sudden stop, and the wheelchair can tip over. Use
the wheelchair only at regular walking speed. Under no circumstance should you let go of the push
handle while pushing.
The durability of this product is ve years when it is used with proper care and maintenance according
to the user’s guide.
Final selection of the type of device and any accessories or adjustments rests solely with the user and
their health care provider. Some important factors to consider when choosing a conguration include,
but are not limited to:
1. The user’s disability, strength, balance, coordination, and ability limitations.
2. Neurological and orthopedic needs of the user.
3. Behavioral factors such as maturity and psychosocial development.
4. All factors should be considered when choosing a chair conguration as this can affect
performance and function of the chair.
This symbol indicates a wheelchair which cannot be used in motor vehicle as vehicle seat.
This wheelchair does not comply with WC19 (RESNAWC-4:2012 for ISO7176-19:2008) and
cannot be used as a vehicle seat to transport the user in a vehicle.
The Symbol indicates a wheelchair which can be used in motor vehicle as vehicle seat.
This wheelchair complies with WC19 (RESNAWC-4:2012 and ISO 7176-19:2008) and can
be used as a vehicle seat to transport the user in a vehicle.
This symbol indicates the position of an anchor point when using a 4-point tide down
system (WTORS) during transit.
This symbol indicates conformity with RESNA WC-4 Section 19 requirements.

3
CONVAID USER’S GUIDE
Unpacking
Check to see that the following items are included with the chair:
• Left and right footplates or one-piece footplate
• Hex key (5/32)
• Seat cushion
• Accessories as ordered
Unfolding
Caution:
Keep ngers
free of folding
mechanism.
Safari Tilt
Size Model No.
12” SFT12
14” SFT14
16” SFT16
18” SFT18
Setting Up
Step 1 Unfasten closure strap. Fig. 1
Step 2 Pull up on the side locks and raise the elevating legrests
until they are at a 90-180 degree angle to the folded chair. Fig. 2
Step 3 Stand the folded chair vertically on rear wheels. Grasp the
push handle closest to you and at the same time push down on the
elevating legrests closest to you using a forward motion. Fig. 3
Fig. 1
Fig. 2
Fig. 3

4
CONVAID USER’S GUIDE
Step 9 Apply wheel locks
before placing individual into chair.
Fig. 9
Step 5 Attach the seat
cushion by pushing rmly into
the back of seat, then pressing
down onto Velcro®. Fig. 5
Fig. 5
Step 7 Swing footplates
forward, or attach one-piece
footplate. Fig 7
Fig. 7
Fig. 4
Step 4 Push down with your
foot on therear lock brace
until it is in the
locked position. Fig. 4
Step 6 Flip down armrests.
Fig. 6
Fig. 6
Step 8 To keep closure snap
from tangling in the wheel,
velcro it onto itself. Fig 8
Fig. 8 Fig. 9

5
CONVAID USER’S GUIDE
Folding
Step 1 Place foot on rear lock brace
and bring the chair to the most
upright position (until you hear a
“click”). Fig. 10
Fig. 10
Step 2 Flip up armrests. Fig. 11
Fig. 11
Step 3 Remove seat cushion. Fig. 12
Fig. 12
Step 4 Swing footplates to the side, Fig. 13 or remove one-piece footplate. Fig. 14
Fig. 13 Fig. 14

6
CONVAID USER’S GUIDE
Step 5 up on center of brace with
foot. Fig. 15
Fig. 15
Step 6 Lean chair back on push
handlesand lower chair to ground.
Walk to front of chair and push down
on tubing above front tires until chair
is folded. Fig. 16
Fig. 16
Step 7 For a more compact fold, pull up on slide lock and
fold the elevating legrests toward the front of chair. Fig. 17
Fig. 17
Step 8 Fasten the closure
strap. Do not use the closure strap
to carry. Fig. 18
Fig. 18
Caution: Keep ngers free of folding
mechanism.

7
CONVAID USER’S GUIDE
Tilt and Recline
To Tilt:
If chair has both tilt & recline options,
release lock by squeezing trigger on left
handle. Tilt to desired angle and release
triggers. If chair has tilt only, release lock
by squeezing trigger on both handles. Tilt
to desired angle and release triggers.
To Recline:
Tilt chair slightly. Release lock by
squeezing trigger on right handle. Pull
back on both handles and release
triggers. Recline option not available on
SFT18. Fig. 19
Note: For optimal use, lubricate the silver
tilt tubes (Mechlocks) every 3 months.
Fig. 19

8
CONVAID USER’S GUIDE
Fitting Guide
Seat Back Height
Seat Width
Convaid’s lightweight, folding chairs are designed to be more than just a convenient chair. Order the
correct size chair by rst determining the user’s height, weight and seating measurements. Properly
tted, Convaid chairs will provide years of comfortable use. As the user grows, refer back to this Fitting
Guide to adjust the dimensions of the chair.
Correct seating and positioning encourage good posture, which in turn aids circulation, breathing and
digestion. Please take the time to properly adjust the chair to t the user. If the user is not correctly
positioned, check the accessories section of this manual to see if one or more of our accessories
would help to facilitate posture or consult your physical therapist. Improper seating can create
problems with posture. Please consult your child’s physical therapist or doctor for additional guidance.
Seat back height varies according to chair type and seat width. Headrest
extensions are available when extra height is needed to support the head.
To determine the seat back height, measure from the seat to the top of
the shoulder or the upper part of the head. Fig. 20
Proper seat width enables the user to sit comfortably and prevents
problems from developing. While user is seated on a at surface,
measure from hip to hip. Fig. 21
The user should have enough room to prevent hips and thighs from
rubbing against the frame. However, the chair should not be too wide or
the user will slide around and posture could be affected.
The seat width measurement is taken from the inside of the armrest
tubes. Fig. 22
Fig. 20
Fig. 21
Fig. 22

9
CONVAID USER’S GUIDE
Seat Depth
Armrest Height Adjustment
Measure from the most posterior portion of the buttocks to the
back of the knee. Subtract from that measurement 1-2” to allow
adequate clearancebetween the seat and the back of the knee.
Fig. 23
Remove seat cushion from seat fabric. Unsnap the fabric from the
back of the seat. Remove screws from adjust- ment holes on sides
of seat frame and slide seat tube to desired position. Reattach
screws and snaps and replace seat cushion. Fig. 24
Note: Do not over tighten.
Fig.24
To attach armrest, remove existing bolts. Attach armrest with the
boltsprovided. Fig. 25
To change height of armrest, remove top mounting bolt, slide
armrest up or down as desired. Reattach bolt. Fig. 26
Fig. 23
Fig. 25
Fig. 24
Fig. 26

10
CONVAID USER’S GUIDE
Seat-to-Back Angle Adjustment
Partially fold the chair to relieve fabric tension. To change, remove bolt
and remount the seat tube using the hole provided in the seat back
tube. Fig. 27
90°- lower hole
95°- upper hole
Note: Be sure to replace the bolt, washers and nut in the same order
as removed.
Fig. 27

11
CONVAID USER’S GUIDE
Positioning Guide
Three-Point Positioning Belt
Depth Adjustable Crotch Strap
Cushioned Shoulder Harness
Convaid offers a wide variety of supports to help properly position the user.
Note: The user must be tted correctly into the chair to achieve optimal posture and comfort.
The three-point positioning belt is standard. Adjust so the user
stays securely in position. The quick-release buckle joins the crotch
strapto both straps.
To Buckle:
Slip the metal buckle on the belt strap into the crotch strap clasp.
Fig. 28
To Release:
Press the red button on the clasp and pull out the buckle.
Fig. 28
The crotch strap can be adjusted by threading strap through desired
slot. Fig. 29
Fig. 29
The cushioned shoulder harness helps the user retain upright trunk
position. To adjust, insert the bolt at the end of the strap through
the grommet hole in the seat back. Grommet hole choice should be
level with or higher than the top of the shoulders. Choose a hole that
will keep the user secure without the strap rubbing against the face
or neck. Secure the strap with the threaded knob. Fig. 30
Fig. 30

12
CONVAID USER’S GUIDE
Full Torso Swing-Away Support Vest
Footplate Adjustment
Seat-to-Footplate Height Adjustment
Adjustable support vest keeps user in place comfortably and
securely. Helps maintain midline seating position and prevent
forward slumping. The vest is attached to the chair with straps that
wrap around the seat back and connect with Velcro®, and shoulder
straps that screw into the seat back. Adjust side straps for proper
t. Fig. 31
The Safari comes standard with a one-piece footplate, which is non-folding and non-elevating. Fig. 32
Elevating legrests with swing-away footplates are available as an option. Fig. 33
Seat-to-footplate height is measured from the back of the knee to the bottom of the heel. Feet or heels
should rest comfortably on top of footplate. Fig. 34 Pull out metal pin. Slide foot support to desired
height. Return pin to locked position. Fig. 35
Fig. 32
Fig. 34
Fig. 33
Fig. 35
Fig. 31

13
CONVAID USER’S GUIDE
Footplate Depth Adjustment
Leg Rest Adjustment
The tilt-in space frame offers adjustable footplate depth. Use
a hex key to loosen the two bolts located on the top of the
footplate.
Slide footplate forward or rearward to desired depth. Retighten
bolts. Fig. 36
Pull down on slide lock. Swing legrest to a desired position and
release slide lock. Ensure that the lock is engaged. Fig. 37
Fig. 36
Fig. 37

14
CONVAID USER’S GUIDE
Foam Wedge
Angle Adjustable Footplates
Use wedge to modify seating or positioning or to correct posture. Fig. 38-41
Angle adjustable footplates can be moved fore and aft, sideways, and rotated vertically and
horizontally. To adjust the angle, loosen the bolts on the footplate and move to desired position.
Retighten the bolts. Fig. 42 – Fig. 45
Fig. 42
Fig. 38 Fig. 39
Fig. 40 Fig. 41
Fig. 43
Fig. 44
Fig. 45

15
CONVAID USER’S GUIDE
Foot Positioner
The foot positioner holds the foot securely in place. Fig. 46 To attach, thread strap through footplate
as shown in Fig. 47, then bolt strap to underside of footplate.
Fig. 46 Fig. 47
Footplate Secure Strap
Calf Panel
The securement strap holds individual footplates together to prevent
them from ippimg up and down. To secure the footplates, buckle the
left and right strap together. Fig. 48
Provides padded support for the lower legs. Fig. 49
Fig. 48
Fig. 49

16
CONVAID USER’S GUIDE
Anatomic Back Support Frame
Swing-Away Lateral Support with Scoliosis Strap
The anatomic back support frame stabilizes the neck and head in
a functional position to assist the development of neck and head
righting reexes. The anatomic back frame is optional from the
factory and must be ordered with the chair. Removable, reformable
stiffeners are located inside the fabric seat back. Stiffeners easily
pull out for custom forming with a heat gun. Fig. 50
Single Flap
Adjustable trunk support stabilizes the trunk and maintains midline
positioning. It can be pulled to one side for scoliosis correction if used
with scoliosis strap. Scoliosis strap comes standard with all trunk
supports. Fig. 51
The trunk support is attached to the chair with straps that wrap
behind the seat back and connect with Velcro®. Fig. 52
Support is achieved by pulling each triangular ap toward the
appropriate side, then securing it by wrapping the strap around the
frame and attaching with Velcro®. The two aps can also be wrapped
around the child’s torso and joined in the middle.
Double Flap
One set of triangular aps locates the midline positioning. The
second set of aps wrap around the trunk for stabilization. The
scoliosis strap can be used to pull the torso to either side. Fig. 53
Fig. 51
Fig. 52
Fig. 50
Fig. 53
Table of contents
Other Etac Wheelchair manuals

Etac
Etac Cross User manual

Etac
Etac Transit User manual

Etac
Etac Swift Mobil Tilt User manual

Etac
Etac Swift Mobil 160 User manual

Etac
Etac Ki Mobility AXiOM BACKS User manual

Etac
Etac Swift Mobil User manual

Etac
Etac Clean Series Instructions for use

Etac
Etac Act Discontinued User manual

Etac
Etac immedia OneWayGlide User manual

Etac
Etac Prio User manual

Etac
Etac Cross 6 User manual

Etac
Etac R82 Rabbit Up User manual

Etac
Etac ad828 User manual

Etac
Etac R82 Heron User manual

Etac
Etac Mobil Tipp User manual

Etac
Etac Immedia OneWayGlide Long User manual

Etac
Etac Relax User manual

Etac
Etac R82 Manatee User manual

Etac
Etac Cross XL User manual

Etac
Etac Rufus Plus User manual