6 fos/4 Panel User Manual
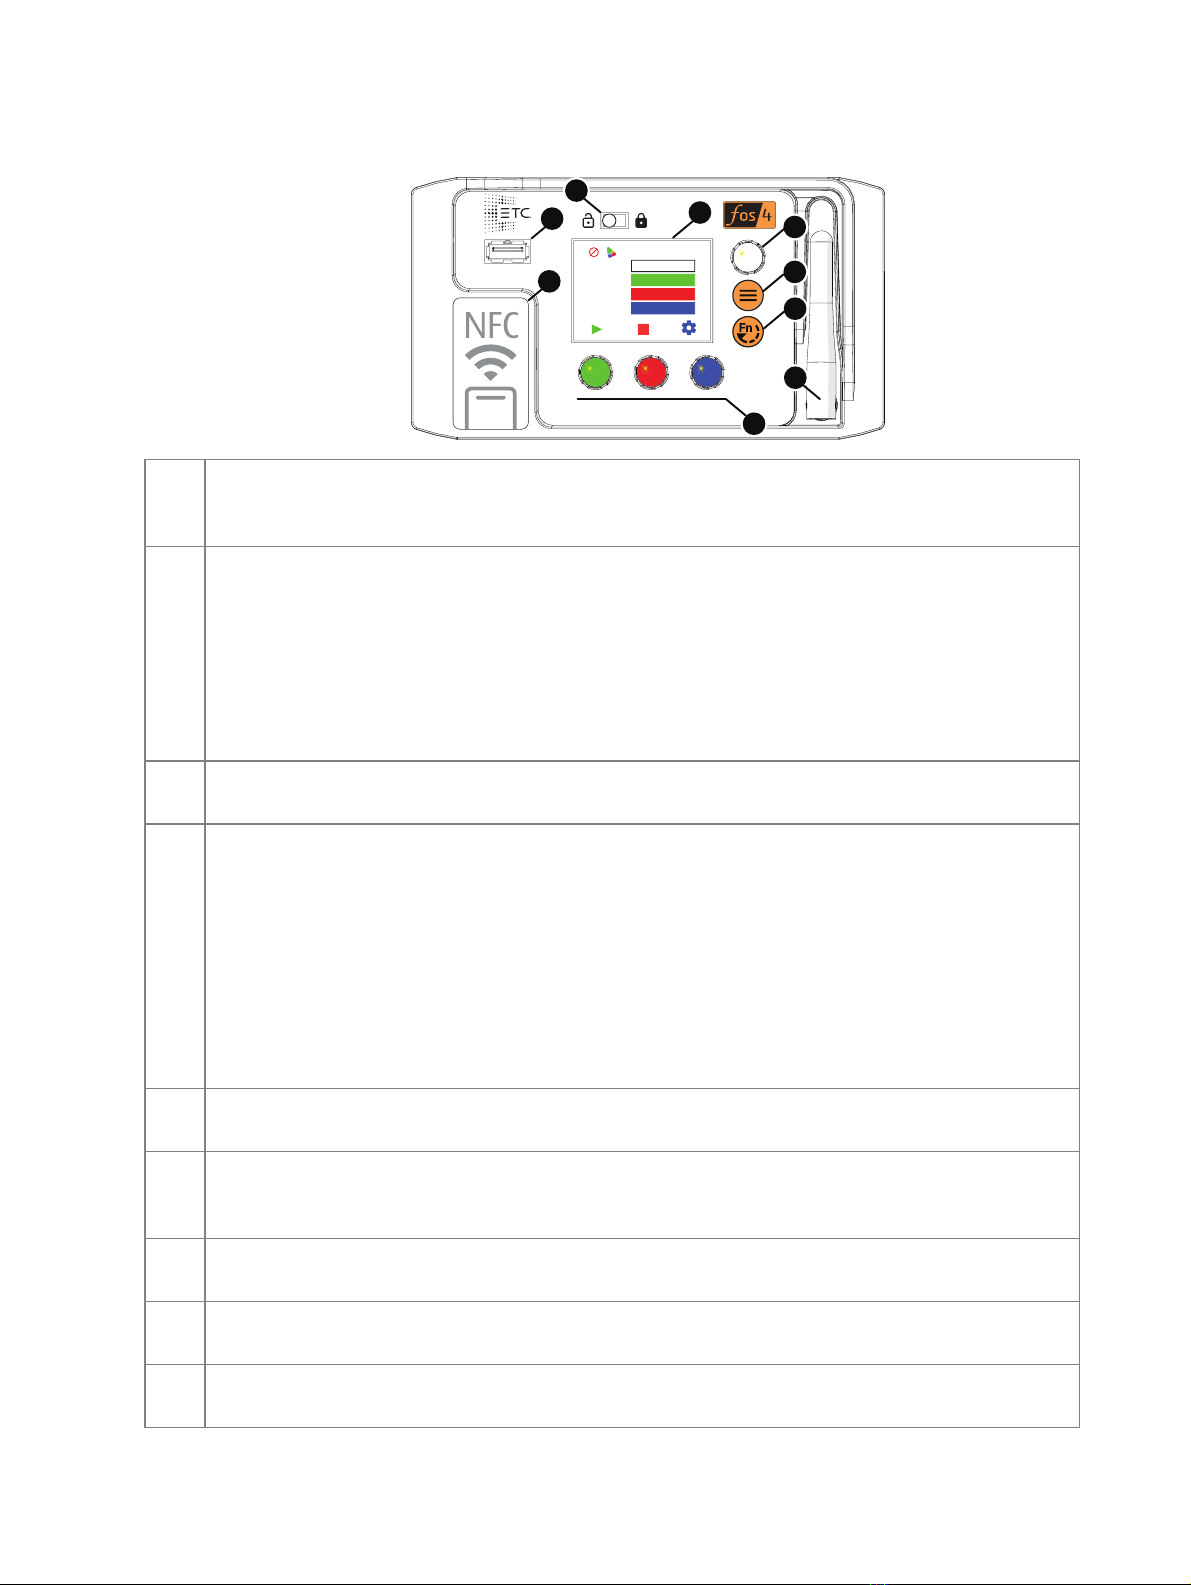
User Interface
Effects
Effect Flicker
Rate 200
Min 0%
Max Int 100%
A Display: The colors of options on the display correspond to the colors of the encoders below
the display (F) and the Intensity encoder to the right of the display(B).
See
Display on the facing page
.
B Intensity encoder:
• When in DMX mode, press the Intensity encoder to enter Focus mode when focusing the
fixture.
• When configuring the fixture in one of the stand-alone modes, press the Intensity encoder
to toggle between the current intensity and 0, or turn the Intensity encoder to modify the
white fields on the display. See
Use Fixture in Stand-aloneMode on page19
.
• When navigating from the Main Menu screen, turn the Intensity encoder to scroll through
menu options, and then press the Intensity encoder to select a menu option.
C Menu button: Press to view the Main Menu screen and configure the fixture. Press the button
again to return to the previous screen when you are setting configuration options.
D Function button: Press the button, use the Intensity encoder to navigate to one of the
following modes, and then press the Intensity encoder to select it:
•DMX:View and set DMX parameters for the fixture.
•Studio: Use one of three studio (white light) presets, or customize the presets.
•Color: Use one of 12 color presets, or customize the presets.
•Gel: Choose from a list of common gel colors.
•Effects: Use one of 12 effects, or customize the effects.
•Preset: Use one of 12 presets (color preset + fade time), or customize the presets.
See
Use Fixture in Stand-aloneMode on page19
and
Use Fixture in DMX Mode on page11
.
E Antenna: For use when controlling the fixture using wireless DMX. See
Set Up Multiverse
Wireless Communication on page25
.
F Encoders(Red, Green, Blue):The colors of encoders correspond to options on the display.
Press to activate the options at the bottom of the display, or turn to modify the values on the
display.
G NFC(Near Field Communication) tag: Use the Set Light app to wirelessly configure the
fixture, with or without power applied to the fixture. See
page25
.
H USB port: Use for updating firmware, saving and loading fixture configuration settings, or
saving error logs via a flash drive. See
Troubleshooting and Maintenance on page27
.
I UI lock: Set this switch to lock the UI. This prevents inadvertent changes to the UI. See
Lock
the Display on page26
.