6 Navis 100 Installation Guide
Before You Begin Installation
Review the following sections before you begin installing the luminaire.
Power Disconnect Device
Before installation, make sure that you have a readily accessible input
power disconnect device installed ahead of your Navis 100 and the driver.
WARNING: Circuits that are installed without an accessible
power disconnect device cannot be serviced or operated
safely.
AVERTISSEMENT : Il est imprudent d'utiliser ou de réparer
les circuits installés sans qu'un dispositif de déconnexion de
l'alimentation ne soit accessible.
Installation Requirements
Ambient operating temperature 0–40°C (32–100°F), 5–95%
non-condensing humidity.
Maximum operating temperature 80°C (176°F). Luminaire turns off
if the operating temperature exceeds the maximum temperature.
Dry locations only.
IP20 rated.
Suitable for use in air handling spaces.
Installation location must support the weight of the luminaire and
applicable mounting hardware.
Navis 100 RGBW luminaires require 0.31m (12in) minimum
spacing for the following:
center-to-center of adjacent luminaires
center of luminaire to side building member
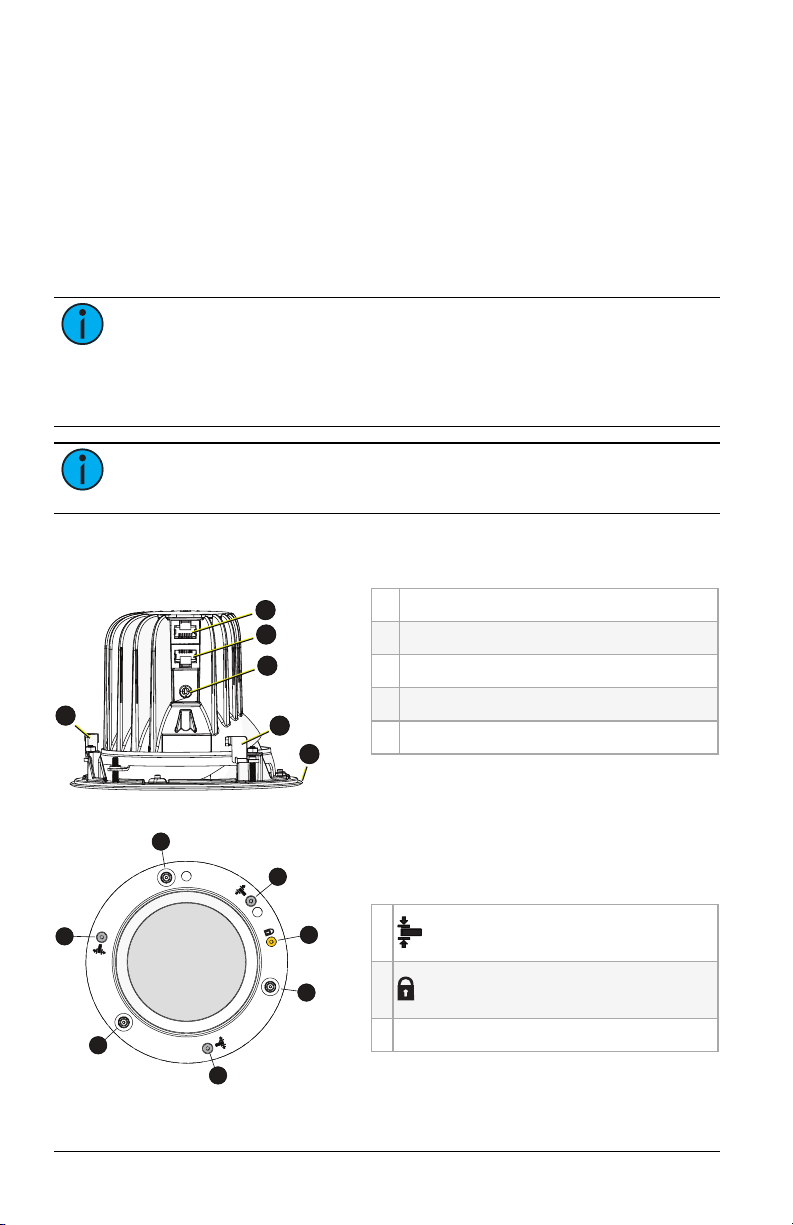
Wiring the Luminaires
Luminaire power and data in and out cables terminate to RJ45
connectors. You must use 0.25 mm2(23 AWG) or larger gauge
conductors in Category-type cable terminated to the T568B standard. You
can connect up to four luminaires along one run of cable when using the
RJ45 output from a driver card. The total cable distance for each wiring
run should not exceed 100 m (328 ft).
Note:
Connect only the same types of luminaires in a wiring run.
Do not mix White, Fade to Warm, and RGBW luminaires in the
same wiring run.