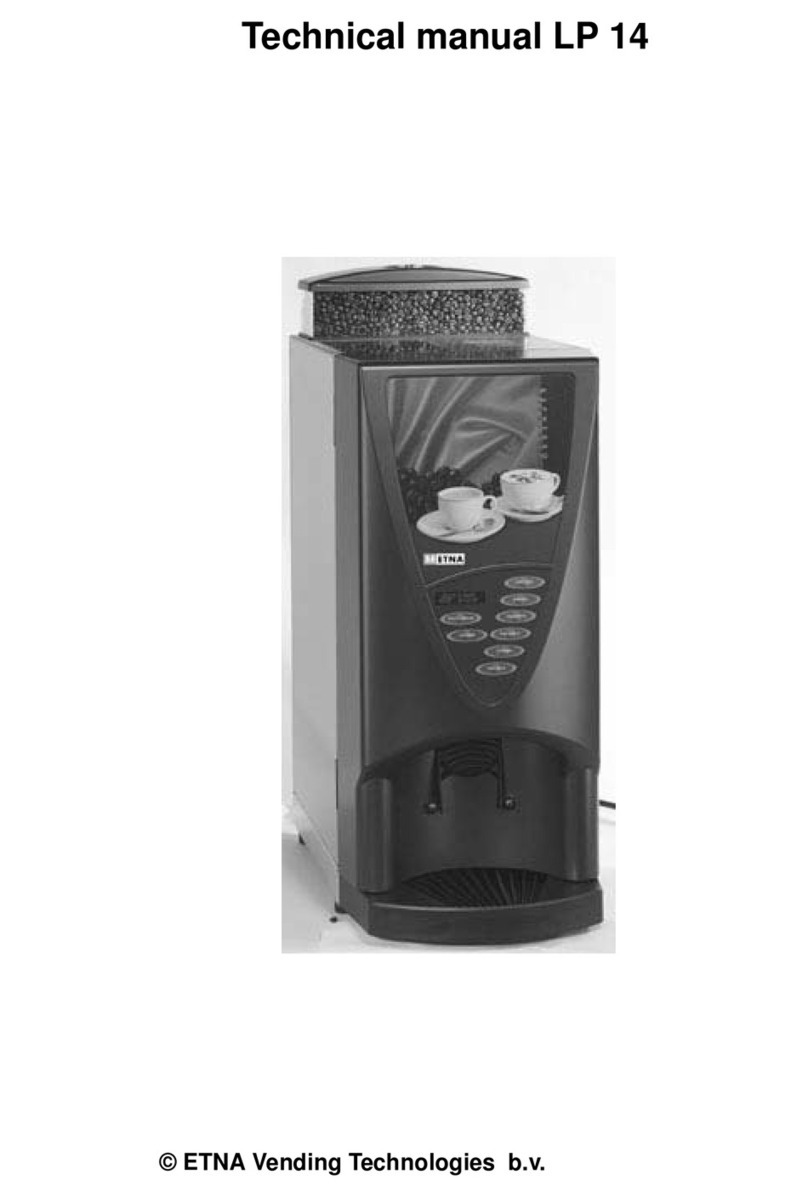
ETNA LP 14 User manual

© ETNA Vending Technologies b.v.
Instruction for use LP 14

Instruction for use LP 14
Manufacturer: ETNA Vending Technologies b.v.
P.O. Box 200
7130 AE Lichtenvoorde
The Netherlands
Distributor:
© ETNA Vending Technologies b.v.
Articlecode: 865335101
Status: 3
Revision: 1

Instruction for use LP 14
3
© ETNA Vending Technologies b.v.
CONTENTS
1 SUMMARY OF PARTS . . . . . . . . . . . . . . . . . . . . . . . . . . . . . . . . . . . . . . . . . . . . . . . . . . . . . . . . . . . . . 4
2 INTRODUCTION . . . . . . . . . . . . . . . . . . . . . . . . . . . . . . . . . . . . . . . . . . . . . . . . . . . . . . . . . . . . . . . . . . 5
3 SAFETY INSTRUCTIONS . . . . . . . . . . . . . . . . . . . . . . . . . . . . . . . . . . . . . . . . . . . . . . . . . . . . . . . . . . . 6
4 PREPARING THE MACHINE FOR USE . . . . . . . . . . . . . . . . . . . . . . . . . . . . . . . . . . . . . . . . . . . . . . . . 7
4.1 Setting up the machine . . . . . . . . . . . . . . . . . . . . . . . . . . . . . . . . . . . . . . . . . . . . . . . . . . . . . . . . 7
4.2 Removal of packaging material. . . . . . . . . . . . . . . . . . . . . . . . . . . . . . . . . . . . . . . . . . . . . . . . . . 7
4.3 Connection . . . . . . . . . . . . . . . . . . . . . . . . . . . . . . . . . . . . . . . . . . . . . . . . . . . . . . . . . . . . . . . . . . 7
4.4 Filling containers . . . . . . . . . . . . . . . . . . . . . . . . . . . . . . . . . . . . . . . . . . . . . . . . . . . . . . . . . . . . . 7
4.4.1 Filling the containers outside the machine . . . . . . . . . . . . . . . . . . . . . . . . . . . . . . . . . . . . 7
4.4.2 Filling the containers inside the machine . . . . . . . . . . . . . . . . . . . . . . . . . . . . . . . . . . . . . 8
4.4.3 Filling coffee container . . . . . . . . . . . . . . . . . . . . . . . . . . . . . . . . . . . . . . . . . . . . . . . . . . . 8
5 OPERATING THE MACHINE. . . . . . . . . . . . . . . . . . . . . . . . . . . . . . . . . . . . . . . . . . . . . . . . . . . . . . . . . 9
5.1 Choosing a drink . . . . . . . . . . . . . . . . . . . . . . . . . . . . . . . . . . . . . . . . . . . . . . . . . . . . . . . . . . . . . 9
5.2 Drinks following payment . . . . . . . . . . . . . . . . . . . . . . . . . . . . . . . . . . . . . . . . . . . . . . . . . . . . . . 9
5.3 “Container empty” message . . . . . . . . . . . . . . . . . . . . . . . . . . . . . . . . . . . . . . . . . . . . . . . . . . . . 9
6 MAINTENANCE . . . . . . . . . . . . . . . . . . . . . . . . . . . . . . . . . . . . . . . . . . . . . . . . . . . . . . . . . . . . . . . . . . 10
6.1 Daily maintenance . . . . . . . . . . . . . . . . . . . . . . . . . . . . . . . . . . . . . . . . . . . . . . . . . . . . . . . . . . . 10
6.1.1 Checking containers . . . . . . . . . . . . . . . . . . . . . . . . . . . . . . . . . . . . . . . . . . . . . . . . . . . .10
6.1.2 Emptying the waste container . . . . . . . . . . . . . . . . . . . . . . . . . . . . . . . . . . . . . . . . . . . . . 10
6.1.3 Cleaning drip tray . . . . . . . . . . . . . . . . . . . . . . . . . . . . . . . . . . . . . . . . . . . . . . . . . . . . . . 10
6.1.4 Rinsing mixer and brewer . . . . . . . . . . . . . . . . . . . . . . . . . . . . . . . . . . . . . . . . . . . . . . . . 10
6.2 Weekly maintenance . . . . . . . . . . . . . . . . . . . . . . . . . . . . . . . . . . . . . . . . . . . . . . . . . . . . . . . . . 10
6.2.1 Cleaning brewer . . . . . . . . . . . . . . . . . . . . . . . . . . . . . . . . . . . . . . . . . . . . . . . . . . . . . . . 10
6.2.2 Cleaning the mixer components . . . . . . . . . . . . . . . . . . . . . . . . . . . . . . . . . . . . . . . . . . .11
7 ERROR MESSAGES AND SOLUTIONS FOR SMALL FAULTS . . . . . . . . . . . . . . . . . . . . . . . . . . . . 12
8 TECHNICAL DATA . . . . . . . . . . . . . . . . . . . . . . . . . . . . . . . . . . . . . . . . . . . . . . . . . . . . . . . . . . . . . . . 13

4© ETNA Vending Technologies b.v.
Instruction for use LP 14
1 SUMMARY OF PARTS
1. Container for instant products 1
2. Container for instant products 2
3. Bean reservoir
4. Mixer parts
5. Drip tray
6. Door
7. Selection panel
8. Dispense head
9. Waste bucket
655
320
385
17,5
532,5
140
140
750
295
1
2
3
4
5
6
7
8
9

Instruction for use LP 14
5
© ETNA Vending Technologies b.v.
2 INTRODUCTION
How to operate and maintain the LP 14.
Figure 2
is an illustration of the control panel of the LP 14.
Figure 2-1 Overview of the buttons on the selection
panel of the LP 14
These instructions are intended for users,
maintenance staff and others who work with the
machine. We advise you to read the instructions
carefully and to keep them safely. Consult your
supplier if you have additional questions.
Chapter 3
describes the safety instructions.
Chapter 4
explains the activities that must be
carried out before the machine is ready for use .
Chapter 5
relates to the operation of the
machine.
Chapter 6
explains maintenance that
must be carried out on the machine. Warnings
about minor faults and how these can be
remedied are described in
chapter 7
. Finally,
chapter 8
contains some technical information.
The LP 14 delivers Café crème, espresso, cappuccino, chocolate espresso, chocolate, café au lait,
Wiener melange, hot water.

6© ETNA Vending Technologies b.v.
Instruction for use LP 14
3 SAFETY INSTRUCTIONS
The LP 14 meets all the requirements
associated with the CE mark.
The following symbols are used in these
instructions:
ᏘThis means: take care,
danger of damage to
the machine
This means: take care,
you are taking a risk
☞This means: important
information
➭This means: tip
The following safety instructions should be
observed during maintenance operations on the
machine. Neither the manufacturer nor the
supplier will be liable for injury occurring as a
result of irresponsible actions.
• Only qualified staff may remove protection
plates installed in the machine.
• Never work on the machine while someone
else is using it.
• Never use the machine without water in the
boiler.
• Dismantling or modifications to the
machine may only be carried out by
qualified staff.
• Modifications to the equipment are subject
to written authorisation from ETNA Vending
Technologies b.v..
• Connect the machine to the water supply in
accordance with local regulations.
• Connect the mains cable to an earthed wall
socket.
• Never attempt to clean the machine with a
water jet, or to use it in an area where
hoses are used.
• If the connection has to be relocated,
contact the service department of your
supplier.

Instruction for use LP 14
7
© ETNA Vending Technologies b.v.
4 PREPARING THE MACHINE FOR
USE
Before the LP 14 is ready for use, several
operations must be carried out. Although these
must be carried out by qualified staff, they are
described here step-by-step.
The machine must first be set up in a suitable
location
(see paragraph 4.1)
and the packaging
removed
(see paragraph 4.2)
. The machine must
then be connected up
(see paragraph 4.3)
.
The next step is to fill up the container
(see paragraph 4.4)
and also the bean container
on top of the machine
(see paragraph 4.4.3)
.
Once this procedure has been carried out, the
machine is ready for use.
4.1 Setting up the machine
To be suitable, the location of the coffee machine
must satisfy a number of requirements.
• The supporting surface must be flat and
stable. Moreover there must be sufficient
room to open the door.
• Other requirements are that the space
where the machine is installed must not be
liable to frost, never hotter than 45°C
(113°F) and not too humid.
• If wall mounted, note that the maximum
angle at which the machine may be
operated is 10 degrees.
• Finally, from a hygiene point of view it is not
advisable to install the machine too close to
a toilet.
4.2 Removal of packaging material
The following components are packed in the
waste container of the machine: operating
manual, adjustable feet, cleaning tablets, bean
container and a service key.
1. Remove the external packaging.
2. Screw the adjusting feet under the machine
and adjust these so that the machine is
level.
3. Fit the bean container.
☞In the case of damage
or missing parts you
must immediately
contact the supplier.
4.3 Connection
1. Connect to the tap using a water hose with
the correct thread (3/ 4 inch BSP) and turn
on the tap. Check that there are no leaks.
2. Connect the mains cable to an earthed wall
socket. Consult
chapter 8
for technical
data on the machine.
3. When you have closed the door or inserted
the service key in the lock, the machine
needs to be installed. A password is
required for this purpose. Your supplier's
installation team will provide one.
4.4 Filling containers
The containers hold the ingredients needed for
preparing drinks. Containers for instant products
have a capacity of 2.3 litres. The coffee container
has a capacity of 3.5 litres. There are two ways of
filling the containers for instant products: by taking
them out of the machine or by lifting the top cover
and filling them while they remain inside the
machine.
4.4.1 Filling the containers outside the
machine
1. Open the machine door.
2. Lift the containers from the holder and pull
them towards you.
3. Remove the cover from the container and
fill it with the desired ingredient. Make sure
that the ingredients are placed in the
correct container.
4. Replace the container. Make sure you
replace the container correctly and that the
drive bearing slides over the sprocket.
➭Place a cup under the
distribution nozzle.
Press the selection
button for the product
concerned a few times
until the dosing case is
completely filled.
8© ETNA Vending Technologies b.v.
Instruction for use LP 14
4.4.2 Filling the containers inside the
machine
1. Open the machine door.
2. Lift the upper lid.
3. Remove the cover from the container and
fill it with the desired ingredient. Ensure that
the correct ingredients are placed in the
containers intended for them.
4. Replace the cover on the container and
shut the upper lid.
➭Place a cup under the
distribution nozzle.
Press the selection
button for the product
concerned a few times
until the dosing case is
completely filled.
4.4.3 Filling coffee container
1. Open the machine door.
2. Remove the bean reservoir cover using the
key.
3. Fill with coffee beans. The coffee reservoir
has a capacity of approx. 1 kg (2.2 lbs) of
beans.
4. Close the coffee bean reservoir.
5. Close the door.

Instruction for use LP 14
9
© ETNA Vending Technologies b.v.
5 OPERATING THE MACHINE
The LP 14 machines are easy to use. The way in
which a drink is selected is described in the next
paragraphs.
The LP 14 is supplied without a payment system
as standard, however a coin mechanism can be
fitted to the machine. The installation instructions
are supplied with the assembly kit for the coin
mechanism and can be obtained from ETNA
Vending Technologies b.v.. The notice indicating
that drinks are not free is described in
(see paragraph 5.2)
. The optional lock switch
used with the jug function in the case of a
machine with a payment system, is also
described in this chapter.
5.1 Choosing a drink
The actions that must be carried out when
choosing a cup of coffee or hot water are
described in
table 5-1
. Other drinks are chosen in
the same way.
Table 5-1 Choosing a drink
5.2 Drinks following payment
If the machine dispenses free drinks, the following
message appears:
The following is displayed on a LP 14 that is
equipped with a coin mechanism:
Where <1.00> is displayed, the current credit is
1.00 for example.
The following is displayed if the credit is lower
than the cost of the drink selected:
Where <1.00> is displayed, the current credit is
1.00 for example and the 1.25 is the price of the
selected drink.
5.3 “Container empty” message
The software includes a “container empty”
message. This is NOT a default setting.
Example of resetting the counter for ingredient 1:
1. Press key 5 on the service panel.
2. Press key 1 on the selection panel until
“reset ingredient 1” appears in the display.
3. Press key 2 on the selection panel to reset
the container counter.
Example of resetting the counter for ingredient 2:
1. Press key 5 on the service panel.
2. Press key 1 on the selection panel until
“reset ingredient 2” appears in the display.
3. Press key 2 on the selection panel to reset
the container counter.
You
would
like
COFFEE HOT WATER
1. Place a mug or
cup on the tray Place a mug or
cup on the tray
2. Press COFFEE Press HOT
WATER
Display
SELECT A DRINK
HH:MM DD:MM:YY
Display
SELECT A DRINK
HH:MM <1.00>
Display
SELECT A DRINK
1.25 <1.00>

10 © ETNA Vending Technologies b.v.
Instruction for use LP 14
6 MAINTENANCE
The quality of thisproduct is guaranteed providing
the machine receives thorough maintenance on a
regular basis. A few vital machine parts are very
sensitive to dirt. Use of this machine requires both
daily
(see paragraph 6.1)
and weekly
(see chapter
6.2)
maintenance.
6.1 Daily maintenance
The following operations must be performed daily:
• Check the containers
• Empty the waste container
• Clean the drip-tray
• Rinse the mixers and brewers
6.1.1 Checking containers
Open the door and check that the containers for
instant products still contain sufficient ingredients.
Check that the bean reservoir on top of the
machine is sufficiently full. If not, top it up as
described in
paragraph 4.4
.
6.1.2 Emptying the waste container
1. Open the door.
2. Remove and empty the waste container.
3. Clean the container using water.
4. Put the container back in the machine.
5. Put the service key into the interlock switch.
6. Press key 5 on the service panel.
7. Press button 2 on the selection panel to
reset the waste counter.
8. To complete the reset procedure, take the
service key out of the lock and close the
door.
6.1.3 Cleaning drip tray
1. Take the drip tray out of the machine
carefully.
2. Empty the drip tray and clean it with water.
3. Replace the drip tray in the machine.
6.1.4 Rinsing mixer and brewer
Rinse mixer:
1. Open the door and switch on the current
with the service key.
2. The guide rod must be detached from the
dispensing arm.
3. Place a cup under the vending nozzle.
Press button 2 on the service panel. The
mixer is rinse.
4. Complete the operation by removing the
service key.
5. Close the door.
Rinse the brewer:
1. Open the door and switch on the current
with the service key.
2. Place a cup under the vending nozzle.
Press button 3 on the service panel. The
brewer is rinsed.
3. Complete the operation by removing the
service key.
4. Close the door.
6.2 Weekly maintenance
The parts used to prepare the drinks must be
cleaned regularly. The LP 14 must be cleaned
thoroughly once a week.
☞Use a damp cloth to
clean the machine on
the inside and outside.
6.2.1 Cleaning brewer
1. Open the door and switch on the current
with the service key
2. Place a cup below the dispensing nozzle.
Press button 4 on the service panel. The
brewer will now be cleaned. This takes
approximately 15 minutes.
3. After a while, the display will request a
cleaning tablet. Put the cleaning tablet into
the cleaning tube.
4. Press button 4 on the service panel.
5. The cleaning process will be started.
6. Complete the operation by removing the
service key.
7. Close the door.

Instruction for use LP 14
11
© ETNA Vending Technologies b.v.
6.2.2 Cleaning the mixer components
During weekly maintenance you must clean the
following parts:
• the hood / extractor
• the mixing chamber
• the hoses
1. Open the door.
2. Remove the ingredient containers from the
machine.
3. Remove the extractor.
4. Remove the mixing chamber.
5. Remove the outlet from the mixing
chamber.
6. Remove the mixer chamber by turning to
the right and then pulling towards you.
7. Clean the extractor, the mixing chambers
and the mixing chambers in hot water and
dry them.
8. Clean the inside of the machine with a
damp cloth.
9. Replace the cleaned parts.

12 © ETNA Vending Technologies b.v.
Instruction for use LP 14
7 ERROR MESSAGES AND
SOLUTIONS FOR SMALL FAULTS
In spite of all the precautionary measures taken,
faults can occur in the LP 14 In that case error
messages will be displayed. A number of possible
faults and solutions are given in the following
table.
Sign Error
message 1 Error message 2 Cause Solution
Please fill bean
container The bean
reservoir is
(almost) empty
Fill the
bean container
Empty the
drip tray The overflow tray
is full Empty the overflow tray
The drip tray
sensor is wet Dry the
drip tray sensor
No water No water supply to
the machine Check the tap, the
intake valve and the
hose
Water
problem No water supply to
the machine Check the tap, the
intake valve and the
hose
The
temperature is
too low
Temperature, one
moment please Boilertemperature
is too low Wait until the boiler has
warmed up
Fault, empty
the
waste
container
Waste container is
full Empty the
waste container
The
machine is
not working
The plug is not
(fully) in the socket Push the plug firmly into
the
wall socket
Taste is not
up to
standard
The container for
instant
products and/or
the bean reservoir
are empty
Fill the container for
instant products and/or
the bean reservoir

Instruction for use LP 14
13
© ETNA Vending Technologies b.v.
8 TECHNICAL DATA
Dimensions: Height excluding bean container: 655 mm
Height including bean container: 750 mm
Breadth: 410 mm
Depth: 580 mm
Weight: 40 kg
Maximum
consumption: 2.7 kilowatts
Required water
pressure: 1.5 - 8 bar
dynamic
Water connection: 3/ 4 inch BSP on
the intake valve
Electrical
connection: 230 V - 50 Hz -
2700 Watt

14 © ETNA Vending Technologies b.v.
Instruction for use LP 14

Instruction for use LP 14
15
© ETNA Vending Technologies b.v.
Other manuals for LP 14
1
Table of contents
Other ETNA Coffee Maker manuals

ETNA
ETNA Tucana Small Instant User manual

ETNA
ETNA nova freshbrew fp User manual

ETNA
ETNA LP 14 User manual

ETNA
ETNA Nova Instant HC User manual

ETNA
ETNA A2793RVS User manual

ETNA
ETNA CALLISTO User manual

ETNA
ETNA Callisto Mini User manual

ETNA
ETNA Nova freshbrew FT User manual

ETNA
ETNA Dorado Medium Espresso User manual

ETNA
ETNA Mundo 1 User manual