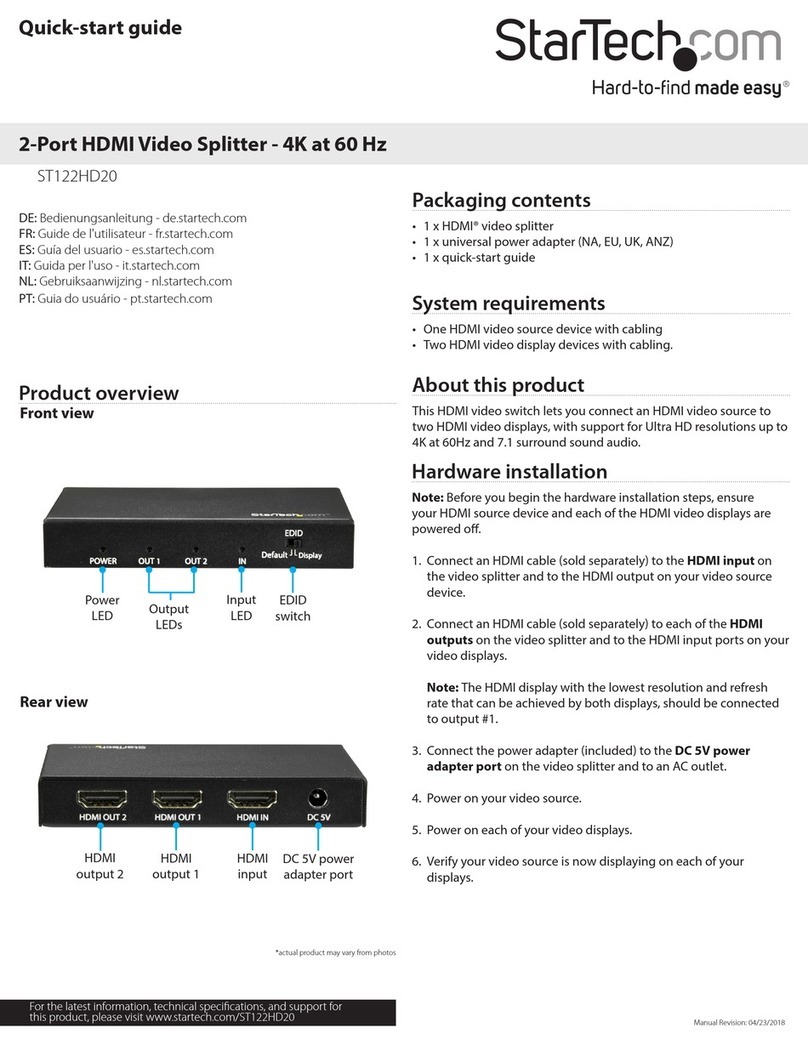
eufy Security T8740 User manual

Anker Innovations Limited. All rights reserved. eufy and the eufy logo are trademarks of Anker
Innovations Limited, registered in the United States and other countries. All other trademarks
are the property of their respective owners.
51005002421 V01
USER MANUAL
Video Doorbell Chime

English 01
Deutsch 08
Español 13
Français 18
Italiano 23
Nederlands 28
Português 33
38
Table of
Contents
What’s in the Box 01
What’s Required for Installation?
01
Installation 02
Replacing the Power Connector 03
Notice 04
Customer Service 41

01 EN EN 02
INSTALLATION
Step 1. Fix the Power Connector to the Doorbell Chime.
A. Place the Power Connector over the Chime in the direction the arrows
indicate.
B. Align the raised slots of the Power Connector with the notch on the base of
the Doorbell Chime.
C. Rotate clockwise to lock the Power Connector in place.
Step 2. Plug the Doorbell Chime into an AC power supply at your desired
location.
Step 3. Plug the USB dongle into the USB port on the back of the HomeBase 2.
WHAT’S IN THE BOX
Doorbell Chime
Model: T8740
Power Connector
(Pin type may vary
in different regions)
Doorbell Chime USB
Dongle for HomeBase 2
Model: T8741
WHAT’S REQUIRED FOR INSTALLATION?
This Doorbell Chime is an accessory exclusive to the eufy Security Video
Doorbell 2K (Battery-Powered).
The USB dongle enables eufy HomeBase 2 to connect to doorbell chimes. One
USB dongle can control up to 4 doorbell chimes.
The USB dongle can only work with HomeBase 2 when a eufy video doorbell is
connected to this HomeBase 2 and the doorbell is pressed.

03 EN EN 04
2. Install the new Power Connector onto the Doorbell Chime following the same
procedure mentioned at the start of the guide.
NOTICE
This product complies with the radio interference requirements of the
European Community.
Declaration of Conformity
Hereby, Anker Innovations Limited declares that this device is in compliance with
the essential requirements and other relevant provisions of Directive 2014/53/
EU.For the declaration of conformity, visit the Web site
https://www.eufylife.com/.
Do not use the Device in the environment at too high or too low temperature,
never expose the Device under strong sunshine or too wet environment.
The suitable temperature for the product and accessories is 0
°C
- 45
°C
.
RF exposure information: The Maximum Permissible Exposure (MPE) level has
been calculated based on a distance of d=20 cm between the device and the
human body. To maintain compliance with RF exposure requirement, use product
that maintain a 20cm distance between the device and human body.
433MHz Frequency Range:433.92MHZ;433MHz Max Output Power:7.303dBm
Anker Innovations Deutschland GmbH I Georg-Muche-Strasse 3-5, 80807 Munich,
Germany
Anker Technology (UK) Ltd I Suite B, Fairgate House, 205 Kings Road, Tyseley,
Birmingham, B11 2AA, United Kingdom
This product is designed and manufactured with high quality materials
and components, which can be recycled and reused.
Step 4. In the eufySecurity App, go to Doorbell Settings - Indoor Chime.
Follow the onscreen instruction to add the Chime to your existing Video
Doorbell.
Step 5. You may select the ringtone and adjust the volume level by using the
Music and Volume buttons located on the side of the Doorbell Chime.
There are 8 ringtones and 3 volume levels selectable. Each Chime can play a
different ringtone according to your setting.
REPLACING THE POWER CONNECTOR
1. Press the Lock button and twist the Power Connector counterclockwise at the same
time to remove it from the Doorbell Chime base.

05 EN EN 06
This device complies with Industry Canada licence-exempt RSS standard(s).
subject to the following two conditions:
(1) this device may not cause interference, and
(2) this device must accept any interference, including interference that may cause
undesired operation of the device."
Le présent appareil est conforme aux CNR d'Industrie Canada applicables aux
appareils radio exempts de licence. L'exploitation est autorisée aux deux conditions
suivantes:
(1) l'appareil nedoit pas produire de brouillage, et
(2) l'utilisateur de l'appareil doit accepter tout brouillage radioélectrique subi,
même si le brouillage est susceptible d'en compromettre le fonctionnement."
This symbol means the product must not be discarded as household
waste, and should be delivered to an appropriate collection facility for
recycling. Proper disposal and recycling helps protect natural resources,
human health and the environment. For more information on disposal
and recycling of this product, contact your local municipality, disposal
service, or the shop where you bought this product.
FCC Statement
This device complies with Part 15 of the FCC Rules. Operation is subject to the
following two conditions: (1) this device may not cause harmful interference, and (2)
this device must accept any interference received, including interference that may
cause undesired operation.
Note: This equipment has been tested and found to comply with the limits for
a Class B digital device, pursuant to Part 15 of the FCC Rules. These limits are
designed to provide reasonable protection against harmful interference in a
residential installation.
This equipment generates uses and can radiate radio frequency energy and, if
not installed and used in accordance with the instructions, may cause harmful
interference to radio communications. However, there is no guarantee that
interference will not occur in a particular installation. If this equipment does cause
harmful interference to radio or television reception, which can be determined
by turning the equipment off and on, the user is encouraged to try to correct the
interference by one or more of the following measures: (1) Reorient or relocate
the receiving antenna. (2) Increase the separation between the equipment and
receiver. (3) Connect the equipment into an outlet on a circuit different from that to
which the receiver is connected. (4) Consult the dealer or an experienced radio/TV
technician for help.
FCC Radio Frequency Exposure Statement
The device has been evaluated to meet general RF exposure requirements. The
device can be used in fixed / mobile exposure condition. The min separation
distance is 20cm.
The following importer is the responsible party
Company Name: POWER MOBILE LIFE, LLC
Address: 400 108th Ave NE Ste 400, Bellevue, WA 98004-5541
Telephone: 1-800-988-7973

DE 08
Inhaltsverzeichnis
IM LIEFERUMFANG 08
WAS IST FÜR DIE MONTAGE
ERFORDERLICH? 08
MONTAGE
09
AUSTAUSCHEN DES
NETZSTECKERS 11
IM LIEFERUMFANG
Türgong
Modell: T8740
Netzstecker
(Die Ausführung des
Netzsteckers hängt
von der jeweiligen
Region ab)
Türgong USB
Dongle für HomeBase 2
Modell: T8741
WAS IST FÜR DIE MONTAGE
ERFORDERLICH?
Dieser Türgong ist ein exklusives Zubehör für eufy Security Videotürklingel 2K
(batteriebetrieben).
Der USB-Dongle ermöglicht den Anschluss der eufy HomeBase 2 an Türgongs.
Ein USB-Dongle kann bis zu 4 Türgongs steuern.
Der USB-Dongle funktioniert nur dann mit der HomeBase 2, wenn eine eufy
Videotürklingel an diese HomeBase 2 angeschlossen ist und die Türklingel
gedrückt wird.

09 DE DE 10
MONTAGE
Schritt 1.Befestigen Sie den Netzstecker am WLAN-Türgong.
A. Positionieren Sie den Netzstecker in der durch die Pfeile angegebenen
Richtung auf dem Türgong.
B. Richten Sie die Vorsprünge am Netzstecker mit der Aussparung unten am
Türgong aus.
C. Drehen Sie den Netzstecker im Uhrzeigersinn, um ihn einrasten zu lassen.
Schritt 2. Stecken Sie den Türgong an der gewünschten Stelle in eine AC-
Stromversorgung ein.
Schritt 3. Stecken Sie den USB-Dongle in den USB-Anschluss auf der Rückseite
der HomeBase 2 ein.
Schritt 4.Gehen Sie in der eufySecurity App zu Türklingel-Einstellungen -
Türgong innen.
Folgen Sie den Anweisungen auf dem Bildschirm, um den Gong zu Ihrer
bestehenden Video-Türklingel hinzuzufügen.
Schritt 5. Sie können den Klingelton und die Lautstärke mit den Musik- und
Lautstärketasten an der Seite des Türgongs einstellen.
Es sind 8 Klingeltöne und 3 Lautstärken wählbar. Je nach Ihrer Einstellung kann
jeder Türgong einen anderen Klingelton wiedergeben.

11 DE
AUSTAUSCHEN DES NETZSTECKERS
1. Drücken Sie die Entriegelungstaste und drehen Sie gleichzeitig den Netzstecker gegen
den Uhrzeigersinn, um ihn vom Türgong abzunehmen.
2. Installieren Sie den neuen Netzstecker am Türgong wie oben in der Anleitung
beschrieben.
Tabla de contenidos
CONTENIDO DE LA CAJA 13
REQUISITOS PARA LA INSTALACIÓN 13
INSTALACIÓN 14
SUSTITUCIÓN DEL CONECTOR
DE ALIMENTACIÓN 16

13 ES ES 14
CONTENIDO DE LA CAJA
Dispositivo sonoro
del timbre
Modelo: T8740
Conector de
alimentación
(el tipo de clavija
puede variar en
función de la región)
Llave USB del dispositivo
sonoro
del timbre para
HomeBase 2
Modelo: T8741
REQUISITOS PARA LA INSTALACIÓN
Este dispositivo sonoro del timbre es un accesorio exclusivo para el timbre con
vídeo 2K (alimentado por batería) de eufy Security.
La llave USB permite establecer la conexión entre eufy HomeBase 2 y
los dispositivos sonoros del timbre. Una llave USB puede controlar hasta
4 dispositivos sonoros del timbre.
La llave USB solo puede funcionar con HomeBase 2 cuando hay un timbre con
vídeo eufy conectado a dicho dispositivo HomeBase 2 y se llama al timbre.
INSTALACIÓN
Paso 1.Fije el conector de alimentación al dispositivo sonoro del timbre.
A. Coloque el conector de alimentación en el dispositivo sonoro en la dirección
indicada por las flechas.
B. Alinee las ranuras elevadas del conector de alimentación con la muesca de
la base del dispositivo sonoro del timbre.
C. Gire hacia la derecha para bloquear el conector de alimentación en su lugar.
Paso 2. Conecte el dispositivo sonoro del timbre a un suministro de
alimentación de CA en la ubicación deseada.
Paso 3. Inserte la llave USB en el puerto USB de la parte posterior de
HomeBase 2.

15 ES ES 16
Paso 4.En la aplicación eufy Security, vaya a Ajustes del timbre > Dispositivo
sonoro interior.
Siga las instrucciones en pantalla para añadir el dispositivo sonoro al timbre
con vídeo existente.
Paso 5. Puede seleccionar el tono y ajustar el nivel de volumen mediante el uso
de los botones Música y Volumen ubicados en el lateral del dispositivo sonoro
del timbre.
Hay 8 tonos y 3 niveles de volumen disponibles para seleccionar. Cada
dispositivo sonoro puede reproducir un tono distinto según la configuración
que establezca.
SUSTITUCIÓN DEL CONECTOR DE
ALIMENTACIÓN
1. Pulse el botón Bloquear y simultáneamente gire el conector de alimentación hacia la
izquierda para extraerlo de la base del dispositivo sonoro del timbre.
2. Instale el nuevo conector de alimentación en el dispositivo sonoro del timbre siguiendo
el mismo procedimiento que se explica al principio de este manual.

FR 18
Sommaire
CONTENU DE LA BOÎTE 18
QUELLES SONT LES CONDITIONS
REQUISES POUR L’INSTALLATION ? 18
INSTALLATION 19
REMPLACEMENT DU CONNECTEUR
D’ALIMENTATION 21
CONTENU DE LA BOÎTE
Carillon de
sonnette
Modèle : T8740
Connecteur
d’alimentation
(Le type de broches
peut varier selon les
régions)
Carillon de sonnette USB
Dongle pour HomeBase 2
Modèle : T8741
QUELLES SONT LES CONDITIONS REQUISES
POUR L’INSTALLATION ?
Ce carillon de sonnette est un accessoire exclusif de la sonnette vidéo 2K eufy
Security (à piles).
Le dongle USB permet à eufy HomeBase 2 de se connecter aux carillons de
sonnette. Un dongle USB peut contrôler jusqu’à 4 carillons de sonnette.
Le dongle USB ne peut fonctionner avec la HomeBase 2 que lorsqu’une
sonnette vidéo eufy est connectée à cette HomeBase 2 et que l’on appuie sur
la sonnette.

19 FR FR 20
INSTALLATION
Étape 1.Fixez le connecteur d’alimentation au carillon de sonnette.
A. Placez le connecteur d’alimentation sur le carillon de sonnette dans le sens
indiqué par les flèches.
B. Alignez les fentes surélevées du connecteur d’alimentation avec l’encoche
sur la base du carillon de sonnette.
C. Tournez dans le sens horaire pour fixer le connecteur d’alimentation en
place.
Étape 2. Branchez le carillon de sonnette sur une alimentation secteur en CA à
l’endroit souhaité.
Étape 3. Branchez le dongle USB dans le port USB à l’arrière de la HomeBase 2.
Étape 4.Dans l’application eufySecurity, allez dans Paramètres de la sonnette -
Carillon intérieur.
Suivez les instructions à l’écran pour ajouter le carillon à votre sonnette vidéo
existante.
Étape 5. Vous pouvez sélectionner la sonnerie et régler le niveau du volume
en utilisant les boutons Musique et Volume situés sur le côté du carillon de
sonnette.
Vous pouvez choisir parmi 8 sonneries et 3 niveaux de volume. Chaque carillon
peut jouer une sonnerie différente en fonction de vos paramètres.

21 FR
REMPLACEMENT DU CONNECTEUR
D’ALIMENTATION
1. Appuyez sur le bouton de verrouillage et tournez en même temps le connecteur
d’alimentation dans le sens inverse des aiguilles d’une montre pour le retirer de la
base du carillon de sonnette.
2. Installez le nouveau connecteur d’alimentation sur le carillon de sonnette en suivant la
même procédure que celle mentionnée au début du guide.
Indice
CONTENUTO DELLA CONFEZIONE 23
NECESSARIO PER L’INSTALLAZIONE 23
INSTALLAZIONE 24
SOSTITUZIONE DEL
CONNETTORE DI ALIMENTAZIONE 26

23 IT IT 24
CONTENUTO DELLA CONFEZIONE
Citofono con cicalino
Modello: T8740
Connettore di
alimentazione
(Il tipo di perno varia in
base all’area geografica
di riferimento)
USB per citofono con
cicalino
Dongle per HomeBase 2
Modello: T8741
NECESSARIO PER L’INSTALLAZIONE
Questo citofono con cicalino è un accessorio esclusivo del videocitofono 2K di
eufy Security (alimentato a batteria).
Il dongle USB consente a eufy HomeBase 2 di connettersi ai citofoni con
cicalino. Un dongle USB può controllare fino a 4 citofoni con cicalino.
Il dongle USB può funzionare solo con HomeBase 2 quando un videocitofono
eufy è collegato allo stesso HomeBase 2 e quando viene premuto il
campanello.
INSTALLAZIONE
Passaggio 1.Fissare il connettore di alimentazione al citofono con cicalino.
A. Posizionare il connettore di alimentazione sul citofono con cicalino nella
direzione indicata dalle frecce.
B. Allineare le fessure sollevate del connettore di alimentazione con la tacca
sulla base del citofono con cicalino.
C. Ruotare in senso orario per bloccare il connettore di alimentazione in
posizione.
Passaggio 2. Collegare il citofono con cicalino a una fonte di alimentazione CA
nella posizione desiderata.
Passaggio 3. Inserire il dongle USB nella porta USB sul retro di HomeBase 2.

25 IT IT 26
Passaggio 4.Nell’app eufySecurity, accedere a Impostazioni citofono - Citofono
interno.
Seguire le istruzioni su schermo per aggiungere il citofono al videocitofono
esistente.
Passaggio 5. È possibile selezionare la suoneria e regolare il livello del volume
utilizzando i pulsanti Musica e Volume situati sul lato del citofono con cicalino.
Sono disponibili 8 suonerie e 3 livelli di volume selezionabili. Ogni citofono può
avere una suoneria diversa in base alle impostazioni.
SOSTITUZIONE DEL CONNETTORE DI
ALIMENTAZIONE
1. Premere il pulsante di blocco e ruotare contemporaneamente il connettore di
alimentazione in senso antiorario per rimuoverlo dalla base del citofono con cicalino.
2. Installare il nuovo connettore di alimentazione sul citofono con cicalino seguendo la
stessa procedura menzionata all’inizio della guida.

NE 28
Inhoudsopgave
WAT ZIT ER IN DE DOOS? 28
WAT ZIJN DE BENODIGDHEDEN
VOOR DE INSTALLATIE?
28
INSTALLATIE
29
DE VOEDINGSCONNECTOR
VERVANGEN
31
WAT ZIT ER IN DE DOOS?
Deurbelgong
Model: T8740
Voedingsconnector
(de stekker kan per
regio verschillen)
Deurbelgong USB-
dongle voor HomeBase 2
Model: T8741
WAT ZIJN DE BENODIGDHEDEN VOOR DE
INSTALLATIE?
Deze deurbelgong is een exclusieve accessoire voor de eufy Security Video
Doorbell 2K (op batterijen).
De USB-dongle stelt de eufy HomeBase 2 in staat om verbinding te maken
met deurbelgongen. Eén USB-dongle kan tot 4 deurbelgongen bedienen.
De USB-dongle kan alleen met de HomeBase 2 werken wanneer er een eufy-
videodeurbel is verbonden met de desbetreffende HomeBase 2 en er op de
deurbel wordt gedrukt.

29 NE NE 30
INSTALLATIE
Stap 1.Bevestig de voedingsconnector op de deurbelgong.
A. Plaats de voedingsconnector in de richting van de pijlen op de deurbelgong.
B. Lijn de verhoogde sleuven van de voedingsconnector uit met de inkeping op
de voet van de deurbelgong.
C. Draai met de klok mee om de voedingsconnector op zijn plaats te
vergrendelen.
Stap 2. Steek de stekker van de deurbelgong in een stopcontact op de
gewenste locatie.
Stap 3. Steek de USB-dongle in de USB-poort op de achterkant van de
HomeBase 2.
Stap 4.Ga ik de eufySecurity-app naar Deurbelinstellingen (Doorbell Settings) -
Binnengong (Indoor Chime).
Volg de instructies op het scherm om de deurbelgong toe te voegen aan uw
bestaande videodeurbel.
Stap 5. U kunt de beltoon selecteren en het volumeniveau instellen met behulp
van de muziek- en volumeknoppen op de zijkant van de deurbelgong.
U kunt kiezen uit 8 beltonen en 3 volumeniveaus. Elke deurbelgong kan een
andere beltoon afspelen, afhankelijk van uw instelling.

31 NE
DE VOEDINGSCONNECTOR VERVANGEN
1. Druk op de vergrendelknop en draai de voedingsconnector tegelijkertijd tegen de klok
in om deze van de deurbelgong te verwijderen.
2. Installeer de nieuwe voedingsconnector op de deurbelgong volgens de procedure die
aan het begin van de handleiding wordt beschreven.
Índice
CONTEÚDO DA EMBALAGEM 33
REQUISITOS PARA A INSTALAÇÃO
33
INSTALAÇÃO 34
SUBSTITUIR O CONETOR DE
ALIMENTAÇÃO 35

33 PT PT 34
CONTEÚDO DA EMBALAGEM
REQUISITOS PARA A INSTALAÇÃO
Esta campainha é um acessório exclusivo do Videoporteiro 2K (a bateria) da
eufy Security.
O adaptador USB permite a eufy HomeBase 2 para ligar a campainhas. Um
adaptador USB pode controlar até 4 campainhas.
O adaptador USB apenas pode funcionar com a HomeBase 2 quando um
videoporteiro da eufy é ligado a esta HomeBase 2 e a campainha é premida.
Deurbelgong
Model: T8740
Voedingsconnector
(O tipo de pino
poderá variar
consoante as regiões
diferentes)
USB para Campainha
Adaptador para a
HomeBase 2
Model: T8741
INSTALAÇÃO
Passo 1.Fixe o conetor de alimentação à campainha.
A. Coloque o conetor de alimentação por cima da campainha na direção
indicada pelas setas.
B. Alinhe as aletas elevadas no conetor de alimentação com o entalhe na base
da campainha.
C. Rode no sentido dos ponteiros do relógio para trancar o conetor de
alimentação.
Passo 2. Ligue a campainha a uma tomada de CA no local pretendido.
Passo 3. Ligue o adaptador USB à porta USB na parte de trás da HomeBase 2.

35 PT PT 36
Passo 4.Na aplicação eufySecurity, aceda às Definições da campainha - Toque
interior.
Siga a instrução no ecrã para adicionar a campainha ao Videoporteiro existente.
Passo 5. Pode selecionar o som de toque e ajustar o nível do volume através
dos botões de Música e Volume que se encontram na parte lateral da
Campainha.
Existem 8 sons de toque e 3 níveis de volume que podem ser selecionados.
Cada Toque pode reproduzir um som de toque diferente de acordo com a sua
definição.
SUBSTITUIR O CONETOR DE ALIMENTAÇÃO
1. Prima o botão de Bloqueio e rode o conetor de alimentação no sentido contrário ao
dos ponteiros do relógio na mesma altura para o remover da base da Campainha.
2. Instale o novo conetor de alimentação na Campainha seguindo o mesmo
procedimento mencionado no início do guia.
Table of contents
Other eufy Security Accessories manuals

eufy Security
eufy Security T8213 User manual
eufy Security
eufy Security T8210 User manual
eufy Security
eufy Security T8900 User manual
eufy Security
eufy Security T8221 User manual
eufy Security
eufy Security T8200S User manual
eufy Security
eufy Security T8220 User manual

eufy Security
eufy Security T8900 User manual
eufy Security
eufy Security T8203 User manual
eufy Security
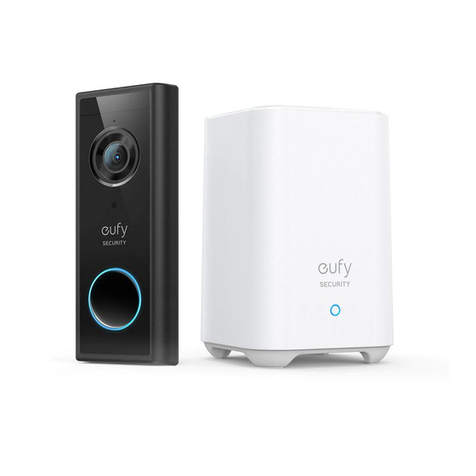
eufy Security HomeBase 2 User manual
eufy Security
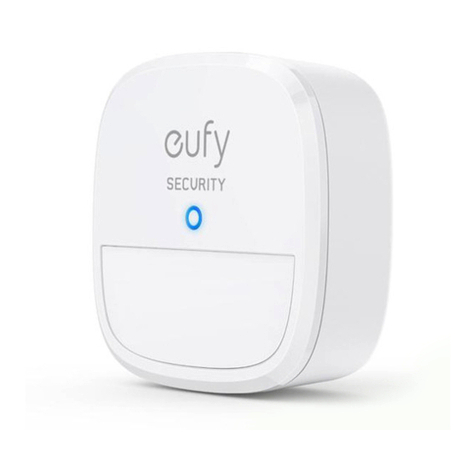
eufy Security T8910 User manual
