EUROM HKG 30-NL User manual

NL Gebruiksaanwijzing
EN Manual
HKG 30-NL
Art.nr. 32.219.4
NL Heteluchtkanon op gas (Propaan / Butaan)
EN Gas-powered hot air gun (Propane / Butane)
Belangrijke waarschuwingen en veiligheidsinstructies
Zorg te allen tijde voor voldoende ventilatie
Houdt brandbare materialen altijd op minimaal 3,5 meter
afstand van het apparaat (4 meter van de voorzijde)
Important warnings and safety instructions
Make sure there is sufficient ventilation
Always keep flammable materials at least 3.5 metres
away from the device (4 metres from the front)

2

3
NL
Hartelijk dank
Hartelijk dank dat u voor dit EUROM product hebt gekozen: het is gemaakt om u veilig
en probleemloos van dienst te zijn. Lees daarom voor gebruik dit instructieboekje
aandachtig door, zorg dat u het begrijpt en handelt zoals daarin beschreven. Bewaar
het boekje om het later nog eens te kunnen raadplegen en zorg ervoor dat ook elke
andere gebruiker het boekje vooraf leest en begrijpt. Dat kan gevaarlijke situaties en
brand voorkomen.
Mocht u na het lezen van het boekje toch nog vragen hebben, raadpleeg dan uw dealer.
Waarschuwingen en Veiligheidsinstructies
Zorg te allen tijde voor voldoende ventilatie
Houdt brandbare materialen altijd op minimaal 3,5 meter
afstand van het apparaat (4 meter van de voorzijde)
Lees en begrijp alle instructies en waarschuwingen uit het
instructieboekje (en op de sticker op het apparaat) voordat
u de kachel assembleert, in gebruik neemt of er onderhoud
aan pleegt. Verkeerd gebruik kan leiden tot brand,
explosie, ernstig persoonlijk letsel,
koolmonoxidevergiftiging of zelfs de dood.
Volg alle plaatselijk geldende voorschriften en codes wanneer
u de kachel installeert en/of gebruikt.
Gebruik in gesloten ruimtes is gevaarlijk en VERBODEN.
Gebruik de kachel alleen in goed geventileerde ruimtes.
Gebruik deze kachel niet in een ruimte, kleiner dan 330 m³.
Een goed geventileerde ruimte voor deze HKG30 kachel heeft
minimaal 900 cm² ventilatieopening (oftewel 30 cm x 30 cm) en
de lucht in de ruimte moet regelmatig circuleren. Onvolledige
verbranding veroorzaakt door gebrek aan zuurstof kan
koolmonoxidevergiftiging veroorzaken. Koolmonoxide is
dodelijk. De eerste signalen van koolmonoxidevergiftiging lijken
op griepachtige verschijnselen: hoofdpijn, duizeligheid,
branderige ogen en neus, droge mond en keel en
misselijkheid. Constateert u deze symptomen, dan werkt uw
heater mogelijk niet goed, of er is te weinig ventilatie. Zorg
onmiddellijk voor frisse lucht! Laat de heater controleren en/of
zorg ervoor dat er voldoende ventilatie is. De één is gevoeliger
voor koolmonoxidevergiftiging dan de ander. I.h.b. zwangere

4
vrouwen, mensen met hart- of longproblemen of
bloedarmoede, ouderen en personen onder invloed van alcohol
hebben een verhoogd risico. Gebruik de heater nooit in woon-
werk- of slaapruimtes!
Gebruik uitsluitend propaan- of butaangas en gebruik
uitsluitend de door de fabrikant bijgeleverde gasslang en
gasregelaar. Controleer of de uitgaande druk van de
gasregelaar overeenkomt met de specificaties op het
typeplaatje van de kachel.
Draai de kraan van de gasfles na gebruik altijd goed dicht.
Verwissel de gasfles altijd in de buitenlucht of in open ruimtes
met voldoende ventilatie. Verwissel de gasfles altijd in een
vlammenvrije omgeving.
Controleer voor gebruik en na het verwisselen van de gasfles
het hele gastransport-systeem en alle aansluitingen op
gaslekkage (zie instructies). Wanneer u gaslekkage constateert
onmiddellijk de kraan van de gasfles dichtdraaien! Open
vervolgens deuren en ramen om het gas te laten ontsnappen.
Gebruik in tussentijd geen vuur of apparatuur die vonken kan
voortbrengen. Verhelp dan de lekkage en controleer opnieuw
op gaslekkage voor u de heater weer in gebruik neemt.
Toestelcategorie A3.
Gebruik de kachel niet in de nabijheid van brandbare of
explosieve materialen als verf etc., licht ontvlambare
vloeistoffen als b.v. thinner, benzine, terpentine, alcohol, of
vluchtige en gasvormige brandbare stoffen. Dat kan brand of
explosie veroorzaken.
Gebruik de kachel niet op plaatsen met losse brandbare
materialen (papier, houtsnippers, kruimels, glasvezels afval
e.d.). Deze materialen kunnen door de kachel worden
aangezogen en brand veroorzaken.
Gebruik de kachel niet in stoffige ruimten.
Gebruik geen spuitbussen in een ruimte met een werkende
kachel. Het drijfgas kan een explosie veroorzaken.
Houd de voorkant van de kachel minstens 4 meter verwijderd
van brandbare materialen als hout, kleding, plastic, papier,
tentzeil enz., en de achter- boven en zijkanten minstens 3,5
meter. Borg tentzeil / plastic e.d. of neem extra afstand in acht
zodat deze materialen nooit binnen genoemde afstanden

5
kunnen komen. Het wordt aanbevolen om brandbestendig
materiaal te gebruiken voor het dakwerk of overkapping.
Plaats de kachel altijd op een vlakke, stabiele en horizontale
ondergrond. Gebruik de kachel nooit op een houten- of andere
brandbare ondergrond en controleer regelmatig of de
ondergrond niet oververhit raakt; dat kan gevaar opleveren!
Deze kachel is bedoeld voor gebruik op werklocaties, in hallen,
e.d.. Voor gebruik in openbare gebouwen moeten de nationale
voorschriften worden nageleefd. De kachel is niet bedoeld
voor huishoudelijk gebruik. Niet te gebruiken voor de
verwarming van bewoonbare ruimtes in woongebouwen.
Gebruik de kachel nooit in woon-, werk- of slaapruimten. Deze
kachel is ook niet geschikt voor gebruik in camper,
woonwagen, (sta)caravan en boten, e.d.
Gebruik de kachel niet in een parterre, kelder of ruimte onder
grondniveau.
Gebruik de kachel nooit in regen of sneeuw en niet in natte of
vochtige ruimten.
Richt de kachel nooit op gasfles of gasslang. Gasfles en
gasslang mogen zich nooit voor de kachel bevinden. Zoek altijd
een veilige, stabiele plaats voor de gasfles uit de buurt van
makkelijk brandbare materialen.
Blokkeer de in en uitlaat van de kachel nooit en gebruik geen
slangen/buizen op de in- of uitlaat.
Ontsteek de kachel alleen wanneer u een onbelemmerde
werking van de ventilator heeft vastgesteld.
Sluit de kachel uitsluitend aan op een geaard stopcontact 220-
240V/50 Hz, beveiligd met een 30mA aardlekschakelaar.
Gebruik alleen geaarde verlengkabels van voldoende
vermogen.
Laat een werkende kachel niet zonder toezicht.
Een werkende kachel nooit verplaatsen, aanraken, of er
onderhoud aan uitvoeren. Wanneer u de kachel wilt
verplaatsen, controleren, schoonmaken, er onderhoud aan wilt
uitvoeren of de gasfles wilt verwisselen, schakel hem dan eerst
uit, neem de stekker uit het stopcontact en laat de kachel
afkoelen.
Wanneer de kachel is uitgeschakeld altijd de stekker uit het
stopcontact nemen. Neem nooit de stekker uit het stopcontact
als de kachel nog brandt!

6
Kijk nooit in de uitblaasopening van de kachel en ga er niet
voor staan.
Breng geen wijzigingen aan op de kachel; dat kan
disfunctioneren en gevaarlijke situaties veroorzaken.
Draai de gasfles onmiddellijk dicht wanneer u een storing,
defect of gaslekkage constateert. Voer zelf geen reparaties uit
maar laat uw kachel alleen door een gekwalificeerd persoon
repareren en gebruik alleen originele onderdelen.
Houd de heater schoon, zie ‘Schoonmaak en Onderhoud’.
PAS OP! De kachel (en i.h.b. kap en uitblaasopening) wordt
tijdens gebruik extreem heet en kan verbrandingen
veroorzaken. Raak hem tijdens en kort na de werking niet aan.
Houdt mensen, dieren, kleding en brandbare stoffen op veilige
afstand. Bijzondere aandacht is geboden wanneer er kinderen
of hulpbehoevende of kwetsbare personen aanwezig zijn.
Beschrijving
1. De HKG30 is een heteluchtkanon met directe verbranding. Het bevat een door een
motor aangedreven ventilator die de luchtcirculatie (en daarmee de zuurstoftoevoer)
bevordert, om een goede verbranding van het gas te bewerken. De HKG30 is een
echte ruimteverwarmer. Door de directe verbranding heeft hij een hoge warmte-
afgifte, gezien zijn (constante) energieverbruik.
2. De HKG30 bevat een vlambeveiliging en een oververhitting beveiliging. De
vlambeveiliging schakelt de gastoevoer uit wanneer de vlam dooft. En de
oververhitting schakelt de gastoevoer uit wanneer de kachel te warm wordt.
3. De HKG30 is voorzien van een omvalbeveiliging die onmiddellijk de gastoevoer
afsluit wanneer de kachel om mocht vallen, in wat voor richting dan ook.
1. Elektrokabel met stekker
2. Ventilatorrooster achterzijde
3. XX
4. Controlebox
5. Gasklep
6. Aansluitnippel gastoevoer
7. Beschermdopje
8. Ontstekingsknop
9. AAN/UIT-schakelaar
10. Handgreep
11. Branderkamper
12. Uitblaasrooster

7
Technische gegevens
Afmetingen:
HKG30:
Direct land van bestemming
Nederland
Gascategorie
I3B/P (1500) –propaan of butaan
Internationale beschermingsgraad
IPX0
Aanvoer gasdruk
mBar
1500
Voltage
V/Hz
220-240 / 50
Stroomverbruik
W
65
Gasverbruik
g/uur
2400
Warmte capaciteit
kW
33
Luchtverplaatsing
m³/uur
1000
Classificatie gastoestel
A3
DE GEUR VAN GAS
Aan gas is een geur toegevoegd om u in staat te stellen een gaslek te ontdekken. Gas
is zwaarder dan lucht; probeer dus vlak boven de grond de geur op te vangen!
Neem onmiddellijk maatregelen als u gas ruikt!
Sluit onmiddellijk de gastoevoer.
Doe niets wat tot vonk of vuur kan leiden om ontsteking van het gas te voorkomen.
Schakel geen elektriciteit in of uit, steek geen lucifer, aansteker o.i.d. aan en gebruik
uw telefoon niet.
Haal iedereen weg uit de buurt van de gasbron en geef het gas ruimschoots de tijd te
verwaaien. Blijf tijdens dat proces uit de buurt! Blijft u gas ruiken of vertrouwt u de
situatie niet, alarmeer dan de brandweer.
Laat een gaslek door gekwalificeerde mensen repareren!

8
Ingebruikname
1. Controleer de kachel op beschadigingen of gebreken. Neem een beschadigde
kachel niet in gebruik maar wend u tot uw leverancier.
2. Zorg voor een onbeschadigde, volle gasfles met propaan of butaan, afgestemd op
het gebruik.
3. Kies een plaats voor de kachel die aan alle veiligheidsinstructies voldoet en zet hem
op een vlakke, stabiele en horizontale ondergrond van onbrandbaar materiaal.
Stekker niet in het stopcontact en stroomschakelaar op O (uit).
4. Monteer de gasslang met passend gereedschap stevig op de drukregelaar (linkse
schroefdraad!)
5. Verwijder het beschermdopje en sluit de gastoevoerslang aan op het apparaat
(linkse schroefdraad!). Draai de moer met passend gereedschap stevig aan voor
een probleemloze gastoevoer.
6. Sluit de drukregelaar aan op de gasfles. Draai de moer stevig dicht zodat er geen
gaslekkage kan optreden. Let er op dat bij de installatie van de gasfles de gasslang
niet gebogen of geknikt is. Vermijd verdraai- en trekspanning.
7. Controleer of het apparaat op correcte wijze is aangesloten op de gasfles en voer
een complete gaslekkagetest uit, zie beschrijving elders in dit boekje.
8. Als alles in orde is opent u de gaskraan. (Afb. 1)
9. Steek nu stekker in het stopcontact. Zet vervolgens de stroomschakelaar op I (aan)
(Afb. 2). De ventilator zal gaan draaien.
10.Wacht tot de ventilator rustig en stabiel draait. Druk nu met uw rechterhand knop
van de gasklep in en houd hem eerst 10 seconden ingedrukt. Druk vervolgens met
uw linkerhand gelijktijdig enkele malen op de ontstekingsknop om het apparaat te
ontsteken (Afb. 3).
11.Nadat het gas is gaan branden de gasklep nog 15 seconden ingedrukt houden.
Daarna kunt u loslaten en zal het gas continu branden (Afb. 4).
12.Om het apparaat uit te schakelen sluit u de gaskraan van de gasfles en wacht u tot
de vlam is gedoofd. Zet nu de stroomschakelaar op O (uit) en neem de stekker uit
het stopcontact. Koppel tenslotte de drukregelaar los van de gasfles.
Pas op! Het apparaat blijft na gebruik nog geruime tijd heet! Neem altijd de stekker
uit het stopcontact als het apparaat niet in werking is!
13.Wanneer u de gasfles moet verwisselen of het apparaat na een periode van opslag
weer wilt gebruiken dient u de hele procedure, incl. de gaslekkagetest, te herhalen.

9
Let op!
Wanneer u het apparaat volgens de hierboven beschreven procedure hebt trachten te
starten en dat lukt na drie ontstekingspogingen niet, probeer het dan niet opnieuw. Door
de hoge gasconcentratie is er explosiegevaar ontstaan! Neem contact op met uw dealer
om de reden van de storing op te sporen.
Let er op dat bij de installatie van de gasfles de gasslang niet gebogen of geknikt is.
Vermijd verdraai- en trekspanning. Daardoor kan hij beschadigen en kan er gaslekkage
optreden!
Gebruik altijd de correcte, door de leverancier geleverde drukregelaar en gasslang.
Met vragen over de gasslang kunt u contact opnemen met uw leverancier. Geadviseerd
wordt een lengte van 1,5 meter.
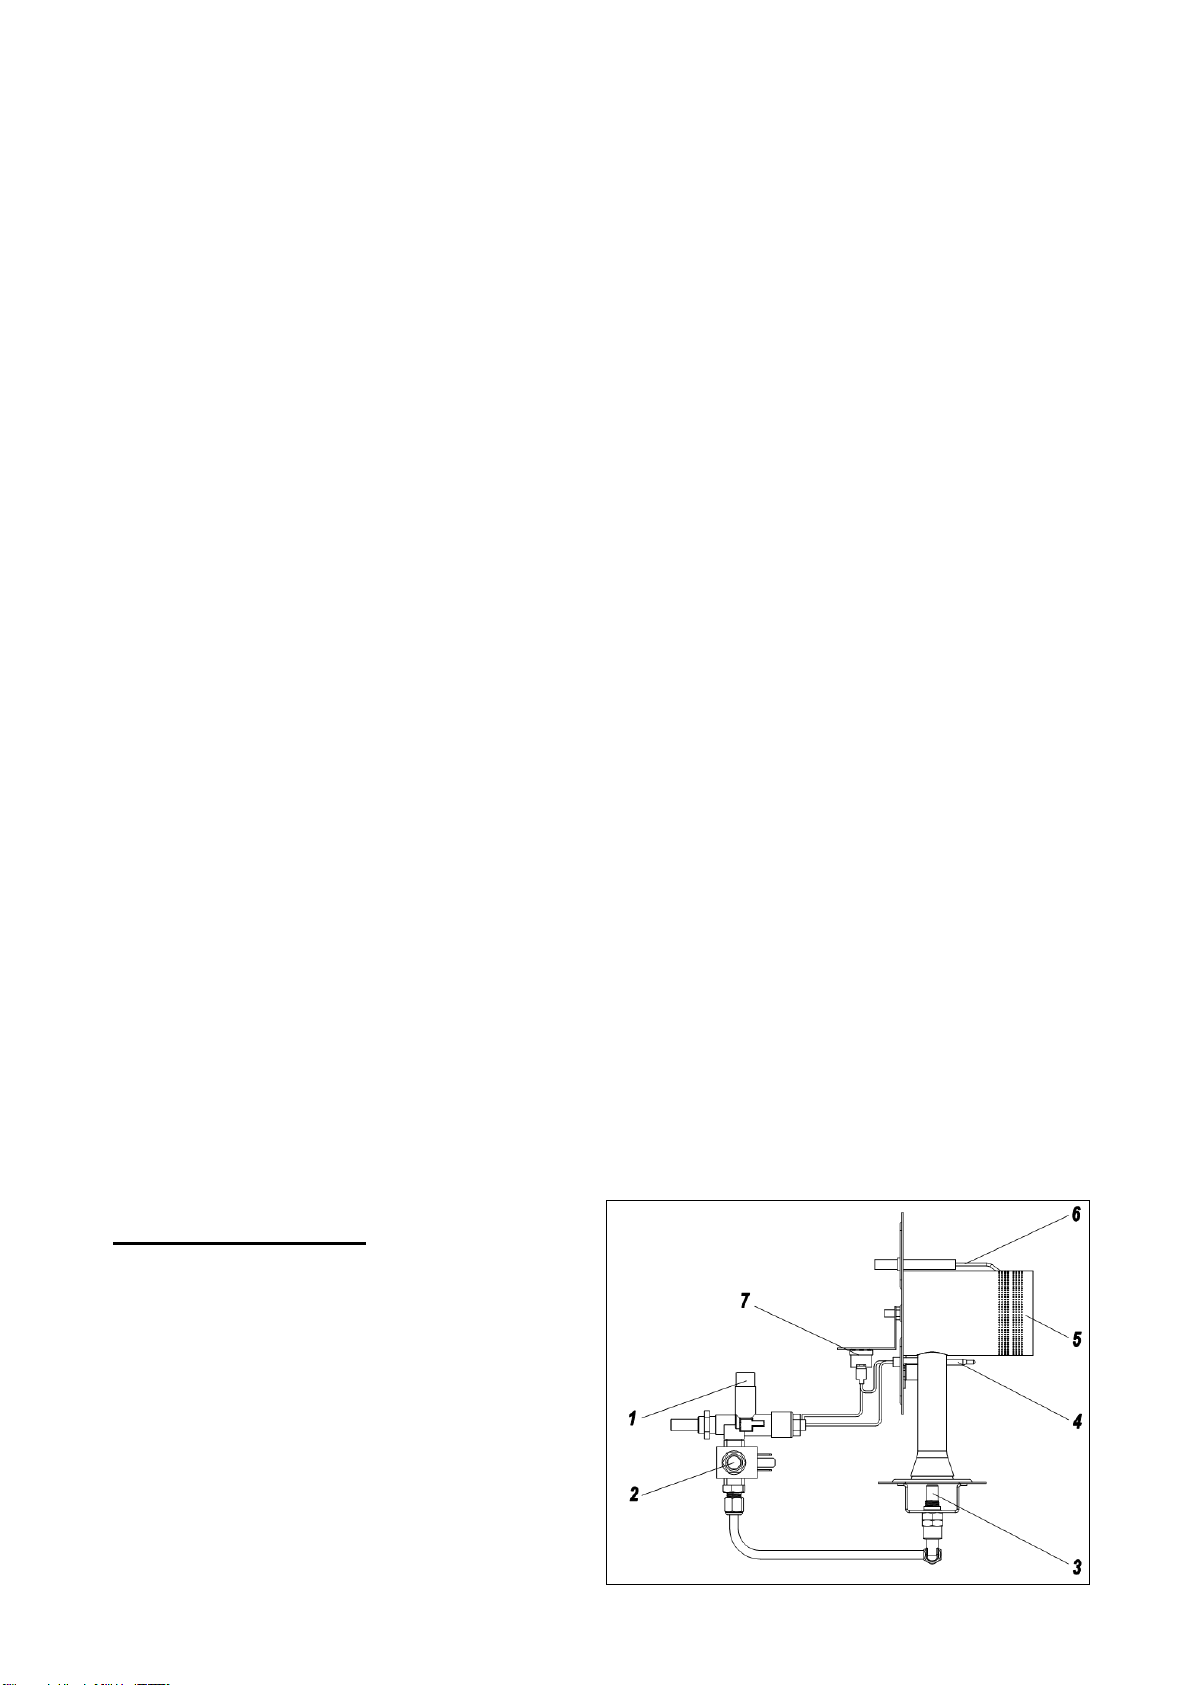
Gaslekkagetest
Om de mogelijkheid van schade tijdens het transport of door hoge druk, slijtage enz. uit
te sluiten dient er tijdens de installatie, na het verwisselen van een gasfles en na een
periode van opslag altijd een complete lekkagetest te worden uitgevoerd. Alle
lekkagecontroles moeten worden uitgevoerd met een zeepoplossing, nooit met
vuur! Rook niet tijdens de controles. Bij gaslekkage (wees alert op de geur!)
onmiddellijk de gaskraan van de gasfles sluiten en het apparaat ver verwijderen van
andere warmtebronnen, vuur en vonken.
Voer de controle uit met een volle gasfles.
Stekker uit het stopcontact, stroomschakelaar op O (uit), gastoevoer dicht.
Maak een zeepoplossing van één deel vloeibare zeep en één deel water.
Breng de zeepoplossing aan op het hele gastransportsysteem, in het bijzonder op de
verbindingen, met een spuitfles, borstel of doek.
Draai de gastoevoer open. Als er sprake is van een lek zullen er zeepbellen
ontstaan.
Als er sprake is van een lek, schakel dan de gastoevoer uit. Bevestig het lekkende
onderdeel strakker, schakel de gastoevoer weer in en controleer opnieuw. Blijven er
bellen ontstaan, neem dan contact op met uw leverancier.
Zorg ervoor dat er geen vuur of vonken in de buurt zijn als u de lekkagetest uitvoert
en rook er niet bij!
Als de gasslang tekenen van barsten, scheuren of andere beschadigingen vertoont,
moet hij worden vervangen door een nieuwe slang van dezelfde lengte en
equivalente kwaliteit. Vervang hem minimaal elke 3 à 4 jaar, zie het opschrift op de
slang.
Schoonmaak en Onderhoud
Schakel het apparaat uit, neem de stekker uit het
stopcontact en geef de kachel tijd om af te koelen
voor u hem reinigt of er onderhoud aan uitvoert.
Houd het apparaat (i.h.b. de roosters en de
ventilatorbladen) schoon en verwijder eventueel

10
stof regelmatig. De omkasting kunt u eventueel met een vochtige doek afnemen.
Gebruik daarbij nooit agressieve, bijtende of schurende reinigingsmiddelen.
Stof of ander vuil in het apparaat kunt u voorzichtig proberen te verwijderen met een
borsteltje, op te zuigen met een stofzuiger of (voorzichtig!) weg te blazen met een
compressor.
Controleer de verbranding nadat de kachel is ontstoken. De normale vlam is blauw en
komt niet buiten het apparaat. De vlam moet stabiel zijn en de gehele vlamcirkel
gelijkmatig van vorm. Als dat niet het geval is, is er wat mis met de verbranding. Neem
dan contact op met uw servicepunt.
Controleer regelmatig de gasslang en zijn schroefverbindingen. Wanneer de slang
beschadigd is (is geknakt, gesprongen of versleten, brandplekken vertoont of wat dan
ook) dient deze onmiddellijk vervangen te worden. Ook zonder zichtbare
beschadigingen dient de slang minimaal elke 3 à 4 jaar te worden vervangen (zie
opdruk slang). Gebruik uitsluitend een goedgekeurde gasslang.
Wanneer de gaskraan van de gasfles hapert en de gastoevoer niet normaal kan worden
afgesloten, druk dan eerst de stroomschakelaar uit (O) en neem dan de stekker uit het
stopcontact. De gasklep zal nu de gastoevoer blokkeren en de kachel dooft. Laat het
apparaat afkoelen maar ontkoppel de gasslang niet! Ga met de gasfles en het
aangesloten apparaat naar uw gasleverancier om het probleem op te laten lossen. Dit
defect zit niet in uw apparaat.
Wanneer u het apparaat langere tijd niet denkt te gebruiken, dient u de gastoevoerslang
los te koppelen van het apparaat en het beschermdopje op de opening te plaatsen.
Plaats het apparaat in de originele verpakking (of een andere stofvrije doos of zak) en
plaats het op een koele, droge plaats buiten het bereik van kinderen. Voordat u het
apparaat weer in gebruik neemt dient u te controleren of de ventilator probleemloos
werkt en of er nergens brandbaar materiaal aan/in/op de kachel is blijven zitten. Voer
ook een gaslekkagetest uit.
Reparaties mogen uitsluitend worden uitgevoerd door daartoe gekwalificeerde
personen. Open zelf de kachel nooit! Zie er op toe dat er uitsluitend originele
onderdelen worden gebruikt; dat geldt zeker ook voor de gasslang en de drukregelaar!
De kachel dient minstens éénmaal per jaar te worden geïnspecteerd door een
gekwalificeerd persoon.
Gasaanvoer circuit
1. Aansluitmoer gastoevoer
2. Elektomagnetisch ventiel
3. Gasnozzle
4. Thermokoppel
5. Branderknop
6. Bougie
7. Voeler oververhitting

11
Werkingsprincipe:
Wanneer de kachel is aangesloten op de gasvoorziening, passeert het gas
achtereenvolgens de volgende onderdelen:
1. Gastoevoer opening (1)
2. Elektromagnetisch ventiel (2)
3. Gasnozzle (3)
4. Branderkop (5), waar het wordt ontstoken door een vonk van de bougie (6)
5. Thermokoppel (4), dat wordt verhit door de warmte van het verbrande gas
6. Oververhittingsbeveiliging (7), dat het elektromagnetische ventiel in de gasklep
bedient.
Elektrisch circuit
Onsteking
Circuit vlambeveiliging

12
Onderdelen
Rating Label

13
EN
Thank you
Thank you for choosing this EUROM product: It is designed to be of service to you
safely and without any hassle. Therefore, please read this user manual carefully, make
sure you understand it and act as described therein. Keep the manual in order to
consult it later and make sure that every other user will read and understand the manual
beforehand. This can prevent dangerous situations and fires.
If you have any questions after reading the booklet, please consult your dealer.
Warnings and Safety Instructions
Make sure there is sufficient ventilation
Always keep flammable materials at least 3.5 metres
away from the device (4 metres from the front)
Read and understand all instructions and warnings from
the instruction manual (on the sticker on the device)
before you assemble, use or perform maintenance on the
heater. Improper use can lead to fire, explosion, serious
personal injury, carbon monoxide poisoning or even
death.
Follow all locally applicable requirements and codes when you
install and/or use the heater.
Use in closed rooms is dangerous and is PROHIBITED. Only
use the heater in well-ventilated spaces. Do not use this heater
in a space smaller than 300 cubic metres. A well-ventilated
area for this HKG30 heater has at least 900 square centimetres
ventilation opening (or 30 cm x 30 cm) and the air in the space
must circulate regularly. Incomplete burning caused by lack of
oxygen can cause carbon monoxide poisoning. Carbon
monoxide is fatal. The first signs of carbon monoxide poisoning
resemble flu-like symptoms: headache, dizziness, burning eyes
and nose, dry mouth and throat and nausea. If you experience
these symptoms, your heater may not work properly or there is
not enough ventilation. Immediately get fresh air! Have the
heater checked and/or ensure that there is adequate
ventilation. One person may be more susceptible to carbon
monoxide poisoning than another person. Particularly pregnant
women, people with heart or lung problems or anaemia, the
elderly and those under the influence of alcohol have an

14
increased risk. Never use the heater in living, working or
sleeping areas.
Only use propane or butane gas and only use the gas hose
and gas regulator supplied by the manufacturer. Check
whether the output pressure of the gas regulator corresponds
with the specifications on the type plate of the heater.
Always tightly close the tap of the gas bottle after use.
Always change the gas bottle in the fresh air or in open areas
with adequate ventilation. Always change the gas bottle in a
flame-free environment.
Check the entire gas transport system and all connections for
gas leaks (see instructions) before and after changing the gas
bottle. If you find a gas leak, immediately close the tap of the
gas bottle! Then open doors and windows to allow the gas to
escape. In the meantime, don’t use any fire or equipment that
could cause sparks. Fix the leak, and check again for gas
leakage before you use the heater again.
Device category A3.
Do not use the heater in the vicinity of flammable or explosive
materials such as paint, etc., highly flammable liquids such as
thinner, gas, turpentine, alcohol or volatile and gaseous
flammable substances. That can cause fire or explosion.
Do not use the heater in places with easily flammable materials
(paper, wood chips, granules, glass fibre waste and the like).
These materials can be sucked up by the heater and cause
fire.
Do not use the heater in dusty areas.
Do not use any pressurised containers in a space with an
operating heater. The propellant can cause an explosion.
Keep the front of the heater at least 4 metres away from
flammable materials such as wood, clothing, plastic, paper, tent
cloth, etc. and keep the rear, upper and sides of the heater at
least 3.5 metres away. Store tent cloth/plastic and the like or
observe extra distance so that these materials can never come
within the stated distances. It is recommended to use fire-
resistant material for the roofing or covering.
Always place the heater on a level, stable and horizontal
surface. Never use the heater on a wooden or other flammable
surface and check regularly that the surface on which it is
placed does not get overheated; that can cause a hazard!

15
This heater is intended for use in work sites, in industrial areas,
etc. For use in public buildings, the national regulations must
be followed. The heater is not intended for household use.
It is not to be used to heat residential spaces in residential
buildings. Never use the heater in living, working or sleeping
areas. This heater is also not suitable for use in campers,
trailers, caravans and boats and so forth.
Do not use the heater in a lobby, basement or space below
ground level.
Never use the heater in rain or snow and not in wet and moist
areas.
Never face the heater facing the gas bottle or gas hose. The
gas bottle and gas hose can never be positioned in front of the
heater. Always find a safe, stable place for the gas bottle out of
the vicinity of easily flammable materials.
Never block the intake and exhaust and do not use any
hoses/tubes on the intake and exhaust.
Only turn on the heater when you have made sure that the
ventilator can work unobstructed.
Only plug the heater into a grounded socket 220-240V/50 Hz,
secured with a 30mA differential switch. Only use grounded
extension cords with adequate power.
Do not leave an operating heater unattended.
Never move, touch or perform maintenance to a heater while it
is running. When you want to move, check, clean or maintain
the heater or want to change the gas bottle, first switch it off,
unplug it and let the heater cool off.
Once the heater is switched off, always unplug it. Never unplug
the heater when the heater is still on!
Never look inside the exhaust opening of the heater and do not
stand in front of it.
Do not make changes to the heater; that can cause dysfunction
and hazardous situations.
Immediately close the gas bottle when you detect a
malfunction, defect or gas leakage. Do not make repairs to the
heater and only have it repaired by a qualified person and only
use original parts.
Keep the heater clean; see “Cleaning and Maintenance”.

16
ATTENTION! The heater (and particularly the cap and exhaust
opening) become extremely hot and can cause burns. During
and shortly after operation, do not touch it. Keep people,
animals, clothing and flammable materials at a safe distance.
Special attention is required when children or those who need
assistance or vulnerable people are around.
Description
1. The HKG30 is a hot air gun with direct incineration. It contains a ventilator driven by
a motor that promotes air circulation (and thus the oxygen supply) to achieve good
incineration of the gas. The HKG30 is a real space heater. Due to direct incineration,
it has a high heat output given its (constant) energy consumption.
2. The HKG30 has a flame security and an overheating security. The flame security
switches the gas supply off when the flame is extinguished. And overheating turns
off the gas supply when the heater gets too hot.
3. The HKG30 has a tipping security that immediately shuts off the gas supply when
the heater could tip over, in any direction.
1. Electrical cable with plug
2. Ventilator grill at the rear
3. XX
4. Control box
5. Gas valve
6. Connection nozzle for gas supply
7. Protective cap
8. Ignition button
9. ON/OFF switch
10.Handle
11.Housing
12.Air discharge grille
Technical details
Dimensions

17
HKG30:
Direct country of destination
Nederland
Gas category
I3B/P (1500) –propane of butane
International protection rating
IPX0
Supply gas pressure
mBar
1500
Voltage
V/Hz
220-240 / 50
Power consumption
W
65
Gas consumption
g/hour
2400
Heat capacity
kW
33
Airflow
m³/hour
1000
Classification gas appliance
A3
THE SMELL OF GAS
An odour is added to gas to allow you to tell if there is a gas leak. Gas is heavier than
air; so try to smell the gas right above the floor.
Immediately take measures if you smell gas!
Immediately shut off the gas supply.
Don’t do anything to cause sparks or fire to prevent inflammation of the gas. Do not
switch electricity on or off, do not light matches, lighter or the like and do not use your
telephone.
Get everyone out of the vicinity of the gas source and give the gas ample time to air
out. Stay nearby during that process. If you still smell gas or have doubts about the
situation, contact the fire department.
Have a gas leak repaired by qualified people.
Operation:
1. Check the heater for damage or defects. Do not use a damaged heater, but contact
your supplier.
2. Make sure to use undamaged, full gas bottles with propane or butane, suitable for
use.
3. Select a place for the heater that meets all the safety instructions and place it on a
level, stable, horizontal surface with non-flammable material. Do not plug it in and
the set the power switch to O (off).
4. Firmly attach the gas hose with suitable tools to the pressure regulator (left screw
threads!)

18
5. Remove the protective cap and attach the gas supply hose to the device (left screw
threads!). Firmly screw on the nut with suitable tools for unproblematic gas supply.
6. Connect the pressure regulator to the gas bottle. Firmly screw the nut on so that no
gas leakage can occur. Make sure when you install the gas bottle that the gas hose
is not bent or kinked. Avoid turned and pulled tension.
7. Check that the device is correctly attached to the gas bottle and perform a complete
gas leakage test (see the description below in this booklet).
8. When you’re sure everything is in order, open the gas tap. (Diagram 1).
9. Now insert the plug into the socket. Then set the power switch to I (on) (Diagram 2).
The ventilator will start running.
10.Wait until the ventilator is running steadily and stable. Now press the right-hand
button of the gas valve and keep it pressed down for 10 seconds. Then with your left
hand simultaneously press the ignition button a few times to ignite the device
(Diagram 3).
11.After the gas starts burning, keep the gas valve pressed in for another 15 seconds.
After that, you can let go and the gas will burn continuously (Diagram 4).
12.To switch off the device, close the gas tap of the gas bottle and wait until the flame
goes out. Now switch the power switch to O (off) and remove the plug from the
socket. Finally, disconnect the gas supply hose from the gas bottle.
Attention! The device will remain hot for a while after use. Always remove the plug
from the socket when the unit is not in use.
13.If you have to change the gas bottle or want to use the device after a period of
storage, you must repeat the entire process, including the gas leakage test.
Attention!
If you have tried to start the device according to the procedure described above and that
does not work after three attempts to ignite it, don’t try it again. Due to the high gas
concentration, there is now an explosion hazard! Contact your dealer to find out the
reason for the malfunction.
Make sure when you install the gas bottle that the gas hose is not bent or kinked. Avoid
twisted and tensile stress. This can damage it and gas leakage can occur!
Always use the correct, supplier-provided pressure regulator and gas hose.
If you have questions about the gas hose, contact your supplier. A length of 1.5 metres
is advised.
Gas leakage test
To rule out the possibility of damage during transport or due to high pressure, wear and
tear, etc., a complete gas leakage test must be performed during installation, after
changing a gas bottle and after a period of storage. All leakage inspection must be
performed with a soap solution, never with fire! Do not smoke during the
inspections. When there is gas leakage, immediately close the gas tap on the gas bottle
(be alert for the odour!) and remove the equipment far from other sources of heat, fire
and sparks.
Perform the inspection with a full gas bottle.
Unplug it, switch the power switch to O (off), close the gas supply.

19
Make a soap solution with one part liquid soap and one part water.
Apply the soap solution to the entire
gas transport system, especially on
the connections, with a spray bottle,
brush or cloth.
Open the gas supply. If there is a
leak, you will see soap bubbles.
If there is a leak, switch off the gas
supply. Tighten the leaking part, turn
on the gas supply again and check
again. If there are still bubbles,
contact your supplier.
Make sure there is no fire or sparks in the vicinity when you are performing the
leakage test and do not smoke!
If the gas hose shows signs of bursting, cracks or other damage, it must be replaced
by a new hose of the same length and equivalent quality. Replace it at least every 3
or 4 years; see the writing on the hose.
Cleaning and Maintenance
Switch the unit off, unplug it and give the heater time to cool off before you clean it or
perform maintenance.
Keep the unit clean (particularly the grills and the ventilator blades) and remove dust
regularly. You can clean the housing with a damp cloth. Never use aggressive,
corrosive or abrasive cleaning agents.
You can carefully try to remove dust and other dirt in the unit with a brush, vacuum it out
or blow it off (carefully) with a compressor.
Check the incineration after the heater is ignited. The normal flame is blue and not
outside of the unit. The flame must be stable and the entire flame circle must be uniform
in shape. If that is not the case, there is something wrong with the incineration. Contact
your service department.
Regularly check the gas hose and its screw connections. If the hose is damaged
(kinked, burst or worn out, shows signs of burns or anything), this must be replaced
immediately. Even without visible damage, the hose must be replaced at least every 3
or 4 years (see the printing on the hose). Only use an approved gas hose.
If the gas tap on the gas bottle falters and the gas supply cannot be turned off normally,
first press the power regular to (O) and unplug the unit. The gas valve will now block the
gas supply and the heater will shut off. Allow the unit to cool off, but don't disconnect the
gas hose! Take the gas bottle and the connected device to your gas supplier to have
the problem solved. This defect is not in your unit.
If you think you won’t use the device for a long time, you should disconnect the gas
supply hose from the unit and place the protective cap on the opening. Put the unit in
the original packaging (or another dust-free box or bag) and keep it in a cool, dry place
outside the reach of children. Before you use the device again, you must check whether

20
the ventilator is working properly and no flammable materials are still next to/in/on the
heater. Also perform a gas leakage test.
Repairs must only be performed by qualified people. Never open the heater yourself!
Make sure that only original parts are used; that definitely applies to the gas hose and
the pressure regulator!
The heater must be inspected at least once a year by a qualified person.
Gas supply circuit
1. Connection nut for gas supply
2. Electromagnetic valve
3. Gas nozzle
4. Thermocouple
5. Burner head
6. Spark plug
7. Overheating protection
Operating principle:
When the heater is connected to the
gas supply, the gas passes in
sequence through the following parts:
1. Gas supply opening (1)
2. Electromagnetic valve (2)
3. Gas nozzle (3)
4. burner head (5), where it is ignited by a spark in the spark plug (6)
5. thermocouple (4), that is heated by the heat of the burnt gas
6. overheating protection (7) that controls the electromagnetic valve in the gas valve
Electric circuit
Table of contents
Languages:
Other EUROM Power Tools manuals