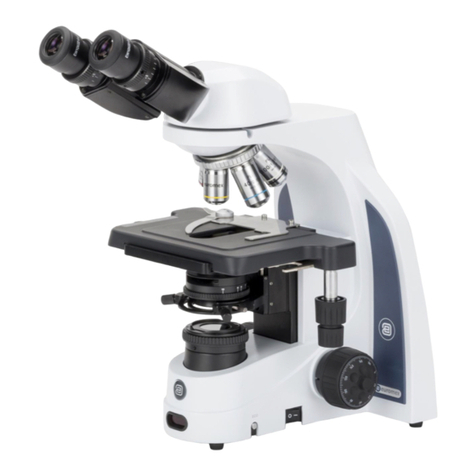
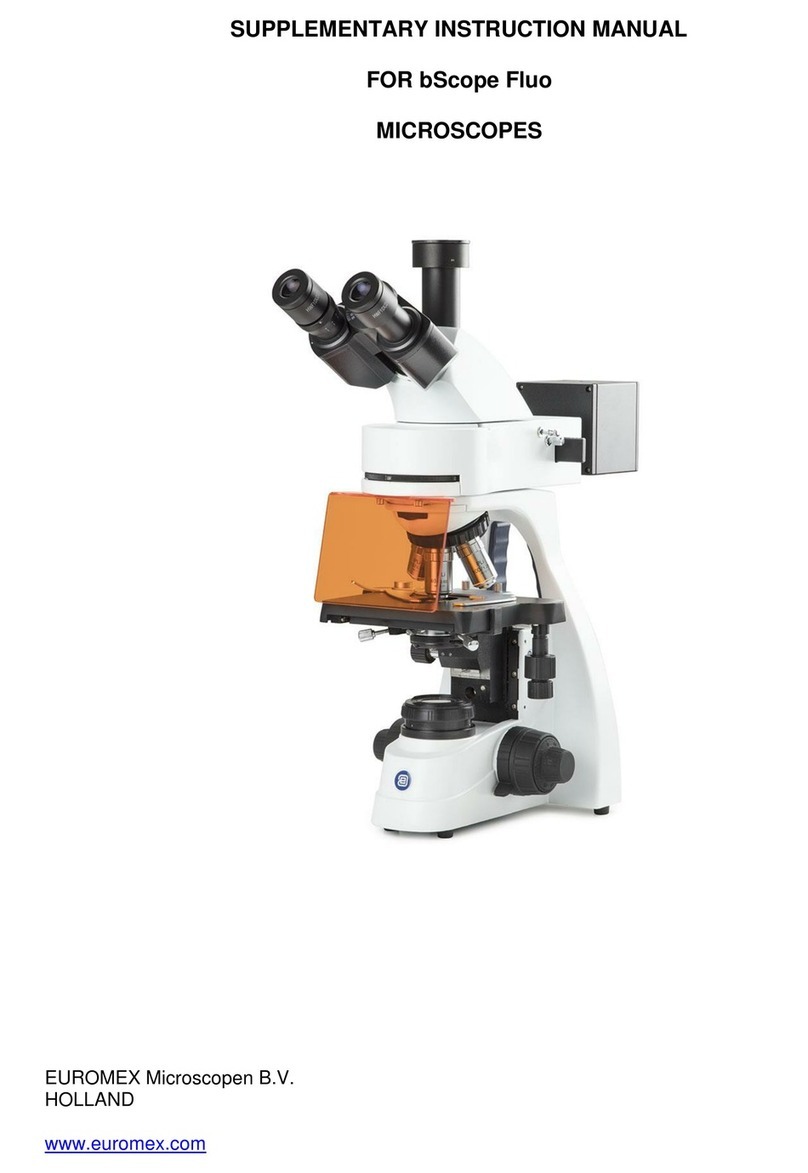
Euromex OXION Series User manual

page1/16
euromex microscopen bv
The Netherlands
www.euromex.com

page2/16
Introduction
The Oxion series has been designed with all kind of ife Sciences applications and great durability
in mind. This resulted in a modern, robust and high level microscope for everyday use, equipped
with excellent optical and mechanical components. Specific attention to production methods
resulted also in an excellent price/performance ratio.
The Oxion features a unique swiveling concept allowing the viewing height to be easily matched
with the user height and compared to traditional microscopes add approximately 40 mm extra
viewing height. The Siedentopf tubes have standard HWF plan 10x eyepieces with 22 mm field of
view and adjustable diopter. The interpupillary distance is 50 to 75 mm. Eyepieces can be secured
to the tubes. The Oxion head has an ergonomic viewing angle of 30°. The Oxion is available in
various configurations suitable for ife Sciences applications in laboratories, high schools and
universities but also for routine medical applications and veterinary medicine. Besides the bright
field contrast method, configurations with phase contrast, dark field contrast, simple polarization
or fluorescence illumination can be used.
The computer optimized design of the Oxion ensures high stability and durability which results in
an advanced ergonomical all-round microscope. Below the head, the microscope features an
opening for insertion of an optional polarizer. A handgrip at the back of the stand allows easy
transportation of the microscope.
The large 150 x 140 mm table with 76 x 50 mm translation mechanical stage and a reversed
nosepiece for up to 5 objectives makes the Oxion suitable for advanced laboratory work.
Ergonomically placed adjustment knobs minimize fatigue during long microscopy sessions. The
general shape of the stand has been specifically designed to match today’s standard. The height
adjustable Abbe N.A. 1.25 condenser accepts sliders for economical phase contrast and dark field
applications.
The Oxion can also be equipped with a heating stage which can be set up to 50° Celsius by a real
PID controller. Higher temperatures can be achieved on special request. The 3 Watt adjustable ED
illumination offers the user a comfortable illumination with a very constant color temperature and
a very long term usage. The Koehler illumination enables highest contrast and maximum
achievable resolving power of the optics. Besides low energy consumption and no heating, the
high powered ED has a long operating lifetime. The 100 Watt mercury-vapor light source enables
a large range of wavelengths to be used for various fluorophores. The vertical light reflected
illuminator can accept up to 4 cubes at the same time for appropriate exciter and emitter filters
Bright field
A large scale of applications is covered by the common light-transmitted bright field contrast
method. Besides the standard plan achromatic 4x, 10x, 20x, S40x, S60x, S100x oil bright field, the
Oxion can also be engaged with newly designed high contrast plan semi-Apochromatic objectives.
The improved correction of these objectives results in lower aberrations and improved resolving
power for the complete optical system. All objectives are treated with a multi-layer anti-reflection
coating and are anti fungus.

page3/16
Phase contrast The observation of living cells and specimens with poor contrast is made possible
by the use of the phase contrast method. Two different phase contrast equipments are available.
All phase plan contrasts objectives can be used with both systems. A first economical way is to use
sliders, each equipped with phase contrast rings. The first slider features phase rings for 10x and
S40x and the second for 20x and S100x plan phase contrast objectives. These phase contrast
sliders are simply inserted into the standard condenser of the Oxion.
The second method is to use one of the 2 available Zernike phase contrast disc condensers. The
first Zernike disc condenser allows bright field contrast and phase contrast for 10x, 20x, S40x and
S100x phase plan objectives. The second one allows bright field and phase plan contrast for 10x,
S40x, S100x phase plan objectives and also features a dark field contrast method for
magnifications up to 400x. Both condensers are delivered with a telescope to adjust the phase
contrast rings.
Fluorescence Today, fluorescence microscopy offers a faster and reliable identification of
infectious diseases and allows observation of complex interactions in unstained living cells. The
high contrast plan semi-Apochromatic Fluarex 4x, 10x, 20x, S40x and S100x oil objectives
combined with the 22 mm eyepieces of the Oxion, offer the necessary resolution and field of view
for fast detection of small pathogens. A 100 Watt mercury –vapor light source combined with the
high performance fluorescence filters produce excellent contrasted images with an outstanding
signal-to-noise ratio.
Caution! In this manual a standard configuration is described. Many items are optional!

page4/16
Introduction .............................................................................................................................. 2
Construction of the microscope ................................................................................................. 6
Preparing the Oxion microscope for use ..................................................................................... 7
Handling ............................................................................................................................................................................................. 7
Assembling Steps ............................................................................................................................................................................... 8
Inserting/replacing the light source ................................................................................................................................................... 8
Mounting the objectives .................................................................................................................................................................... 8
The microscope head ......................................................................................................................................................................... 8
Placing the eye pieces ........................................................................................................................................................................ 8
The eyeshades ................................................................................................................................................................................... 8
Connecting the power cord ............................................................................................................................................................... 8
Operation: ................................................................................................................................. 9
Setting up the illumination ................................................................................................................................................................ 9
Place the specimen slide .................................................................................................................................................................... 9
Focusing and slide protection ............................................................................................................................................................ 9
Adjusting the focusing tension........................................................................................................................................................... 9
The interpupillary distance .............................................................................................................................................................. 10
The correct eye point ....................................................................................................................................................................... 10
People wearing glasses .................................................................................................................................................................... 10
Adjusting the diopter ....................................................................................................................................................................... 10
Abbe condenser ............................................................................................................................................................................... 11
The field (Köhler) diaphragm ........................................................................................................................................................... 11
Adjusting the Aperture Diaphragm .................................................................................................................................................. 11
Use of the S100x oil-immersion objective ....................................................................................................................................... 12
Using filters ...................................................................................................................................................................................... 12
continued on next page

page5/16
sing the Oxion range accessories ............................................................................................13
Using the Phase Contrast Slider ....................................................................................................................................................... 13
Mounting and operation of the Euromex Zernike phase contrast condenser set ........................................................................... 13
Using the Zernike phase contrast set. .............................................................................................................................................. 14
Centering the phase rings ................................................................................................................................................................ 14
Using the Dark Field Slider ............................................................................................................................................................... 14
Using the simple polarizing set ........................................................................................................................................................ 15
Using the 0.5x ½ Inch CS/C-mount camera adapter AE.5057 (for trinoculair models only) ............................................................ 15
Using the S R camera adapter AE.5527(for trinoculair models only) .............................................................................................. 15
Maintenance and cleaning ........................................................................................................16
Cleaning the optics .......................................................................................................................................................................... 16
Maintenance of the stand ................................................................................................................................................................ 16
Accessories ...............................................................................................................................17
Eyepieces and eyeshades ................................................................................................................................................................. 17
Objectives ........................................................................................................................................................................................ 17
Fluorescence .................................................................................................................................................................................... 17
Sliders and phase contrast sets ........................................................................................................................................................ 18
Miscellaneous .................................................................................................................................................................................. 18

page6/16
Construction of the microscope
The names of the several parts are listed below and are indicated in the picture:
A) Photo port N) Revolving nosepiece for 5 objectives
B) Microscope head O) Objectives
C) Set screw for tube P) Object clip
D) Stand arm Q) Object x/y stage
E) Stage controls R) Condenser with iris diaphragm
F) Coaxial fine adjustment S) Height adjustment condenser (not visible)
G) Coaxial coarse adjustment T) Köhler (field) diaphragm + filter holder
H) On/Off switch with light adjustment X) Slide protection screw
I) amp unit
J) Eyepieces
K) Eye cups
) Diopter adjustment
M) Filter slot (with dust cover)

page7/16
Preparing the Oxion microscope for use
Handling
Your microscope is a delicate product, please handle it with care.
Carefully remove the items from their packing and place them on a flat, firm surface. Please do not
expose the microscope to direct sun light, high temperatures, damp, dust or acute shake. Please
make sure the worktable is flat and horizontal.
When moving the microscope, use both hands to hold
the microscope. Hold it at the back handle
and the front of the base (see Fig. 1, point 1).
Caution! Holding the microscope at the table, stage
focusing knob or head will damage the
microscope.
For safety reasons, make sure the power switch is
turned off (“0”) and remove the plug before
Replacing the led or fuse, and make sure the unit is
not too warm.
Figure 1

page8/16
Assembling Steps
Euromex Microscopes will always try to keep the number of assembly steps for their customers as
low as possible but in some cases there are some steps to be taken. The steps mentioned below
are often not necessary but described for your convenience nonetheless.
Inserting/replacing the light source
1. Align the oriented pin and power pin on the light source to oriented holder and power socket,
and then push light source into arm smoothly and plug it thoroughly. When replacing the bulb,
turn off the main power and wait until the ED and holder cool down. Replace whole ED light
source if ED bulb is defect.
Mounting the objectives
1. Rotate the coarse focusing knob to lower the stage to the lowest position.
2. Install the objectives into the objective nosepiece from the lowest magnification to the highest
in a clockwise direction from the rear side of the microscope. When using the microscope, start
using the low magnification objective (4X or 10X) to search for specimen and focus, and then
continue with high magnification objective to observe.
The microscope head
The standard Oxion series configuration is supplied with the head assembled. However, if your
order contains the fluorescence it should be mounted first. The dovetail on the bottom side of
these parts fits into the slot on the top side of the other parts.
Placing the eye pieces
1. Remove the cover of eyepiece tube.
2. Insert the eyepiece into the eyepiece tube
3. When adjusting diopter by adjustable eyepiece, lock eyepiece with hexagon lock-screw to avoid
the eyepiece group from rotating in eyepiece tube.
The eyeshades
Each eyepiece has its rubber eyeshade. This prevents damage to the lens, and prevents stray light.
The eyeshade can simply be slipped over the eyepiece.
Connecting the power cord
The Oxion series microscopes supported a wide range of operating voltages: 100 to 240V. Please
use a grounded power connection.
1. Make sure the power switch is at“0” (OFF) before connecting.
2. Insert the connector of power cord into the Oxion’s power socket, and make sure it
connects well.
3. Insert the other connector into the mains socket, and make sure it connects well.

page9/16
Don’t use bend or twist the power cord, it will get damaged. Using the special cord supplied by
Euromex. If it’s lost or damaged, choose one with the same specifications.
Operation:
Setting up the illumination
1. Connect the Oxion microscope to a mains power source and turn on the main power
switch on.
2. Adjusting the light adjustment knob until the illumination is comfortable for observation.
Rotate the light adjustment knob clockwise to raise brightness. Rotate the light adjustment
knob counterclockwise to lower brightness
Caution: The maximum light intensity when using the 4x and 10x can damage the eyes! We
recommend using the neutral filter with these magnifications.
Place the specimen slide
1. Push the arm of the specimen holder backwards.
2. Release the arm slowly clamping the slide with the cover glass facing up.
3. Rotating the X and Y-axis knob will move the specimen to the center for alignment with the
center of the objective.
Focusing and slide protection
1. Select the objective 4x to the optical path.
2. Rotate the position screw to top, observe the right eyepiece with right eye. Rotate the
coarse focusing knob until the image appears.
3. Rotate the fine focusing knob for detailed focusing and lock the slide protection screw. The
slide protection screw protects the slide by limiting the travel of the table. This way the
objectives will not touch or break your slides.
Adjusting the focusing tension
The Oxion series microscope focusing knobs can be adjusted for tension. You can set it from light
to heavy according your own preference. Please note that when the specimen leaves the focus
plane after focusing or the stage declines itself, the tension should be set higher. To tighten the
focusing arm (more heavy), rotate the tension adjustment ring according to the arrowhead
pointed; to loosen it, please turn it in the reverse direction.

page10/16
The interpupillary distance
Using a binocular (or trinocular) tube is less tiring for the eyes than the use of a monocular tube. In
order to obtain a smooth “compound” image, one should go through the below steps.
The correct interpupillary distance is reached when one round image is seen in the field of view
(see image below). This distance can be set by either pulling the tubes towards each other or
pulling them from each other. This distance is different for each observer and thus should be set
individually. When more users are working with the microscope it is recommended to remember
your interpupillary distance for a quick set up during new microscopy sessions. The Oxion’s
swiveling eyepiece tube can be rotated 360º. You can select corresponding eye point height
according to your own preference.
Field of view before Field of view after
adjustment adjustment
The correct eye point
The eye point is the distance from the eyepiece to the user’s pupil. To obtain the correct eye
point, move the eyes towards the eyepieces until a sharp image is reached at a full field of view.
People wearing glasses
When the eyeshades bother people wearing glasses, the Oxion series eyeshades simply can be
folded back to create more space.
Adjusting the diopter
Using a binocular (or trinocular) tube is less tiring for the eyes than the use of a monocular tube. In
order to obtain the right interpupillary setting, one should go through the below steps.
• Turn the diopter adjustment ring of the left eyepiece tube until the scale shows the same
reading as on the indicator.
• Close the right eye and focus the left tube by means of the coarse- and fine adjustment
knobs
• Close the left eye and focus the right tube with the diopter adjustment ring.
This procedure should be followed by each individual user. When more users are working with the
Oxion microscope it is recommended to remember your diopter setting for a quick set up during
new microscopy sessions.

page11/16
Abbe condenser
Beneath the object stage an Abbe condenser (M) N.A. 12.5 is mounted. The condenser can be
adjusted in height by means of a rack and pinion movement and knob (H). With this one can focus
the light on the specimen by which the contrast can be optimized. The condenser is factory pre-
centered if needed the following procedure can be followed to center the condensor.
1. Move the condenser to the highest position.
2. Select the 10x objective to the light path and focus the specimen.
3. Rotate the field diaphragm adjustment ring to put the field diaphragm to the smallest
position.
4. Rotate the condenser up-down knob, and adjusting the image to be clearest.
5. Adjusting the center adjustment screw and put the image to the center of the field of view.
6. Open the field diaphragm gradually. If the image is in the center all the time and inscribed
to the field of view, it shows condenser has been centered correctly.
The field (Köhler) diaphragm
By limiting the diameter of the beam entering the condenser, the field diaphragm can prevent
other light and strengthen the image contrast. When the image is just on the edge of the field of
view, the objective can show the best performance and obtain the clearest image. The diaphragm
is factory pre-centered.
Adjusting the Aperture Diaphragm
1. The aperture diaphragm is used to select the numerical aperture of the illumination. When
the N.A. of illumination is matching with the N.A. of the objective, the highest possible
resolution, dept of field and contrast are obtained.
2. When contrast is low, rotate the diaphragm adjustment ring to 70%-80% of the N.A. of
objective this will improve the contrast of the image. The diaphragm is factory pre-
centered.

page12/16
se of the S100x oil-immersion objective
The Euromex Oxion range microscopes are equipped with an S100x N.A. 1.25 oil immersion
objective. Please follow these instructions for using this objective:
1. Remove the dust protection from the revolving nosepiece to mount the S100x objective.
2. Focus the image with the S40x objective.
3. Turn the revolving nosepiece so the S100x objective almost reaches the click-stop.
4. Put a small drop of immersion oil on the centre of the slide (always use Euromex
Immersion oil).
5. Now turn the S100x objective so that you feel the click stop.
6. The front lens is in contact with the immersion oil.
7. ook through the eyepiece and focus the image with the fine adjustment knobs.
8. The distance between the lens of the objective and the slide is only 0.14 mm!
9. In case there are small bubbles visible turn the S100x objective a couple of times left/right
so that the front of the objective moves in the oil and the bubbles will disappear.
10. After using the S100x objective turn the table with the fine adjustment knobs downwards
until the front lens doesn’t touch the oil any longer.
11. Always clean the front lens of the S100x objective with a piece of lens paper that is
moistened with a drop of Xylol or alcohol. We recommend using Euromex lens paper and
Xylol or alcohol.
12. Clean the slide after use as well.
The S100x can also be used without immersion oil (dry). Please be aware of the fact that in such
case the resolution will be much lower and parfocallity is lost!
Caution
Never put a drop of Xylol or alcohol directly on the lens of the objective. It could enter the
objective and dissolve the glue that holds the lenses! Avoid oil contact with any of the other
objectives!
sing filters
Filter can change the background to a more suitable view and increase the contrast. Please see the
Oxion brochure for all available filters.

page13/16
Using the Oxion range accessories
sing the Phase Contrast Slider
1. Keep the phase contrast slider face up (text up); insert it from left to right into the
condenser slider socket as the direction of the arrow pointed.
2. Each slider has 3 positions, 2 phase contrast positions and in the center of the slide the
bright field position for normal use without phase contrast. Each phase contrast objective
used has to be matched with the phase contrast ring on the slider. For example: when the
10x phase contrast objective is used the slider should be positions to match the 10 phase
diaphragm).
When observing phase contrast, please set the aperture diaphragm indicator to “PH” position.
Note: the phase diaphragms in the sliders are pre-centered do not need to be adjusted in
operation.
Mounting and operation of the Euromex Zernike
phase contrast condenser set
Use of phase contrast with the Oxion microscope
The phase contrast method was designed in 1934 by the
Dutchman Frits Zernike to observe very thin or transparent
objects. This technique uses the fact that light travelling
through tissue undergoes a phase shift due to diffraction.
By recombining the phase shifted light with the background
light, a contrasted image appears in the eyepiece

page14/16
sing the Zernike phase contrast set.
Any Oxion model with a Zernike phase contrast set comes with the condensor and objectives
already mounted and centered on your microscope. If you suspect misalignment or want to check
the alignment please see the next point for ”centering the phase rings”.
The height of condenser can be adjusted in height by means of a rack and pinion movement. In
this way the light beam is concentrated in the specimen for an optimum resolution.
Centering the phase rings
Take following steps in order to centre the phase rings:
• For centering of the 10x phase objective, turn the condenser disc in such a way that the
corresponding phase ring is in place under the condenser.
• Place the centering telescope in the eyepiece tube, and focus the phase ring of the
objective by means of the adjustable eye lens.
• Now focus the centering ring of the condenser by means of the coarse and fine adjustment
knobs.
• At last, center the phase ring beneath the condenser disc with the phase contrast adjusting
levers, until the two rings visible in the eyepiece are in one centric line.
• Repeat each step for all objectives.
Not centered Centered properly
sing the Dark Field Slider
1. Keep the dark field slider face up (text up); insert it from left to right into the condenser
slider socket as the direction of the arrow pointed.
2. The slider has 2 positions, one position for dark field and one for normal bright field use
without dark field.
When observing in dark field, please fully open the diaphragm to maximum.

page15/16
sing the simple polarizing set
1. Simple polarizing includes analyzer and polarizer
2. Remove the dust cover from the filter slot (M), and insert the analyzer text face up.
3. Put the polarizer into the condenser slot.
4. Rotate the polarizer to change the state of polarization.
sing the 0.5x ½ Inch CS/C-mount camera adapter AE.5057 (for trinoculair models
only)
1. Screw the adapter on your cs/c-mount camera.
2. oosen the lock-screw on the trinocular head.
3. Insert the camera adapter into the trinocular port according to the direction of the figure.
Secure the lock-screw tightly.
4. Focus on a specimen through binocular using your eyes, then observe the image through
camera, if the image is un-sharp, rotate the adjustment tube to focus the image.
sing the SLR camera adapter AE.5527(for trinoculair models only)
1. oosen the lock-screw on the trinocular head and remove the dust-cover.
2. Insert S R camera adapter to the trinocular. Secure the lock-screw.
3. oosen the lock-screw on the photo tube and remove the photo tube.
4. Insert the photography eyepiece 3.2X to the eyepiece base. Insert and secure the tightly.
5. Place the T2-ring on the S R camera adapter (some models come pre-mounted)
6. Place your camera(without objective lens)

page16/16
Maintenance and cleaning
Always place the dustcover over your Oxion microscope after use. Keep the eyepiece and
objectives always mounted on the microscope to avoid dust entering the instrument.
Cleaning the optics
When the eyepiece lens or front lens of the 10x or S40x objective are dirty they can be cleaned by
wiping a piece of lens paper over the surface (circular movements). When this does not help put a
drop of Xylol or alcohol on the lens paper. Never put Xylol or alcohol directly on the lens!
When dirt is clearly visible in the field of view it resides on the lowest lens of the eyepiece. By
using the Allen-key the eyepiece can be removed from the tube. Clean the outside of the lens.
In case there is still dust visible please check if the dust is in the eyepiece by turning it. If this is the
case remove the lowest lens carefully from the eyepiece and clean it. Euromex strongly
recommends using Euromex cleaning accessories for your Oxion microscope
It is not necessary – and not recommended – to clean the lens surfaces at the inner side of the
objectives. Sometimes dust can be removed with high pressured air. There will never be dust in
the objectives if the objectives are not removed from the revolving nosepiece.
Caution
Cleaning cloths containing plastic fibres can damage the coating of the lenses!
Maintenance of the stand
Dust can be removed with a brush. In case the stand or table is really dirty the surface can be
cleaned with a non-aggressive cleaning product.
All moving parts like the height adjustment or the coaxial course and fine adjustment contain ball
bearings that are not dust sensitive. With a drop of sewing-machine oil the bearing can be
lubricated.
Replacing the fuse
Always remove the mains cable from the microscope and turn the main switch to “0” (OFF) before
replacing the fuse. Then screw off the fuse cap from the fuse base with screwdriver. Install a new
fuse (specification of the fuse: T250V, .15A).
When in doubt always contact your local Euromex distributor!

page17/16
Accessories
Eyepieces and eyeshades
AE.3210 HWF 10x/22 eyepiece
AE.3215 HWF 15x/13 eyepiece
AE.3223 HWF 10x/22 eyepiece with micrometer reticule
AE.3225 Pair of eyeshades
Objectives
AE.3104 Infinity Plan Achromatic 4x objective
AE.3106 Infinity Plan Achromatic 10x objective
AE.3108 Infinity Plan Achromatic 20x objective
AE.3110 Infinity Plan Achromatic S40x objective
AE.3112 Infinity Plan Achromatic S60x objective
AE.3114 Infinity Plan Achromatic S100x objective
AE.3126 Infinity Plan Phase Achromatic 10x objective
AE.3128 Infinity Plan Phase Achromatic 20x objective
AE.3130 Infinity Plan Phase Achromatic S40x objective
AE.3134 Infinity Plan Phase Achromatic S100x objective
AE.3180 Telescope for phase contrast alignment
AE.3144 Infinity Plan Semi-Apochromatic 4x objective
AE.3152 Infinity Plan Semi-Apochromatic S40x objective
AE.3146 Infinity Plan Semi-Apochromatic 10x objective
AE.3156 Infinity Plan Semi-Apochromatic S100x objective
AE.3148 Infinity Plan Semi-Apochromatic 20x objective
Fluorescence
AE.3240 Fluorescence illuminator including power supply
AE.3245 Fluorescence filter block for eGFP, FITC, Alexa Fluor488, Cy2, DiO, Fluo-4, FluorX,
MitoTracker Green, Oregon Green 488, Rhodamine 110, SpectrumGreen
AE.3246 Fluorescence filter block for Alexa Fluor 568 & 594, Cy3.5, MitoTracker Red,
Rhodamine Red, X-Rhodamine, SpectrumRed, Texas Red, Texas Red-X, 5-ROX
AE.3247 Fluorescence filter block for BOBO-1, Cerulean, CFP, POPO-1, SpectrumAqua
AE.3248 Fluorescence filter block for Alexa Fluor 350, AMCA/AMCA-X, Cascade Blue, DAPI
Fast Blue, Hoechst 33342 & 33258, ysoTracker Red, Marina Blue
Other beamsplitters, exciter and emitter filters available from a separate brochure

page18/16
Sliders and phase contrast sets
AE.3183 Phase contrast Zernike condenser with P PH 10x, S40x, S100x oil and darkfield stop
AE.3184 Phase contrast Zernike condenser with P PH 10x, 20x, S40x, S100x oil
AE.3185 Slider with darkfield stop
AE.3187 Slider with phase rings for 10x and S40x plan phase contrast objectives
AE.3189 Slider with phase rings for 20x and S100x oil plan phase contrast objectives
Miscellaneous
AE.3190 Polarizer/Analyzer set
AE.3194 Polarizer for lamphouse
AE.3192 Polarizer slider for nosepiece
AE.3196 Neutral density filter 45 mm
AE.3198 Blue filter 45 mm
AE.3200 Yellow filter 45 mm
AE.3202 Green filter 45 mm
AE.5057 Photo adapter 0.5x magnification for ½ inch C/CS mount camera
AE.5527 Photo adapter for S R camera without T2 adapter
AE.5040 T2 adapter for Canon EOS S R camera
AE.5025 T2 adapter for Nikon S R camera
AE.5045 3.2x lens for AE.5527
PB.5155 Microscope 76 x 26 mm glass slides, edges grinded, packed per 50 pieces
PB.5168 Cover glasses 22 x 22 mm, thickness 0.13-0.17 mm, packed per 100 pieces
PB.5255 Immersion oil n=1.482, 25 ml
PB.5274 Isopropanol 99%, 200 ml cleaning liquid
PB.5245 ens cleaning paper, 100 sheets
Spare parts
SL.1385 100 Watt mercury-vapor lamp for AE.3220 illuminator
SL.5510 3W ED replacement for Oxion
AE.3199 Glass fuses 3.15 A 250 V packed per 10 pieces
Table of contents
Other Euromex Microscope manuals
