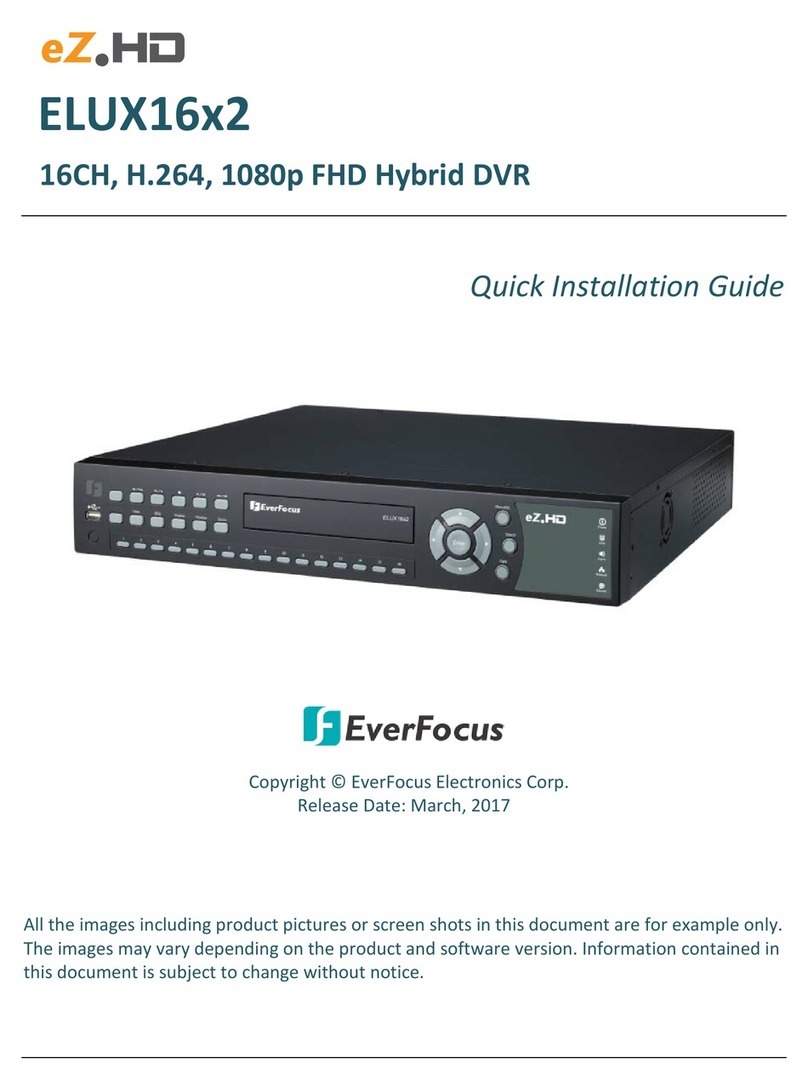
manuals.online logo
Brands
  1. Home
  2. •
  3. Brands
  4. •
  5. EverFocus
  6. •
  7. DVR
  8. •
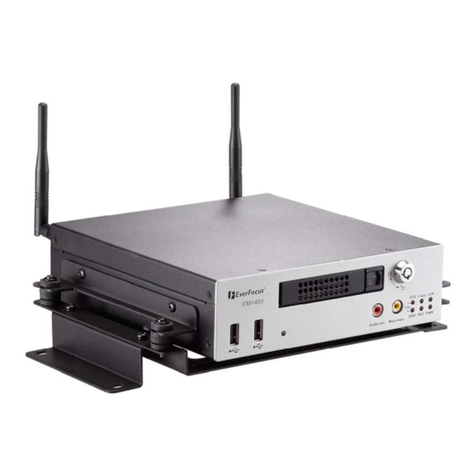
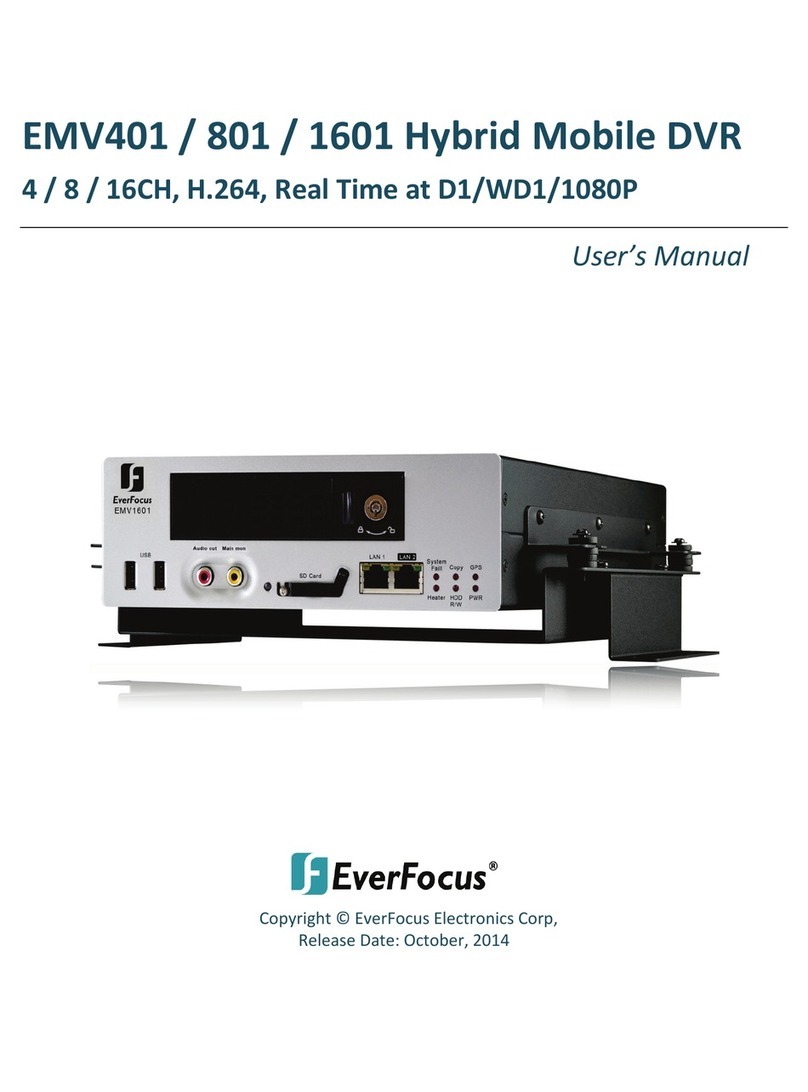
  9. EverFocus EMV200 DVR User manual

EverFocus EMV200 DVR User manual

User Manual
E
EM
MV
V2
20
00
0
D
DV
VR
R
E V E R F O C U S E L E C T R O N I C S C O R P O R A T I O N
EMV200 DVR
Instruction Manual
2010 EverFocus Electronics Corp
www.everfocus.com
All rights reserved. No part of the contents of this manual may be reproduced or transmitted in any form or by
any means without written permission of the Everfocus Electronics Corporation.
Release Date: Apr. 2011
QuickTime is a registered trademark of the Apple Computer, Inc.
Windows is a registered trademark of the Microsoft Corporation.
Linksys is a registered trademark of the Linksys Corporation.
D-Link is a registered trademark of the D-Link Corporation.
DynDNS is a registered trademark of the DynDNS.org Corporation.
Other product and company names mentioned herein may be the trademarks of their respective owners.
ii
iiii
ii
SAFETY PRECAUTIONS
Ventilation Slots: Do not block the ventilation openings or slots on the cover.
Limits for Temperature, umidity and Power: Do not operate the device beyond its specified
temperature, humidity or power source ratings. Do not use the device in environments with very high
temperature or humidity. Use it at temperatures between -20~ ºC (-4~131ºF). The input power source for
this device is 10~36VDC.
Servicing: Do not attempt to service this unit by yourself. Do not attempt to disassemble the device.
Opening or removing covers may expose you to dangerous voltages and other hazards. There are no user-
serviceable parts inside. Refer all work on this device to qualified service personnel. Handle the device with
care. Do not strike or shake it, as this may damage the device.
Cleaning: Unplug the unit from the outlet before cleaning. Do not use strong or abrasive detergents when
cleaning the device’s cover. Use a damp cloth to clean the device when it is dirty. If the dirt is hard to
remove, use a mild detergent and wipe gently.
Attached Devices: Do not attach devices that are not recommended by the manufacturer.
Power Outlets: Do not overload outlets and extension cords as this could cause fire or electric shock.
Power Cables: Power cables and their connectors should be placed where they are not likely to be walked
on, crushed or pinched by items placed upon or against them.
Foreign Objects: Never push objects of any kind into this unit through openings as they may touch
dangerous voltage points or short out parts, possibly resulting in fire or electric shock. Do not let any
metallic parts drop through the slots, as this could permanently damage the device. If this happens
accidentally, turn the power off immediately and contact qualified service personnel for support.
Liquids: Do not expose the device to water or moisture, and do not try to operate it in wet areas or near
water – for example: near a bath tub, wash bowl, kitchen sink, or laundry tub, in a wet basement, near a
swimming pool, in an unprotected outdoor installation, etc. Take immediate action if the device becomes
wet. Turn the power off and refer servicing to qualified service personnel. Moisture can damage the device
and can also cause electric shock. Never spill liquid of any kind on the unit.
Read All Instructions: All the safety and operating instructions should be read before the unit is operated.
Retain These Instructions: The safety and operating instructions should be retained for future reference.
eed All Warnings and Follow All Instructions.
This Product is RoHS compliant.
ATTENTION!
This is a class A product which may cause radio interference in a domestic environment; in
this case, the user may be urged to take adequate measures.
Federal Communication Commission Interference Statement
This equipment has been tested and found to comply with the limits for a Class B digital device, pursuant to
Part 1 of the FCC Rules. These limits are designed to provide reasonable protection against harmful
interference in a residential installation. This equipment generates, uses and can radiate radio frequency
energy and, if not installed and used in accord
radio communications. However, there is no guarantee that interference will not occur in a particular
installation. If this equipment does cause harmful interference to radio or television recep
determined by turning the equipment off and on, the user is encouraged to try to correct the interference by
one of the following measures
•Reorient or relocate the receiving antenna.
•Increase the separation between the equipment and
•Connect the equipment into an outlet on a circuit different from that to which the receiver is connected.
•Consult the dealer or an experienced radio/TV technician for help.
FCC Caution: Any changes or modifications not expressly approved by
could void the users’
authority to operate this equipment.
WEEE
The information in this manual was current upon publicatio
Therefore, all specifications are subject to change without prior notice.
errors.
Please read this manual carefully b
efore installing and using this unit. Be sure to keep it handy for later reference.
This Product is RoHS compliant.
This is a class A product which may cause radio interference in a domestic environment; in
this case, the user may be urged to take adequate measures.
Federal Communication Commission Interference Statement
This equipment has been tested and found to comply with the limits for a Class B digital device, pursuant to
Part 1 of the FCC Rules. These limits are designed to provide reasonable protection against harmful
interference in a residential installation. This equipment generates, uses and can radiate radio frequency
energy and, if not installed and used in accord
ance with the instructions, may cause harmful interference to
radio communications. However, there is no guarantee that interference will not occur in a particular
installation. If this equipment does cause harmful interference to radio or television recep
determined by turning the equipment off and on, the user is encouraged to try to correct the interference by
one of the following measures
:
•Reorient or relocate the receiving antenna.
•Increase the separation between the equipment and
receiver.
•Connect the equipment into an outlet on a circuit different from that to which the receiver is connected.
•Consult the dealer or an experienced radio/TV technician for help.
FCC Caution: Any changes or modifications not expressly approved by
the party responsible for compliance
authority to operate this equipment.
The information in this manual was current upon publicatio
n. The manufacturer reserves the right to revise and improve his products.
Therefore, all specifications are subject to change without prior notice.
Manufacturer is not responsible for misprints or typographical
efore installing and using this unit. Be sure to keep it handy for later reference.
iii
iiiiii
iii
This is a class A product which may cause radio interference in a domestic environment; in
This equipment has been tested and found to comply with the limits for a Class B digital device, pursuant to
Part 1 of the FCC Rules. These limits are designed to provide reasonable protection against harmful
interference in a residential installation. This equipment generates, uses and can radiate radio frequency
ance with the instructions, may cause harmful interference to
radio communications. However, there is no guarantee that interference will not occur in a particular
installation. If this equipment does cause harmful interference to radio or television recep
tion, which can be
determined by turning the equipment off and on, the user is encouraged to try to correct the interference by
•Connect the equipment into an outlet on a circuit different from that to which the receiver is connected.
the party responsible for compliance
n. The manufacturer reserves the right to revise and improve his products.
Manufacturer is not responsible for misprints or typographical
efore installing and using this unit. Be sure to keep it handy for later reference.
iv
iviv
iv
TABLE OF CONTENTS
1 PRODUCT OVERVIEW ..................................................................................................... 1
1.1 FEATURES ........................................................................................................................... 1
1.2 PACKAGE
CONTENTS ......................................................................................................... 2
1.3 SPECIFICATIONS ................................................................................................................. 2
1.4 FRONT
PANEL ..................................................................................................................... 3
1.5 REAR
PANEL ....................................................................................................................... 4
1.6 SYSTEM
CONNECTION ....................................................................................................... 5
1.7 FRONT
&
REAR
PANEL
CONNECTOR .................................................................................. 6
1.8 INSTALLATION
OF
EMV200 ................................................................................................ 6
1.9 VI EO
INPUTS/OUTPUTS
INSTALLATION ......................................................................... 10
1.10 AU IO
INSTALLATION ................................................................................................... 10
1.11 ALARM
CONTACTS
INSTALLATION ................................................................................ 10
1.11.1
Alarm Input Contacts ............................................................................................................................. 11
1.11.2
Alarm Output Relay ............................................................................................................................... 11
1.12 USB-M
OUSE INSTALLATION
................................................................................................. 11
1.13 NETWORK
CONNECTION ............................................................................................... 12
1.13.1
Direct PC Connection through Crossover Networ Cable ...................................................................... 12
1.13.2
Networ Connection through Patch Cable ............................................................................................ 13
1.14 FINAL
INSTALL PROCESS ................................................................................................ 13
2 MOUSE OPERATION ..................................................................................................... 14
2.1 GENERAL USB MOUSE OPERATION ................................................................................. 14
2.1.1
How to select a channel......................................................................................................................... 14
2.1.2
OSD Root Menu ..................................................................................................................................... 14
2.1.3
Field Input Options ................................................................................................................................ 15
3 CONFIGURATION ......................................................................................................... 16
3.1 CONFIGURATION OF VR ................................................................................................ 16
3.2 LOGIN ............................................................................................................................... 16
3.3 O
N
S
CREEN
C
ONFIGURATION
M
ENU
........................................................................................ 17
3.4 SEARCH ............................................................................................................................ 18
3.4.1
Time Search ........................................................................................................................................... 18
3.4.2
GPS Speed Search .................................................................................................................................. 19
3.4.3
Event Search .......................................................................................................................................... 21
3.5 ARCHIVE
(USB) ................................................................................................................. 22
4 DVR CONFIGURATION .................................................................................................. 23
4.1 C
ONFIGURATION
M
ENU
......................................................................................................... 23
4.2 CAMERA SETTING ............................................................................................................ 24
v
vv
v
4.2.1
Normal ................................................................................................................................................... 24
4.2.2
Video Adjust .......................................................................................................................................... 25
4.2.3
Alarm ..................................................................................................................................................... 26
4.3 RECOR SETTING ............................................................................................................. 26
4.3.1
Record .................................................................................................................................................... 27
4.4 ALARM/GPS ..................................................................................................................... 28
4.4.1
Alarm-Alarm Settings ............................................................................................................................ 28
4.4.2
Alarm-Event Settings ............................................................................................................................. 30
4.4.3
Alarm – Video Loss ................................................................................................................................ 35
4.4.4
Alarm-GPS Speed ................................................................................................................................... 36
4.4.5
Alarm-GPS Event Action ........................................................................................................................ 37
4.4.6
Alarm-GPS Fencing ................................................................................................................................ 38
4.5
ATE
/T
IME
S
ETTING
............................................................................................................. 39
4.5.1
Date/Time Settings ................................................................................................................................ 39
4.5.2
Daylight Saving ...................................................................................................................................... 40
4.6
ISPLAY
.............................................................................................................................. 40
4.6.1
Title ........................................................................................................................................................ 41
4.6.2
Monitor On Screen Display .................................................................................................................... 41
4.6.3
Layout .................................................................................................................................................... 42
4.6.4
Sequence ............................................................................................................................................... 43
4.7 NETWORK SETTING .......................................................................................................... 43
4.7.1
LAN Settings .......................................................................................................................................... 44
4.7.2
Mobile Connection Settings ................................................................................................................... 46
4.7.3
Email Settings ........................................................................................................................................ 47
4.7.4
DDNS Settings ........................................................................................................................................ 48
4.7.5
Alarm Server Settings ............................................................................................................................ 49
4.7.6
Meta Server Settings ............................................................................................................................. 50
4.7.7
Networ Test ......................................................................................................................................... 51
4.7.8
Remote/Mobile...................................................................................................................................... 51
4.8 SYSTEM ............................................................................................................................ 52
4.8.1
User ....................................................................................................................................................... 52
4.8.2
I/O Control ............................................................................................................................................. 55
4.8.3
DISK Info ................................................................................................................................................ 56
4.8.4
LOG ........................................................................................................................................................ 57
4.8.5
SETTINGS ............................................................................................................................................... 58
4.8.6
SERVICE .................................................................................................................................................. 59
4.9 INFORMATION ................................................................................................................. 60
5 NETWORKING OVERVIEW ............................................................................................ 61
5.1 I
NTRO UCTION TO
TCP/IP ..................................................................................................... 61
5.2 S
UBNET
M
ASKS
.................................................................................................................... 61
5.3 G
ATEWAY
A
RESS
.............................................................................................................. 61
5.4 V
IRTUAL
P
ORTS
.................................................................................................................... 62
5.5 P
RE
-I
NSTALLATION
................................................................................................................ 62
5.6 W
HAT IS YOUR
N
ETWORK
S
ETUP
? ........................................................................................... 63
5.7 S
IMPLE
O
NE TO
O
NE
C
ONNECTION
.......................................................................................... 64
vi
vivi
vi
5.8
IRECT
H
IGH
S
PEE
M
O EM
C
ONNECTION
............................................................................... 67
5.9 R
OUTER OR
LAN
C
ONNECTION
................................................................................................ 68
6 REMOTE OPERATION FROM BROWSER ............................................................................. 71
6.1 CONNECTING TO EMV200 ............................................................................................... 71
6.2 BROWSER SECURITY SETTING .............................................................................................. 72
6.2.1
Installing ActiveX controls ..................................................................................................................... 72
6.2.2
Enabling ActiveX Controls ...................................................................................................................... 74
6.3 REMOTE LIVE VIEW .......................................................................................................... 77
6.4 REMOTE PLAYBACK ......................................................................................................... 79
7 EVERFOCUS DDNS SETUP ............................................................................................. 80
8 LINKS S & D-LINK PORT FORWARDING ........................................................................ 81
8.1 TYPICAL LINKSYS PORT FORWAR ING ............................................................................ 81
8.2 TYPICAL
-LINK PORT FORWAR ING .............................................................................. 83
9 SD CARD READER ......................................................................................................... 85
9.1
U
N ERSTAN
U
SER
I
NTERFACES
.............................................................................................. 85
9.2
B
ASIC
O
PERATIONS
.............................................................................................................. 86
9.2.1 Open File ....................................................................................................................................................... 86
9.2.2 Open SD ........................................................................................................................................................ 86
9.2.3 Playbac Controls ......................................................................................................................................... 86
9.3
S
EARCH
V
I EO
..................................................................................................................... 86
9.3.1 Search by Date/Time .................................................................................................................................... 86
9.3.2 Search by Event ............................................................................................................................................ 86
9.3.3 Search by Video Slide Bar ............................................................................................................................. 87
9.4
A
RCHIVE AN
S
NAPSHOT
....................................................................................................... 87
9.4.1 Archive Video from Video Window ............................................................................................................... 87
9.4.2 Snapshot Image ............................................................................................................................................ 87
10 TROUBLESHOOTING ....................................................................................................... 88
APPENDIX A: TIMING OF ALARM MODES ............................................................................. 89
APPENDIX B: EXPRESS SETUP RECORDING VALUE SELECTION RULES .................................... 92
APPENDIX C: REMOTE CONTROL .......................................................................................... 94
1
1PRODUCT OVERVIEW
Full featured video surveillance in the palm of your hand: the EverFocus EMV200 digital video recorder
features a built-in GPS receiver with antenna to track location and H.264 compression technology for efficient
recording and fast, high quality network image transmission. Record real-time video with audio on both channels
(up to 30/2 fps per channel @ D1 resolution). Its ultra compact size allows easy installation almost anywhere. In a
vehicle, for fast deployment at a temporary fixed site, or in portable battery powered surveillance, the EMV200 is
ready to do the job! This amazing DVR provides multiple interfaces including a USB port, wired Ethernet, IR
remote control, 2 alarm inputs and 1 SPDT/Form “C” alarm output. Using shock and vibration resistant Molex
connectors, it is solid enough for reliable operation even on bumpy roads. Add to this a new easy to read
graphical user interface specially designed for use with portable small-screen monitors, and you get a powerful
surveillance in a small package. The power supply in the EMV200 will provide surge protection and voltage
regulation for the DVR. These comprehensive features, including plug-and-play SD card recording, speed
reporting and ‘virtual fencing’ using the embedded GPS module and hand held IR remote control capability make
this DVR the best choice for your 1~2 channel portable and mobile recording applications.
1.1 FEATURES
2Channels of real time D1 video and audio recording
Built-in GPS module tracks speed, location and geographic limits
Ultra compact size (300g/117 x 63 x 38.4mm add inch/pound data) for easy installation
Recording Rate : up to 30/2 fps per channel @ D1 resolution
H.264 compression format for efficient storage and network utilization
Special Graphical User Interface design for use with small-sized mobile/portable monitors
Molex connectors for shock & vibration resistance; interface cables to BNC, RCA and power jacks supplied
Alarm Inputs & Outputs : 2 & 1 (alarm relay output is form “C”)
Plug-and-play recording on completely shock proof SD card with security cover (up to 32GB)
Swap out SD recording media, or export video through convenient USB port.
USB port supports a mouse for easy setup, programming and playback/export
Supports multiple interfaces: USB 2.0, RS-232, wired Ethernet, IR Remote Control
Optional External EDGE/GPRS/CDMA/WI-FI Modules for cellular/specialized wireless Transmission
GPS function tracks speed and geographic limits (Embedded GPS module, optional external GPS antenna
required)
Power Supply : 10V~36VDC with Surge Protection, Voltage Regulation, programmable Delay ON/OFF for
flexible control
Temperature range : -10ºC ~ ºC/14 ºF ~131 ºF (Operating), -40ºC ~ 8 ºC/-40 ºF~18 ºF (Non-Operating)
C apter
1
2
1.2 PACKAGE CONTENTS
-
Digital Video Recorder x1
-
Screws x 1 pack with Plum wrench
-
GPS Antenna x 1 set
-
IR Remote Control x 1
-
Battery x 2
-
Camera Power cable x 1
-
Video & Audio cable x 1
-
RS232/Alarm cable x 1
1.3 SPECIFICATIONS
EMV200
EMV200 EMV200
EMV200 -
--
-
2CH Mobile DVR
2CH Mobile DVR2CH Mobile DVR
2CH Mobile DVR
Video Format
NTSC/PAL (auto detected by system)
Operating System
Embedded Linux with special small monitor friendly GUI
Video Input
2 channels (vibration resistant locking Molex connectors – Interface cables to
BNC-F provided)
Video Output
Main monitor: 1 composite
1 Vp
-
p
,
(vibration resistant locking Molex connectors
–
Interface cables to BNC-F provided)
Video Compression
H.264
Recording Resolution
s
(Rate and resolution set
independently per camera)
NTSC: 704x480/ 704x240/3 2x240
PAL: 704x 76/ 704x288/3 2x288
Audio Inputs
2 line in (vibration resistant locking Molex connectors - Interface cables to RCA-F
provided).
Audio Outputs
1 line out (vibration resistant locking Mol
ex connectors
-
Interface cables to RCA
-
F provided).
Alarm Inputs
2 alarm inputs (vibration resistant locking Molex connectors
-
Interface cables
supplied)
Alarm Outputs
1
alarm relay output
SPDT/Form “C”
(vibration resistant locking Molex
connectors - Interface cables supplied)
Recording Storage
1 SD/SDHC card storage card Up to 32Gb with tamper resistant retention cover
Recording Rate
(Rate and resolution set
independently per camera)
Up to NTSC: 60fps, PAL: 0fps at all resolutions (D1, 2 CIF, CIF
)
Recording Mode
Continuous recording, event recording, continuous + event recording (Rate and
resolution in each mode set independently per camera)
Record Quality
Adjustable in five levels per camera per Record Mode
Pre Alarm Recording
Optional; seco
nd interval
Playback Rate
Up to NTSC: D1 60fps, PAL: D1 0fps
Playback Search
Time/date, event search
Video Loss Detection
Yes
3
Event Alarm
SD card error, SD card temperature, SD card Full, SD card missing, Power Loss,
Network Loss, GPS loss, GPS speed, GPS fencing
Email alert
Multiple email notifications in response to alarms and events. (Requires real time
network connectivity though cellular device).
GPS Function
Embedded GPS Sensor(
optional external GPS antenna required
) for speed and
geographic limit alarms (rectangular or circular fencing)
Configuration Method
On screen menu with ‘portable monitor friendly’ graphical user interface
Control/Setup
IR remote control, USB mouse, network I/F
Real time clock
Can be synchronized to GPS/NTP time source; flexible DST settings
Watchdog Function
Reboots DVR automatically if required
Networking
RJ4 socket, 10/100Mbps
TCP
-
IP/DHCP/PPPoE/DDNS/SMTP/SSL/POP3/HTTP/NTP
Interface
RS-232, USB 2.0
Power Source
13.8/27.6VDC nominal; 10V~36VDC range (Built in surge protection, voltage
regulation, programmable Delay On/Off relative to ignition or other switched
voltage)
Dimensions
117 x 63 x 38.4mm / 4.6”x 2. ”x 1. ”
Weight
300g / 0.66lbs.
Operating Temp.
Working Temperature: -10
℃
~
℃
; 14 ºF ~131 ºF
Storage Temperature: -40
℃
~8
℃
; -40 ºF~18 ºF
1.4 FRONT PANEL
Your primary interaction with your new DVR will be through the Front Panel buttons and their corresponding
buttons on the included IR Remote Control. Take a moment to learn where the keys are as the remainder of the
manual will refer to them often.
Figure 1-1 Front Panel
4
1) SD Card Slot: Slot to insert SD card.
2) IR Receiver: Receiver for IR remote control.
3) Alarm Input(2), Alarm Output(1) & RS232:
Alarm Input (2) - Connect up to 2 alarm inputs, selectable between N.O./N.C. contacts.
Alarm Output (1) - N.C or N.O type alarm out (form “C”).
RS232 - Connect to RS232/RS48 compatible device.
4) Power LED: This LED ON indicates Power on.
5) Network Connector: RJ-4 network connection 10/100Mbps Ethernet. There are two LEDs on the LAN
jack; Green LED means network is connected, amber LED flickers when data is being exchanged.
6) Philips mounted/Pin-torx: Use Philips screw for an easier mounting to prevent over-tightening. Use Pin-
torx for a safe installation to prevent cam-out. A screwdriver is included for Pin-torx.
REAR PANEL
During initial setup you will be connecting your DVR to multiple input and output devices. This is done through the
rear panel.
Figure 1-2 Rear Panel
○
○○
○
1
GPS Antenna: Connect to the GPS antenna.
○
○○
○
2
Power Input and Switched Ignition: 1 pin is reserved for power input; connect to 10V~36VDC power source.
1 pin is for ignition control; connect to the other vehicle devices to avoid excess power consumption at ignition.
5
○
○○
○
3
Video & Audio Input/Output:
Video Inputs (2): Connect camera’s video output or other composite video source to the video input
connection.
Audio Input (1): Connect line level output of an audio preamplifier to the audio input connection corresponding
to the appropriate camera.
Video Output (1): Monitor for live and playback display and on-screen display.
Audio Output (1): Connect to the line level input of an audio amplifier
○
○○
○
4
USB port: USB port recommended for connecting the USB mouse.
1.5 SYSTEM CONNECTION
Please refer to the following diagrams for the system connections.
Note: Monitor and Camera must be purchased separately.
6
1.6 FRONT & REAR PANEL CONNECTOR
Alarm/RS232
GND GND GND RS232-RXD1 RS232-TXD1
ALARM_OUT ALARM_IN ALARM_COM ALARM_IN_1 GND
Audio/Video
VIN1 VIN2 TV_OUT AUDIO_IN AUDIO_OUT
GND GND GND GND GND
Power In
ING_IN
GND
GND
DC12V
1.7 INSTALLATION OF EMV200
Step 1. Please put your EMV200 on the suitable location of vehicle. Please see the figure below.
Step 2. Please tighten 4 screws at 4 corners of device to the surface. Please see the figure below.
7
Now you have completed all mounting procedures.

Possible Installation Locations Inside the Automobile Vehicle: Truck
Glove box (inside or underneath)
Drive seat (between seat and wall) or Passenger seat (underneath)
(Users are suggested to use “support” for mounting option)

Show the wiring on the wiring harness that connects to the electrical system.
8

Possible Installation Locations Inside the Automobile Vehicle

Show the wiring on the wiring harness that connects to the electrical system.
Drive seat (between seat and wall)
Trunk (Users are suggested to use
“suspend” for mounting option)
Glove box (inside or underneath)
Passenger seat (underneath)
9

Installing the Camera(s) and Monitor
The DVR is typically connected to one camera installed inside the car. Other camera(s) can also be installed in
different locations (for example, use the waterproof camera to the outside of vehicle). For installation procedure,
please refer to the guide that came with the camera(s) you purchased.
The Monitor power supply connects from the Automotive adapter (cigarette plug)
Monitor and cameras must be purchased separately.

Connect the Camera(s)Connect the power connector from the camera(s) harness into the CAMERA
POWER OUT jack on the back panel of the DVR.
Connect the primary camera(s) video connector to the CAMERA INPUT and the audio connector to the AUDIO
INPUT in the back panel.
Adjust the camera(s). After the camera is installed, connect a monitor directly to the camera and observe the
image.
Make any adjustment if necessary.
LCD Monitor
LCD Monitor
10
1.8 VIDEO INPUTS/OUTPUTS INSTALLATION
Cameras and CCTV monitors must use copper center conductor/copper braid 7 Ohm video cable (e.g. RG- 9,
RG-6, RG-11) with BNC connectors.
To avoid impedance mismatch and undesired loss/reflections, 0 Ohm coax cable (e.g. RG- 8), or 7 ohm foil
shield antenna cable and other types of coaxial cable are not compatible.
All connected video sources must provide a 1 Vpp NTSC or PAL standard video signal.
When converting other transmission types (twisted pair, fiber optics, radio) for the video inputs, be sure to verify
accurate receiver calibration and signal levels.
ATTENTION: In order for the system to auto-detect the appropriate video format (NTSC or PAL), make sure that
there is a video signal on video input 1 upon power-up.
1.9 AUDIO INSTALLATION
This DVR provides 2 line level audio inputs and 1 line level audio output.
ATTENTION: The direct connection of a non-amplified microphone is not supported (a microphone amplifier is
required). The audio output requires an amplifier to drive a speaker or headphones.
The installation must be connected with audio coax cable and RCA plugs.
AUDIO RECORDING FUNCTIONALITY:
Audio recording is activated / deactivated in the Camera Menu for Camera #1~2 respectively. Please check and
always comply with local laws and regulations when using audio recording.
The audio channel is always recorded together with video and is independent of the image recording rate. Though
the audio record control is done in the Camera #1~2 screen, there is no specific camera allocation.
1.10 ALARM CONTACTS INSTALLATION
The alarm inputs can be used to start recording or for recording rate adjustment. In addition, alarm reactions such
as camera display on the monitor, buzzer, e-mail and network alarm are available. The alarm output relay can be
switched if required. Alarm input response actions can be controlled according to a flexible schedule.
11
1.10.1 Alarm Input Contacts
This DVR provides one alarm input per camera. All inputs are programmable N.O. (Normal Open) or N.C. (Normal
Closed) Inputs have to be switched by dry contacts. All settings are programmed in the ALARM menu (Section 0).
Alarm input with N.O. (Normal Open) contact Alarm input with N.C. (Normal Closed) contact
in idle state in idle state
1.10.2 Alarm Output Relay
The relay output provides either Normally Open or Normally Closed dry contacts.
Output relay in idle state
1.11 USB-Mouse installation
Connect the USB mouse to one of the 2 USB ports. (This can be done while DVR is powered on) The rear USB
V1.0 port is recommended to reserve the higher speed front USB V2.0 port for video copy/export.
NOTE: Recommended mouse types are Logitech® and Microsoft® wired USB wheel-mouse. Wireless USB
mouse is not supported.
12
1.12 NETWORK CONNECTION
This section only describes physical connection to an Ethernet network. This step must be completed before the
DVR can connect to the network. There are two basic types of connection:
1.12.1 Direct PC Connection t roug Crossover Network Cable
The point-to-point connection of DVR and PC requires a crossover (crossed) network cable. This type of
connection is ONLY used for direct connection to a single PC. Make sure that the PC is equipped with a 10/100
Mbps compatible network connection.
Figure 1-3 Direct PC Connection
Pinout of crossover-cable
13
1.12.2 Network Connection t roug Patc Cable
The connection to an existing network requires a normal patch cable (straight-through). The illustration shows the
connection to a network switch or router.
Figure 1-4 Network Connection through Patch Cable
Pinout of straight patch cable
1.13 FINAL INSTALL PROCESS
Once you have completed the basic wiring connections, you are ready to turn on the DVR. Simply plug in the
power source. The POWER LED will light up if power is normal. Once the system has finished loading, you can
begin to set up the menu options for the DVR.

This manual suits for next models

1

Other EverFocus DVR manuals

EverFocus ECOR264-4X1 User manual

EverFocus

EverFocus ECOR264-4X1 User manual

EverFocus EDVR16D1/250 User manual

EverFocus

EverFocus EDVR16D1/250 User manual

EverFocus ECOR Series User manual

EverFocus

EverFocus ECOR Series User manual

EverFocus EDSR-1600 User manual

EverFocus

EverFocus EDSR-1600 User manual

EverFocus EPHD04+ HDcctv User manual

EverFocus

EverFocus EPHD04+ HDcctv User manual

EverFocus Paragon 264 Series User manual

EverFocus

EverFocus Paragon 264 Series User manual

EverFocus ELUX16x2 User manual

EverFocus

EverFocus ELUX16x2 User manual

EverFocus EDSR 400F User manual

EverFocus

EverFocus EDSR 400F User manual

EverFocus ECOR264 Series User manual

EverFocus

EverFocus ECOR264 Series User manual

EverFocus PowerPlex EDR-920 Guide

EverFocus

EverFocus PowerPlex EDR-920 Guide

EverFocus EDSR 900F Manual

EverFocus

EverFocus EDSR 900F Manual

EverFocus Paragon EPARA16D3 Manual

EverFocus

EverFocus Paragon EPARA16D3 Manual

EverFocus PowerPlex EDR1600 Service manual

EverFocus

EverFocus PowerPlex EDR1600 Service manual

EverFocus TUTIS-16F3 User manual

EverFocus

EverFocus TUTIS-16F3 User manual

EverFocus PARAGON 264x1 User manual

EverFocus

EverFocus PARAGON 264x1 User manual

EverFocus EDR410H User manual

EverFocus

EverFocus EDR410H User manual

EverFocus EPHD04 Series User manual

EverFocus

EverFocus EPHD04 Series User manual

EverFocus ECOR 4 User manual

EverFocus

EverFocus ECOR 4 User manual

EverFocus ECOR264-4F1 User manual

EverFocus

EverFocus ECOR264-4F1 User manual

EverFocus EDR410H User manual

EverFocus

EverFocus EDR410H User manual

EverFocus EMV400S FHD User manual

EverFocus

EverFocus EMV400S FHD User manual

EverFocus EDSR400M User manual

EverFocus

EverFocus EDSR400M User manual

EverFocus IRONGUARD II 16 POE User manual

EverFocus

EverFocus IRONGUARD II 16 POE User manual

EverFocus ENVR8304X 04CH User manual

EverFocus

EverFocus ENVR8304X 04CH User manual

Popular DVR manuals by other brands

XTS NVR532 user manual

XTS

XTS NVR532 user manual

ADT DVR7800S-U Series user guide

ADT

ADT DVR7800S-U Series user guide

ATV Falcon FA-DR4250 user manual

ATV Falcon

ATV Falcon FA-DR4250 user manual

ATV FA4-120 user manual

ATV

ATV FA4-120 user manual

Velleman DVR16H1 Quick installation guide

Velleman

Velleman DVR16H1 Quick installation guide

Digital Watchdog VMax Flex H.264 user manual

Digital Watchdog

Digital Watchdog VMax Flex H.264 user manual

Bosch DIVAR 3000 Series quick guide

Bosch

Bosch DIVAR 3000 Series quick guide

FLIR M3200 MPX installation manual

FLIR

FLIR M3200 MPX installation manual

Trajet Everec ME1 instruction manual

Trajet

Trajet Everec ME1 instruction manual

ACM ACM-TPG08 user manual

ACM

ACM ACM-TPG08 user manual

Sony HSR-X200P operating instructions

Sony

Sony HSR-X200P operating instructions

Sanyo DSR-3000P instruction manual

Sanyo

Sanyo DSR-3000P instruction manual

Comelit IPNVR025A manual

Comelit

Comelit IPNVR025A manual

Luma LUM-500-NVR Series quick start guide

Luma

Luma LUM-500-NVR Series quick start guide

Hills NVR-CH4 quick guide

Hills

Hills NVR-CH4 quick guide

Motorola DCT2500 quick start guide

Motorola

Motorola DCT2500 quick start guide

Toshiba Surveillix XVR16-120-X user manual

Toshiba

Toshiba Surveillix XVR16-120-X user manual

Toa Netcansee N-DR2000 instruction manual

Toa

Toa Netcansee N-DR2000 instruction manual

manuals.online logo
manuals.online logoBrands
  • About & Mission
  • Contact us
  • Privacy Policy
  • Terms and Conditions

Copyright 2025 Manuals.Online. All Rights Reserved.