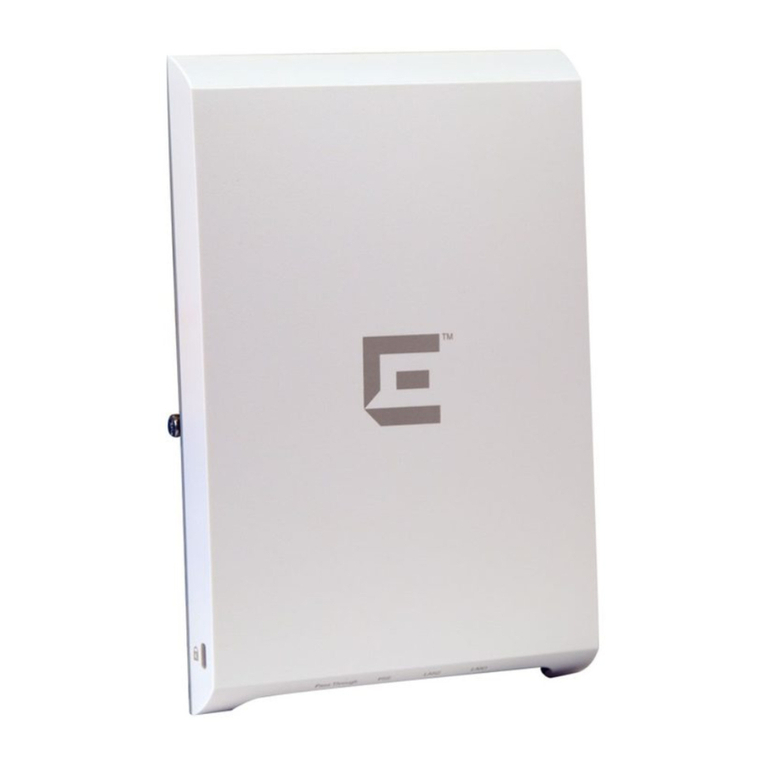
ExtremeWireless AP3912i User manual

ExtremeWireless™AP3912i
Installation Guide
9035014-02 Rev-01
Published December 2016

Copyright © 2017 Extreme Networks, Inc. All rights reserved.
Legal Notice
Extreme Networks, Inc. reserves the right to make changes in specifications and other information
contained in this document and its website without prior notice. The reader should in all cases
consult representatives of Extreme Networks to determine whether any such changes have been
made.
The hardware, firmware, software or any specifications described or referred to in this document
are subject to change without notice.
Trademarks
Extreme Networks and the Extreme Networks logo are trademarks or registered trademarks of
Extreme Networks, Inc. in the United States and/or other countries.
All other names (including any product names) mentioned in this document are the property of
their respective owners and may be trademarks or registered trademarks of their respective
companies/owners.
For additional information on Extreme Networks trademarks, please see:
www.extremenetworks.com/company/legal/trademarks
Support
For product support, phone the Global Technical Assistance Center (GTAC) at 1-800-998-2408
(toll-free in U.S. and Canada) or +1-408-579-2826. For the support phone number in other
countries, visit: http://www.extremenetworks.com/support/contact/
For product documentation online, visit: https://www.extremenetworks.com/documentation/
For information, contact:
Extreme Networks, Inc.
6480 Via Del Oro
San Jose, California 95119
USA

Table of Contents
Preface.........................................................................................................................................4
Text Conventions...................................................................................................................................................................4
Terminology............................................................................................................................................................................. 4
Providing Feedback to Us.................................................................................................................................................5
Getting Help.............................................................................................................................................................................5
Related Publications............................................................................................................................................................ 5
Chapter 1: Overview...................................................................................................................6
LED Indicators........................................................................................................................................................................ 6
Uplink and Power Connections......................................................................................................................................8
Chapter 2: Installation Process...............................................................................................10
Verifying the Box Contents............................................................................................................................................ 10
Safety Guidelines.................................................................................................................................................................. 11
Mounting the Bracket to a Wall..................................................................................................................................... 11
Mounting the Bracket to a Junction or Gang Box...............................................................................................13
Connecting the LAN/Power to the AP..................................................................................................................... 13
Mounting the AP to the Bracket...................................................................................................................................15
Appendix A: Specifications.....................................................................................................16
Appendix B: Regulatory Information.....................................................................................17
United States..........................................................................................................................................................................17
Canada......................................................................................................................................................................................19
European Community......................................................................................................................................................20
Certifications of Other Countries................................................................................................................................25
ExtremeWireless™ AP3912i Installation Guide 3

Preface
Text Conventions
The following tables list text conventions that are used throughout this guide.
Table 1: Notice Icons
Icon Notice Type Alerts you to...
General Notice Helpful tips and notices for using the product.
Note Important features or instructions.
Caution Risk of personal injury, system damage, or loss of data.
Warning Risk of severe personal injury.
New This command or section is new for this release.
Table 2: Text Conventions
Convention Description
Screen displays This typeface indicates command syntax, or represents information as it appears on the
screen.
The words enter and
type
When you see the word “enter” in this guide, you must type something, and then press
the Return or Enter key. Do not press the Return or Enter key when an instruction
simply says “type.”
[Key] names Key names are written with brackets, such as [Return] or [Esc]. If you must press two
or more keys simultaneously, the key names are linked with a plus sign (+). Example:
Press [Ctrl]+[Alt]+[Del]
Words in italicized type Italics emphasize a point or denote new terms at the place where they are defined in
the text. Italics are also used when referring to publication titles.
Terminology
When features, functionality, or operation is specific to a switch family, such as ExtremeSwitching™or
Summit®, the family name is used. Explanations about features and operations that are the same across
all product families simply refer to the product as the switch.
ExtremeWireless™ AP3912i Installation Guide 4

Providing Feedback to Us
We are always striving to improve our documentation and help you work better, so we want to hear
from you! We welcome all feedback but especially want to know about:
•Content errors or confusing or conflicting information.
•Ideas for improvements to our documentation so you can find the information you need faster.
•Broken links or usability issues.
If you would like to provide feedback to the Extreme Networks Information Development team about
this document, please contact us using our short online feedback form. You can also email us directly at
internalinfodev@extremenetworks.com.
Getting Help
If you require assistance, contact Extreme Networks using one of the following methods:
•GTAC (Global Technical Assistance Center) for Immediate Support
•Phone: 1-800-998-2408 (toll-free in U.S. and Canada) or +1 408-579-2826. For the support
phone number in your country, visit: www.extremenetworks.com/support/contact
•Email: support@extremenetworks.com. To expedite your message, enter the product name or
model number in the subject line.
•GTAC Knowledge — Get on-demand and tested resolutions from the GTAC Knowledgebase, or
create a help case if you need more guidance.
•The Hub — A forum for Extreme customers to connect with one another, get questions answered,
share ideas and feedback, and get problems solved. This community is monitored by Extreme
Networks employees, but is not intended to replace specific guidance from GTAC.
•Support Portal — Manage cases, downloads, service contracts, product licensing, and training and
certifications.
Before contacting Extreme Networks for technical support, have the following information ready:
•Your Extreme Networks service contract number and/or serial numbers for all involved Extreme
Networks products
•A description of the failure
•A description of any action(s) already taken to resolve the problem
•A description of your network environment (such as layout, cable type, other relevant environmental
information)
•Network load at the time of trouble (if known)
•The device history (for example, if you have returned the device before, or if this is a recurring
problem)
•Any related RMA (Return Material Authorization) numbers
Related Publications
ExtremeWireless and ExtremeWireless AP documentation can be found on the Extreme Documentation
page at: http://documentation.extremenetworks.com
The ExtremeWireless User Guide is recommended.
Preface
ExtremeWireless™ AP3912i Installation Guide 5

1Overview
LED Indicators
Uplink and Power Connections
The AP3912i (WS-AP3912-FCC/ROW) is a wall-plate 11ac Wave 2 access point (AP) that lets you extend
your wireless LAN and deploy local Wi-Fi while still providing extension for wired clients from the same
Ethernet jack. This fully-featured AP plugs into existing Ethernet cabled wall plates. The AP provides
application visibility, control, and policy support over three radios and three wired LAN ports. Wireless
and wired trac can be assigned application-level policy at the access point. The AP3912i provides
flow-based data handling for wireless and wired connections in a single plug-and-play package. There is
minimal or no impact to the existing infrastructure.
Three client ports are electrically connected to the AP board (internal switch). The PSE port can provide
(802.3af), which allows you to directly power devices such as iPhones and IP cameras. A pass-through
port uses PoE that is provided by the switch directly, not from the AP. The pass-through port can be
used to directly expose an additional switch port from the same jack. No additional power supply is
needed.
Additional features:
•Supports the 802.11ac and 802.11n wireless standards, with full backward compatibility with legacy
802.11abg.
•Has two concurrent Wi-Fi radios, one 5GHz 2x2 11ac radio and one 2.4GHz 2x2 11n. One radio can
operate as a Bluetooth or 802.15.4 radio.
•Interoperates fully with Wireless LAN, including support for VoWLAN, branch oce mode, guest
services, RTLS, availability, and mobility.
•Is enabled for ExtremeCloud™ support.
LED Indicators
The AP3912i has six LED indicators. The LEDs provide status information on the current state of the
AP3912i. For more information about LEDs, see the ExtremeWireless User Guide.
ExtremeWireless™ AP3912i Installation Guide 6

Figure 1: AP3912 LEDs
Table 3: AP3912i LED Status Indicators
LED Indicator Status Description
1 (Status) Green Indicates AP is working
normally
Amber System failure
2 (Ethernet link state) LAN
1
Amber Indicates a valid 1Gbps
Ethernet link
Green Indicates a valid 10Mbps or
100Mbps Ethernet link
Overview
ExtremeWireless™ AP3912i Installation Guide 7

Table 3: AP3912i LED Status Indicators (continued)
LED Indicator Status Description
3 (Radio 1) Green Indicates Radio 1 is enabled
4 (Radio 2) Green Indicates Radio 2 is
enabled
5 (PSE Client Port) Green Uplink AP port detects AF
source
6 (BLE) Green Indicates IoT (BLE or
802.15.4) is enabled
Uplink and Power Connections
The AP3912i uses as follows:
Table 4: Power Sources
Power Source Description
LAN 1 uplink PoE LAN 1 may be connected using an 802.3at or 802.3af switch port
PoE 802.3at Power is enabled on the PSE Client port and the PSE LED is green.
PoE 802.3af Power is disabled on the PSE Client port and the LED is o (not green).
The AP has three client ports (P1, P2, and P/3/PSE). These client ports let users connect to wired clients,
such as laptops and printers, to the network. The PSE power of P3 is enabled only if LAN 1 is powered
using 802.3at.
When the PSE is enabled., 802.3af PoE devices, such as IP cameras, can be powered from P3.
The pass-through port (blue connector) allows direct connection to a second switch port. On the pass-
through port, power and connection attributes (such as speed and duplex) of devices are dictated by
the characteristics of the corresponding switch model and by the port that the backend pass-through
port is connected to.
Note
LAN connectors with shrouds will not fit into the ports. Remove the shroud or use an optional
jumper cable.
Overview
ExtremeWireless™ AP3912i Installation Guide 8

Figure 2: Ports and Reset Button Location
The Reset button is located to the right of the power connections. (See the arrow in the previous
figure.) Insert a straightened paperclip into the hole and depress the switch.
Overview
ExtremeWireless™ AP3912i Installation Guide 9

2Installation Process
Verifying the Box Contents
Safety Guidelines
Mounting the Bracket to a Wall
Mounting the Bracket to a Junction or Gang Box
Connecting the LAN/Power to the AP
Mounting the AP to the Bracket
Caution
The unit and all interconnected equipment must be installed indoors within the same building,
including all -powered network connections, as described by Environment A of the IEEE
802.3af standard.
Follow these procedures to install the AP3912i:
1Verify the box contents.
2 Review the Safety Guidelines on page 11.
3Mount the bracket to a wall, or junction/gang box.
4Connect the AP to the network.
5Mount the AP to the bracket.
Verifying the Box Contents
Before you install the AP3912i, make sure that you have all of the necessary parts.
1 Verify that the box contains the following items:
Table 5: AP3912i Box Contents
Quantity Item
1 AP3912i Quick Reference
1 ExtremeCloud™Quick Start Card
1 WS-AP3912i AP
1 Wall plate bracket (includes Security Torx captive screw)
2 Screw-in wall anchors
2 Pan-head machine screws
ExtremeWireless™ AP3912i Installation Guide 10

Table 5: AP3912i Box Contents (continued)
Quantity Item
2 Flat-head wood screws
1 Security Torx key (T10 size)
Note
You will also need to provide your own cable.
2 Perform a visual inspection of the AP for any signs of physical damage. Contact Extreme Networks if
there are any signs of damage.
Note
Before mounting the AP3912i, read Safety Guidelines on page 11.
Safety Guidelines
This section contains notices that you must adhere to ensure your personal safety and to prevent any
damage to the equipment.
Caution
The unit and all interconnected equipment must be installed indoors within the same building,
including all -powered network connections as described by Environment A of the IEEE
802.3af standard.
Qualified Personnel
Danger
Only qualified personnel should perform installation procedures.
Mounting the Bracket to a Wall
This procedure assumes that you are running a LAN cable through a wall.
Note
You can also mount this AP to a wall and run a LAN cable between the AP and bracket
without creating a hole in the wall.
Installation Process
ExtremeWireless™ AP3912i Installation Guide 11

Figure 3: AP3912i Mounting Bracket
Table 6: AP3912i Mounting Bracket
Number Description
1 AP mounting tabs
2 Security Torx captive screw
To mount the bracket to a wall:
1 Using the mounting bracket as a guide, choose a location where it is feasible to place the AP’s
center. If the RJ45 connectors on the rear of the AP will be used, the location must allow LAN cables
to come out of the wall within the large, rectangular hole. Place the bracket against the wall. (The
captive screw will be used to lock the AP in place.) Decide which two holes to use to mount the
bracket to the wall. We recommend that the two holes be on opposite sides of the large, center
opening.
Installation Process
ExtremeWireless™ AP3912i Installation Guide 12

2 Mark the two hole centers.
3 For drywall/plasterboard walls, drill two holes using a 1/4” or 6mm diameter drill bit.
4 For drywall/plasterboard walls, screw the plastic anchors into the holes.
5 Attach the wall plate bracket using the two wood screws. Torque the screw to 9.0 in-lbs.
6Connect the LAN/power to the AP.
7Attach the AP to the mounting bracket.
Mounting the Bracket to a Junction or Gang Box
To mount the bracket to a junction or gang box:
1 Place the mounting bracket over the junction box with the captive screw on the left side and the
large, flat plate against the wall. The bracket should be attached to a vertical surface.
2 Align two of the bracket holes with two of the box’s holes. Use bracket holes that are closest to the
center of the bracket. Make sure that the entire box is covered by the bracket.
3 Using the two pan head machine screws, attach the bracket to the box using the aligned holes.
Torque the screws to 12.0 in-lbs.
4Connect the LAN/power through the bracket to the AP.
5Attach the AP to the mounting bracket.
Connecting the LAN/Power to the AP
Connect the building wire LAN 1 wire (either + at or PoE af) to the black RJ-45 connector using short
patch cables. Alternatively, connect using the associated punch-down block. The connector and the
punch-down block are located on the rear of the AP.
Additionally, you can connect the pass-through cable to the blue connector (top) on the back of the AP
or its associated punch-down block.
If you are using the punch-down block, use a punch-down tool with a 110 blade.
Important
Make sure that the wires are punched down professionally. Otherwise the LAN 1 link speed will
be dropped to 100 Mbps, instead of 1000 Mbps.
There are two standards for patch-panel cable pin-out. Please select the standard used by your facility.
Installation Process
ExtremeWireless™ AP3912i Installation Guide 13

Figure 4: Patch-panel Cable Pin-out Colors
For a T-568A Straight-Through Ethernet Cable, the pin colors are:
•Pin 1: White-Green
•Pin 2: Green
•Pin 3: White-Orange
•Pin 4: Blue
•Pin 5: White-Blue
•Pin 6: Orange
•Pin 7: White-Brown
•Pin 8: Brown
For a T-568B Straight-Through Ethernet Cable, the pin colors are:
•Pin 1: White-Orange
•Pin 2: Orange
•Pin 3: White-Green
•Pin 4: Blue
•Pin 5: White-Blue
•Pin 6: Green
Installation Process
ExtremeWireless™ AP3912i Installation Guide 14

•Pin 7: White-Brown
•Pin 8: Brown
Mounting the AP to the Bracket
After you attach the bracket to a wall or junction/gang box and connect the LAN/power, attach the AP
to the bracket.
1 Line up the AP holes (marked with arrows in the following diagram) on the rear with the two "L"
shaped angled tabs near the right side of the bracket (see figure).
Figure 5: AP3912i Rear View
2 Insert the AP onto the tabs.
3 Slide the AP approximately 1/4" to the left on the two bracket tabs.
4 Attach and tighten the Security Torx screw to the AP so that the AP is attached to the bracket.
Torque the screw to 7 in-lbs.
Installation Process
ExtremeWireless™ AP3912i Installation Guide 15

ASpecifications
This appendix lists the specifications for the ExtremeWireless™ Indoor Access Point AP3912i.
Table 7: Specifications for the AP3912i
Item Specification
AP Part Number: 31025 WS-AP3912i-FCC
AP Part Number: 31026 WS-AP3912i-ROW
Enclosure material AP enclosure is not plenum rated.
Power source Power is provided by Power-over-Ethernet (802.3at or
802.3af). No AC power supply is needed.
If wall plate has more than two Ethernet ports, the extra
ports are not accessible after installing the Wall Plate
AP.
Power consumption 802.3at or PoE 802.3af
Sensor radio power budget is 802.1af (12.5W)
Antenna Four single band internal antennas
Uplink interface One 10/100/1000BT Ethernet port
RoHS compliant Yes
Radio configuration Dual Band Dual Concurrent 802.11ac and 802.11n
Radio 1: 5 GHz; 2x2:2; IEEE 802.11 ac (up to 886 Mbps
per radio)
Radio 2: 2.4 GHz; 2x2:2; IEEE 802.11n (up to 300 Mbps
per radio)
Legacy 802.11abg mode support
Integrated sensor radio that operates as Bluetooth 4.0
radio or operates as 802.15.4 (one at a time)
Water/dust proof ratings Not applicable
Operating temperature 0°C to 40°C
Non-operating transportation/storage -40°C to 70°C (-40°F to 158°F)
Altitude (feet) >6,500 feet; safety approved to 2,000 meters
Relative humidity (% RH) 0% to 95% (non-condensing)
Wind Not applicable. The AP3912i is an indoor-only model.
ExtremeWireless™ AP3912i Installation Guide 16

BRegulatory Information
United States
Canada
European Community
Certifications of Other Countries
United States
FCC Declaration of Conformity Statement
This equipment has been tested and found to comply with the limits for a Class B digital device,
pursuant to Part 15 of the FCC Rules. These limits are designed to provide reasonable protection against
harmful interference in a residential installation. This equipment generates, uses and can radiate radio
frequency energy and, if not installed and used in accordance with the instructions, may cause harmful
interference to radio communications. However, there is no guarantee that interference will not occur in
a particular installation. If this equipment does cause harmful interference to radio or television
reception, which can be determined by turning the equipment o and on, the user is encouraged to try
to correct the interference by one of the following measures:
•Reorient or relocate the receiving antenna.
•Increase the separation between the equipment and receiver.
•Connect the equipment into an outlet on a circuit dierent from that to which the receiver is
connected.
•Consult the dealer or an experienced radio/TV technician for help.
FCC Caution:
Any changes or modifications not expressly approved by the party responsible for compliance could
void the user's authority to operate this equipment.
This device complies with Part 15 of the FCC Rules. Operation is subject to the following two conditions:
•This device may not cause harmful interference
•This device must accept any interference received, including interference that may cause undesired
operation.
This transmitter must not be co-located or operating in conjunction with any other antenna or
transmitter.
USA Conformance Standards
This equipment meets the following conformance standards:
ExtremeWireless™ AP3912i Installation Guide 17

Safety
•UL 60950-1
•CSA 22.2 No.60950-1-03
EMC
•FCC CFR 47 Part 15, Class B
•FCC Subpart C 15.247
•FCC Subpart E 15.407
•RSS-247
•ICES-003
•EN 301 893
•EN 300 328
•EN 301 489 1 & 17
•EN 60601-1-2
•EN 50385
•EN 55022 (CISPR 22)
•AS/NZS3548 (CISPR22)
•Extreme Networks #QMS-00102
Radio Transceiver
Other
•IEEE 802.11ac (5 GHz)
•IEEE 802.11n (2.4 GHz)
•IEEE 802.3at ()
•IEEE 802.3af (PoE)
Warning
The ExtremeWireless™ AP3912i must be installed and used in strict accordance with the
manufacturer's instructions as described in this guide and related documentation for the
device to which the AP3912i is connected. Any other installation or use of the product violates
FCC Part 15 regulations. This Part 15 radio device operates on a non-interference basis with
other devices operating at the same frequency when using the antennas provided or other
Extreme Networks-certified antennas. Any changes or modifications to the product not
expressly approved by Extreme Networks could void the user's authority to operate this
device. For the product available in the USA market, only channels 1 to 11 can be operated.
Selection of other channels in the 2.4 GHz band is not possible.
FCC Radiation Exposure Statement
This equipment complies with FCC RF radiated exposure limits set forth for an uncontrolled
environment. This equipment should be installed and operated with a minimum distance of 20 cm
between the radiator and your body.
Regulatory Information
ExtremeWireless™ AP3912i Installation Guide 18

End users must follow the specific operating instructions for satisfying RF exposure compliance. This
device has been tested and has demonstrated compliance when simultaneously operated in the 2.4 GHz
and 5 GHz frequency ranges. This device must not be co-located or operated in conjunction with any
other antenna or transmitter. The radiated output power of the AP3912i is below the FCC radio
frequency exposure limits as specified in “Guidelines for Human Exposure to Radio Frequency
Electromagnetic Fields” (OET Bulletin 65, Supplement C).
Professional Installation Notice
To comply with FCC part 15 rules in the United States, the system must be professionally installed to
ensure compliance with the Part 15 certification. It is the responsibility of the operator and professional
installer to ensure that only certified systems are deployed in the United States. The use of the system in
any other combination (such as co-located antennas transmitting the same information) is expressly
forbidden.
Canada
Industry Canada Compliance Statement
This device complies with RSS-247 of the Industry Canada Rules. Operation is subject to the following
two conditions: (1) This device may not cause harmful interference, and (2) this device must accept any
interference received, including interference that may cause undesired operation.
Ce dispositif est conforme à la norme CNR-247 d'Industrie Canada applicable aux appareils radio
exempts de licence. Son fonctionnement est sujet aux deux conditions suivantes: (1) le dispositif ne doit
pas produire de brouillage préjudiciable, et (2) ce dispositif doit accepter tout brouillage reçu, y compris
un brouillage susceptible de provoquer un fonctionnement indésirable.
Caution
1 The device for operation in the band 5150-5250 MHz is only for indoor use to reduce the
potential for harmful interference to co-channel mobile satellite systems;
2 High-power radars are allocated as primary users (i.e. priority users) of the bands
5250-5350 MHz and 5650-5850 MHz and that these radars could cause interference
and/or damage to LE-LAN devices.
Caution
Avertissement:
1 Les dispositifs fonctionnant dans la bande 5150-5250 MHz sont réservés uniquement pour
une utilisation à l’intérieur afin de réduire les risques de brouillage préjudiciable aux
systèmes de satellites mobiles utilisant les mêmes canaux;
2 De plus, les utilisateurs devraient aussi être avisés que les utilisateurs de radars de haute
puissance sont désignés utilisateurs principaux (c.-à-d., qu’ils ont la priorité) pour les
bandes 5250-5350 MHz et 5650-5850 MHz et que ces radars pourraient causer du
brouillage et/ou des dommages aux dispositifs LAN-EL.
Regulatory Information
ExtremeWireless™ AP3912i Installation Guide 19

FOR MOBILE DEVICE USAGE
Radiation Exposure Statement: This equipment complies with IC radiation exposure limits set forth for
an uncontrolled environment. This equipment should be installed and operated with minimum distance
20 cm between the radiator & your body.
Déclaration d'exposition aux radiations: Cet équipement est conforme aux limites d'exposition aux
rayonnements IC établies pour un environnement non contrôlé. Cet équipement doit être installé et
utilisé avec un minimum de 20 cm de distance entre la source de rayonnement et votre corps.
Canada Conformance Standards
This equipment meets the following conformance standards:
Safety
•UL 60950-1
•CSA 22.2 No.60950-1-03
EMC
•FCC CFR 47 Part 15, Class B
•FCC Subpart C 15.247
•FCC Subpart E 15.407
•RSS-247
•ICES-003
•EN 301 893
•EN 300 328
•EN 301 489 1 & 17
•EN 60601-1-2
•EN 50385
•EN 55022 (CISPR 22)
•AS/NZS3548 (CISPR22)
•Extreme Networks #QMS-00102
Other
•IEEE 802.11ac (5 GHz)
•IEEE 802.11n (2.4 GHz)
•IEEE 802.3at ()
•IEEE 802.3af (PoE)
European Community
Note
This product complies with the requirements of Directive 2011/65/EU of the European
Parliament and of the Council of 8 June 2011 on the restriction of the use of certain hazardous
substances in electrical and electronic equipment.
Regulatory Information
ExtremeWireless™ AP3912i Installation Guide 20
Table of contents
Other ExtremeWireless Wireless Access Point manuals
Popular Wireless Access Point manuals by other brands

Moxa Technologies
Moxa Technologies AirWorks AWK-3121 Quick installation guide

Ruckus Wireless
Ruckus Wireless ZoneFlex R500 Quick setup guide

Netis
Netis WF2222 Quick installation guide

Pakedge
Pakedge W6x user guide

D-Link
D-Link DWL-2100AP - AirPlus Xtreme G manual

ANTAIRA
ANTAIRA ARS-7235-PSE-AC Series Hardware manual