manuals.online logo
Brands
  1. Home
  2. •
  3. Brands
  4. •
  5. FAAFTECH
  6. •
  7. Automobile Accessories
  8. •
  9. FAAFTECH FT-RC-RN User manual

FAAFTECH FT-RC-RN User manual

Other FAAFTECH Automobile Accessories manuals

FAAFTECH FT-VF-HND2 User manual

FAAFTECH

FAAFTECH FT-VF-HND2 User manual

FAAFTECH SHIFTPOWER-USA User manual

FAAFTECH

FAAFTECH SHIFTPOWER-USA User manual

FAAFTECH FT-VF-NS4 User manual

FAAFTECH

FAAFTECH FT-VF-NS4 User manual

FAAFTECH FT-VIDEO-LVDS AUD4 User manual

FAAFTECH

FAAFTECH FT-VIDEO-LVDS AUD4 User manual

FAAFTECH FT-VF-GMLAN User manual

FAAFTECH

FAAFTECH FT-VF-GMLAN User manual

FAAFTECH FT-RC-AUD3 User manual

FAAFTECH

FAAFTECH FT-RC-AUD3 User manual

Popular Automobile Accessories manuals by other brands

Magneti Marelli AC161 Installation instruction

Magneti Marelli

Magneti Marelli AC161 Installation instruction

FDI uEZ GUI Start here

FDI

FDI uEZ GUI Start here

JCROffroad JT Install instructions

JCROffroad

JCROffroad JT Install instructions

Rostra VOXXElectronics 250-1930 owner's guide

Rostra

Rostra VOXXElectronics 250-1930 owner's guide

TOP VEHICLE TECH GR3FORD5 installation manual

TOP VEHICLE TECH

TOP VEHICLE TECH GR3FORD5 installation manual

Safe Fleet PRIME DESIGN AR-2000-BLK manual

Safe Fleet

Safe Fleet PRIME DESIGN AR-2000-BLK manual

Skoda Fabia Combi 5J Fitting instructions

Skoda

Skoda Fabia Combi 5J Fitting instructions

Camcar 40077 Al Mounting instructions

Camcar

Camcar 40077 Al Mounting instructions

Camcar 40089 AL Mounting instructions

Camcar

Camcar 40089 AL Mounting instructions

Impac Tradesman 2000 installation manual

Impac

Impac Tradesman 2000 installation manual

DVB OFFROAD BRSB-01 installation manual

DVB

DVB OFFROAD BRSB-01 installation manual

Safari Snorkel SS385HF installation guide

Safari Snorkel

Safari Snorkel SS385HF installation guide

ULTIMATE SPEED 279746 Assembly and Safety Advice

ULTIMATE SPEED

ULTIMATE SPEED 279746 Assembly and Safety Advice

SSV Works DF-F65 manual

SSV Works

SSV Works DF-F65 manual

ULTIMATE SPEED CARBON Assembly and Safety Advice

ULTIMATE SPEED

ULTIMATE SPEED CARBON Assembly and Safety Advice

Witter F174 Fitting instructions

Witter

Witter F174 Fitting instructions

WeatherTech No-Drill installation instructions

WeatherTech

WeatherTech No-Drill installation instructions

TAUBENREUTHER 1-336050 Installation instruction

TAUBENREUTHER

TAUBENREUTHER 1-336050 Installation instruction

manuals.online logo
manuals.online logoBrands
  • About & Mission
  • Contact us
  • Privacy Policy
  • Terms and Conditions

Copyright 2025 Manuals.Online. All Rights Reserved.

Installing the Interface
REV 281117
Follow the instructions below to install the FT-RC-RN kit.
Turn on the car ignition and the radio (Media NAV). Then, plug the device to the vehicle’s OBD connection (usually found inside
the glove compartment).
Once you plug in the device to the OBD connection, wait for the device to program the rear camera and reset the radio. After the
radio has been reset, you can unplug the device and hand it over to the costumer, in case he needs to enable the rear camera
once again.
Important Notice
When you plug in the device for the first time, the device will program the rear camera and save the vehicle’s chassis number. If
you plug the device again, it will deprogram the rear camera and reset the device memory, which will make it ready for installing
in another vehicle. Therefore, every time you remove the device from a vehicle, you will need to disable the rear camera; other-
wise it will not be possible to install this device on a new vehicle.
OBD Connection
Plug in to the vehicle’s OBD connection
to program the rear camera.
The OBD connection generally can be found inside
the glove compartment or underneath the dashboard,
close to the gear and brake pedals.
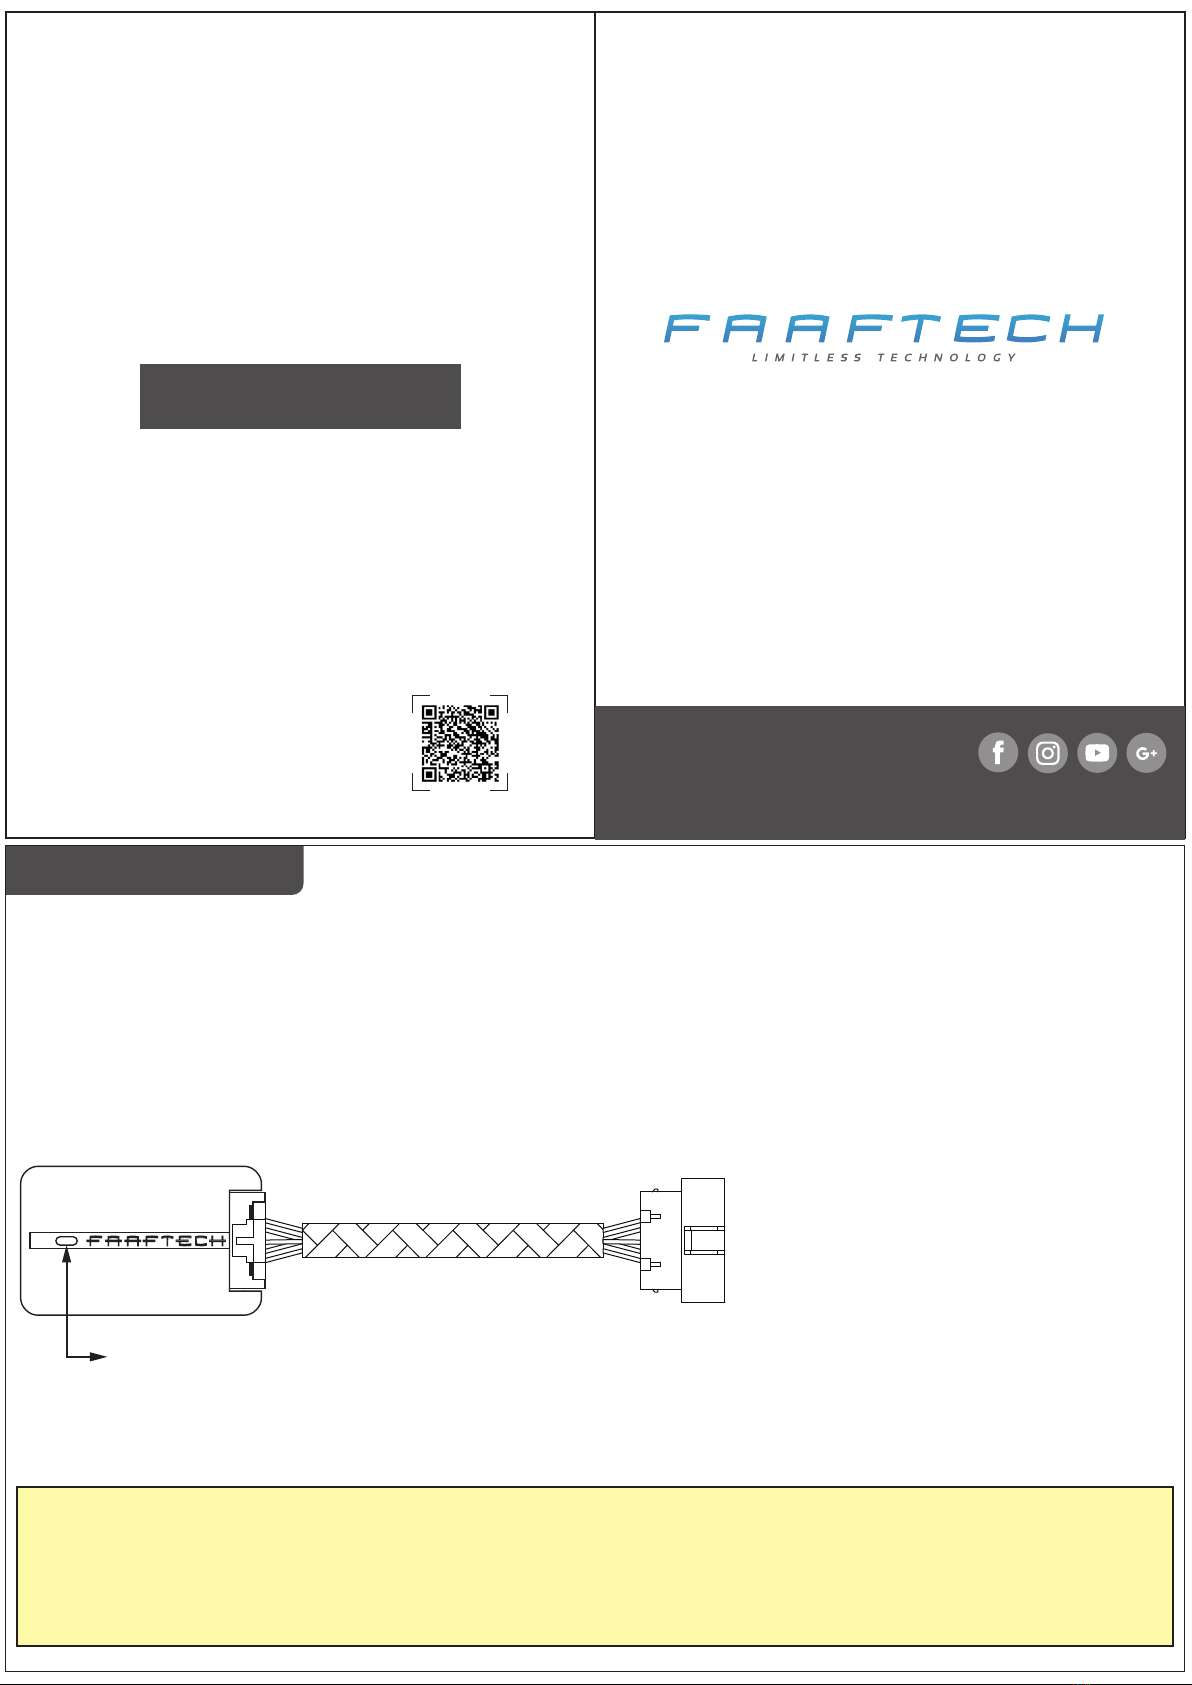
Signaling LED
Blinking Blue – Signals the rear camera has been programmed
Blinking Red – Signals the rear camera has been deprogrammed
On Purple – Signals the device has already been used on another vehicle
Installation Manual
FT-RC-RN
For your safety and comfort, read this manual carefully.
Scan this QR code to see which
vehicles are compatible. +55 0800 603 2330 or +55 62 3241 4600
[email protected]
www.faaftech.com.br
Available from Monday to Friday, from 8 a.m. to 6 p.m. Brasilia time
TECHNICAL SUPPORT Follow us on social media
Installing the Device
Functioning
Once you have programmed the rear camera, remove the radio. Then, connect the whip to the Camera Entry, ACC Output, GND
Output and the Reverse Entry connections.
See on the figure below the description of each one of the wires on the whip.
Once you finish installing, test the system functions.
Turn on the ignition, wait for the radio to start and put the car on the reverse gear to view the rear camera image.
If that does not work, check the device installation and follow all the instructions on this manual again.
Connect to the rear camera video
Connect to the radio
Connect to the
original whip
ACC / GND
Use to power the rear camera
Reverse Entry
Connect to the rear lamp signal to turn on the
Media NAV Reverse
Note: some cars already have this wire connected to the
rear lamp wire. In that case, there is no need to connect
this wire to the lamp signal.
ACC GND Entrada Reverse
Reverse Input
Entrada Camera
Camera Input
NAV Media after installing the rear camera.