manuals.online logo
Brands
  1. Home
  2. •
  3. Brands
  4. •
  5. Fagor
  6. •
  7. Oven
  8. •
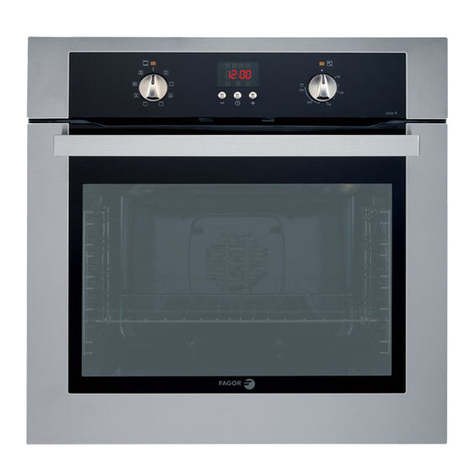
  9. Fagor FDU700X Installation and operating instructions

Fagor FDU700X Installation and operating instructions

GB
Built-in oven
installation
use
maintenance
pag.
General warnings 3
Installation 5
How to cook 8
pag.
Oven cooking chart 10
Descri tion and use of accessories 10
Cleaning and maintenance 15
INDEX
Read carefully all the instructions contained in this booklet. It provides you with important
information regarding the safe installation, use and maintenance of the appliance as well as
useful advice for getting the best out of your oven. Keep this booklet in a safe place for future
reference.
The a liance has been designed and constructed following the under mentioned Euro ean rules:
EN 60335 - 1 lus relevant amendment
EN 60335 - 2 - 6 lus relevant amendment
Furthermore the a liance is in conformity with the under mentioned Euro ean directives:
CEE 2006/95 + 93/68 relevant to electric safety (BT)
CEE 89/336 + 92/31 + 93/68 relevant to electromagnetic com atibility (EMC)
Oven features that can come into contact with food are made of materials suitable to those rescribed
by CEE 89/109 directives and law by decree Nr. 108.
The conformity of the a liance to the above mentioned norms is ut in evidence by the CE symbol
evident on the identifying name late.
The manufacturer ays articular attention when rinting its instruction manual however mis rints may
occur. If the texts are unclear, lease contact the service centre for ex lanations.
After removing the acking, check that the a liance is not damaged in any way. Be careful not to
leave the acking materials ( lastic sheeting, ex anded olystyrene etc.) in reach of children, as they
can be dangerous.
IMP RTANT: do not use the oven door handle to move the appliance, such as when removing
it from the packaging.
IMP RTANT
This a liance must be used exclusively for cooking food and for no other ur ose.
Any other use of the a liance (such as heating a room) is incorrect and therefore dangerous.
The manufacturer can not be considered res onsible for ossible damages arising from a wrong
installation or incorrect.
The manufacturer can not be considered responsible for possible damages arising from a
wrong installation or incorrect use of the appliance.
The manufacturer reserves the right to make modifications that may be necessary and useful,
without prejudicing essential safety and working features.
- Installation and maintenance have to be done by qualified staff only.
- The a liance should only be used for the cooking of food and not for any other use.
- The safety of this a liance is assured only when it is correctly connected to a good system of
reviewed grounding, like from the norms.
- When in use the a liance becomes very hot. Do not touch the heated elements inside the oven.
- Do not touch the a liance with humid or wet hands or feet.
- Do not use the a liance barefoot.
- Do not ull the feeding cable in order to detach the lug from socket.
- Do not leave the a aratus ex osed to atmos heric agents (rain, sun and so on).
- Do not allow the a liance to be used by children.
CAUTI N: The oven surfaces may get very hot when the grill is in use. Kee children well away.
Keep from sitting and put heavy objects on the oven door when it is open.
This a liance is not intended for use by ersons (including children) with reduced hysical, sensory
or mental ca abilities, or lack of ex erience and knowledge, unless they have been given su ervision
or instruction concerning use of the a liance by a erson res onsible for their safety.
Children should be su ervised to ensure that they do not lay with the a liance.
GENERAL WARNINGS
3
N TE: Pictures a earance and gra hics are indicative only.
1234 5 67889
6
5
43
2
1
10
1. Thermostat warning light (upper oven .
2. Functions selector (upper oven
3. Warning light for functions selector (upper oven
4. Thermostat (upper oven
5. Clock digital programmer
6. Functions selector (lower oven .
7. Warning light functions selector (lower oven
8. Thermostat (lower oven
9. Thermostat warning light (lower oven
10. Grill energy regulator
(optional available only for some models
60
200
150
260
100
60
200
150
260
100
0
0
CONTROLS DESCRIPTION
4
°C
°C
How to remove packing
After having removed internal and external acking ensure that the a aratus is intact and not damaged.
If you are not sure do not use the oven, and call your Retailer.
Some oints are rotected with a lastic coating.
It is absolutely necessary to eliminate this covering before using the a liance.
The elements used for packing (cardboard, bags, polystyrene, cards) must be kept away from
children because they are a potential source of danger.
Installation, regulation, transformation, maintenance should only be done by qualified personnel
only.
L CATING IN KITCHEN FURNITURE
Its necessary that the furniture has suitable features see ict. 2 for mod. F 88 (oven dimensions
595 x 542 x 884 mm) and 2/1 for mod. F 72 (oven dimensions 595 x 542 x 714 mm).
(FIXING) C NNECTI N
After having built the oven in the furniture, o en the door and fix the oven frame in the furniture with
four screws sideways (2 each side), screwing them in the holes, as indicated in fig. 2 for mod. F 88
and fig. 2/1 for mod F 72.
ATTENTI N:
Adjacent boards have to be made of heat resistant material and the glues have to be resistant to 100°
C. tem eratures.
At the end of mounting contacts to electrics com onents have to be im ossible.
Protections have to be removable only with the hel of a tool.
INSTALLATION
5
fig. 2
screw
screw
screw
screw
fig. 2/1
6
screw
screw
screw
screw
Side runners
ELECTRICAL C NNECTI N
Electric connection has to be done according to rules and law rovisions in force.
Before doing the connection, check the following:
- The electric ower and sockets are suitable to maximum ower of the oven. (See data late on the
a liance).
- WARNING: THIS APPLIANCE MUST BE EARTHED.
The a liances electrical safety can only be guaranteed when it has been correctly connected to
a ro erly earthed ower su ly, as laid down in the regulations for electrical safety.
Important: the manufacturer cannot be held res onsible for any damage to ersons or objects due
to the lack of an earth connection.
- Never use reducers, ada tors or branches for connections.
C NNECTING F FEEDING CABLE
If a aratus is not fitted with feeding cable, use cable Mod. H05RR-F 3x4 sq. mm. stating suitable
section of the cable which has to be connected to terminal.
To obtain that you have to:
- Connect the su ly cable to the terminal stri of the oven (fig. 3), kee ing the earth wire 3 cm. longer
than the active conductors (live/neutral) .
- Connect cables wires as follows:
L = (live) brown or red wire
N = (neutral) blue wire
= (earth) yellow - green wire.
N.B. supplys cable temperature should never reach a temperature 50°C above the room
temperature in any point.
Connection to normal socket
Connect feeding cable a normal lug suitable to the load stated on data late.
When the cooker has been built-in household check that the lug is accesible.
Direct connection to electric supply
If an a liance is not equi ed with su ly cable and lug, the ower su ly must be fitted with a
disconnect switch in which the distance between contacts ermits total disconnection in accordance
with overvoltage category III, as required by installation regulations.
The yellow/green earth wire should not be controlled by the switch..
7
fig. 3
L
N
At the first use of the oven, its normal to smeel the rotective oils used in manufacture burning off.
Leave oven on maximum setting for a roximately one hour before use.
N.B. Set any timer, clock or programmer to manual mode (see section on page 11)
N.B. Before carryng out cleaning, disconnect the appliance from electrical supply.
At the end of the initial heating, let the oven cool down and clean the inside with detergent and warm
water. Before using, wash all grid accessories, baking- an and trays.
General information and use precautions
- The oven must be used with the door closed.
- Always hold the handle in the middle, to o en the oven door.
- When you o en the oven door, beware hot va our.
- Use rotective gloves to insert or to extract containers from the oven.
- Use containers resistant to the tem eratures indicated on the thermostat knob.
- After use of the oven, be sure that all controls are in the off osition..
- Never roast or bake on the oven base.
ven light
The symbols resent on the oven control knob are different according to the models. The first function
common to all is the oven light bulb switching on, identified by the symbol .
Once selected, the bulb light is on during other oven functions.
60 ÷ 260
Lower heating element
This function is articularly suitable for cooking from the bottom, heating
food and sterilizing glass jars. It is also indicated for food requiring
long, slow cooking, e.g. casseroles. This function can be used between
60° and 260°C.
Using the oven selectors it is ossible to set the following functions.
Note: the oven must be used with the door closed
All functions will start after selecting the oven tem erature with the
thermostat knob.
Cooking
mode
indicators
temperature °C
min 60
max 260
60 ÷ 200
Total grill
This function switches on both to elements to radiate heat directly
over the foods.
This function can be used between 60 and 200°C.
For the multifunction oven, set knob controls the energy regulation
o tional available only in some model of the grill to the ositon 6.
Turning this knob you can select a gradual variation of the grill cooking
tem erature.
60 ÷ 260
Natural convection
Both the lower and u er heating elements o erate together. This
is the traditional cooking, very good for roasting joints, ideal for biscuits,
baked a les and cris ing food. You obtain very good results when
cooking on a shelf adjusting the tem erature between 60 and 260°C.
HOW TO COOK
8
COOKING FUNCTIONS (upper oven)
60 ÷ 260
Fan oven
Both the fan and the circular heating element o erate together.
The hot air adjustable between 60 and 260°C is evenly distributed
inside the oven.
This is ideal for cooking several ty es of food (meat, fish) at the same
time without affecting taste and smell. It is indicated for delicate astries.
Fan-assisted natural convection
The to and bottom elements and fan are all on. This is the normal
cooking method, excellent for a variety of foods. It roduces good
results for cooking on one level; ideal for biscuits, cakes and cana és
with the tem erature adjustable from 60 to 260 C.
60 ÷ 200
60 ÷ 260
60 ÷ 260
Fan assisted total grill
The air which is heated by the grill heating element is circulated by the
fan and so hel s to distribute the heat between 60 and 200°C. The fan
assisted grill re laces erfectly the turns it. You can obtain very good
results also with large quantities of oultry, sausage, red meat.
For the multifunction oven, set knob controls the energy regulation
o tional available only in some model of the grill to the ositon 6.
Turning this knob you can select a gradual variation of the grill cooking
tem erature.
Lower heating element
This function is articularly suitable for cooking from the bottom, heating
food and sterilizing glass jars. It is also indicated for food requiring
long, slow cooking, e.g. casseroles. This function can be used between
60° and 260°C.
Using the oven selectors it is ossible to set the following functions.
Note: the oven must be used with the door closed
All functions will start after selecting the oven tem erature with the
thermostat knob.
Cooking
mode
indicators
temperature °C
min 60
max 260
60 ÷ 200
Defrosting with fan
The air at ambient tem erature is distributed inside the oven for
defrosting food more quickly and without roteins adulteration.
Medium grill
This function o erates the to central element which radiates heat
directly over the foods.
This function can be used between 60 and 200°C.
60 ÷ 200
Total grill
This function switches on both to elements to radiate heat directly
over the foods.
This function can be used between 60 and 200°C.
For the multifunction oven, set knob controls the energy regulation
o tional available only in some model of the grill to the ositon 6.
Turning this knob you can select a gradual variation of the grill cooking
tem erature.
60 ÷ 260
Natural convection
Both the lower and u er heating elements o erate together. This is
the traditional cooking, very good for roasting joints, ideal for biscuits,
baked a les and cris ing food. You obtain very good results when
cooking on a shelf adjusting the tem erature between 60 and 260°C.
9
COOKING FUNCTIONS (lo er oven)
C LING M T R
Some models are equi ed with tangential cooling motor.
ven cooking chart (lower oven)
ven mod. 88 ven mod. 72
Function Level °C Minutes °C Minutes
mod. 88
mod. 72
Meats
Roast veal Fan oven 4 3 190 130 190 120
Roast ork Fan oven 4 3 190 130 190 100
Fillet of beef Grill 5 4 260 6 + 6 260 6 + 6
Poultry
Roast chicken Grill 2 2 200 85/90 200 85/90
Scones Fan oven 3/5 1/3 190 20/22 180 20
Bread Fan oven 4 3 180 25/30 180 25/30
Pastres
Biscuits Fan oven 3/5 1/3 200 15 200 14
S onge cake Fan oven 4 3 150 50 150 45
Small cake Fan oven 4 3 160 25 150 35
Cakes
A le- ie Fan oven 4 3 190 45 170 43
ven cooking chart (upper oven)
ven mod. 88 ven mod. 72
Function Level °C Minutes °C Minutes
mod. 88
mod. 72
Toast Grill 2 2 260 3 260 3
Fillet of beef Grill 2 2 260 6 + 6 260 6 + 6
The values shown (tem eratures and cooking times) are a roximate and may vary de ending on the
ty e of meat and its thickness.
DESCRIPTIONS OF ACCESSORIES
10
front part
Oven accessories
A = wire shelves B = Drip dray (optional D = Grill pan set
AB C
N TE: Install the grids, by lacing them on the horizontal slides inside
the oven wall.
The raised art of the grid must be in face of the oven rear
wall (fig. 4).
fig. 4
Semi-automatic operation (end cooking)
Push key 3 and set end cooking with key 5, symbols AUTO and lights u .
Set now thermostat knob on required tem erature and function knob on required kind of cooking.
When set hour is reached, symbol switches off  AUTO symbol blinks and alarm sounds.
Automatic operation (postponed cooking)
At first, its necessary to rogram cooking length (key 2).
Symbols AUTO and light u .
Then, you have to rogram time for cooking end. (key 3).
symbol switches off as reviously described.
Set thermostat knob on required kind of cooking.
Symbol lights u again when cooking starts.
When time of cooking has ex ired symbol switches off and symbol AUTO flashes.
Then alarm sounds.
Acoustic signal / Alarm
The acoustic signal sounds at the end of a s ecific rogramming and it stays on for about 2 minutes.
If you need to sto it before this eriod of time, you have to ush one of the functions buttons.
Program beginning and check
Programme starts in about 4 seconds from time indicated.
It is ossible to check time remaining by ushing button.
Correction or erasure of set program
The rogram can be corrected in at any time by ushing rogramming button before and after keys
Nr. 4 or 5.
The erasure of a rogramme can be done correcting set time and bringing it to 0,00 value.
By deleting time of working, you automatically delete the end of working and vice versa.
Oven automatically sto s and auto symbol blinks time cannot be corrected when automatic rogram
is on.
DIGITAL PR GRAMMING
If the oven fitted with this accessory (see ict. 1 at the end of this handbook) it has the following
functions:
Clock (you can set it with 2 and 3 keys)
Minute-counter (you can set it with key 1)
Cooking time (you can set it with key 2)
Cooking end (you can set it with key 3)
Time regulation: back (you can set it with key 4)
Time regulation: forward you can set it with key 5).
Digital dis lay D indicates hour, cooking end and cooking length times.
Time setting
After electric connection or after a current leakage, the dis lay shows the following at the same time:
AUTO and 0,00.
Press and release together the keys 2 and 3 within 4 seconds, roceed with the setting of the exact
hour, ushing 4 and 5 keys. At the end of the setting no symbols are on.
Minute-counter
Push key 1 and select cooking time through keys 4 or 5 symbol lights u . At the end of time set,
alarm switches on and symbol, blinks. After having switching off the alarm, this symbol disa ears.
Semi-automatic operation (cooking length)
Push key 2 and set cooking length time with key 5, symbols AUTO and lights u .
Set the thermostat knob on required tem erature and function
knob on required kind of cooking.
When the set time has ex ired, symbol switches off, AUTO symbol blinks and alarm sounds.
11
DIGITAL PROGRAMMING (fig. 5).
Features
24 hours clock with automatic rogramme and minutes counter.
Functions
Cooking time, cooking end time, manual osition, clock, minutes counter, times to be set u to 23
hours 59 minutes.
Display
4-figures, 7-segments di lay for cooking times and time of day.
Cooking time and manual function = sauce an symbol
Automatic function = AUTO
Minutes counter = bell symbol
The symbols light u when the corres onding functions are selected.
Setting
To set, ress and release the desired function, and within 5 seconds set the time with + and - buttons.
Tasto + e -
+ and - buttons.
The + and - buttons increase or decrease the time at a s eed de ending on how long the button is
ressed.
Setting the time
Press any two buttons (cooking time, end time, minutes counter) at the same time, and + or - button
to set the desired time. This deletes any reviously set rogramme. The contacts are switched off and
the AUTO symbol flashes.
Manual use
By ressing the manual button the relay contacts switch on, the AUTO symbol switches off and the
sauce an symbol lights u .
Manual o eration can only be enabled after the automatic rogramme is over or it has been cancelled.
Automatic use
Press the cooking time or end time button to switch automatically from the manual to the automatic
function.
Semi-automatic use with cooking time setting
Press the cooking time button and set the desired time with + or -.
The AUTO and cooking time symbols light u continuously.
The relay switches on immediately. When the cooking end time corres onds to the time of day, the
relay and cooking time symbol switch off, the sound signal rings and the AUTO symbol flashes.
Semi-automatic use with end time setting
Press the end time button. The time of day a ears on the dis lay. Set the cooking end time with +
button. The AUTO and cooking time symbols light u continuously.
The relay contacts switch on. When the cooking end time corres onds to the time of day, the relay
and the cooking time symbol switch off. When the cooking time is u , the AUTO symbol flashes, the
sound signal rings and both the relay and the cooking time button switch off.
Automatic use with cooking time and end time setting
Press the cooking time button and select the length of the cooking time with + or - button.
The AUTO and cooking time symbols light u continuously. The relay switches on.
By ressing the cooking end time button the next cooking end time a ears on the dis lay.
Set the cooking end time with + button. The relay and the cooking time symbol switch off.
The symbol lights u again when the time of day corres onds to the cooking start time. When the
cooking time is u , the AUTO symbol flashes, the sound signal rings, the cooking time symbol and
the relay switch off.
HOROLOGE LED (fig 6)
12
Minutes counter
Cooking time
End time
Manual
Subtract time
Add time
Minutes counter
Press the minutes counter button and set the cooking time with + or - button.
The bell symbol lights u when the minutes counter is o erating. When the set time is u , the sound
signal rings and the bell symbol switches off.
Sound signal
The sound signal starts at the end of a rogramme or of the minutes counter function and it lasts for
15 minutes.
To sto it, ush any one of the functions buttons.
Start programme and check
The rogramme starts 4 seconds after it has been set.
The rogramme can be checked at any time by ressing the corres onding button.
Setting error
A setting error is made if the time of day on the clock falls within the cooking start and end times.
To correct the setting error, change the cooking time or cooking end time. The relays switch off when
a setting error is made.
Cancelling a setting
To cancel a setting, ress the cooking time button and then ress the - button untill 00 00 a ears
on the dis lay.
A set rogramme will automatically cancel on com letion.
13
A
U
T
fig. 6
fig. 5
12345
Use of the turnspit .
- Thread the chicken or the cubes of meat for
roasting on below s it L, ensuring that it is
gri ed safely between the two forks F (fig. 7).
- Put the s it on su ort G, .
- Put su ort G com letely into the oven.
- Fit the end of the s it into the motor M at the
back of the oven
- Place the oven tray with a little water on the
lowest shelf of the oven.
- Close the oven door.
- When removing the s it, wear oven mitts and
ull out su ort G.
The turns it, marked with the symbol is an o tional available only in some models. Its symbol is
next to the oven function symbols, for exam le when selecting the function grill the turns it will
automatically o erate too.
14
TURNSPIT (optional)
F
L
G
M
fig. 7
Wait until the a liance has cooled down before attem ting to clean it.
Disconnect it from the ower su ly, either by ulling the lug out or switching off the ower su ly
at the mains.
N TE: Do not use steam cleaners to clean the oven.
Clean enamelled, chromed or ainted arts with warm water and soa , or non-corrosive liquid detergent.
Clean stainless steel arts using methylated s irit of a suitable commercially roduced solution.
Clean aluminium anels or edges with cotton wool or with a cloth soaked in vaseline or a seed-based
oil. Clean and then go over it with methylated s irit.
Never use abrasives, corrosive detergents, bleaches or acids for cleaning the oven.
Do not leave corrosive or acidic substances (lemon juice, vinegar, etc.) on enamelled, ainted or
stainless steel arts.
Removal of oven door
To make cleaning easier, remove the oven door as follows:
1) o en the door halfway and remove the glass sto ers A, the rofile B (as shown in fig. 8) and the
glass C, as shown in fig. 8A.
2) o en the oven door com letely.
3 ) fli the hinge hooks "A" outwards (see fig. 8B).
4) shut the oven door slowly until it reaches hooks "A", making sure these are locked into slots "B"
of the oven door, as shown in fig. 8C.
5) Using both hands, ush the oven door lightly inwards, toenable the door hinges "C" to come away
from the slots "D" (see fig. 8D) and ull the door towards you until it is released from the oven.
After cleaning it, re osition it correctly following the aboveste s in the reverse order and fli ing hooks
"A" inwardsbefore you shut the oven door (fig. 8E).
B
AA
A
B
C
D
A
CLEANING AND MAINTENANCE
15
Fig 8A
Fig 8
Fig. 8D
Fig. 8C
Fig. 8B
A
A
Fig. 8E
C
ven light (fig. 9)
The oven bulb is a s ecial kind which is resistant to high tem eratures.
Re lace it as follows: disconnect the oven from the ower su ly by
removing the lug or switching off the ower su ly at the mains; remove
the rotective glass (A) and re lace the burnt-out bulb with one of the
same ty e. Re lace the rotective glass.
Fig. 9
T300°C
A
CAUTI N:
Do not use rough or abrasive materials or shar metal scra ers to clean the glass doors of the oven
since they may scratch the surface and cause the glass to break.
Important: if the oven is no longer to be used, it should be made ino erable by cutting the
ower su ly cable, after un lugging it from the ower su ly. Disused a liances can be
a safety risk as children often lay with them. For this reason it is advisable to make the
oven safe.
Bk Br
R
Bl
Bl
R
Bl
Bl
Gy
Bl
Bl
Bl
Bl
G
Gy
Br
Br
Br
V
Br
Br
Bk
Bl
Gy Bl
Br
Br
Br
Br
Bl
Br
Bl
Bl
Br
Bl
Bl
Br
Bl
G
Gy
V
W
Br
Bl
Bl
Bl
Bl
Br Bl
Bl
W
BlBl
G
V
Bk
R
Bl
W
Bl
Black=Bk
Brown=Br
Red=R
Green=G
Blue=Bl
Grey=Gy
White=W
Violet=V
Oven electrical diagram
Warming
Light
Warming
Light
Warming
Light
Warming
Light
Grill element
1300W
Upper
element
800W
Oven Selector
Switch
Oven Selector Switch
Oven
Thermostat
Oven
Thermostat
Lower
element
Cooling
Fan
Lower element
Convectional
Fan Motor
Grill
element
Upper
element
Ring Element
Overtime Thermo
switch
Overtime Thermo
switch
Thermo
switch
Thermo
switch
Lamp
Lamp
Bk
Br
R
Bl R
Bl
Bl
Gy
Bl
Bl
Bl
Bl
G
Gy
Br
Br
Br
V
Br
Br
Bk
Bl
G
y
Bl
Br
Br
Br
Br
Bl
Br
Bl
Bl
Br
Bl
Bl
Br
Bl
G
Gy
V
W
Br
Bl
Bl
Bl
Bl
Bl
Br Bl
Bl
W
BlBl
G
V
Bk
R
Bl
W
Bl
Black=Bk
Brown=Br
Red=R
Green=G
Blue=Bl
Grey=Gy
White=W
Violet=V
Oven electrical diagram (grill energy regulator)
Warming
Light
Warming
Light
Warming
Light
Warming
Light
Grill element
1300W
Upper
element
800W
Oven Selector
Switch
Oven Selector Switch
Oven
Thermostat
Oven
Thermostat
Lower
element
Cooling
Fan
Lower element
Convectional
Fan Motor
Grill
element
Upper
element
Ring Element
Overtime Thermo
switch
Overtime Thermo
switch
Thermo
switch
Thermo
switch
Lamp
Lamp
Grill energy
regulator
This a liance is marked according to the Euro eandirective
2002/96/EC on Waste Electricaland Electronic Equi ment (WEEE).By
ensuring this roduct is dis osed of correctly,you will hel revent
otential negativeconsequences for the environment and humanhealth,
which could otherwise be caused byina ro riate waste handling of
this roduct.
The symbol on the roduct, or on thedocuments accom anying
the roduct, indicatesthat this a liance may not be treated ashousehold
waste. Instead it shall be handedover to the a licable collection oint
for therecycling of electrical and electronic equi ment.Dis osal must
be carried out in accordance withlocal environmental regulations for
wastedis osal.For more detailed information about treatment,recovery
and recycling of this roduct, leasecontact your local city office, your
householdwaste dis osal service or the sho where you urchased
the roduct.
Ti olitografia Montagnani - Modena (Italy) - Cod. 537237 1108
0051

Other manuals for FDU700X

1

Other Fagor Oven manuals

Fagor AE-061 User manual

Fagor

Fagor AE-061 User manual

Fagor OVEN User manual

Fagor

Fagor OVEN User manual

Fagor OVEN User manual

Fagor

Fagor OVEN User manual

Fagor 8H-185BB User manual

Fagor

Fagor 8H-185BB User manual

Fagor 6H-750A User manual

Fagor

Fagor 6H-750A User manual

Fagor CX-5 User guide

Fagor

Fagor CX-5 User guide

Fagor 5HA-196 X - REV 7-10 Installation guide

Fagor

Fagor 5HA-196 X - REV 7-10 Installation guide

Fagor CX-4 User manual

Fagor

Fagor CX-4 User manual

Fagor HM-480X USING Installation and operating instructions

Fagor

Fagor HM-480X USING Installation and operating instructions

Fagor 8H-115BB User manual

Fagor

Fagor 8H-115BB User manual

Fagor IO-CBI-2020 User manual

Fagor

Fagor IO-CBI-2020 User manual

Fagor Multifunction Combi Oven User manual

Fagor

Fagor Multifunction Combi Oven User manual

Fagor 6H-750NEPOCA User manual

Fagor

Fagor 6H-750NEPOCA User manual

Fagor 8H-755BB User manual

Fagor

Fagor 8H-755BB User manual

Fagor 5H-741 Series User manual

Fagor

Fagor 5H-741 Series User manual

Fagor 5HA-196 X - REV 7-10 Parts list manual

Fagor

Fagor 5HA-196 X - REV 7-10 Parts list manual

Fagor MH-26 User manual

Fagor

Fagor MH-26 User manual

Fagor 8H-195TCB User manual

Fagor

Fagor 8H-195TCB User manual

Fagor FSO 900X User manual

Fagor

Fagor FSO 900X User manual

Fagor FBI981x User manual

Fagor

Fagor FBI981x User manual

Fagor MH-21N User manual

Fagor

Fagor MH-21N User manual

Fagor 12223.3eEHiTsDpsW User manual

Fagor

Fagor 12223.3eEHiTsDpsW User manual

Fagor 8H-185AB User manual

Fagor

Fagor 8H-185AB User manual

Fagor MH-2600MF User manual

Fagor

Fagor MH-2600MF User manual

Popular Oven manuals by other brands

Sharp EO19K Operation manual

Sharp

Sharp EO19K Operation manual

Zanussi ZBF 560 Instruction booklet

Zanussi

Zanussi ZBF 560 Instruction booklet

Amana ACO27 use and care manual

Amana

Amana ACO27 use and care manual

Amana EvenAir Plus owner's manual

Amana

Amana EvenAir Plus owner's manual

Franke CR 982 M user manual

Franke

Franke CR 982 M user manual

DeLonghi EO-1200.1 Instructions for use

DeLonghi

DeLonghi EO-1200.1 Instructions for use

Avanti POA8K3S instruction manual

Avanti

Avanti POA8K3S instruction manual

Indesit FIE 76 KC.A IX GB operating instructions

Indesit

Indesit FIE 76 KC.A IX GB operating instructions

Toastmaster XO-1MSS Specification sheet

Toastmaster

Toastmaster XO-1MSS Specification sheet

Lincat LYNX 400 LCO Installation, operating and service instructions

Lincat

Lincat LYNX 400 LCO Installation, operating and service instructions

Bertazzoni F6M9PX Installation, use & care manual

Bertazzoni

Bertazzoni F6M9PX Installation, use & care manual

eka KF 1010 EV UD Use and instruction manual

eka

eka KF 1010 EV UD Use and instruction manual

Frigidaire FGEW3065PF use & care

Frigidaire

Frigidaire FGEW3065PF use & care

LG LWS3081ST instruction manual

LG

LG LWS3081ST instruction manual

Whirlpool AXMT 6332/IX/1 Instructions for use

Whirlpool

Whirlpool AXMT 6332/IX/1 Instructions for use

Kaiser EH Series user manual

Kaiser

Kaiser EH Series user manual

Lincat CIBO quick start guide

Lincat

Lincat CIBO quick start guide

Zanussi ZOP38903XD user manual

Zanussi

Zanussi ZOP38903XD user manual

manuals.online logo
manuals.online logoBrands
  • About & Mission
  • Contact us
  • Privacy Policy
  • Terms and Conditions

Copyright 2025 Manuals.Online. All Rights Reserved.