ARIANNE 4ARIANNE 4
1
*
*
2
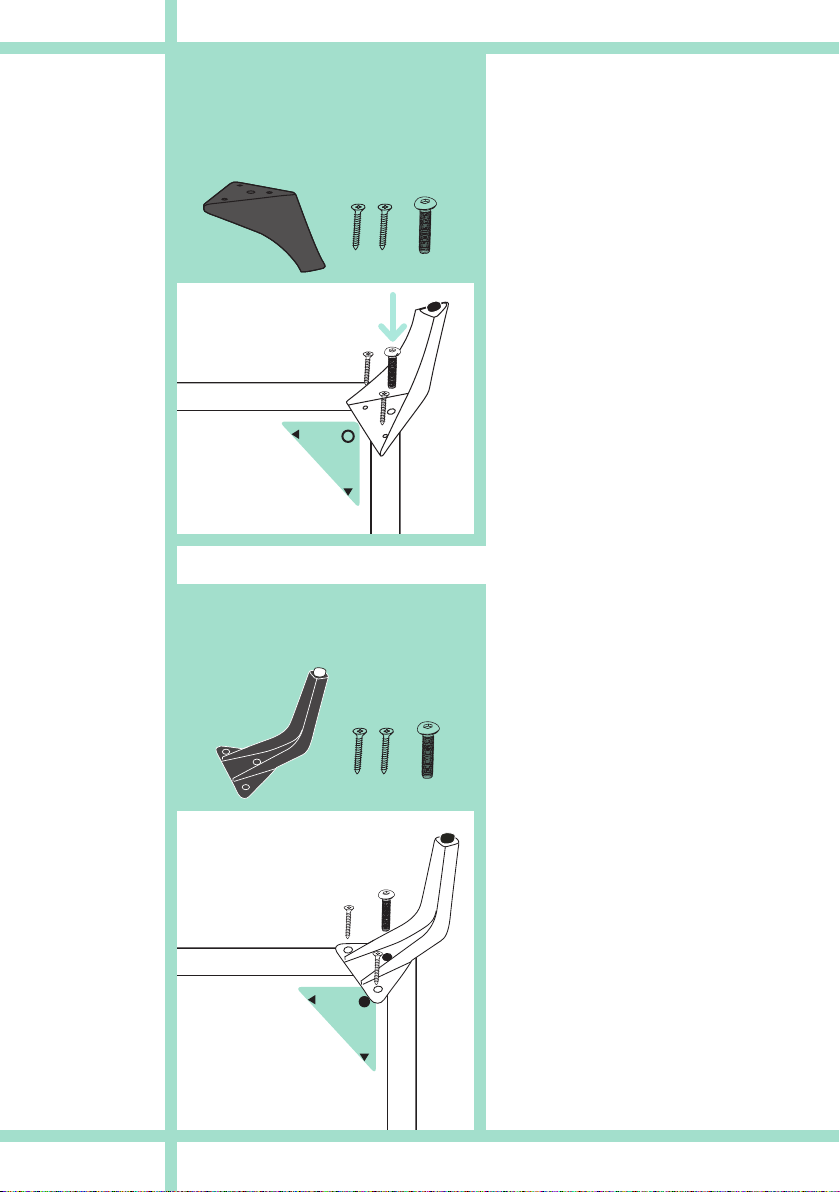
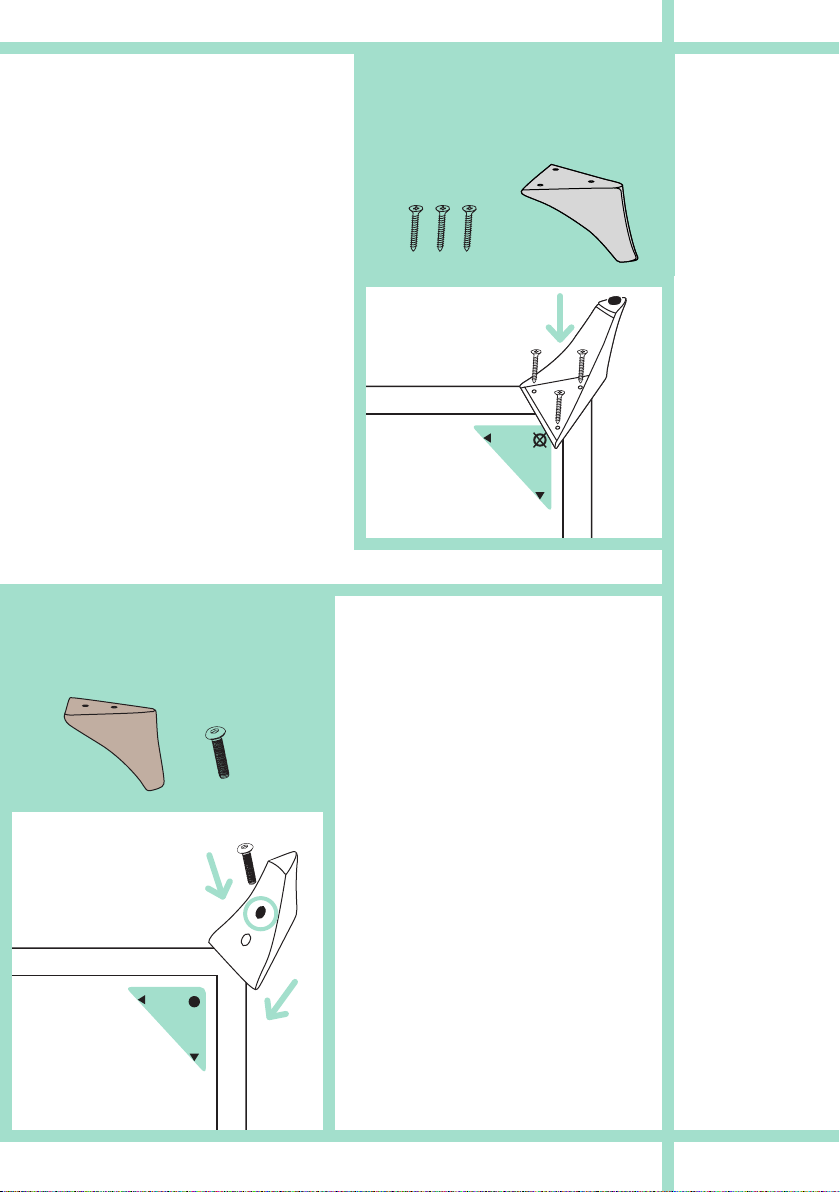
Arianne Plus
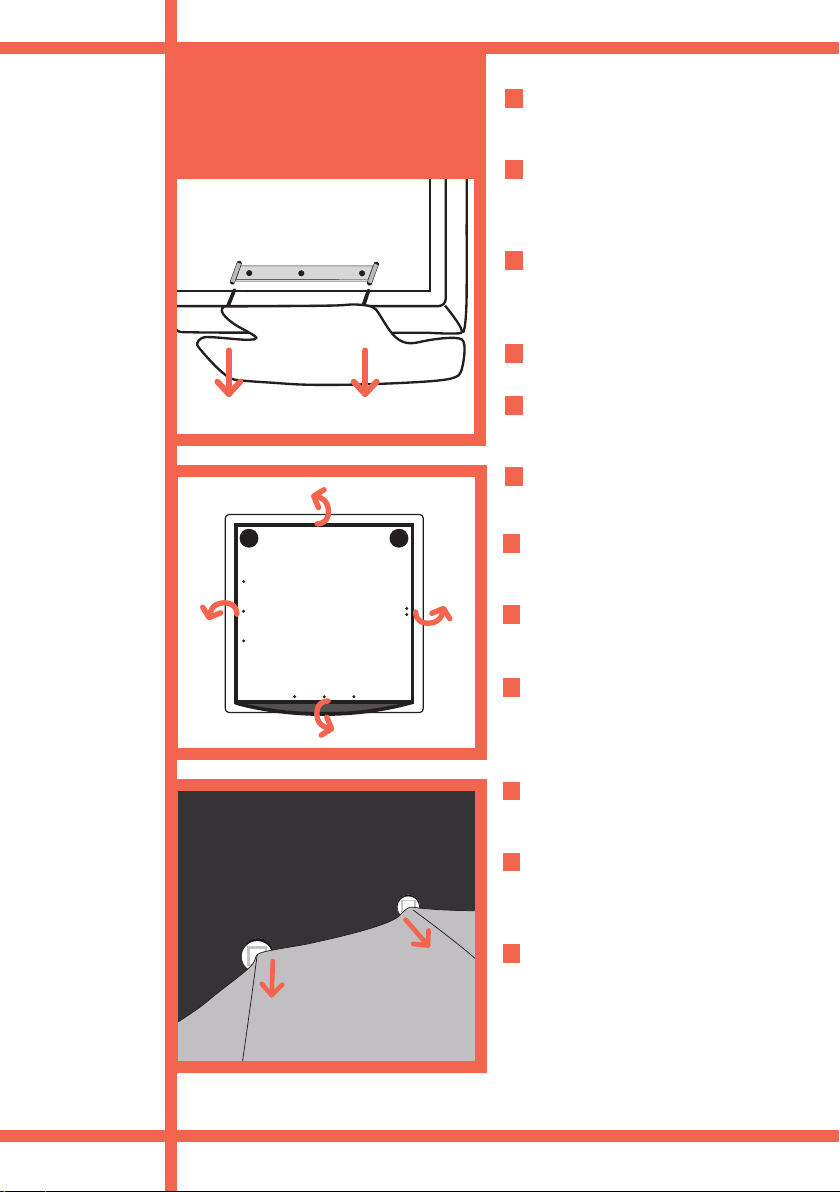
1. Vissez la pièce (*) à l’arrière du
canapé, en serrant bien les vis.
2. Insérez les pivots du dossier dans
la pièce que vous venez de viser.
Dans le cas de l’accoudoir, on ferait
pareil, placez la pièce sur le côté
du module et insérez les pivots de
l’accoudoir dans la pièce (*).
INSTRUCCIÓN MONTAJE BRAZO Y RESPALDO ARIANNE PLUS / ARIANNE PLUS BACK AND ARM ASSEMBLY /
INSTRUCTIONS DE MONTAGE ACCOUDOIR ET DOSSIER ARIANNE PLUS / ANLEITUNG AUFBAU VON ARM UND
RÜCKENLEHNE ARIANNE PLUS
1. Atornillamos la pieza (*) en el culo
del sofá, apretando bien los tornillos.
2.Introducimos los pivotes del
respaldo en la pieza que hemos
atornillado.
En el caso del brazo haríamos lo
mismo, colocamos la pieza en el
lateral del módulo e introducimos
los pivotes del brazo en la pieza (*).
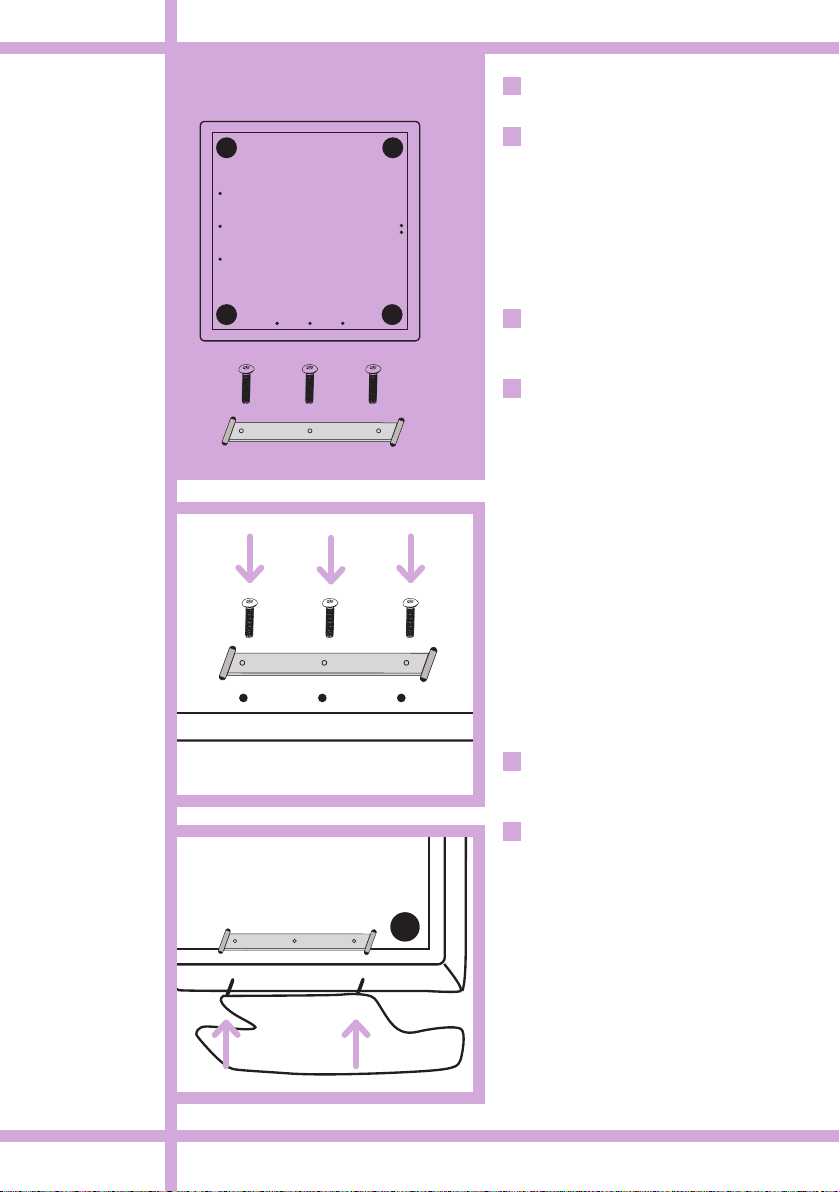
1. Screw the metal plate (*) to the
bottom of the sofa, tightening the
screws.
2. Insert the back support pivots on
the holes of the metal plate.
In the case of the arm we would do it
the same way, fixing the metal plate
(*) on the module side and inserting
the arm pivots on it.
1. Wir schrauben den Verbinder in
der Unterseite des Sofas an, die
Schrauben mit kraft befestigen.
2. Die Rückenlehne wird mit den 3
Schrauben befestigt.
Bei den Armlehnen machen wir
dasselbe, wir platzieren sie an der
Seite des Modules und fügen die
Verbinder der Armlehne ein (*).
6x35