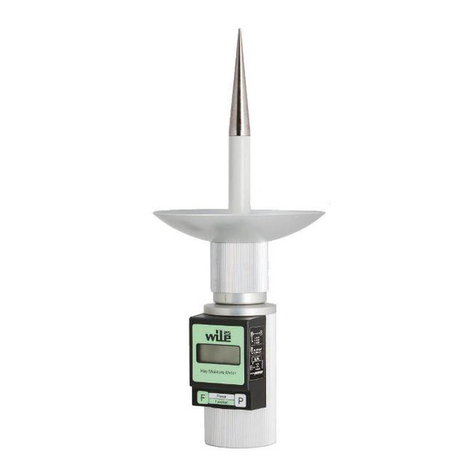
Farmcomp Wile 27 User manual

Moisture meter for hay, straw and silage
Kosteusmittari paalatulle heinälle, oljelle ja
säilörehulle
Fuktighetsmätare för balat hö, halm och
ensilage
Влагомер тюкованного сена,соломы и
силоса
EN OPERATING INSTRUCTIONS
FI KÄYTTÖOHJEET
SE BRUKSANVISNING
RU РУКОВОДСТВО ПО ЭКСПЛУАТАЦИИ

EN
2
OPERATING INSTRUCTIONS FOR WILE 27
MOISTURE METER (EN)
Included in this pack
–Wile 27 moisture meter
–User guide
9 V 6F22 battery - Needs connecting
–
QUICK INSTRUCTION
Measurement
1. Push the probe in the bale
2. Press - ON
3. Press - MENU to select the scale
4. The meter shows run.
5. The moisture % is shown
6. The meter switches off automatically
Choosing the scale
Scales for hay and silage:
-1- for large round bales
-2- for large square bales
-3- for bales with a density
Select density between 80 and 250 kg/m3
Scales for straw:
-4- for large round bales
-5- for large square bales
-6- for bales with a density
Select density between 80 and 250 kg/m3
When measuring small bales with scales
-3- ja -6- , you can generally use the density
setting 180 kg/m3.
For defining and setting the bale density in the
meter, please refer to 2.6.
Read all the instructions carefully before
using your Wile hay moisture meter

EN
3
1. GENERAL
The Wile 27 measures the moisture in baled dry
hay, straw (wheat and barley straw), haylage
and silage. You can get the dry matter content
by subtracting the moisture percentage from
100. Example: The meter will show the moisture
content as 30%, so the dry matter content is
70%
The battery has been placed in the compart-
ment, that is located under the handle, it needs
to be connected.
2. MEASUREMENT
2.1. Preparation
When the meter is not used for a long time:
- Replace battery (See 5. "Battery")
- Read this manual
- Check you meter (See 4. "Control, care and
maintenance")
2.2 Bales and measurements
In big bales the chances of varying moisture is
greater so always make 5 readings per bale to
get an average.
In small traditional bales it is normally enough to
do one measurement.
Always double check any high readings, when
you deal with dry hay or straw.
If you find moist spots, immediately take action
to prevent further damage.
Please note that spoiling hay may heat up
dangerously.
2.3. Available scales
Scales for hay and silage
No 1: Large round bale - Over 290 kg/m3
No 2: Large square bale - Over 330 kg/m3
No 3: Bales with density - 80 to 250 kg/m3
Scales for straw
No 4: Large round bale - Over 200 kg/m3

EN
4
No 5: Large square bale - Over 240 kg/m3
No 6: Bales with density - 80 to 250 kg/m3
When measuring small bales with scales
-3- ja -6- , you can normally use the density
setting 180 kg/m3.
The most accurate results are obtained when
you use the real density of the bale.
The meter also has scale number -0-, this is
used for service purposes.
2.4. Selection of the scale
2.4.1. Checking the current scale
Turn ON-The number of the current scale will
appear on the display, e.g. -1-.
2.4.2. Choosing the scale
Turn ON-. Wait until you can see the scale
number on the display, e.g. -1-.
Change it by pressing MENU.
When you have the desired number, wait a
moment, then run is in the display, the meter
will turn itself off and is ready for measurement.
2.5 Measurement
Turn ON. The display will show all available
characters to allow you check that the display is
working properly.
After this you will see the number of the scale
that is in use, e.g. -1-.
When using the scale -3- or -6- you will see the
current bale density setting, for example 120
kg/m³.
You can change this setting when necessary
(please see. 2.6).

EN
5
After this the measurement starts automatically.
First run will appear on the display and after
this the result is shown as weight per cent, for
example 28,8.
After the measurement the meter turns off
automatically and it is now ready for the next
measurement.
2.6 How to determine the bale density and
set it up in the meter
You need to set the bale density when you use
the scale -3- or -6-.
To define the density, you need to know the
weight and volume of the bale. Divide the
weight of the bale (kg) with its volume (m3), the
result is the bale density in kg/m3
Rectangular bales
Length x Height x Width = Volume
Weight ÷ Volume = Density kg/m3.
Large round bales
Distance across the bale centre x 2 ÷ 1.273
x hight= Volume
Weight ÷ Volume = Density kg/m3.
Set the density in the meter as follows:
Turn ON- (Only Scale 3 or 6)
After this you can see the current density value
setting, for example 120 kg/m3
You can adjust the density value while the
density value is shown on the display. Push the
button MENU once to add 10 kg/m3to the
value. (250 is the maximum and then it reverts
to the beginning)

EN
6
3. PROCESSING THE RESULTS
3.1. Average calculation
The meter can store and calculate an average
value of 99 measurements. After a measure-
ment you can add the result to the average
calculation.
3.1.1. Adding a result to the average
calculation
When the result is shown on the display, Press
MENU. Now Awill be on the display, the meter
has included the latest result to the average.
Then the average calculations E.g. A05 and
28,8 are alternating on the display.
It means the following:
A05 –The avg. is based on 5 measures
28,8 -The avg. moisture % of the results.
If you don't want to include the results just wait
and the meter will automatically switch off. Then
just start again.
Before using the average calculation, always
check that the average memory is empty.
Delete if necessary.
3.1.2. Delete the average memory
Method 1. When the average value is
displayed, press MENU and keep it pressed
until you see 0and after that A00 on the
display.
Method 2. Press MENU and keep it
depressed then press ON. When you see A on
the display, release the MENU button. If you
now see an average value, you can erase it by
keeping the button MENU depressed until you
see on the display 0 and after that A00.

EN
7
Please note! It is a good practice to erase
the average memory after completing a
measuring session. This prevents any old
values affecting later measurements.
The avg. memory blinks If it is full.
3.2. Adjusting the calibration
If you have had a sample tested in an oven and
the moisture is different to what the Wile 27
reads. Then you can adjust your Wile 27 to
match the oven test, and this adjustment can
remain in the settings to change future
measurements.
The calibration can be adjusted +/- 10 moisture
per cent
3.2.1. If you want to add the result
Press MENU twice when the result is on the
display. Three bars will appear on the top of the
display and after that the moisture reading. Now
add 0,1 percent to the result with each press of
MENU.
3.2.2. If you want to deduct from the result
Press MENU three times when the result is on
the display. Three bars will appear on the
bottom of the display and after that the moisture
reading. Now deduct 0,1 percent from the result
with each press of MENU.
Please note! The adjustment of the calibration
is specific for each of the 1 to 6 scales.
3.2.3. Adjustment of the calibration
An adjustment to the calibration will appear on
the display after the next run.
E.g. "-.5". - 0,5 per cent units have been
deducted from the result before displaying it.

EN
8
Please note: the proceeding zero is not
displayed.
E.g. "1.5" - 1.5 per cent units have been added
to the result before displaying it.
3.2.4. Removing the adjustment
Press MENU and keep it depressed until the
reading changes Now the adjustment is
removed.
3.3. Result out of range
HI is displayed if the result is over the upper
limit of the measurement range
LO is displayed if the result is below the lower
limit of the measurement range
4. CONTROL, CARE AND MAINTENANCE
All Wile 27 moisture meters are calibrated prior
to shipping and will not need any servicing,
except changing the battery.
To check the calibration:
Select the scale -0-. Keep the probe in free air
and read the result. The reading should be 2000
+/-5. Please note that readings over 1999 will
be displayed without first digit, i.e.,
2003 displays as "003".
If the value deviates from this, please check
that the tip of the probe is clean. If cleaning of
the probe tip does not help, there may be a
problem with the meter or the calibration. In this
case please contact your Wile dealer or Farm-
comp.
Store the meter in a dry place, preferably at
room temperature. Do not drop the meter.
Remove the battery for longer storage.
If there is a fault in the meter, please contact
you local Wile dealer or Farmcomp. If you
suspect a fault in the meter, always check the
battery first.

EN
9
5. BATTERY
The meter works with a 9 volt 6F22 battery or
an alkaline battery of the same format.A battery
is included in the delivery.
Remove the battery if the meter is not used for
an long period of time. Insert a new battery prior
to each new season.
LOBAT-sign at the upper left corner of the
display indicates that the battery should be
replaced
Replace the battery as soon as possible.
To replace the battery, open the lid of the bat-
tery compartment, under the handle. Take out
the battery and disconnect it from the connector
and re-connect the new battery and close the
lid.
If the battery is nearly empty, the LOBAT sign
may not be seen any more.
Always first check the battery if you suspect any
problems with the operation of the meter.
Please note that the batteries discharge them-
selves slowly even if the meter is not used.
6. TECHNICAL DATA
Wile 27 can measure the moisture of baled hay,
straw, haylage and silage
The meter shows the water content of the
sample in percentage of weight. The definition
of moisture is based on measuring the loss of a
high frequency alternating current signal
(capacitance) in the sample.
The repeatability of the result is +/- 2,0 percent
of moisture or better.
Wile 27 meter is calibrated to give uniform
results with the official methods that are used
for defining the moisture content in hay and
straw.
The calibrations are defined with samples that
represent the most common available qualities
of hay and silage.
The straw scales are defined for the straw of
wheat and barley

EN
10
Measurement ranges
Baled straw: approx. 10-50%
Baled hay and silage: approx. 10-73%.
Bale density range
>80 kg/m3
Features
- Automatic compensation of the temperature
difference of the meter and the environment
- Average calculation of up to 99 measurements
- Adjust calibration to match the meter reading
with a reference result.
7. SERVICE, WARRANTY AND STORAGE
This product carries a one (1) year
manufacturer warranty for materials and
workmanship. The warranty also covers
possible overload situations caused by thunder.
The warranty is valid for one (1) year from the
date of purchase on the receipt.
To claim the warranty, the customer should
return the defect product to the Manufacturer,
reseller or the nearest Wile Service Partner at
customer's own expense. The warranty claim
must be accompanied by the description of the
fault, copy of the sales receipt and customer's
contact information. The manufacturer / Wile
Service Partner will repair or replace the defect
product and return it as soon as possible.
The warranty does not cover any damages that
are caused by incorrect or careless use of the
product, installation that does not correspond to
the provided instructions and other damages
which may arise due to causes beyond the
control of the manufacture.
Farmcomp does not accept any responsibility
for any direct, indirect or consequential
damages that are caused by the use of the
product or the fact that the product could not be
used. The liability of Farmcomp is limited to the
price of the product in maximum.
IMPORTANT: Do not open the device! Do
not try to repair the device yourself! The
above mentioned actions are strictly
forbidden! Only the manufacturer and
authorized service partners have the right to
repair the device.

FI
11
KÄYTTÖOHJE WILE 27
KOSTEUSMITTARILLE
Toimitussisältö
-Wile 27 -kosteusmittari
-Käyttöohje
-Paristo 9 V 6F22
PIKAOHJE
Mittaus
1.Työnnä anturi paaliin
2.Käynnistä mittari ON-painikkeella.
3.Valitse MENU-painikkeella sopiva asteikko
4.Mittauksen aikana näytössä näkyy run
5.sen jälkeen mittaustulos
kosteusprosentteina.
6. Mittari sammuu itsestään, minkä
jälkeen voit tehdä seuraavan mittauksen.
Asteikkovalinnat
Asteikot heinälle ja säilörehulle:
-1- Pyöröpaalit
-2- Suurkanttipaalit
-3- Paalit, joiden tiheys on 80–250 kg/m3, ja
tiheyden valinta.
Asteikot oljelle:
-4- Pyöröpaalit
-5- Suurkanttipaalit
-6- Paalit, joiden tiheys on 80–250 kg/m3, ja
tiheyden valinta.
Tavalliselle pienpaalille voit yleensä
käyttää asteikkoja -3- ja -6- asetuksella
180 kg/m3. Tiheyden määritys ja valinta
ks. kohta 2.6.
Tutustu tähän käyttöohjeeseen ennen
mittarin käyttöönottoa.
1. YLEISTÄ
Wile 27 mittaa kosteutta paalatusta
kuivasta heinästä, oljesta (vehnän ja

FI
12
ohran oljen), säilöheinästä ja säilörehusta.
Kuiva-ainepitoisuus saadaan
vähentämällä kosteusprosentti luvusta
100. Esimerkiksi jos kosteus on 30 %, on
kuiva-ainepitoisuus 70%.
Mittari on valmis käyttöön heti, kun olet
asentanut pariston kahvan alla olevaan
paristokoteloon.
2. MITTAAMINEN
2.1 Mittauksen valmistelu
Jos mittarin edellisestä käsittelykerrasta
on jo aikaa
- vaihda paristo (tarkemmin ks. kohta 5.
Paristo)
- lue käyttöohje kokonaan
- tarkasta mittarisi (tarkemmin ks. kohta 4.
Mittarin tarkastus)
2.2 Paalit ja mittaukset
Tee paalierästä aina useita mittauksia sen
eri puolilta. Huomaa, että heinän kosteus
voi vaihdella huomattavasti paalista toiseen ja
myös yhden paalin sisällä. Pienpaalissa riittää
yleensä yksi mittaus. Tee isossa paaleissa
enemmän mittauksia, noin viisi eri puolilta
paalia. Tekemällä mittauksia eri kohdista
varmistat, että mittaustulos edustaa
mahdollisimman hyvin koko erän
keskimääräistä laatua.
Kuivaa heinää ja olkea käsitellessä muista, että
jos yksikin kosteuslukema on liian korkea, tee
tarkistusmittaus samasta kohdasta. Jos lukema
on edelleen liian korkea, ryhdy tarvittaviin
kuivaustoimenpiteisiin. Kosteita kohtia sisältävä
heinä on kuivattava kuivurissa tai paalit on
avattava, jotta heinä ei pilaantuisi. Pilaantuva
heinä saattaa lämmetä vaarallisesti.
2.3 Käytössä olevat asteikot
Asteikot heinälle ja säilörehulle
Asteikko 1: Tyypillinen pyöröpaali (tiheys
yli 290 kg/m3)

FI
13
Asteikko 2: Tyypillinen suurkanttipaali
(tiheys yli 330 kg/m3)
Asteikko 3: Paalit, joiden tiheys 80–250
kg/m3, ja tiheyden valinta.
Asteikot oljelle
Asteikko 4: Tyypillinen pyöröpaali (tiheys
yli 200 kg/m3)
Asteikko 5: Tyypillinen suurkanttipaali
(tiheys yli 250 kg/m3)
Asteikko 6: Paalit, joiden tiheys 80–250
kg/m3, ja tiheyden valinta.
Pienpaaleille voi yleensä käyttää
asteikkoja -3- tai -6-
tiheysasetuksella 180 kg/m3. Näillä
asteikolla saat kuitenkin tarkimman
tuloksen, kun käytät paalin todellista
tiheyttä.
Mittarissa on lisäksi ”asteikko” -0- (ns.
perusasteikko), jota Wile-huolto käyttää
mittarin kalibrointiin.
2.4 Asteikon valinta
2.4.1 Asteikon numeron tarkastaminen
Käynnistä mittari painamalla ONpainiketta.
Odota, että näytölle tulee
käytössä olevan asteikon numero,
esimerkiksi -1-.
2.4.2 Asteikon numeron valinta
Käynnistä mittari painamalla ONpainiketta.
Odota, että näytölle tulee
käytössä olevan anturin numero,
esimerkiksi -1-. Kun numero on näkyvissä,
voit vaihtaa sen painelemalla MENUpainiketta.
Kun oikea numero on näytöllä,
odota hetki. Näytölle tulee käytössä oleva
tiheys, run -teksti ja hetken kuluttua
mittari sammuu. Nyt mittari on valmis
mittaukseen.

FI
14
2.5 Mittaaminen
Käynnistä mittari painamalla kerran
Onpainiketta. Näytölle tulee ensin
hetkeksikaikki käytössä olevat merkit. Mittarin
näyttö on ehjä ja käyttökelpoinen, jos kaikki
näytön segmentit tulevat näkyviin.
Seuraavaksi näytölle tulee käytössä
olevan asteikon numero, esimerkiksi -1-.
Asteikkoa -3- tai -6- käytettäessä näytölle tulee
seuraavaksi käytössä oleva paalin tiheys,
esimerkiksi 120 kg/m³.
Tarvittaessa voit muuttaa tiheyden
asetukset (ks. kohta 3.6).
Sitten mittaus käynnistyy. Ensin näytöllä
näkyy run ja sen jälkeen näytteen kosteus
painoprosentteina, esimerkiksi 28,8.
Mittauksen jälkeen mittari sammuu
automaattisesti ja on valmis seuraavaan
mittaukseen.
2.6 Paalin tiheyden määrittäminen ja
asettaminen mittariin
Paalin tiheys on asetettava mittariin kun
teet mittausta asteikoilla -3- tai -6-.
Tiheyden määrittämiseksi sinun on
tiedettävä paalin paino. Jaa paalin paino
(kg) sen tilavuudella (m3), tulos on paalin
tiheys kg/m3.
Kantti- ja pienpaalin tilavuus:
Mittaapaalin pituus, leveys ja korkeus metreinä.
Laske paalin tilavuus kertomalla nämä
keskenään.

FI
15
Pyöröpaalin tilavuus:
Mittaa paalin halkaisijan metreinä, kerro se
itsellään, jaa tulos luvulla 1.273, ja kerro tämä
paalin korkeudella.
Kun olet laskenut paalin tiheyden, aseta
tiheyslukema mittariisi. Se tapahtuu
seuraavasti: Käynnistä mittari painamalla
Onpainiketta. Odota, että näytölle tulee
Käytössä olevan asteikon numero, (jonka
on oltava joko -3- tai -6-). Sen jälkeen
näytölle tulee viimeksi käytetty
tiheyslukema, esimerkiksi 120 kg/m3
Tiheysarvon ollessa näkyvissä voit
jokaisella MENU- painikkeen
painalluksella lisätä tiheysarvoon 10
kg/m3. (lukeman 250 jälkeen listan selaus
alkaa alusta)
3. Tuloksen käsittely
3.1 Keskiarvon laskenta
Mittari osaa laskea usean mittauksen
keskiarvon. Kun olet suorittanut
mittauksen, voit tallentaa tuloksen
mukaan keskiarvoon, kun tulos on
näkyvillä näytöllä.
3.1.1. Mittaustuloksen laskeminen
mukaan keskiarvoon
Suorita mittaus normaalisti. Kun
mittaustulos näkyy näytöllä, paina kerran
MENU- painiketta. Nyt näyttöön tulee A ja
mittari laskee näytöllä näkyneen
mittaustuloksen mukaan keskiarvoon.
Laskenta on valmis, kun näytöllä
vuorottelevat esimerkiksi A05 ja 28,8.

FI
16
Esimerkin arvot tarkoittavat
- A05 –Tallennettujen tulosten
lukumäärä on 5
- 28,8 - näiden viiden mittaustuloksen
keskiarvo.
Jos et halua laskea tulosta mukaan
keskiarvoon, älä tee mitään mittauksen
jälkeen vaan odota, että mittari sammuu
itsestään ja on valmis uuteen
mittaukseen.
Ennen jokaisen mittauserän keskiarvon
laskemista varmista aina, että
keskiarvomuisti on tyhjä ja tyhjennä se
tarvittaessa.
3.1.2 Keskiarvomuistin tyhjennys
Tapa 1. Kun keskiarvotulos on näytössä,
poista tulos pitämällä MENU- painiketta
painettuna, kunnes näytöllä näkyy 0 ja
sitten A00.
Tapa 2. Paina alas MENU- painike ja pidä se
painettuna, kun käynnistät mittarin
Ppainikkeella. Kun näytölle tulee A, vapauta
MENU- painike. Jos näytölle nyt
tulee keskiarvolukema, voit poistaa sen
pitämällä MENU- painiketta painettuna,
kunnes näytöllä näkyy 0 ja sitten A00.
Huom! Tyhjennä keskiarvomuisti aina
lopuksi, jotta muistiin jäänyt keskiarvo ei
sotke seuraavan mittauserän keskiarvoa.
Keskiarvomuistiin mahtuu enintään 99
mittausarvoa. Jos keskiarvoon ei enää voi
lisätä uusia arvoja, keskiarvo alkaa
vilkkua.
3.2 Kalibroinnin säätäminen
Mittarin kalibrointia voi säätää

FI
17
referenssinäytteen avulla.
Jos tiedät uunikokeella määritetyn
kosteuden näytteelle, voit säätää mittarin
näyttämään tätä referenssiarvoa.
Kalibroinnin säätöalue on +/- 10
kosteusprosenttia.
3.2.1 Haluat lisätä kosteustulokseen
Kun näytöllä on tulos ja painat kaksi
kertaa MENU- painiketta, näyttöön tulee
kolme viivaa näytön yläreunaan ja sitten
kosteus. Nyt voit jokaisella MENUpainikkeen
painalluksella lisätä tulokseen 0,1 kosteus- %.
3.2.2. Haluat vähentää
kosteustuloksesta
Kun näytöllä on tulos ja painat kolme
kertaa MENU- painiketta, näytölle tulee
kolme viivaa näytön alareunaan ja
sitten kosteus. Nyt voit jokaisella
MENUpainikkeen
painalluksella vähentää
tuloksesta 0,1 prosenttiyksikköä.
Huom! Kalibroinnin säätö on
asteikkokohtainen
3.2.3 Kalibroinnin säädön näkyminen
mittarissa
Jos olet tehnyt kalibroinnin säädön, se
näkyy run- tekstin jälkeen näytöllä
(anturin tulee olla näytteessä). Näytössä
voi olla esimerkiksi ”-.5”. Tämä tarkoittaa,
että tulokseen on tehty 0,5
prosenttiyksikköä kosteutta vähentävä
korjaus. HUOM! Etunolla ei näy.
Näytössä voi olla esimerkiksi ”1.5”. Tämä
tarkoittaa, että tulokseen on tehty 1,5

FI
18
prosenttiyksikköä lisäävä korjaus.
3.2.4 Kalibroinnin säädön poisto
Kun kosteustulos on näytössä, poista
korjaus pitämällä MENU- painiketta
painettuna, kunnes lukema muuttuu
(korjaus on tällöin poistunut).
3.3 Poikkeava tulos
Jos tulos ylittää mittausalueen ylärajan,
näyttöön tulee HI.
Jos tulos alittaa mittausalueen alarajan,
näyttöön tulee LO.
4. Mittarin tarkastus ja hoito
Kaikki Wile 27 -mittarit on kalibroitu
valmistuksen yhteydessä, eivätkä ne
tarvitse määräaikaishuoltoa.
Kalibroinnin tarkastaminen: Käynnistä
mittari ja valitse -0- asteikko. Pidä anturin pää
vapaasti ilmassa. Lukeman pitäisi olla alueella
2000 +/-5, eli alueella 1995–005 (näytön suurin
kokonaan näkyvä lukema on 1999, joten sitä
seuraava arvo 2000 näkyy lukemana 000, esim.
lukema 003 tarkoittaa mittarin arvoa 2003). Jos
arvo poikkeaa tästä, tarkasta ensin, että anturin
kärki on puhdas. Jos anturin puhdistaminen ei
auta, mittarissa tai sen kalibroinnissa voi olla
vikaa. Ota silloin yhteyttä jälleenmyyjääsi tai
Farmcompiin. Voit puhdistaa mittarin
pyyhkimällä kuivalla tai kostealla kankaalla. Älä
käytä voimakkaita pesuaineita. Älä päästä
kosteutta mittarin sisään. Säilytä mittari
kuivassa paikassa,
mieluimmin huoneenlämmössä. Älä
pudota mittaria. Poista paristo pitkän
varastoinnin ajaksi.
Jos epäilet mittarissa olevan vikaa, ota
yhteyttä Wile-jälleemyyjääsi tai
Farmcompiin. Wile- mittareita kalibroivat

FI
19
ja korjaavat Farmcomp ja valtuutetut
Wilehuoltopartnerit.
Jos epäilet häiriötä laitteen
toiminnassa, tarkasta aina ensin paristo.
5. Paristo
Mittari toimii 9 voltin paristolla, joka on
tyyppiä 6F22 tai vastaava alkaliparisto.
Paristo kuuluu toimitukseen.
Poista paristo pitkäaikaisen säilytyksen
ajaksi. Vaihda mittariin uusi paristo
satokauden alussa.
LOBAT-merkki näytön vasemmassa
yläkulmassa kertoo, että paristo on
uusittava.
Pyri vaihtamaan paristo ensi tilassa.
Yleensä voit kuitenkin käyttää mittaria
paristosta riippuen vielä hetken aikaa.
Pariston vaihto: Avaa mittarin kahvassa
oleva paristokotelo. Ota paristo ulos ja
irrota se liittimestään. Kytke uusi paristo
liittimeen ja laita se paikalleen. Lopuksi
sulje kansi.
Jos paristo on lähes tyhjä, näytöllä näkyy
satunnaisia merkkejä ja LOBAT- teksti voi olla
sammunut.
Jos epäilet ongelmia laitteen toiminnassa,
tarkista aina ensimmäiseksi paristo.
Huomaa, että paristot purkautuvat hitaasti
itsekseen, vaikka mittaria ei
käytettäisikään.
6. Tekniset tiedot ja ominaisuudet
Wile 27- kosteusmittari mittaa paalatun
kuivan, esikuivatun ja tuoreen/säilötyn
heinän sekä oljen kosteutta.
Mittari näyttää näytteen vesipitoisuuden
painoprosentteina. Mittaus perustuu
mitattavan aineen vaihtovirtavastuksen
(kapasitanssin) mittaamiseen.
Mittaustuloksen toistettavuus on +/- 2,0
kosteusprosenttia tai parempi.
Wile 27-mittari on kalibroitu antamaan

FI
20
yhteneviä tuloksia heinien ja tuorerehun
kosteusmäärityksissä käytettyjen
virallisten menetelmien kanssa.
Asteikkojen laadinnassa käytetään
näytteitä, jotka edustavat kulloinkin
yleisimpiä heinäkasveja normaalitilassa.
Olkiasteikot on määritetty vehnän ja ohran
oljelle.
Kosteuden mittausalue
Paalatulla oljella noin 10-50%
paalatulla heinällä ja säilörehulla noin
10-73%.
Mitattavan paalin tiheys
>80 kg/m3
Ominaisuuksia
- automaattinen kompensointi mittarin
ja ympäristön lämpötilaerolle
- Keskiarvon laskenta 2- 99
mittaustuloksesta
- mahdollisuus säätää kalibrointia
vastaamaan uunikokeella määritettyä
kosteutta.
7. Takuu
Kaikilla Wile- tuotteilla on 12 kuukauden
takuu materiaaleille ja valmistukselle.
Takuu on voimassa 12 kuukautta laitteen
ostopäivästä. Asiakkaan tulee toimittaa
viallinen tuote valmistajalle,
jälleenmyyjälle tai lähimpään
Wilehuoltopisteeseen.
Takuuvaatimukseen
tulee liittää kuvaus viasta, asiakkaan
yhteystiedot sekä kopio ostokuitista, josta
ilmenee laitteen ostopäivämäärä.
Valmistaja korjaa viallisen tuotteen tai
vaihtaa sen uuteen tuotteeseen
mahdollisimman nopeasti. Valmistajan
takuuvastuu rajoittuu enimmillään tuotteen
ostohintaan. Valmistaja ei vastaa
vahingoista, jotka johtuvat tuotteen
Table of contents
Other Farmcomp Measuring Instrument manuals
Farmcomp
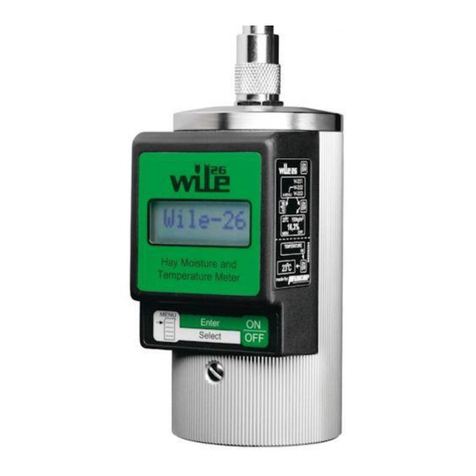
Farmcomp WILE-26 User manual

Farmcomp
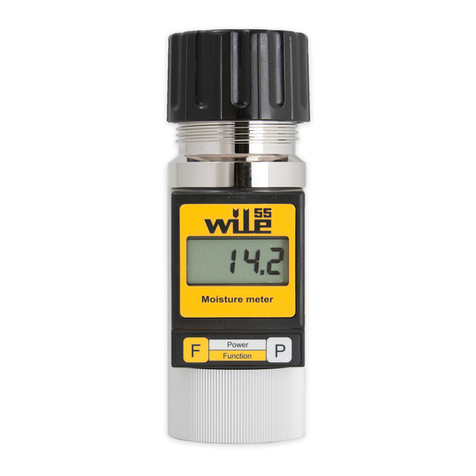
Farmcomp wile 55 User manual

Farmcomp
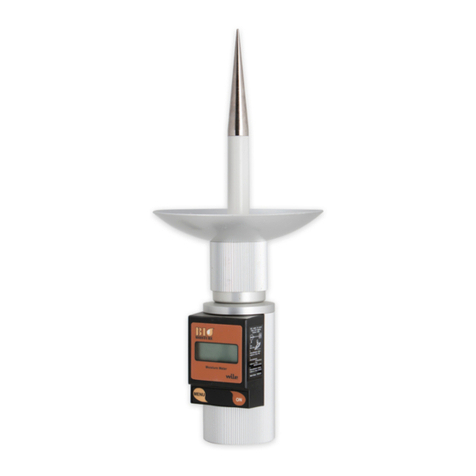
Farmcomp Wile BIO Moisture User manual

Farmcomp
Farmcomp Wile Rice User manual

Farmcomp
Farmcomp Wile 65 User manual

Farmcomp
Farmcomp Unimeter Digital User manual

Farmcomp
Farmcomp Wile 78 Crusher User manual
Farmcomp
Farmcomp Wile-25 User manual

Farmcomp
Farmcomp FARMEX HT-PRO User manual
Popular Measuring Instrument manuals by other brands

National Instruments
National Instruments USB-568 RF Series Getting started guide

HP
HP 400F Operating and service manual

Agilent Technologies
Agilent Technologies 11980A Operation and service manual

Kestrel
Kestrel Sportsman 4500 instruction manual

DPM
DPM TT Series operating manual

Trotec
Trotec PC200 quick start guide