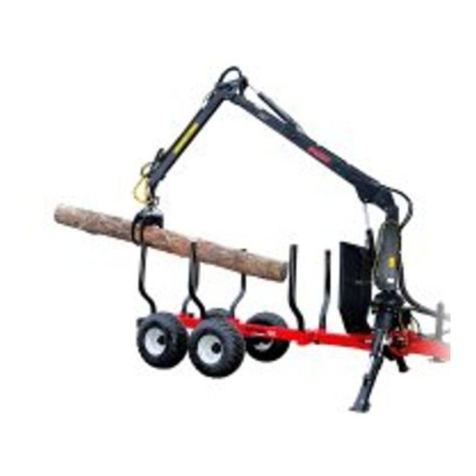
Farmi Forest Corporation 100 Guide

FARMI 100
Farmi Forest Corporation
Ahmolantie 6
FIN-74510 Iisalmi, Finland
Tel. +358 (0)17 83 241
Fax. +358 (0)17 8324 372
www.farmiforest.
OPERATION, MAINTENANCE AND SPARE PARTS MANUAL
READ THIS OPERATION AND MAINTENANCE MANUAL CAREFULLY
BEFORE USING THE MACHINE
FROM MACHINE: 44085060 A-EN-041111-NK
FOREST TRAILER
TRANSLATION OF THE INSTRUCTION MANUAL

FARMI 100
2
WARNING SYMBOLS IN THIS MANUAL
• imminent danger which could cause serious personal injury or death
• danger which could cause personal injury
• conditions or misuse that could damage equipment or machinery
NOTE! • reminders, such as for performing checks or carrying out maintenance
or repair procedures
INTRODUCTION
This manual includes the information and maintenance instructions required for operating the machine in the
optimal manner.
Although you have experience in using this kind of machinery, read the operation and maintenance instruc-
tions carefully since they include information enabling ecient and safe operation. Regular maintenance is the
best way to guarantee the ecient and economical performance of the machine.
Each and every operator must read, understand, and follow all safety instructions
and procedures.
CUSTOMER FEEDBACK
We are happy to receive your opinions and suggestions for improvements by mail, fax or e-mail.
All implemented suggestions for improvements will be rewarded.
WARNING!
!
CAUTION!
!
!
DANGER!
CAUTION!
!

FARMI 100
3
Manufacturer:
Farmi Forest Corporation
Ahmolantie 6, FIN-74510 IISALMI, Finland
Person authorized to compile the technical documentation:
Name: Heikki Sirviö
Address: Ahmolantie 6, FIN-74510 IISALMI, Finland
Commercial name:
Farmi
Machine denomination:
Forest trailer
Machine type:
FARMI 100
Machine series number:
Herewith, we declare that the machine brought into circulation conforms with
the pertinent requirements of the Machinery Directive 2006/42/EC.
The following harmonized standards have been applied for the conceptional design
of the machine:
SFS EN ISO 12100, SFS-EN ISO 4254-1
Iisalmi 4.11.2011
(Place) (date)
Juha Hallivuori
EC DECLARATION OF CONFORMITY

FARMI 100
4
PRODUCT WARRANTY
Farmi provides a 12-months warranty on all Farmi products.
Register on our home page (www.farmiforest.) under FeedBack (”Product Registration” form) within 30 days
after the receipt of the product to get full product warranty and additional information on your product. If it
is not possible for you to register via internet, please register as follows: Complete the registration form on the
last pages of this manual and return it to us within 30 days after the receipt of the product.

FARMI 100
5
When ordering spare parts, please indicate machines type from the machine plate, spare parts order
number, description and quantity required. Example. FARMI 100, 54819200, draw bar eye, xed, 1 pc
TABLE OF CONTENTS
PRODUCT WARRANTY 4
GENERAL SAFETY INSTRUCTIONS 6
MAIN PARTS 10
STICKERS AND SIGNS 10
TECHNICAL DATA 11
ASSEMBLY 12
INSTRUCTIONS FOR USE 12
PRE-OPERATION CHECKS 12
DRIVING 12
MOUNTING, DISMOUNTING AND PARKING OF TRAILER/CRANE COMBINATION 13
HYDRAULIC STEERING 14
LUBRICATION INSTRUCTIONS 15
TROUBLESHOOTING TABLE 15
MAINTENANCE 16
FARMI 100 20
FARMI 100 22
HOSE ASSY, TWO HUBS WITH BRAKES 24
HOSE ASSY, ONE HUB WITH BRAKES 24
HYDRAULIC STEERING 25
6-BOLTS HUB WITH BRAKES 26
6-BOLTS HUB WITHOUT BRAKES 27
PRODUCT REGISTRATION FORM 30

FARMI 100
6
GENERAL SAFETY INSTRUCTIONS
These safety instructions are meant for the owners
of FARMI equipment, as well as those who operate,
service or repair it.
The instructions help with:
• using the machine safely, appropriately and eec-
tively.
• identifying, avoiding and preventing potentially
dangerous situations.
The manufacturer supplies an instruction manual,
which must always be available at the place of ope-
ration of the machine. Each user must read the
safety, maintenance and operating instructions
before operating the machine, and comply with
these instructions at all times.
Ensure that every operator of
the machine is familiar with the
content of the instruction manual
and situation-specic safety
instructions, and has been sui-
tably trained before operating
the machine.
The machine complies with technical requirements
and applicable safety regulations. However, incorrect
use, maintenance or repair of the machine may cause
risks.
In addition to the instruction manual, remember to
comply with regulations of the local occupational
health and safety authorities, and with your country’s
laws and decrees.
The manufacturer is not liable for damages caused
by:
• incorrect, negligent or inappropriate use of the
product.
• non-original spare parts.
• normal wear and tear.
• misuse caused by an untrained person’s
improper actions.
• alterations made without the manufacturer’s
permission.
Written authorization must be
requested from the manufacturer
for any alterations to the machine.
STARTING
• Familiarize yourself thoroughly with the use, ope-
ration and controls of the machine and its equip-
ment before starting.
• Familiarize yourself with the capacities and limita-
tions of the machine and its equipment.
• Do not use the machine unless you are completely
familiar with its operation.
• Be aware of the machine’s danger zones.
• During operation, prevent bystanders from entering
the danger zone.
• Ensure that each operator has the necessary safety
equipment, such as a helmet, safety goggles, work
safety boots and suitable protective clothing.
• Never wear loose clothing around moving parts.
Protect long hair!
• Ensure that work is carried out according to the
stipulations of applicable occupational health and
safety legislation.
• Before starting up or using the machine, ensure
that it cannot cause a risk to other people or pro-
perty.
• Perform a safety check on the machine before
every use. If you observe any faults or deciencies,
repair the machine immediately.
• Before operating the machine, ensure that there
are no foreign articles in it.
• Place the machine on a hard, level surface for ope-
ration. In the winter avoid working in slippery areas.
• Before mounting and using the machine, check
the PTO drive shaft for correct condition and
attachment.
• Never use a faulty or decient machine.
CAUTION!
!
CAUTION!
!

FARMI 100
7
TRANSPORT
• Before driving with the machine, ensure the safe
mounting of the machine. Make sure that the
journals are seating correctly and that the pins are
tight. Check the tension of the lower link stabili-
zers.
• Before driving with the machine, make sure that
the required lamps and reectors as well as the
slow moving vehicle sign are attached correctly.
Moreover, the lamps should be checked for correct
functioning.
• Before driving with the attached machine, make
sure that the hydraulic unit of the machine is
depressurized (unless otherwise instructed in the
operating instructions).
• When driving on public roads, always observe the
valid trac regulations. The travel speed must be
adapted to the specic conditions.
• When driving, please take into consideration the
additional mass resulting from the machine’s
weight. It may aect the reactions, the steerability
and the braking function of the tractor.
• Please note that the machine rear sways when
turning.
• Pay attention to the machine’s height near bridges
or other height restricting objects.
• When backing o, the machine may obstruct the
rear view. Exercise extreme caution. If necessary,
ask a agman to help you; he can indicate the
required distances.
• It is prohibited for other people to ride on the
machine.
OPERATION
Many occupational accidents
take place in abnormal
circumstances. Therefore it is im-
portant to take into account all
the possible circumstances that
may arise during operation of
the machine.
• Depending on the machine’s type, it will have
diverse safety devices and protectors. These are
meant to protect the machine and its operator,
and they must never be removed or altered. Never
start up or use the machine without all the safe-
ty devices and protectors in place. Also check the
universal joint’s safety equipment and joins.
• Never insert any body part into the machine with
the engine running.
• If any faults arise that may jeopardize occupatio-
nal safety, turn o the machine.
• During operation, the machine’s operator is res-
ponsible for safety in the whole work area. Work
may not be carried out in the presence of any fac-
tors that jeopardize occupational safety.
• Exercise extreme caution when hitching / unhit-
ching the machine from a tractor/trailer.
The machine’s operator must
have constant, unobstructed
visibility of the work area. If this
is not possible, the operator must
work with an assistant.
• Look out for moving parts when the machine is in
operation.
• Secure the machine against unauthorized and
accidental operation (e.g. moving when parked)
whenever it is left unattended.
• Never leave the machine running unattended.
• Avoid causing fast, stroke-like loading.
• Never exceed the given operating values.
• All safety and warning signs on and in the machine
must be legible and intact.
• The machine may not be operated by persons
who are unwell or under the inuence of drugs or
alcohol.
MAINTENANCE
• The machine may only be serviced and repaired
by professionals.
• Electrical and hydraulic faults may only be repaired
by authorized professionals.
• In cases requiring welding, contact the manufac-
turer.
• Turn o the tractor engine and disconnect the
universal joint before beginning service or main-
tenance actions.
• Before any maintenance work, turn the main power
switch of the tractor to OFF.
• Ensure that there is no pressure in the hydraulic
system.
• Take out the key from the tractor’s ignition for the
duration of the servicing or maintenance. Check
that the power is o from the machine you are
working on.

!
DANGER!
CAUTION!
!

FARMI 100
8
• When servicing the machine, place it on a level
surface and ensure that it cannot be moved.
• Observe the service intervals and annual safety
inspections.
• All spare parts and equipment must fulll the
manufacturer’s requirements. This can be guaran-
teed by using original parts.
• Put all safety devices back into place immediately
once servicing or maintenance is complete.
When lifting the machine, check
that the lifting/hoisting equip-
ment is in perfect working order.
Check the weight of the machine
before lifting it. Choose lifting
trajectories so that they do not
cause any danger.
Many countries have specic legislation on lifting,
hoisting cables and hoists. Always comply with local
safety regulations.
OILS AND LUBRICATION
• Always use the oil types recommended by the
manufacturer. Other types of oil may cause
faults or improper operation of the equipment,
which could lead to serious damage to people or
property.
• Never mix dierent liquids or oils.
• Always follow the manufacturer’s lubrication
instructions.
• Use control equipment carefully until the hydraulic
oil has had time to reach its operating tempera-
ture.
CAUTION!
!

FARMI 100
9
SAFETY INSTRUCTIONS FOR HYDRAULIC CIRCUITS
1. Work on hydraulic equipment may only be carried
out by professional hydraulic engineers.
2. Be cautious when using the equipment in cold
conditions.
3. Check the machine for leaks. Do not use the
machine if there is a leak from any system. Check
all hydraulic hoses – particularly those which are
bent during use – and replace any that are in poor
condition or have leaks. Ensure that all joins are
tight and that the lines are not damaged. Check
that all protective caps and ller caps are closed
properly. Check the hose sheathing for damage.
4. Check that all hose connectors, lengths and quali-
ties comply with applicable requirements. When
replacing or repairing hoses, use original parts or
hoses and connectors recommended by the ma-
nufacturer. Check particularly that the pressure
classes of the hoses and connectors are suitable to
the operating pressure levels.
5. Check that all safety devices such as pressure relief
valves, etc., are in place and work properly. Fami-
liarize yourself with their use. Safety systems may
never be bypassed.
6. Check the main hydraulic parts daily, and always
after a fault. Replace any damaged parts imme-
diately.
7. If a component is damaged, clean it before
repairing it. Do not use solvents when cleaning
parts.
8. Do not attempt to carry out repairs that you are
not fully familiar with.
9. Never carry out repairs of the hydraulic circuit
when the system is pressurized. When pressuri-
zed, the oil spray can penetrate the skin and cause
mortal danger.
10. Never work below a device or component that is
only being held up by hydraulics. Use separate
supports when carrying our maintenance or re-
pairs. Do not disconnect cylinders or their valves
until the machine is well supported.
11. Most hydraulic oils do not evaporate easily. Risk
factors include hot oil, spills and oil mist (pressu-
rized).
12. If oil gets into your eyes, rinse with plenty of water
and contact a doctor.
13. Avoid prolonged or repeated contact with your
skin.
14. If sprays or contact with the skin cannot be
avoided, use protective gloves, goggles and
clothing as necessary. Do not use oily clothing.
15. Avoid discharging hydraulic oil into the
environment, as it can pollute waterways and the
groundwater. If biodegradable oil is to be used,
please contact the manufacturer beforehand and
have the suitability of your equipment for the ope-
ration with biodegradable oil conrmed by him
before such oil is used.
16. Store the oil in sealed containers provided by the
manufacturer. Try to transfer the oil directly from
its container into the tank.
17. If the oil must be passed through other containers,
ensure that they are completely clean. Caps, fun-
nels, sieves and lling holes must also be clean.
18. Never store oil outdoors, as water could condense
in it.
19. Always dispose of oil in a suitable container, never
into the environment!

FARMI 100
10
1
10
9
8
7
6
5
4
3
2
MAIN PARTS
STICKERS AND SIGNS
These stickers and plates must be found on the machine. Replace missing stickers or plates immediately..
1. Machine plate FARMI 100 (40146740) 4. FARMI-sticker (40146900)
3. 100-sticker (40147350)
1. Screen
2. Central beam
3. Draw bar
4. Bogie
5. Hub
6. Stake
7. Tyre
8. Support leg
9. Draw bar eye
10. Mounting plate for crane

FARMI 100
11
DIMENSIONS
TECHNICAL DATA FARMI 100
Loading capacity kg 10 000
Own weight with support legs kg 1680-1750
Loading area m2 2,3
Ground clearance mm 550
Hydraulic steering with 2 cylinders
Tyres 400/60-15,5 14PR oset-15
Recommended cranes FARMI 4581
FARMI 4670
(Ground clearance)
up to the bottom of
the tandem bogie,
without load.

FARMI 100
12
ASSEMBLY
SAFETY
Read the assembly instructions
before installing the trailer.
Careless assembly and non-
compliance with instructions
may cause hazards to users and
damages to the machine.
The warranty is void for machines or components
which have been damaged due to non-compliance
with approved assembly and installation instructions.
Before beginning the assembly work, ensure that
there is no pressure in the hydraulic system.
Never connect or disconnect pressure hoses or com-
ponents when the hydraulic system is pressurized.
INSTRUCTIONS FOR USE
SAFETY
Read the Instructions for use
before using the tractor / trailer
combination.
Non-compliance with instructions
can cause machine breakage or
user injury.
Before starting the machine, ensure that it is in
working order. Check for any wear and tear or
damage. Repair any damages that aect the
machine’s operation immediately.
Never use the trailer for other purposes than those
for which it is designed.
PRE-OPERATION CHECKS
• Check the oil level in the vehicle hydraulic system.
• Ensure that the trailer is correctly coupled to the
vehicle, that the hoses and the hydraulic compo-
nents are correctly mounted and are funtioning.
• Before driving make sure the brakes are disengaged.
• Check the tyre pressures. If needed, increase or
decrease tyre pressure. Don’t exceed recommen-
ded tyre pressures.
DRIVING
• Braking heavily will wear or even damage the brakes.
Apply the brake steadily.
• If you use a hydraulic steering, do not suddenly
overload the control cylinders.
• Be careful not to turn over the vehicle or the forest
trailer.
WARNING!
!
WARNING!
!

FARMI 100
13
MOUNTING, DISMOUNTING AND PARKING OF
TRAILER/CRANE COMBINATION
Please ensure the following
before mounting a trailer to a
tractor
• the trailer/crane combination must be in perfect
condition
• the maintenance and checking measures must be
carried out according to the maintenance instruc-
tions.
According to the instruction manual of the tractor,
check whether the max. permissible load of the pul-
ling device exceeds the permissible load of the trailer
coupling ring (as per the trailer’s technical data).
MOUNTING A TRAILER/CRANE COMBINATION TO A
TRACTOR
Please ensure that the pulling device has locked in
the operating position before mounting the trailer to
tractor.
1. Lift the outrigger to the driving position.
2. Connect the hydraulic hoses of the hydraulic
steering to the tractor.
3. Connect the hydraulic hoses of the crane to the
tractor; see chapter ”Connection to hydraulic unit”
for details.
4. Make sure the support legs are in the transport
position.
5. If the trailer is equipped with a brake, connect
the brake’s connections and hoses to the tractor.
Before driving with the machine, ensure correct
functioning of the brake.
6. Remove all locking elements placed in front of /
behind the tires. Please ensure that the combi-
nation can be freely driven before starting the
machine.
DISMOUNTING A TRAILER/CRANE COMBINATION
FROM A TRACTOR
Please ensure that the ground is level and stable
before dismounting and parking the trailer.
1. Put locking elements front of/behind the trailer’s
tires in order to avoid trailer movement during
parking.
2. Disconnect the crane hydraulic hoses from the
tractor.
3. Disconnect the brake connections and hoses from
the tractor.
4. Disconnect the hydraulic steering hoses from the
tractor.
5. Swivel the outrigger to the parking position and
secure it.
6. Detach the trailer from the tractor.
CAUTION!
!

FARMI 100
14
HYDRAULIC STEERING
The trailer is equipped with hydraulic steering. The
hydraulic steering is composed of two double-acting
hydraulic cylinders and the associated hydraulic ho-
ses.
The hydraulic pressure required for the cylinders is
generated by the tractor’s hydraulic system. The trac-
tor must have a double-acting multi-way valve for the
hydraulic steering. The maximum operating pressu-
re is 200 bars. Under no circumstances may the the
pressure exceed the maximum permissible value.
Always bleed the hydraulic system before using the
hydraulic steering.
1. Attach the trailer to the tractor.
2. Remove all locking elements placed in front of/be-
hind the tires.
3. Make sure there is nobody in the danger zone of
the forest trailer/crane combination.
4. Connect the hoses of the hydraulic steering to the
tractor.
5. Open the multi-way valve slightly and with cauti-
on to operate the hydraulic steering.
6. Slowly operate the steering from one limit stop to
the other to bleed the cylinders completely.
7. Bleeding has been accomplished when smooth
steering movements are obtained and the stee-
ring responds directly to the control of the multi-
way valve.

FARMI 100
15
LUBRICATION INSTRUCTIONS
LUBRICANT RECOMMENDATIONS
Before carrying out lubrication or maintenance work,
switch o the main engine. Never clean, lubricate or
maintain a machine that is in operation.
Ensure that lubrication and maintenance are carried
out regularly by following the lubrication and mainte-
nance schedules given in the lubrication diagram.
Check the machine daily to ensure timely discovery of
wear and tear and any damage.
When carrying out maintenance work, use appropriate
tools that are in good condition.
Keep ammable items away from open re.
RECOMMENDED LUBRICANTS
Brand Type
BP Energrease LS-EP2, L21M
EXXON Beacon EP2,
Multipurpose GR Moly
MOBIL Mobilux EP2, Mobil Grease MP,
Special
SHELL Alvania EP Grease 2
UNION /
TEXACO
Marfak Multi-purpose 2,
Molytex Grease 2
TEBOIL Universal CLS
TROUBLESHOOTING TABLE
PROBLEM CAUSED BY MEASURES
BRAKE IS INEFFECTIVE BRAKE HOSE IS LEAKING OR FAULTY CHECK HOSES AND CONNECTIONS
TOO LITTLE PRESSURE IS BEING FED
TO THE BRAKES
CHECK PRESSURE
BRAKE SHOES OR DRUMS ARE WORN CHANGE BRAKE SHOES OR DRUMS
BRAKE CYLINDER SEALS ARE FAULTY REPLACE SEALS
BRAKE CYLINDER IS FAULTY REPLACE OR REPAIR BRAKE CYLINDER

FARMI 100
16
MAINTENANCE
REPLACING HYDRAULIC HOSES
• When changing hydraulic hoses, clean the new
hoses, at least with compressed air.
• Check that the hoses are connected properly after
the change.
• If any hoses are removed for long periods of time,
protect the ports properly.
• Let the pump rotate slowly to bleed the air from
the system after changing hoses or components.
CHECKING TIRE PRESSURE
• Only use appropriate tools for checking and adjus-
ting tire pressure.
• Do not exceed the recommended maximum
pressure.
• Check tyre pressure.
400/60-15,5 14 PR 3,6 bar max.
OBJECT ACTION
Maintenance interval, working hours
8 h,
or after working shift
50 h,
or after working week
After 250 working hours or
once a year
General Check cylinders and
leakages in hoses
Check pins and lockings
Check fastening bolts
Check the condition of
primary structures
Drawbar eye Lubricate axis of rotation
of the drawbar eye
Check torque of the
mounting screws
Drawbar joint Lubricate slide bearings Check torque of the jour-
nal
Hydraulic stee-
ring cylinder
Lubricate swing bearings
Check condition of pis-
ton rod and piston rod oil
scraper
Check condition of hoses
and couplings
Check journals and locks Check cylinder bearings
Bearings of the
oating bogie
Lubricate slide bearings Check journal lock for
correct seat
Check condition of the slide
bearings
Load backrest,
adjustable sets of
bolsters, tandem
bogie
Check torque of bolts and
nuts
Tires Check condition of tires,
torque of mounting sc-
rews and tire pressure
Hubs Check condition of the hub
bearings
Lubricate bearings
Check condition of the brake

FARMI 100
17
MAINTENANCE
• Maintenance work must be carried out regularly
to ensure safe and trouble-free operation.
• Always use the appropriate tools.
• Determine the location of the defect.
• Keep the disassembled sections, removed parts,
and the repair area protected from dirt.
• Clean the parts using kerosene, never fuel oil.
LUBRICATION
Rell fresh grease until some old grease escapes. Wipe
o excess grease.
CHECK AND LUBRICATE HUBS
Remove the hub cap. Check the bearing case for ing-
ress of water. If there are signs of water, rust or dirt,
disassemble and carefully clean the hub. Replace bea-
rings and seals if necessary.
When assembling the hub, apply grease to the sliding
surfaces of the bearings. Then lubricate and relubrica-
te as follows:
1. Open the bleed screw.
2. Greasethebearingsthroughthenipplesuntilsomeof
the existing grease escapes through the bearings.
3. Donotusetoomuchgrease;otherwise,thehubcan
overheat during travel.
4. Afterwards, close the bleed screw and remount the
hub cap.
On a hub equipped with a brake check the conditi-
on of the brake shoes. If the friction surface has worn
down to less than 2 mm, replace the brake shoes.
Clean the brake parts and the brake drum before as-
sembly. Slightly lubricate the articulated joints.
REPLACING BEARINGS
• When installing bearing sleeves, use an
appropriate drift.
• Make sure that the new bearing’s grease hole
meets the nipple.
• If the bearings have grease pockets, ll these with
Vaseline.
PRESSURE MEASUREMENT
Always make the adjustments with the manometer in
place.
• The main pressure is measured from the measu-
ring point in the control valve’s inlet section.
• Adjustments and inspections for each movement:
• Set the main pressure relief valve to 5 bar
above the value set for the protective valve.
• Performthemovement, and check and adjust
the pressure if necessary.
• Finish by adjusting the main pressure to the
set value.
• Pressure measurements are to be performed at
the normal operating temperature and at the
normal ow rate.
• The free ow pressure can be read from the mano-
meter when the ow of oil is directed through the
valve.
REPAIR WELDING
If welding is required for modifying or repairing the
crane, note the following:
• The welder must be qualied: welding grade 3.
There must be no root defects.
• Remove paint and any oil from the location to be
welded.
• Connect the ground terminal directly to the piece
to be welded – there must be no joints in between.
• Use OK 48.00 or equivalent electrodes. The
electrodes must be dry.
• Improperly welded structures can get fractured.

FARMI 100
18

FARMI 100
19

FARMI 100
20
FARMI 100
R3/8"
R3/8"
Loctite 2701
1
10
9
8
6
5
3
2
11
20
19
18
17
16
15
14
13
12
21
30
29
28
27
26
25
24
23
22
31
39
38
37
36
35
34
33
32
4.3
4.6
4.2
4.4
27.1
4.5
4.1
4
7
40
41
49 48
47
46
45
44
43
42
4.5
27.6
27.8
27.7
27.5
27.4
27.3
27.2
27 33
27
29
43
47
34
Table of contents
Other Farmi Forest Corporation Farm Equipment manuals

Farmi Forest Corporation
Farmi Forest Corporation VALBY HF 231 Guide

Farmi Forest Corporation
Farmi Forest Corporation VALBY HF 160 Guide

Farmi Forest Corporation
Farmi Forest Corporation VALBY HF 231 Guide

Farmi Forest Corporation
Farmi Forest Corporation CH380HF Guide

Farmi Forest Corporation
Farmi Forest Corporation VARIO 101 Guide

Farmi Forest Corporation
Farmi Forest Corporation 90 Guide