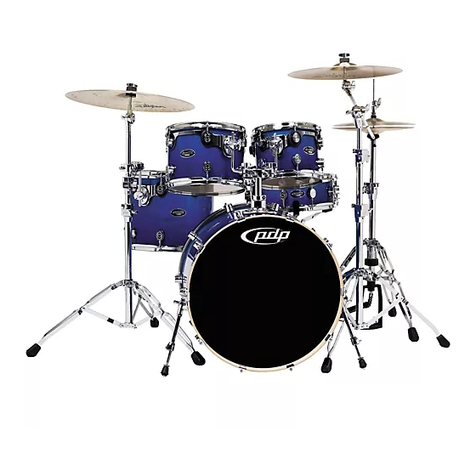
FAZLEY DDK-100 User manual

DDK-100
electronic drum kit
user manual
All information and illustrations shown in this user manual are subject to change without further notice.
User manual version: 1.0 Creation date + author initials: 05-05-2015 RV Revision date + author initials:

Introduction
Thank you for purchasing this Fazley electronic drum kit. We advise that you read this user manual in its
entirety before unpacking the contents of the box, so that you are familiar with all of the functionality that this
product has to offer. Please be sure to check that all of the parts and accessories listed below under box
contents are included in the package. In the event that the DDK-100 does not function properly, or if you
have any issues while operating it, please remove the plug from the power socket and contact your dealer for
assistance.
Box contents:
1x Fazley DDK-100 drum kit, consisting of various separate components:
– 3x mesh head trigger
– 3x cymbal pad trigger
– 1x drum module
– 1x power supply for drum module
– 1x drum frame with integrated cable tree
– 1x kick drum pedal with mesh head trigger
– 1 x hi-hat pedal
1x drum key
1x quick start guide
1x assembly instruction book
Please inspect the device and the included accessories.
Should you discover that either the device or one or more of the included parts have been damaged or
rendered defective while in transit, please contact your dealer directly.
Please note that the pictures in this user manual serve illustrative purposes only and may differ from the
product you receive.
Contact:
Fazley musical instrument products and accessories
Verrijn Stuartweg 18
4462 GE Goes
The Netherlands
Please do not send any products to this correspondence address.
Should you wish to send in a product for repair or for a refund, please contact your dealer for an RMA
(Return Merchandise Authorisation .
All information and illustrations shown in this user manual are subject to change without further notice.
User manual version: 1.0 Creation date + author initials: 05-05-2015 RV Revision date + author initials:

Sa ety instructions
Everyone involved with the installation, operation and maintenance of this device must:
- Be qualified
- Be skilled
- Have read the instructions in this user manual
- Be sure that neither the device nor the included accessories are damaged. Should the device or the
included accessories be damaged, please contact your dealer for more information.
- Ensure that the device is in good working condition and is safe to operate. Please follow the advice and
instructions as they are described in this user manual.
Damage caused by misuse and/or modifications made to the device are not covered by the warranty.
This device does not contain any parts that need to be repaired or replaced by the user. Should maintenance
or repairs be necessary, they must be handled by a qualified technician.
Important in ormation regarding health and sa ety:
- Do not remove any labels or stickers from this device.
- Do not leave any cables lying around.
- The device should not be opened up, and any hardware or software that may be present should not be
modified.
- To achieve optimal performance, inputs on this device should not be fed with a signal higher than
necessary.
- The outputs on this device should not be overloaded.
- The device should only be used indoors; contact with water, rain and moisture should always be avoided.
Do not place any objects containing liquids on top of the device.
- Remove the device from any nearby flames or heat sources; do not place it near flammable fluids, gasses
or objects.
- Disconnect this device from the power supply if it will not be used for a longer period of time, if maintenance
is necessary, or if the device needs to be cleaned.
- Do not pull on the cable to remove a connector, as this could cause damage.
- Do not use any cables other than the ones described in this manual. Do not use defective cables. Please
contact your dealer if the included or necessary cables do not function properly with this device.
- In the event that the device is exposed to extreme temperature changes (e.g. transported through a cold
outdoor environment into a warm indoor environment), it should not be turned on until it has reached room
temperature. This is necessary to prevent moisture from forming in the device, which could lead to electric
shocks.
Guidelines and operation o this device:
- This device is intended for indoor use by adults only.
- This device is not suitable for use by children, and should always be operated by an adult.
- This device may only be used in a suitable environment where no damage to the device can occur. Do not
use the device in moist or dusty environments such as:
- indoor swimming pools where chlorine is used
- beaches where there is sand and salt
- outdoors
- indoors in spaces where intense heat sources are present, or where it reaches temperature levels that
would be considered uncomfortable for a person
- Avoid impacts and collisions during use and transport. Do not transport the device while it is in use. Avoid
using excessive force when installing and operating the device.
All information and illustrations shown in this user manual are subject to change without further notice.
User manual version: 1.0 Creation date + author initials: 05-05-2015 RV Revision date + author initials:
WARNING!
Keep this device away rom moisture, water and rain to avoid the chance
o electric shocks.

- The user should become familiar with the functions of the device before using it.
- Should the device not be used in the manner described in this user manual, damages or even injuries could
occur. Fazley cannot be held responsible for any injuries or damages that occur as a result of improper use
of this product.
Storage and transport:
- This product is not designed for mobile use. The device is not designed to be transported.
If the device needs to be transported, it is recommended to do so in the original packaging or in a suitable
flight bag or flight case with sufficient foam padding so as to prevent damage.
- This device is not designed for permanent (24/7) use. The expected lifespan of the device will not be
affected by occasionally turning the device off. Disconnect the device or turn off the power when it is not
actively in use.
- If the device will not be used for a longer period of time, it should be disconnected and stored in a dust-free
environment.
- Do not expose the device to extreme temperature differences.
Housing
- Inspect the device s housing frequently, and always just before use. Avoid operating the device if there are
large dents or cracks, or if screws are missing. Do not use the device if the housing is not in good condition.
Contact your dealer or a qualified technician if you are unsure about the state of the device.
- Check the device and the screws for corrosion. Corrosion must not be present on this device. Contact your
dealer or a qualified technician if you find any corrosion on the screws.
Every power and signal connector should be securely mounted. Do not use the device if the connectors are
not secure.
Avoid dust and dirt build-up. Clean the device once a month by disconnecting it from the power supply and
wiping it down with a dry or slightly moist cloth. If the device is used frequently, the cleaning intervals should
increase.
Symbol explanation:
WEEE: Ensure that this device is disposed of properly. This product falls under the WEEE
(Waste Electrical and Electronic Equipment) directive. The requirements of this directive apply
to all manufacturers and producers of electronic devices in the EU. Do not throw this product
away with regular rubbish. Please contact your local authority for more information about how
to recycle and dispose of these products in your region. By recycling this product in the proper
manner, we can work together to ensure that we can continue to enjoy these kinds of products
and still protect the environment as much as possible from pollution.
CE: The CE logo indicates that this product meets the European norms and requirements to
which it must legally conform.
Only suitable or indoor use: this product was only designed for indoor use. The maximum
environmental temperature must not exceed 40 degrees Celsius (104 degrees Fahrenheit).
All information and illustrations shown in this user manual are subject to change without further notice.
User manual version: 1.0 Creation date + author initials: 05-05-2015 RV Revision date + author initials:

Overview o the drum module
The DDK-100 drum module is the central nervous system of this digital drum kit. It is equipped with all the
sounds that can be played on the pads or mesh heads, but it also has functions on board that you can adjust
as desired. This manual takes you through the options step by step.
1. Volume controls
There are 3 rotary knobs for adjusting the volume of the following functions:
- Aux in: The Aux in volume control is used to adjust the volume level of external playback equipment such
as a computer, smartphone, tablet, MP3 player or other device so you can play along with your favourite
music.
- Headphones: The volume level of the headphones can be adjusted with this rotary knob. The headphone
output is located on the rear of the drum module.
- Master volume: This is the main volume control that sets the volume of a connected speaker set or mixer.
2. Cursor buttons
All information and illustrations shown in this user manual are subject to change without further notice.
User manual version: 1.0 Creation date + author initials: 05-05-2015 RV Revision date + author initials:
1
2
3
456
7
8
9
10
11
12
13

The cursor buttons allow you to select certain fields/values on the display, which can then be changed using
the rotary knobs or + / - buttons.
3. Rotary knob
The large rotary knob is used to change the values of certain parameters, but it can also be used to change
the presets in large steps. The large rotary knob has the same functionality as the + / - buttons.
4. Tempo button
This button allows you to adjust parameters that have to do with tempo, metronome and MIDI speed.
5. Click button
Use this button to turn the metronome on or off if you want an audible click track to assist you while you play.
6. Scope button
This button makes it possible to view your playing on the display in real time.
7. '+' / '-' buttons
These buttons enable you to add or subtract values or scroll through the list of drum kits. Add values or scroll
forward with the + button and remove values or scroll backward with the - button.
8. Display
The drum module display provides you with all the information you need to know, such as the name of the
selected drum kit. If you activate a menu function, then the screen will display the necessary parameters.
Navigate through the values or change them as desired with the large rotary knob or the + / - buttons.
9. F1 - F4 unction keys
Depending on what the display is showing, the F1 - F4 function keys can be used to call up certain functions,
parameters or settings. The name of each function is shown on the display.
10. Group aders
The group faders are for adjusting the volume levels between the various drum sounds.
11. Song play section
The Song play section consists of multiple buttons that can be used to start, stop and record accompanying
melodies (songs).
Function per control:
- SONG: Use this function to select a song or access the song-related settings.
- PLAY/PAUSE button: Push this button to play or pause the selected song.
- MUTE: Use this button to turn off a specific instrument in the selected song.
- REC: Push this button to make a recording while playing along with a song.
12. General controls
The general controls are used to access the menu functions.
These consist of:
- SETUP: Push this button to access the menu settings for MIDI, triggering, pad sensitivity, etc.
- RETURN: Use this button to save adjusted settings in a menu of your choice and then return the previous
menu.
- USER KIT: Use this button to activate your custom user kits.
- HOME: Push the Home button to return to the list of normal standard preset kits.
All information and illustrations shown in this user manual are subject to change without further notice.
User manual version: 1.0 Creation date + author initials: 05-05-2015 RV Revision date + author initials:

Connecting the drum module
1. Phone
Headphone output equipped with a TRS jack plug connector
2. L/mono main output
Main output, suitable for connecting an active speaker, mixer or audio interface. Equipped with a TRS jack
plug connector.
3. R main output
This is the output for the right channel if you want to send the stereo output to an active speaker set, mixer or
audio interface. Equipped with a TRS jack plug connector.
4. AUX IN
The AUX IN connector is for connecting an external line source such as a tablet, smartphone, MP3 player,
computer, and so on so you can play along with your favourite music. There is a separate volume control on
the drum module for the AUX. Equipped with a TRS mini jack plug connector.
5. DC IN
The DC in connector is used for supplying power to the drum module via the included power adapter.
6. MIDI IN
The electronic drum module can be triggered by an external MIDI device such as a pad controller or MIDI
keyboard. You can find more information about this later on in this manual. Equipped with a 5-pin DIN.
7. MIDI OUT
The MIDI OUT connection can be used to convert the data from the trigger pads and mesh head to a MIDI
signal that can be sent to an external device. This will be explained in more detail later on in this manual.
Connect via 5-pin DIN.
8. USB MIDI
The drum module can used as a MIDI device when connected directly to a computer or laptop. Use it to play
a drum plugin or trigger certain sounds in your DAW (Digital Audio Workstation). Connect via USB type B
port.
9. TOM 4
It is possible to add a fourth (not included) tom to this connector. You can not plug in any other USB source
to this USB- input.
All information and illustrations shown in this user manual are subject to change without further notice.
User manual version: 1.0 Creation date + author initials: 05-05-2015 RV Revision date + author initials:
1 32 4 5 6 7 8 9 10
11

10. Crash 2
It is possible to connect a second (not included) crash via this TRS jack plug connector.
11. Editing adapter
The editing adapter ensures that the drum module is optimally positioned on the frame.
All information and illustrations shown in this user manual are subject to change without further notice.
User manual version: 1.0 Creation date + author initials: 05-05-2015 RV Revision date + author initials:

Basic operations o the drum module
Turning on the drum module
To turn on the drum module, make sure it is connected to the power adapter and that the adapter is plugged
in.
Make sure the volume controls are turned down. Turn the drum module on by pushing the Power button.
Once the drum module has started up, you can hit the trigger pads and adjust the volume gradually to a
comfortable level.
Turning o the drum module
It is recommended to turn the volume controls down completely before turning off the drum module.
Press and hold the Power button until Power Off appears on the display. Then, release the button and the
drum module will switch off.
Saving adjusted settings
If you ve made some adjustments to the parameters in the menu, use the Return button to save them and
return to the previous menu.
Using the cursor
The drum module cursor indicates specific parameters in a list of settings. Use the
buttons to browse the parameters until you reach the setting you d like to change. The
cursor will point at the currently selected parameter.
Function keys F1 - F4
The F1 through F4 function keys can be used to select certain functions depending on
where you are in the menu structure. Because the functions differ per menu item, the display will always
show which function is under which button in any given menu.
The '+' / '-' buttons and the rotary knob
The + / - buttons and the rotary knob are basically the same because they can both be used to adjust
parameters. Increase a specific value or add a setting by turning the rotary knob clockwise or by pressing +
button.
Decrease a value or remove a setting by turning the rotary knob counter-clockwise or by pressing the -
button.
The rotary knob is ideal for making quick changes in big steps (like browsing through various presets) and
more accurate adjustments are made in smaller steps with the + / - buttons.
Song playback
Push the Song button and the Song Display will appear. Browse through the options
and select the song you want using the + / - buttons and/or the rotary knob.
Use the play/pause button to start or stop the song.
The cursor buttons will adopt a specific function and the F1 - F4 keys can be used for
activating these functions.
Starting and stopping the metronome
To start the metronome, press the Click button. You can start playing along as soon as you hear the click
track.
To stop the metronome, press the Click button again.
All information and illustrations shown in this user manual are subject to change without further notice.
User manual version: 1.0 Creation date + author initials: 05-05-2015 RV Revision date + author initials:

Advanced settings
Adjusting the tempo o the metronome or song
Press the Tempo button to adjust the tempo of the metronome or song. Then use the rotary knob or + / -
buttons to change the tempo as desired.
Selecting an instrument
If you want to assign a different instrument or sound to a specific trigger, make sure
you re in the main menu by pressing the Home button.
Press the F2 button and open INST in the menu to access a list of different sounds
that can be used for different trigger pads.
Hit the trigger you d like to assign a sound to and it will appear on the display. A Head
and Rim indicator enables you to choose if the sound should be assigned to the head or the rim.
You can also use the cursor buttons (arrow keys) to browse through the various trigger pads (left to right) or
the various sounds (up and down).
The mixer can be used to adjust volume and panning or each sound.
You can create a custom drum kit using specific sounds of your choice or adjust the volume and panning of
the sounds themselves so that when a sound comes from a left-sided trigger, it will be audible on the left side
of your headphones, for instance.
Press F1 (MIX) in the instrument menu.
In the new menu, you can fine-tune the main volume level and panning for the other trigger pads. The
panning determines whether the sound comes from the left, the middle, or the right when played on a stereo
source like a speaker system or a set of headphones.
Naming the drum kit
Name any drum kit that you configure yourself using a maximum of ten characters.
To do this, press the Home button to return to the main menu and press F1 to view the function list.
Use the F4 function button to create a name for your drum kit. Use the cursor to scroll through the characters
and press Enter (F2) to select the character you want to use. Use F3 to erase a character and F4 to save the
name. The name should now appear in the list.
Playing along with songs
The basic functionality of the songs has already been described earlier in this
manual, but there are more possibilities available. Each song consists of drum,
piano, bass and miscellaneous sounds that can be turned on or off as desired.
To mute certain sounds, press F2 to open the Mute menu. Here, you will see a list of
the sounds that are present in the selected song.
Use the F1 - F3 buttons to turn the selected sound on or off.
Press Return to save the settings and go back to the song.
Using the loop unction during the song
If you want to follow the rhythm of a selected song, it is possible to play it as a continuous loop that will keep
playing until you stop it. While the song is playing, press the F3 (Repeat) function to mark the beginning of
the loop and press it again to mark the end of the loop. This section of the song will then keep repeating itself
endlessly. To stop the loop, press F3 (repeat) again.
Using the internal metronome
All information and illustrations shown in this user manual are subject to change without further notice.
User manual version: 1.0 Creation date + author initials: 05-05-2015 RV Revision date + author initials:

You can configure the built-in metronome as you
wish by pressing the Tempo button. Then, press the
F1 function button to go to Setup. When you see
Click Setup on the display, you can edit the
metronome settings. Please note, the settings are
on two separate pages, you can toggle between
them using the F1 and F2 function keys.
Use the Cursor to browse the parameters and use
the + / - buttons or the rotary knob to adjust them.
You will find an overview of the settings and
possible values in the image next to this.
Recording and playback
When you want to record a MIDI track, press REC
and the MIDI Recorder will appear. Press REC again to access the recording
menu.
Recording will begin as soon as you hit the first trigger pad. When you re done
playing your rhythm, press the REC button and you ll see Record Finish on the
display, which means the recording has been saved.
The DDK-10 will record a built-in limit of 5,000 pad hits before it automatically
stops. If you want press REC again, it will record over the old data unless you
saved it.
Save the recorded data by pressing down and holding the F4 Save function after
recording. Give your recording a name using the character window and press F4
to save.
Playing back a MIDI recording
Press the REC button to open the MIDI recorder. Browse through the various files and select the one you
want using the + / - buttons or the rotary knob. Press F1 Playback to playback the selected file.
Please note, the file will not play if the Mute function is activated.
When the track reaches the end, the recording will stop automatically and Play Finish will appear on the
display.
Using the SCOPE (timing) unction
The SCOPE function provides you with insight about your timing. Press the SCOPE
key to go to the SCOPE menu. When you play a rhythm, the trigger pads are shown
on the display as x s.
The display will refresh after a certain number of beats (depending on your selected
screen size). You can change the size of the display by using the ZOOM+ and ZOOM-
buttons (F1 and F2 keys).
Optimising the pad settings
You can adjust the pad response to suit your personal preference. Bear in mind that such adjustments will
have an effect on the sound of the entire kit.
All information and illustrations shown in this user manual are subject to change without further notice.
User manual version: 1.0 Creation date + author initials: 05-05-2015 RV Revision date + author initials:

Press the SETUP button to activate the Setup mode. Go to F1 (Trig) to activate the Trigger menu.
Press F1 or F2 to toggle between Page 1 and Page 2 and browse through the options. Use the Cursor
button to browse through the available parameters.
Use the + / - buttons or the rotary knob to adjust the parameters.
List of parameters, values and descriptions:
Type Kick, Snare, Tom 1-
4, Hi-hat, Crash 1-
2, Ride, Bell
The trigger type is a collection of parameters, optimised by the various
trigger pad models.
Sensitivity 1-32 This value determines the sensitivity level of the trigger pads. The lower
the sensitivity, the lower the main volume level needs to be, even when
the trigger pad is hit forcefully.
Curve Linear, Logarithmic,
Exponential
These settings determine how much the sensitivity levels affect the
volume. The linear mode is standard.
Mask Time 1-32 The Mask Time function prevents two trigger pads from being
unintentionally hit at the same time, for instance if a bass drum pedal
bounces back and hits the mesh head again. Please note, the higher
you set this value, the harder it will be to play fast rhythms.
Retrig Level 1-10 Retrig Level is similar to Mask Time, but has to do with unintentional re-
triggering. If you re using acoustic trigger sounds, these can create
altered waveforms that can register a faintly-audible second hit. Please
note, the higher you set this value, the harder it will be to play fast
rhythms.
Anti-Cross 1-10 Anti-Cross ensures that a trigger pad only receives the signal when hit
above a specified velocity level. This can prevent pads from getting
triggered by vibrations from other pads.
Dynamic
Range
1-10 This is used to edit the dynamic range of a trigger pad between the
maximum value and the minimum value as specified by the user.
MIDI-related settings
Press the SETUP button and then press F2 to go to the MIDI settings.
Toggle between Pages 1 and 2 by pressing F1 and F2 to view the various options:
Channel 0-15 This setting is to edit the MIDI channel for MIDI data export.
USB-MIDI
OUT
ON/OFF This setting enables the drum module to be used as MIDI device (over
USB). The default value is ON.
USB-MIDI IN ON/OFF This setting is to determine whether the drum module receives MIDI
(over USB) or not. The default value is ON.
Auto Trace ON/OFF This option turns the Note Chase on or off, which is important during
the recording process. When MIDI data is received, a window opens
automatically to edit the settings of the selected trigger. The default
value is ON.
RETRANSMI
T
ON/OFF This option sends MIDI data that runs to/from a USB connection to a
MIDI input/output.
SYSTEM
REAL
ON MIDI device information output
MIDI OUT ON/OFF This option specifies whether MIDI data is sent to an external device or
not. The default value is ON .
All information and illustrations shown in this user manual are subject to change without further notice.
User manual version: 1.0 Creation date + author initials: 05-05-2015 RV Revision date + author initials:

MIDI IN ON/OFF This option allows MIDI data to be received from an external device .
The default value is ON.
System Utilities
Adjusting the display contrast
Press the Setup button, select Util with the F3 function key and the Utility menu will appear.
Press the F1 function key to open the Ctrl section. The LCD contrast can be adjusted as if it were a
parameter.
Press Return to save the new settings and go back to the previous menu.
So tware in ormation
In the LCD contrast menu, you can press F1 to open a window with firmware information.
Factory settings reset
PLEASE NOTE, by resetting the drum module to the actory settings, all your personal pre erences
will be erased and reset to de ault values.
Press the Setup button, then press F3 to open the Utility window.
Press F2 to activate the Reset function. You will see a warning. If you are sure, press OK using the F4
function key, and the device will reset to the factory settings.
Once this is done successfully, the Home menu will appear.
All information and illustrations shown in this user manual are subject to change without further notice.
User manual version: 1.0 Creation date + author initials: 05-05-2015 RV Revision date + author initials:

Technical speci ications
General speci ications:
- complete drum kit with mesh heads
- standard drum configuration
- versatile, intuitive drum module operation
- mesh head technique for accurate response
- practical, compact and easily-adjustable drum frame
- integrated cable tree in frame for neat, tidy appearance
- all hardware is easily adjustable for optimal playing comfort
Con iguration:
- drum frame
- Hi-hat pad + Hi-hat foot controller
- Kick drum mesh-head + traditional pedal with beater
- 2 toms + floor tom mesh-head
- Crash + Ride cymbal pads
- drum module
Drum module connections:
- headphone output via 6.35mm jack plug
- Mono or Stereo headphone output via 6.35mm TS jack (1 or 2)
- AUX in via 3.5mm TRS mini jack
- power input for included power adapter
- MIDI I/O via 5-pin DIN connectors
- USB MIDI connection for bi-directional communication via USB B port
- USB input for optional extra mesh head
- trigger input for optional extra crash cymbal pad via 6.35mm TS jack
- D-SUB 25 multi-pin connector for cable tree
Drum module speci ications:
- 38 songs for accompaniment with individually-mutable instruments
- 25 preset kits
- sound data base with 423 versatile sounds for personal user presets
- group faders for adjustable volume balance
- versatile utilities for optimal adjustment of personal settings
- expansive data exchange with traditional MIDI equipment and USB MIDI devices
Hardware:
- 4-legged construction with round tubes
- high-quality plastic couplers
- integrated cable tree
- labelled cables for easy connection to trigger pads and pedals
- pedals can be used on smooth surface as well as on drum mat/carpet thanks to rubber anti-slip layer and
grip pins.
- cable binders included to bundle multiple cables
Mesh heads:
- high-quality plastic housing
- stretched mesh with adjustable tension
- built-in PCB with high-quality vibration sensors
- lockable 4-pin GX16D connection for reliable connection
Cymbal pads:
- high-quality plastic cymbal pad with partial rubber coating
- connection via right-angled 6.35mm TRS jack
All information and illustrations shown in this user manual are subject to change without further notice.
User manual version: 1.0 Creation date + author initials: 05-05-2015 RV Revision date + author initials:

Technical details:
- 25 preset kits
- 15 user kits
- 423 built in sounds
- 38 built in songs
- trigger inputs standaard: kick, snare, tom1, tom2, tom3, hi-hat, crash, ride, hi-hat controller
- trigger inputs extra: tom4, crash2
- LCD-display: 128 x 64 dots graphic display (backlit LCD)
- connection voltage: 100-240V AC, 50/60 Hz
- operating voltage: 12V DC, 2A by power adapter (included)
- net weight +/- 23,5 kgs
- gross weight: +/- 28 kgs
- floor surface when set up: ca. 130 x 75 cm excl. throne (130 x 100 cm incl. throne)
- box dimensions 880 x 75 x 280 mm
All information and illustrations shown in this user manual are subject to change without further notice.
User manual version: 1.0 Creation date + author initials: 05-05-2015 RV Revision date + author initials:

Preset SONG list
Preset drum kit list
All information and illustrations shown in this user manual are subject to change without further notice.
User manual version: 1.0 Creation date + author initials: 05-05-2015 RV Revision date + author initials:

Preset VOICE list
All information and illustrations shown in this user manual are subject to change without further notice.
User manual version: 1.0 Creation date + author initials: 05-05-2015 RV Revision date + author initials:

All information and illustrations shown in this user manual are subject to change without further notice.
User manual version: 1.0 Creation date + author initials: 05-05-2015 RV Revision date + author initials:

All information and illustrations shown in this user manual are subject to change without further notice.
User manual version: 1.0 Creation date + author initials: 05-05-2015 RV Revision date + author initials:

All information and illustrations shown in this user manual are subject to change without further notice.
User manual version: 1.0 Creation date + author initials: 05-05-2015 RV Revision date + author initials:
Other manuals for DDK-100
2
This manual suits for next models
4
Table of contents
Other FAZLEY Drum manuals
