FCI MagicRound ASD-0001 User manual
P a g e | 1
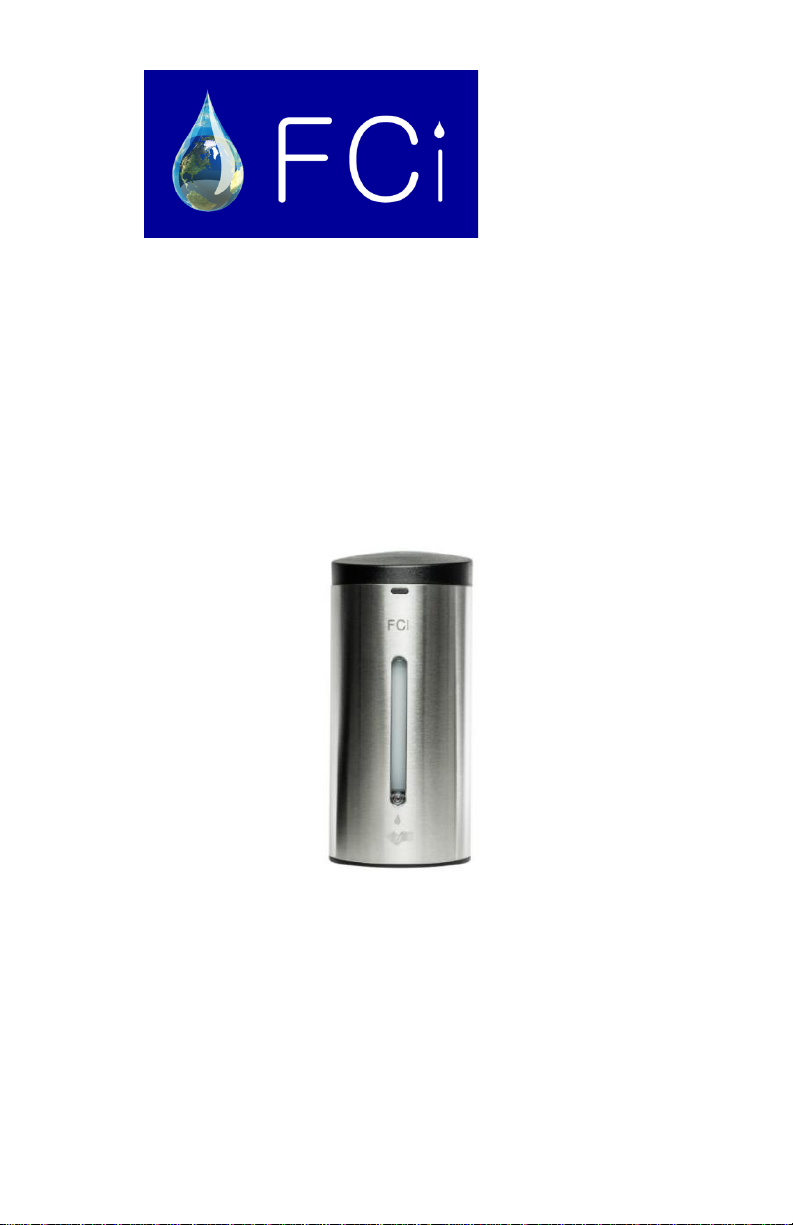
MagicRound Automatic Soap
Dispenser
ASD-0001
Installation Manual
Quality Guarantee
*Thank you for choosing the automatic wall mount soap dispenser. Please
read the instruction carefully before installation. This manual is for your
reference only.

P a g e | 2
Features
•Hands free sensor operation improves
hand washing hygiene.
•Easy installation and low-cost
maintenance
•Battery powered.
•Stainless steel finish
•Suitable for schools, offices,
supermarkets, hospitals, and other high-
volume facilities
Specifications
Power
Supplied 9V (6 x AA Alkaline
batteries)
Sensing Range
5 –15 cm
Soap Vol per
Drop
1 ml
Soap Bottle
Volume
650 ml
Ambient
Temperature
1 –45 oC

P a g e | 3
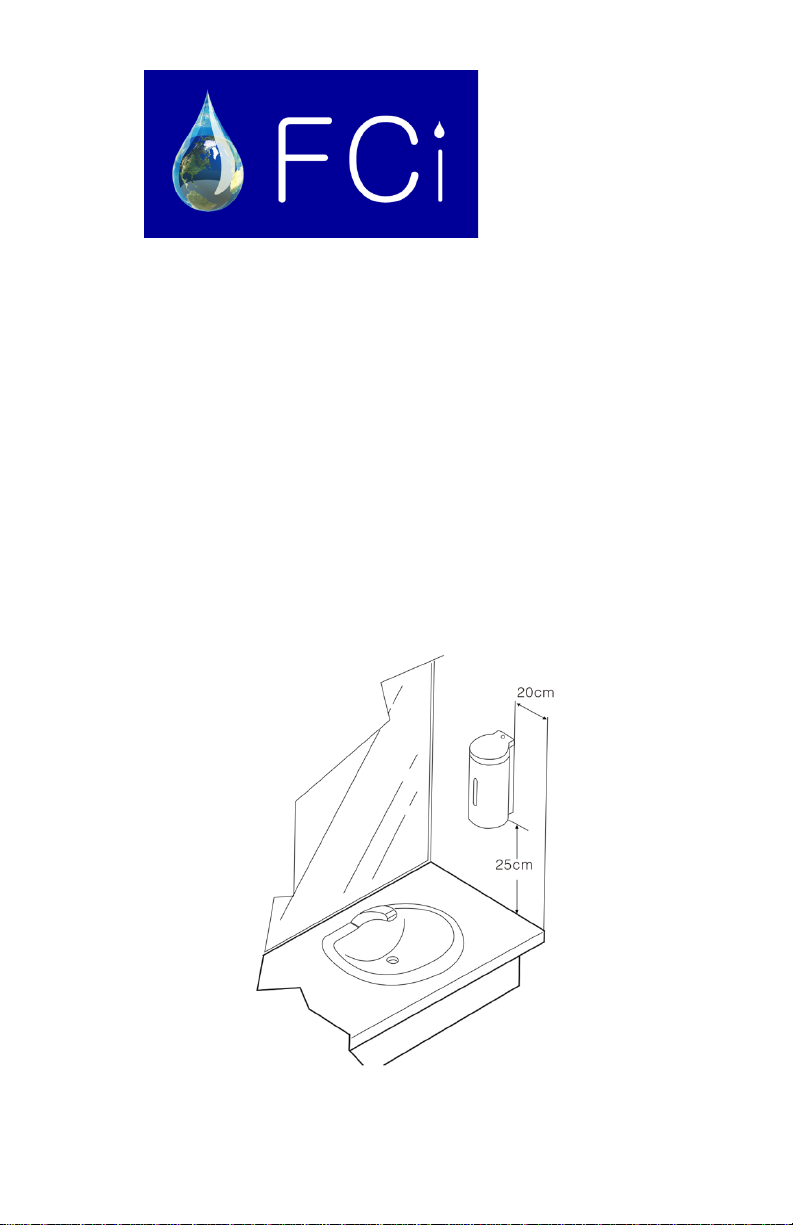
Before Installation
•Locate position of soap dispenser.
•Ensure that soap dispenser does not
interfere with anything above the
lavatory/counter or shining surface top
area. Must be installed 250 mm above the
counter.
•Pay special attention so that the sensor
surface is not flawed or scratched during
the installation process.
•Before installing on the wall, check that no
other piping and wiring is running behind
hole locations. Wall should be sufficiently
reinforced or risk failure due to soap case
unit falling.
•Do not place other devices that use an
inverter or infrared sensor near the faucet,
as this may cause the faucet to
malfunction.
P a g e | 4
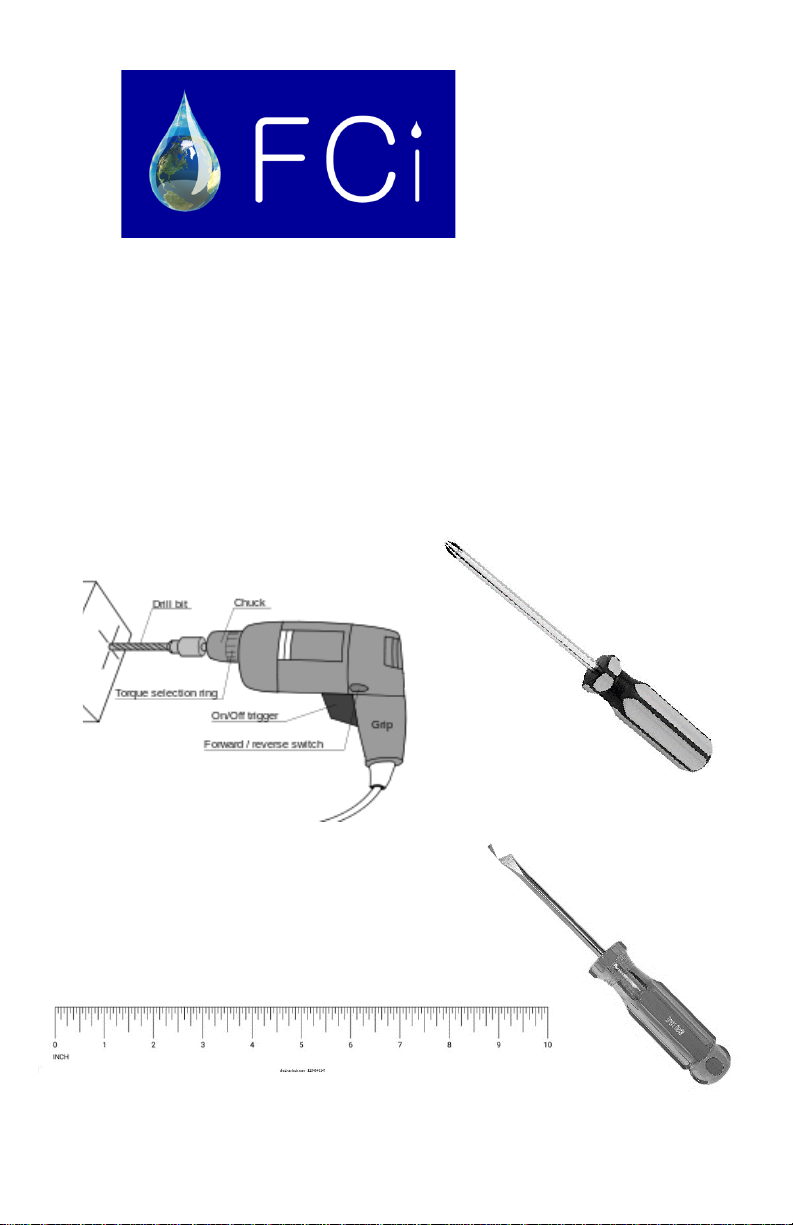
Tools You will Need
•Power drill with 6 mm wall drill bit
•Flat head screwdriver
•Phillips screwdriver
•Ruler/tape
measure

P a g e | 5
Part List

P a g e | 6
Construction /
Installation Diagram
i. Using the supplied black plastic
key, open & remove the upper
cover.
ii. Disconnect the battery power and
remove the battery holder
iii. Using a Philips screw driver remove
the upper right-hand Phillips screw
and remove the steel wall mount
plate (wall build-up frame).
iv. Use the steel plate as a guide,
mark where holes need to be
drilled. Important: Make sure
bracket and case unit is mounted
level.
v. When installing onto a concrete
wall, drill holes 30 mm deep using a
6 mm masonry drill bit. Insert wall
anchors into the holes and mount
the plate using the screws.
vi. Slide & assemble the dispenser
onto the plate tongues, ensuring
the dispenser is secured by the two
tongues.
P a g e | 7
vii. Remove the white plastic cap & fill
the soap cartridge with soap. Do
not overfill the soap cartridge to the
top the cap.
viii. Assemble back the battery holder
and tighten the holder onto the
upper cover.
ix. Connect the battery power cable.
x. Place & close the upper cover onto
the dispenser.
xi. Remove the white sensor film from
underneath the sensor.

P a g e | 8
P a g e | 9
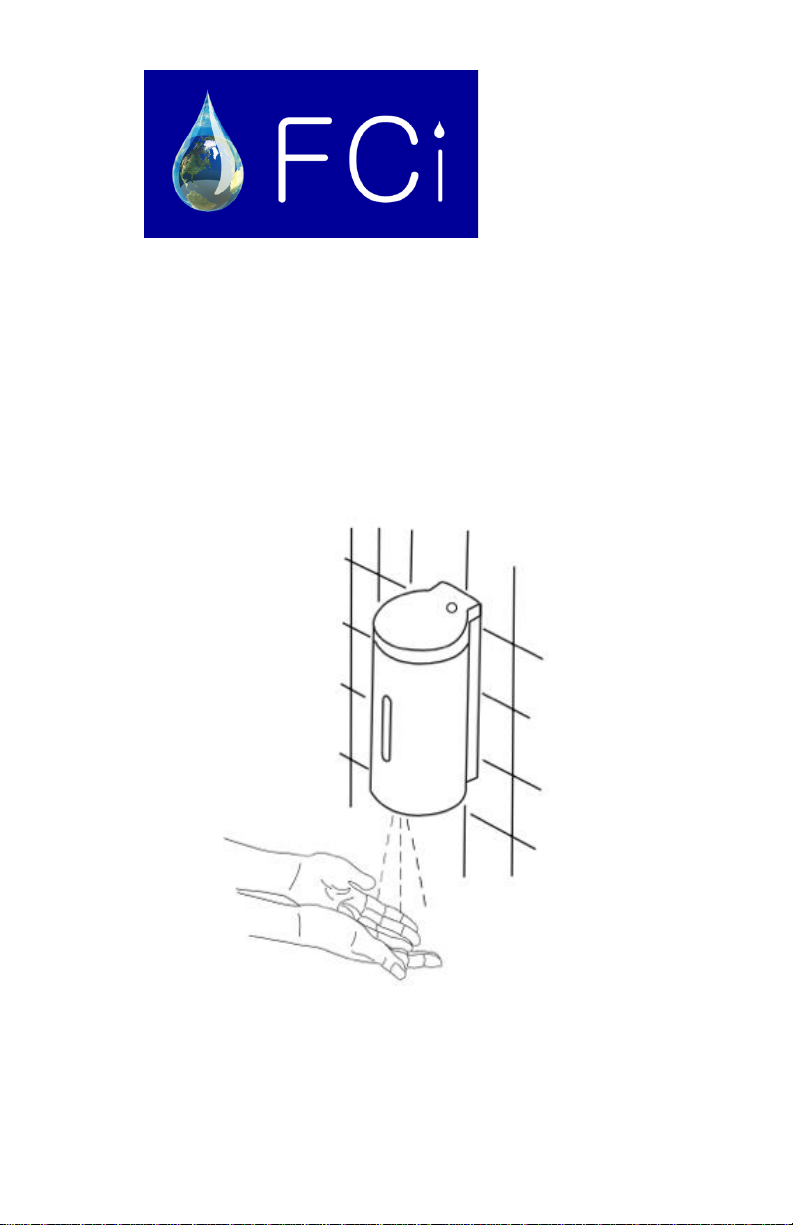
Operations
As the user’s hands enter below the beam’s
effective range (5 –15 cm), the beam is reflected
back into the sensor receiver and activates the
solenoid valve allowing a single soap application
to flow from the dispenser.

P a g e | 10
Soap Volume
Adjustment
No adjustments are required for most settings.
Factory default soap volume is 1 ml. The factory
setting should be satisfactory for most
installations.
To invoke the volume adjustment, press the
button below the dispenser and hold it until the
LED starts flashing slowly, about five seconds.
Press the button again and hold until the LED
flashes for approximately 5 seconds and flashing
continuously.
Place a medium target such as small card board
under the dispenser nozzle until the desired
volume has been reached. Remove the target to
complete setup.

P a g e | 11
Soap Dispensing
Range Adjustments
No adjustments are required for most settings.
Factory default range is set at 1 cm. The factory
setting should be satisfactory for most
installations.
To invoke the sensing range adjustment, press
the button below the dispenser and hold it until
the LED starts flashing slowly, about five
seconds. Press the button again and hold for 5
seconds until the LED flashes continuously.
Place a medium target such as small card board
below the sensor eye at the desired range until
the LED stops flashing. Remove the target to
complete setup.

P a g e | 12
Battery Replacement
The sensor LED will flash continuously & rapidly
to indicate low battery power.
i. Using the supplied black plastic
key, open & remove the upper
cover.
ii. Disconnect the battery power and
remove the battery holder.
iii. To remove the battery holder,
unfasten the two Phillips screw
from the upper cover.
iv. Remove the 6 AA size batteries
and replace with new AA batteries.
v. Place back the holder and securely
tighten the two Phillips screws
vi. Assemble back & close the upper
cover.

P a g e | 13
Troubleshooting
1. Unit does not operate
i. Check battery. Remove & replace
3 AA size batteries.
2. Soap does not dispense
i. Soap bottle needs refill. Refill
soap.
ii. Check soap dispensing nozzle for
clog. Clean nozzle with soft cloth.

P a g e | 14
Care & Cleaning
DO NOT USE abrasive or chemical cleaners
(including chlorine bleach) to clean dispenser
that may dull the luster and attack the special
decorative finishes. Use ONLY mild soap and
water, then wipe dry with clean cloth or towel.
While cleaning the bathroom tile, protect the
dispenser from any splattering of cleaner. Acids
and cleaning fluids will discolor or remove
decorative finish.

P a g e | 15
Resources
Warranty Information
For information on product
warranty, visit our resource page
through the QR code.
Alternatively, you can visit our
warranty claims page at
https://faucetscanada.ca//warranty
-claim/
For Installation guides, visit our
resource page through the QR
code.
Alternatively, you can visit our
resource page at
https://faucetscanada.ca/resources/
To view more products from
Faucets Canada, visit our shop
page through the QR code.
Alternatively, you can visit our shop
page at
https://faucetscanada.ca/shop/

P a g e | 16
About us
Here at FCi, our main goal is to break the eco-
innovation boundary and provide customers with
fixtures that save water and deliver reliable
sources of sanitation every time.
As Canada’s favourite automatic faucet brand,
we are proud to say we deliver quality touchless
fixtures that perform beyond expectations and
exceed design standards.
To learn more about Faucets Canada, please visit our website at
FacucetsCanada.ca
This manual suits for next models
1
Table of contents
Other FCI Dispenser manuals


Popular Dispenser manuals by other brands


Bunn
Bunn IMIX-3S+ Installation & operating guide

RIVIAN
RIVIAN PT00401761 installation guide

BULMAN Products
BULMAN Products R999 8-ROLL Instructions for assembly and use

Fetco
Fetco XTS Series Cleaning manual

AFFINIS GROUP
AFFINIS GROUP SaniServ AccuFreeze Operation manual

NCR
NCR Retrofit OPTIC 5 Touch installation guide