FCI ASD-0003 User manual

P a g e | 1
MagicMoon Automatic
Dispenser
ASD-0003
Installation Manual
Quality Guarantee
*Thank you for choosing the automatic faucet soap dispenser. Please
read the instruction carefully before installation. This manual is for your
reference only.

P a g e | 2
Features
•Hands free sensor operation improves
hand washing hygiene.
•Easy installation and low-cost
maintenance
•Modular one-piece construction with
chrome-plated cast brass spout and black
throat plate
•Available with hardwired or battery power
Specifications
Power
6V (4 x Alkaline D batteries)
Sensing Range
5 –15 cm
Foam Vol per
Drop
4 –25 ml (4 ml factory default
setting)
Soap Bottle
Volume
1500 ml
Ambient
Temperature
1 –55 oC

P a g e | 3
Before Installation
•Locate position of soap dispenser.
•Ensure that soap dispenser does not
interfere with anything above or below the
lavatory/counter top area
•Pay special attention so that the sensor
surface is not flawed or scratched during
the installation process.
•Before installing on the wall, check that no
other piping and wiring is running behind
hole locations. Wall should be sufficiently
reinforced or risk failure due to foam tank
case unit falling.
•Do not place other devices that use an
inverter or infrared sensor near the faucet,
as this may cause the faucet to
malfunction.

P a g e | 4
Tools You will Need
•Adjustable wrench
•Power drill with 25 –30 mm counter top
drill bit
•Phillips screwdriver
•Utility knife
•Hammer
•Ruler/tape measure
P a g e | 5
Part List
Faucet Body
Assembly
Control Box
Assembly
1
Sensor
1
Sensor cable
female
2
Nozzle
assembly
2
Control box
cover
3
Hex screw
3
Control box
base
4
Spout
4
Push button
5
O Ring
5
Hose clip
6
Tapered
washer
6
Power cable
7
Nut
7
Fixed frame
8
Tube clip
8
Suction tube
9
Clear tubing
9
Bottle cap
10
Brass shank
10
Soap bottle
11
Male sensor
cable

P a g e | 6
Part List Diagram

P a g e | 7
Construction /
Installation Diagram
1. Faucet Soap Assembly
i. Soap Dispenser oftentimes can be
mounted in the left or right hole of a
100 m or 200 mm center-set sink.
The ability to do this is contingent
upon the width of the faucet spout
and accessibility to the unit on the
underside of the sink (the Motor
and Soap Bottle cannot interfere
with the water or drain lines). When
such interference above or below
the sink occurs, the Soap
Dispenser must be installed
through the countertop to the side
of the sink as shown in figure 1.
ii. Drill a 25 –30 mm hole into the
counter.
iii. Slide the plastic gasket onto the
brass shank making certain that the
hole in gasket is positioned over the
washer in the base of the spout.
iv. Guide the brass shank, tubes and
the sensor cable through the hole in
the counter.
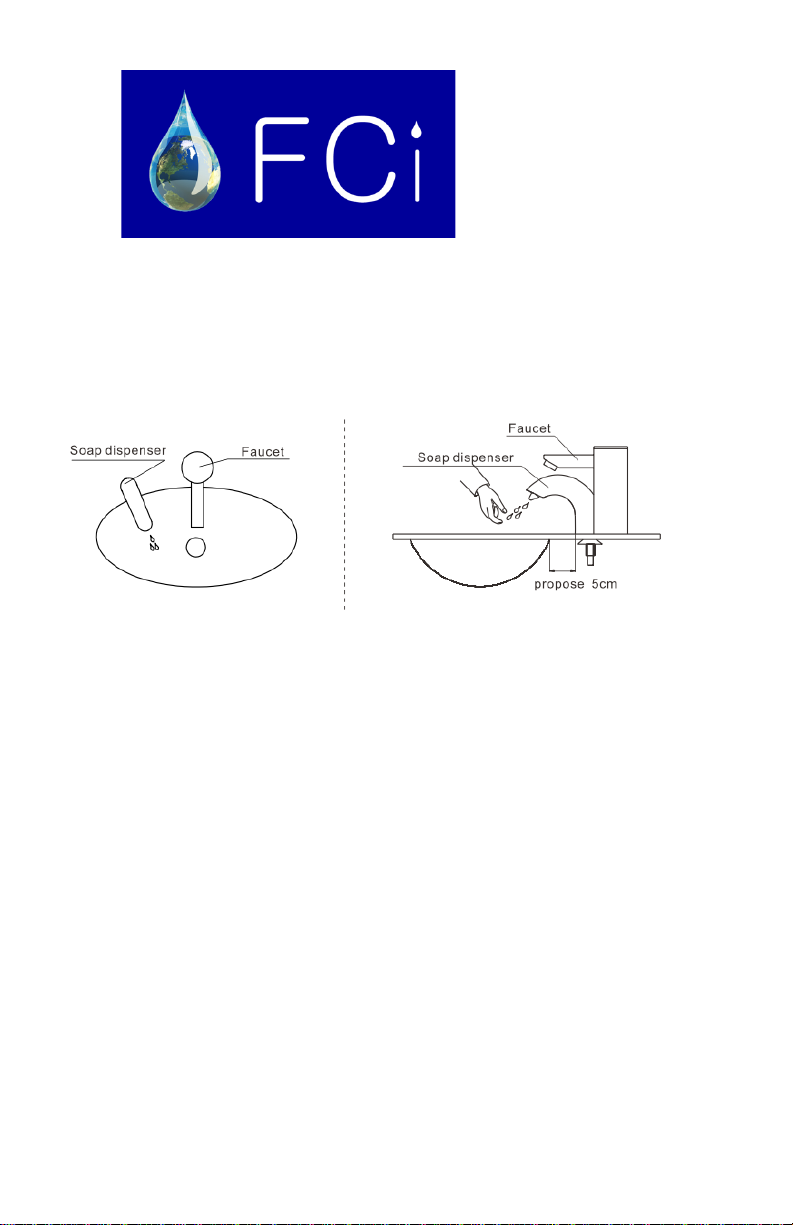
P a g e | 8
v. Position spout to direct soap into
the sink
vi. Screw the flange nut onto the
shank and tighten.
2. Control Box Assembly (Including Battery
Box)
i. Determine a temporary position for
mounting the foam tank & battery
case units.
ii. Make sure foam tank unit is within
reach of the liquid soap and air tube
from the foam soap dispenser.
iii. Use the mounting grey plastic
bracket as a guide, mark where
holes need to be drilled. Important:
Make sure bracket and foam tank
case unit is mounted level. Repeat
for battery case unit.

P a g e | 9
iv. When installing onto a concrete
wall, drill holes 30 mm deep using a
6 mm masonry drill bit. Insert wall
anchors into the holes and mount
the dispenser using screws.
v. When installing onto a wood wall,
drill holes using a 3 mm drill bit and
attach the dispenser bracket using
screws provided.
vi. Remove the battery case cover and
install 4 D size batteries. Assemble
back the cover and tighten the
cover using the four supplied
Philips screws. Guide the male
battery box cable through the
bottom opening and place the case.
3. Connect Foam & Air Tubes
Connect the foam soap tube and air
tube from the foam soap dispenser into
the soap tube fitting and air tube fitting
found on top of the foam tank case
unit, respectively.
i. Check soap tube tags and
align with correct fittings as
indicated on the fitting’s
connection label.
ii. Cut the soap tube and the air
tube at suitable lengths.
Ends should be cut at right
angles and tubes should be
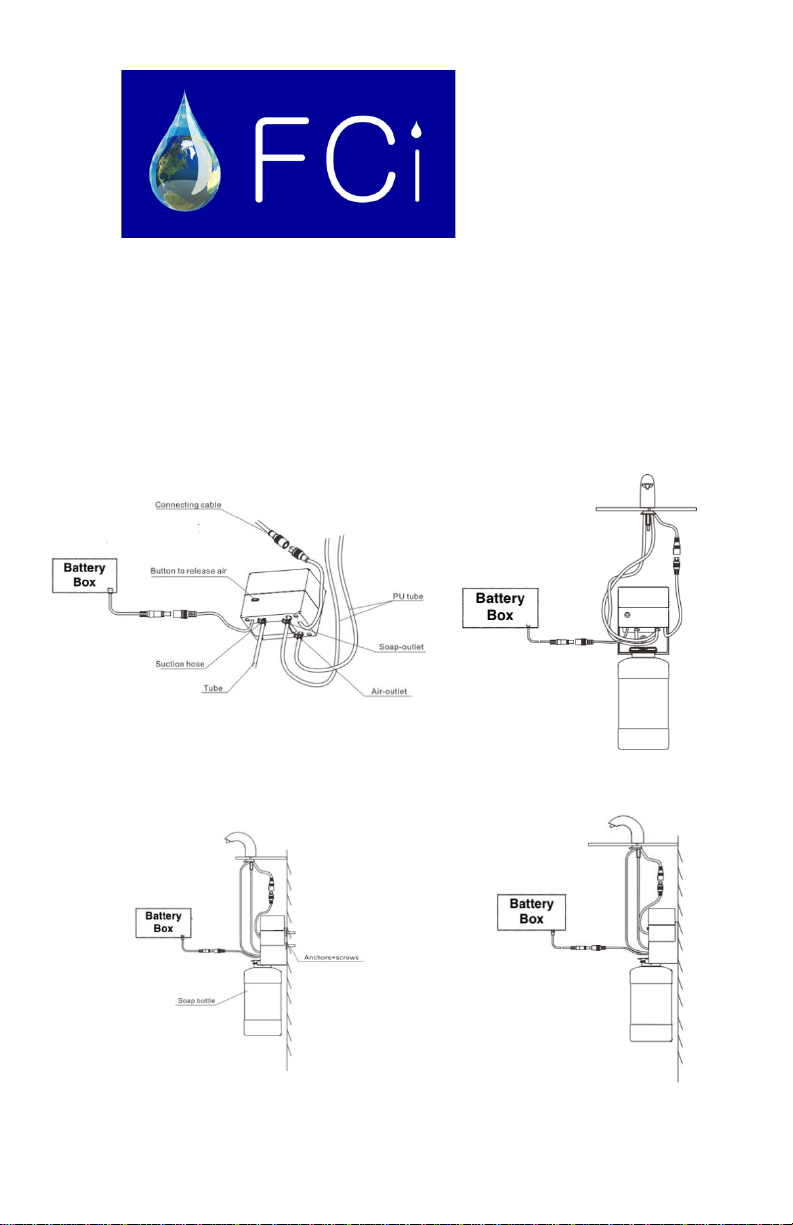
P a g e | 10
free of kinks and bends
when connected.
iii. Insert soap tube and air tube
into respective fittings and
secure with tube clamps.

P a g e | 11
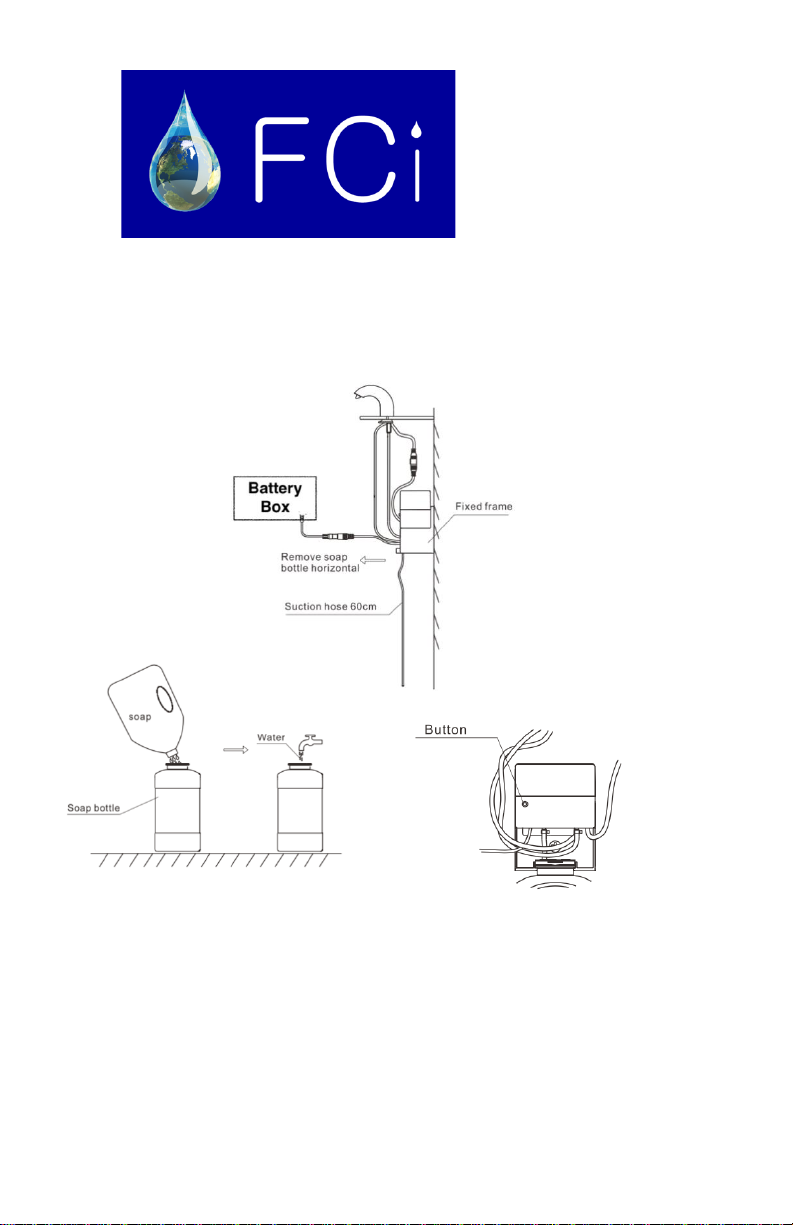
Fill / Refill Soap
1. Lift the soap bottle and horizontally pullout
the bottle.
2. Remove the plastic bottle cap.
3. Fill the bottle with 2 parts water & one-part
soap concentrate. Avoid overfilling the
bottle.
4. Return the bottle back into the case unit
(fixture frame).
5. Push the green button on the controller to
release trapped air & prepared the
dispenser for use.
P a g e | 12
Fill / Refill Soap Diagram
P a g e | 13
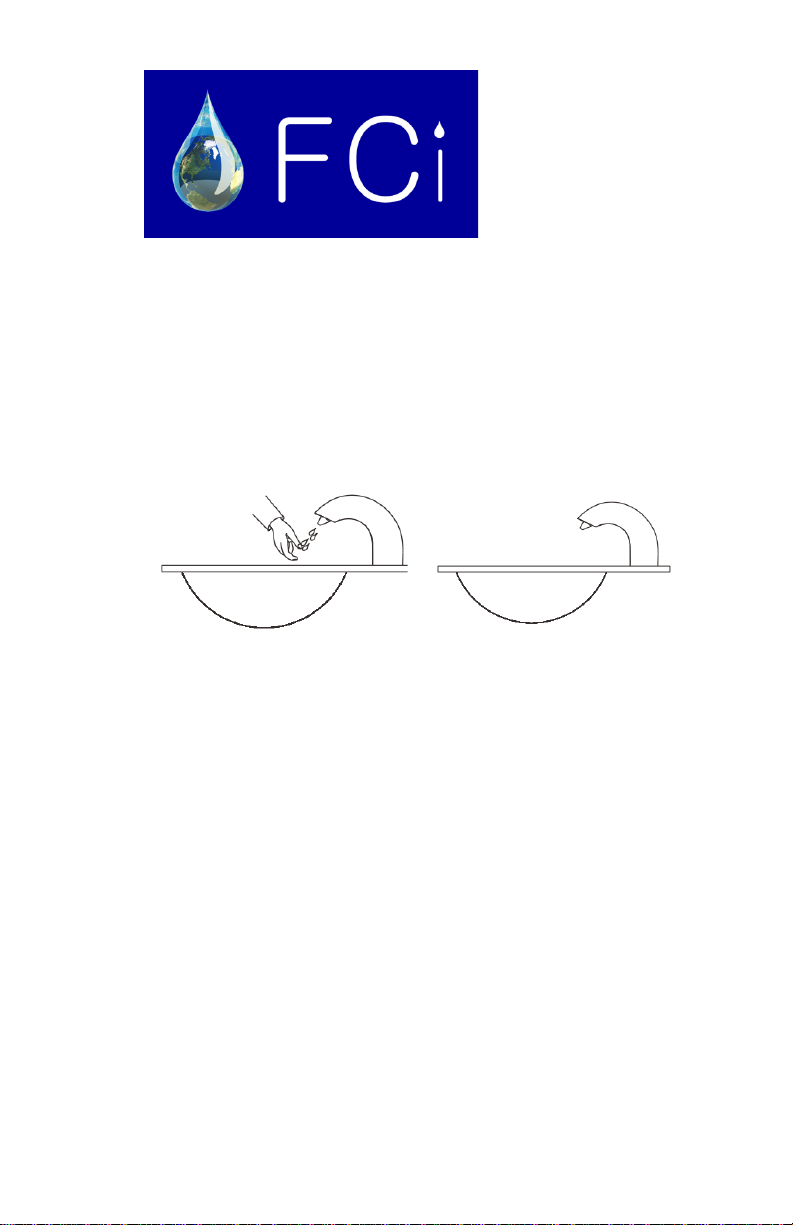
Operations
As the user’s hands enter the beam’s effective
range, the beam is reflected back into the sensor
receiver and activates the solenoid valve allowing
a single soap application to flow from the spout.

P a g e | 14
Soap Volume
Adjustment
No adjustments are required for most settings.
Factory default soap volume is 4 ml. The factory
setting should be satisfactory for most
installations.
To adjust the volume, aim the remote control at
sensor eye. Press the plus “Time +” to increase
the soap volume and “Time – “to reduce the
volume. The LED will flash three times when the
maximum or minimum dispense volume has
been reached.
P a g e | 15
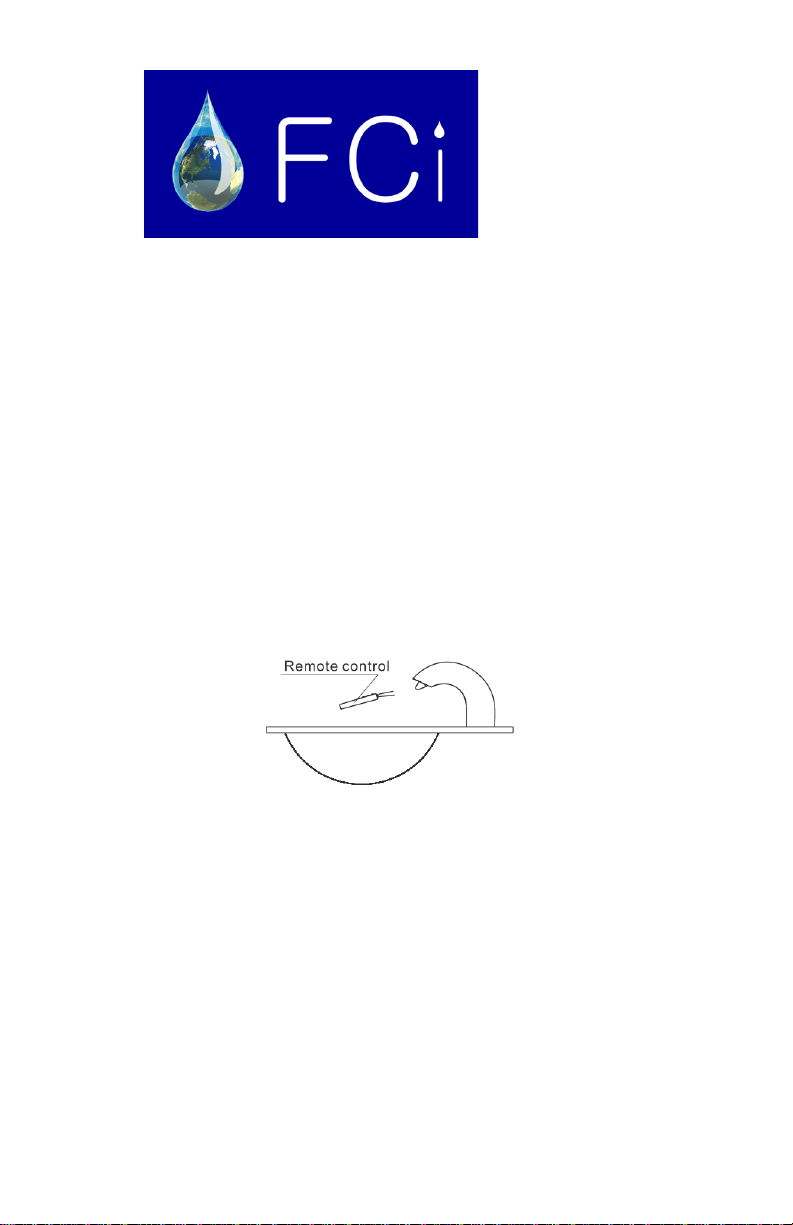
Soap Dispensing
Range Adjustments
To adjust the dispensing range:
1. On the remote press the auto adjust
button.
2. Place hand at the desired distance. The
LED will flash for 1 sec then stays on for 3
secs to confirm setting.

P a g e | 16
Battery Replacement
1. Disconnect the power cables.
2. Remove the black battery holder from the
case unit
3. Using a Philips screw driver, remove the
two Philips screws, plastic cover and the
four D size batteries.
4. Replace with 4 new batteries, place back
the cover and tighten the assembly.
5. Place back holder onto the case unit and
connect the power cables.

P a g e | 17
Troubleshooting
1. Unit does not operate
i. Check battery power cables are
connected. Connect power cables.
2. Soap does not dispense
i. Soap bottle needs refill. Refill 2:1
water & soap.
ii. Check soap dispensing nozzle for
clog. Clean nozzle with soft cloth.
3. Liquid soap is not in foam state
i. Soap bottle needs refill. Refill 2:1
water & soap.

P a g e | 18
Care & Cleaning
DO NOT USE abrasive or chemical cleaners
(including chlorine bleach) to clean faucet that
may dull the luster and attack the chrome or
special decorative finishes. Use ONLY mild soap
and water, then wipe dry with clean cloth or
towel. While cleaning the bathroom tile, protect
the dispenser from any splattering of cleaner.
Acids and cleaning fluids will discolor or remove
chrome plating.

P a g e | 19
Resources
For Installation guides, visit our
resource page through the QR
code
Alternatively, you can visit our
resource page at
https://faucetscanada.ca/resource
s/
To view more products from
Faucets Canada, visit our shop
page through the QR code.
Alternatively, you can visit our
shop page at
https://faucetscanada.ca/shop/
Warranty Information
For information on product
warranty, visit our resource page
through the QR code.
Alternatively, you can visit our
warranty claims page at
https://faucetscanada.ca//warranty-
claim/

P a g e | 20
About us
Here at FCi, our main goal is to break the eco-
innovation boundary and provide customers with
fixtures that save water and deliver reliable
sources of sanitation every time.
As Canada’s favourite automatic faucet brand,
we are proud to say we deliver quality touchless
fixtures that perform beyond expectations and
exceed design standards.
To learn more about Faucets Canada, please visit our website at
FacucetsCanada.ca
Table of contents
Other FCI Dispenser manuals


