manuals.online logo
Brands
  1. Home
  2. •
  3. Brands
  4. •
  5. FCMP OUTDOOR
  6. •
  7. Lawn And Garden Equipment
  8. •
  9. FCMP OUTDOOR Woodgrain Rain Barrel User manual

FCMP OUTDOOR Woodgrain Rain Barrel User manual

Thank you for purchasing this fine product q
• Decrease storm water runo at peak storm times, reducing
pollution, potential basement ooding and burden on wastewater
treatment facilities
• Provide naturally softened, chlorine-free water for greener lawns
and gardens, delicate houseplants, washing cars and windows.
• Conserve water during hot, dry summer months.
Woodgrain Rain Barrel
q
• Diminue l’écoulement des eaux lors des tempêtes ce qui réduit la
pollution, la probabilité d’inondation des sous-sols et le fardeau sur
les installations de traitement des eaux.
• Fournit de l’eau naturellement douce et sans chlore pour un jardin
vert, pour les plantes d’intérieur ainsi que pour laver la voiture et les
fenêtres.
• Permet de conserver l’eau lors périodes des canicules.
Bois-comme tonneau de pluie
1 Grillage antidébris en aluminium
1 Tuyau
1 Tuyau de raccordement
2 Bandes de xation
1 Bouchon
1 Attaches
1 Aluminum Debris Screen
1 Hose
1 Connector Hose
2 Tie-down Straps
1 Shut-o Valve
1 Hose Clip
www.fcmponline.com
Copyright © 2018 GRANDMARK Ltd.
Merci d'avoir acheté cet excellent produit
www.fcmponline.com
Copyright © 2018 GRANDMARK Ltd.
➄
➃
➂
➁
➀insert screen with leading edge
tucked under front rim of barrel
opening
with front edge inserted, push
back edge of screen downward
to t in place
rmly force hose clamp into
drilled hole
hose clamp will lock in place
t hose end over spigot, twist
and lock in place
➅The barrel must be installed on a
at, level surface. We recommend
using pressure treated wood or a
patio stone as a base to prevent
shifting and tipping
Assembly and Installation Instructions
➄
➃
➂
➁
➀insérer écran avec bord
d'attaque remplié sous la jante
avant l'ouverture du tonneau
avec bord avant insérée, appuyez
sur le bord arrière de l'écran vers
le bas pour s'adapter à la place
forcer fermement bride du
tuyau dans le trou percé
bride du tuyau se verrouillera en
place
pousser l'extrémité du tuyau
plus de robinet et torsion et
verrou en place
➅Le tonneau doit être installé sur
une surface plane. Nous vous
recommandons d'utiliser le bois
traité sous pression ou un patio
en pierre de base pour prévenir
le déplacement et de tomber
Assemblage et installation
2
2
1
1
➄
➃
➂
➅
2
2
1
1
➄
➃
➂
➅
Forest City Models & Patterns Ltd. Warranty
One (1) Year Warranty on Manufacturer Defects. Warranty excludes cracking from improper use/storage. For
warranty issues, please contact Forest City Models & Patterns:
Forest City Models & Patterns Ltd., 157 Gerald Parkway, Thorndale, Ontario, Canada N0M 2P0
Phone: 519-858-5795 Fax: 519-858-9196 e-mail: [email protected]
Enlever le coude et
couper le tuyau de
decente à la
bonne longueur
Laisser 5 cm (2 po)
d’espace libre entre
le coude du tuyau
de decente et le
grillage antidébris Tuyau de
decente
raccourci
Puisage de l’eau du tonneau:
Pour puiser l’eau, détacher le tuyau de l’attache, ouvrir l’obturateur et remplir
un arrosoir. Le tuyau peut être raccordé à un tuyau d’arrosage plus long pour
atteindre d’autres endroits du jardin.
Drawing Water from the Barrel:
To draw water, unclip garden hose from barrel, turn on valve and ll a
watering can. This hose can be connected to a long garden hose to water
other areas of the garden.
Forest City Models & Patterns Ltd. Garantie
Une (1) Garantie d'Année sur les Défauts de Fabricant. La Garantie exclut de craquage à partir de d'une utilisation impropre /
stockage. Pour les éditions de garantie, contactez s'll vous plait Forest City Models and Patterns:
Forest City Models & Patterns Ltd., 157 Gerald Parkway, Thorndale, Ontario, Canada N0M 2P0
Phone: 519-858-5795 Fax: 519-858-9196 e-mail: [email protected]
Before positioning the barrel, you will need to shorten the
current downspout to allow water to exit into the barrel.
Remove elbow from bottom of downspout, measure and
cut the downspout so that it will be 5 cm (2 in) above the
barrel screen once elbow is reinstalled.
Allow 5 cm (2 in)
clearance
between downspout
elbow and Spout
and Debris Screen Shortened
downspout
Remove elbow
and cut downspout
to size
➆
Warning - Winter Storage
If you live in a cold climate, drain the barrel and hose completely.
Hoses should be stored inside. Place the barrle upsidedown to avoid
water freezing and cracking the barrel.
Avant d’installer le tonneau, il faut raccourcir le tuyau de
descente pour permettre à l’eau de s’écouler dans le
tonneau. Enlever le coude au bas du tuyau de descente,
mesurer et couper le tuyau pour qu’il repose à 5 cm (2 po)
au dessus du grillage une fois le coude réinstallé.
➆
Warning - Winter Storage
If you live in a cold climate, drain the barrel and hose completely.
Hoses should be stored inside. Place the barrle upsidedown to avoid
water freezing and cracking the barrel.
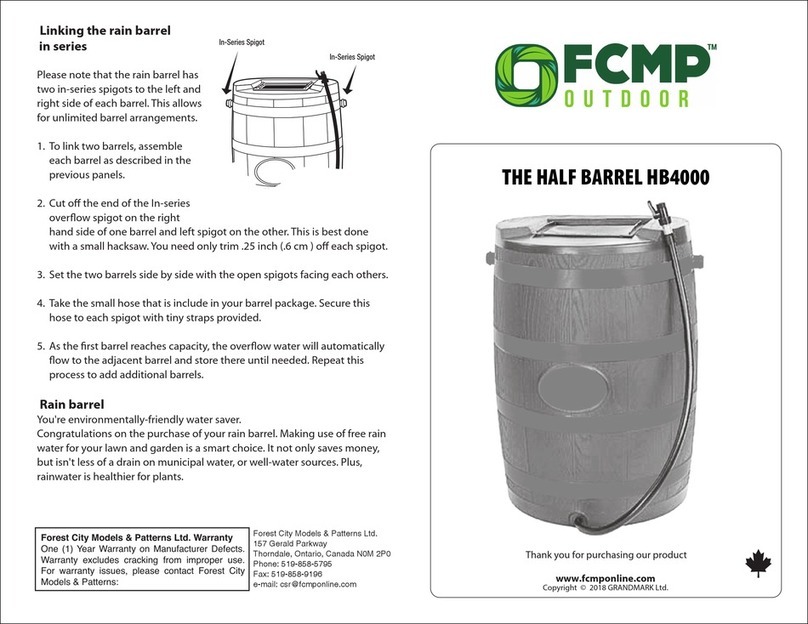
Linking Multiple Barrels In-Series:
Please note that the rain barrel has two in-series spigots to the left and
right of the back of each barrel. This allows for unlimited barrel
arrangements.
1. To link two barrels, assemble each barrel as described in the
previous panels.
2. Cut off the end of the in-series overflow spigot on the right hand side of
one barrel and the left spigot on the other. This is best done with a
small hacksaw or sharp utility knife. You need only trim .25 inch (.6 cm)
off of each spigot.
3. Set the two barrels side-by-side with the open spigots facing each
other.
4. Take the small hose (B) from your Hardware pack. Secure this hose to
each spigot with tie straps (C) provided.
5. As the first barrel reaches capacity, the overflow water will
automatically flow to the adjacent barrel and store there until needed.
Repeat this procedure to add additional barrels.
Warning - Winter Storage
If you live in a cold climate, drain the barrel and hose completely.
Hoses should be stored inside. Place the barrle upsidedown to avoid
water freezing and cracking the barrel.

Connexion de plusieurs tonneaux en série :
Veuillez note que le tonneau est doté de deux joints en série à la droite et
à la gauche à l'arrière de chaque baril. Cela permet d'arrangements
tonneau illimitées.
1. Pour relier deux barils, assemblez chaque baril selon les directives.
contenues a l'intérieur de cette brochure.
2. Coupez l'extrémité du joint en séné du cote droit d'un des barils, et du
cote gauche de l'autre baril. Cette tache est plus facile si on utilise une
petite scie a métaux ou un couteau universel bien coupant. Vous
n'avez besoin de couper que 0.25 po (0,6 cm) de chaque joint.
3. Installez les deux barils hardware pack, les joints ouverts en face l'un
de l'autre.
4. Utilisez le petit tuyau (B) fourni avec l'ensemble de raccordement.
Fixez ce tuyau a chaque joint a l'aide des attaches autobloquantes (C)
fournies.
5. Lorsque le premier baril est plein, l'eau de surplus coulera
automatiquement dans le baril adjacent et y restera jusqu'à ce qu'on
l'utilise. Répétez cette procédure pour ajouter d'autres barils.
Avertissement - Entreposage hivernal
Si vous vivez d'ans un climat froid, vidangez la cuve et les tuyaux
complètement. Rangez les tuyaux à l'intérieur. Placez la cuve sens
dessus dessous pour éviter que I'eau ne gèle et ne fissure Ia! cuve .

Other FCMP OUTDOOR Lawn And Garden Equipment manuals

FCMP OUTDOOR Catalina Rain Barrel User manual

FCMP OUTDOOR

FCMP OUTDOOR Catalina Rain Barrel User manual

FCMP OUTDOOR HP3000-BLK User manual

FCMP OUTDOOR

FCMP OUTDOOR HP3000-BLK User manual

FCMP OUTDOOR Wicker Style Planter User manual

FCMP OUTDOOR

FCMP OUTDOOR Wicker Style Planter User manual

FCMP OUTDOOR RC45 User manual

FCMP OUTDOOR

FCMP OUTDOOR RC45 User manual

FCMP OUTDOOR HB4000 User manual

FCMP OUTDOOR

FCMP OUTDOOR HB4000 User manual

FCMP OUTDOOR RM4000 User manual

FCMP OUTDOOR

FCMP OUTDOOR RM4000 User manual

FCMP OUTDOOR IM4000 User manual

FCMP OUTDOOR

FCMP OUTDOOR IM4000 User manual

Popular Lawn And Garden Equipment manuals by other brands

GHE AeroFlo 120 L manual

GHE

GHE AeroFlo 120 L manual

Weka 367.1000.16400 ASSEMBLY, USER AND MAINTENANCE INSTRUCTIONS

Weka

Weka 367.1000.16400 ASSEMBLY, USER AND MAINTENANCE INSTRUCTIONS

WOODLAND SCENICS E-Z WATER instructions

WOODLAND SCENICS

WOODLAND SCENICS E-Z WATER instructions

Costway PS6502 user manual

Costway

Costway PS6502 user manual

Worx Landroid installation guide

Worx

Worx Landroid installation guide

Agri-Fab Poly Lawn Roller 45-02671 owner's manual

Agri-Fab

Agri-Fab Poly Lawn Roller 45-02671 owner's manual

AeroGarden Sprout quick start guide

AeroGarden

AeroGarden Sprout quick start guide

CAMPAGNOLA HOLLY Use and maintenance manual

CAMPAGNOLA

CAMPAGNOLA HOLLY Use and maintenance manual

Oase AquaOxy 55 operating instructions

Oase

Oase AquaOxy 55 operating instructions

Milwaukee TURBO-Pro Operator's manual

Milwaukee

Milwaukee TURBO-Pro Operator's manual

Swisher GC-07 GARDEN CART manual

Swisher

Swisher GC-07 GARDEN CART manual

Gardigo MOUSE TRAP 2.0 instruction manual

Gardigo

Gardigo MOUSE TRAP 2.0 instruction manual

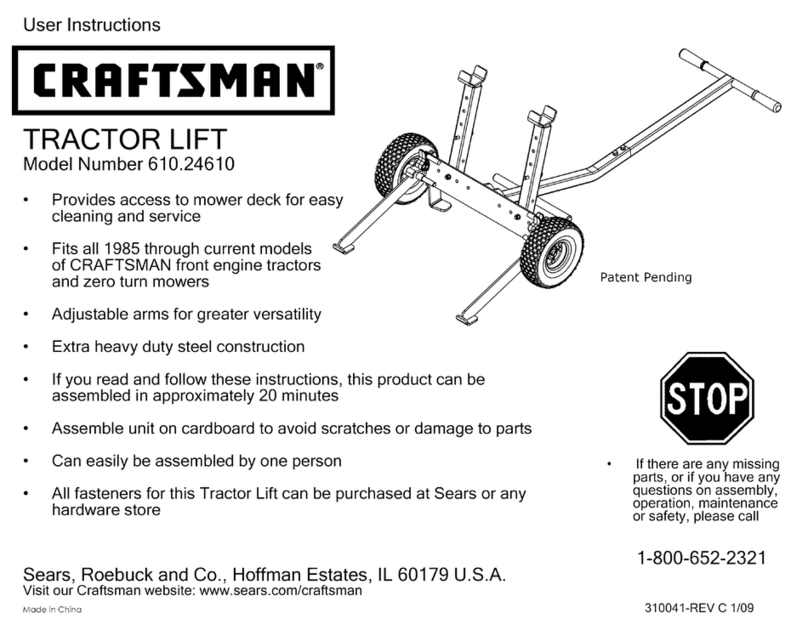
Craftsman 610.24610 User instructions

Craftsman

Craftsman 610.24610 User instructions

plastia urbalive Berberis 26 quick start guide

plastia

plastia urbalive Berberis 26 quick start guide

Edco CPL-8 Operator's instruction manual

Edco

Edco CPL-8 Operator's instruction manual

Trac Vac 682-IC Operating and assembly manual

Trac Vac

Trac Vac 682-IC Operating and assembly manual

Midwest Equipment Manufacturing Trac-Vac 452-DIC Operating and assembly manual

Midwest Equipment Manufacturing

Midwest Equipment Manufacturing Trac-Vac 452-DIC Operating and assembly manual

Jata hogar mosquitoTRAP MT11 Instructions of use

Jata hogar

Jata hogar mosquitoTRAP MT11 Instructions of use

manuals.online logo
manuals.online logoBrands
  • About & Mission
  • Contact us
  • Privacy Policy
  • Terms and Conditions

Copyright 2025 Manuals.Online. All Rights Reserved.