manuals.online logo
Brands
  1. Home
  2. •
  3. Brands
  4. •
  5. Ferguson
  6. •
  7. Door Lock
  8. •
  9. Ferguson HLK11 Series User manual

Ferguson HLK11 Series User manual

DoorLockInstallation
Step1AdjustLatchBackset
AdjusttheBacksettomatchyourdoor:
A) ToAdjustto2‐3/4”Backsetpullsquarelatchcamout.
B) ToAdjustto2‐3/8”Backsetpushsquarelatchcamin
Step2InstallLatchintothedoor
InstallLatchintodoorpositionedsothatwedgedshapedsideofBoltengages
thestrikefirstwhenclosingthedoor
Step3InstallLockbody
Step4WaveLeverOnlyLeftHandingAdjustment
A) InstallexterioroflockbyInsertingLockSpindleThroughSquareLatchCamand
StudsthroughroundholesuntillockisFlushwiththedoor.
B) ForKnobswithverticalkeyslotstheknobshouldbeinstalledwiththeKeySlot
positionedsothattheKeywillbeteethupwhenused.
C) Installtheinteriorofthelockbyinsertingitoverthespindle.
Insertscrewsthrough
holesandtightendownwithahand‐heldscrewdriver.
Note:Checkalignmentofthelockasyoutightenthescrewstokeeplockcenteredover
theboreHole
A
B
C
AB
OnlyShapedLeversneedtobeadjustedforhanding,straightLeverscanbesimply
installedflippedtotheproperhanding..WaveLeversareshippedRight‐Handed.
A) Handlesareremovedbyrotatingthelever45Degreesandpushingtherelease
catchwhilepullingthelockoffthespindle.
B) Oncebothsidesareofftheycanbeswappedsothatthehandlespointontothe
door.
C) Securetheleversbypushinguntiltheysnapintoplace.Testbypullingoutonthe
lever
Note:Leverscanonlyberemovedwhenthelockisunlocked
Step5InstallStrike EntryLockonly–
EnsureSecurityPin
SeatsProperly
Right
Wrong
2-3/4”(70mm) 2-3/8”(60mm)
X
DeadboltLockInstallation
Step1AdjustLatchBackset
AdjusttheBacksettomatchyourdoorbytwisting
theLatchFace1/8turnclockwisefromthetailand
pullingouttochangefrom2‐3/8”to2‐3/4”Backset
orpushingintochangefrom2‐3/4”to2‐3/8”
Backset
RotatetheFacebacktotheLockedPositionbefore
installingtheLatch
Step2InstallLatchintothedoor
InstallLatchintheuppositionasmarkedonthelatch.
CrossshapedcrankshouldbeonthebottomandcenteredL/RinyourLockhole.
Important:Donothammeronthelatch
Step3SingleCylinderLocks
Step3DoubleCylinderLocks
A) Note:BarSpindleontheBackofthelockshouldpassthroughthecrossshapedcrankoftheLatchintheverticalposition.
B) KeySlotshouldbeatthebottomofthelocksothattheteethofthekeywillfaceupwheninserted.
C) Insertthespindleoftheexteriorlockbodythroughthelatchandholdthelockcenteredontheborehole.
D) SlidetheturnpieceoftheinteriorassemblyontotheSpindlethatprotrudesthroughthelatch
E) InsertScrewsthroughtheinteriorPlate,thelatchandintotheexteriorBody.
F) Somewigglingmightbenecessarytogetthealignmentright.
G) CenterLockandtestoperationbeforefinaltighteningofthescrews.
H) InstalltheStrikeontheJamb
A) ExteriorforkedbarSpindleshouldpassthroughthecrossshapedcrankoftheLatchintheverticalposition.
B) InteriorforkedbarSpindleshouldpassthroughthecrossshapedcrankoftheLatchinthehorizontalpositionlockinginto
theexteriorspindle
C) InsertScrewsthroughtheinteriorbody,thelatchandintotheexteriorBody.
D) Wigglingwillbenecessarytogetthealignmentright.
AB
A B
DC E
DoorLockInstructionsNewDoorPreparation
Step1:MarkDoor
Step2:DrillHoles Step4:PrepareJambforStrike
Step3:MortiseDoorforLatch
A) DrillthroughDoorFacewith2‐1/8”
holesaw.DrillonesideuntilGuide
BitpunchesthroughthenDrillfrom
throughwiththeHolesawfrom
theothersidetoCompletethe
Lock

Bore

Hole
B) Drillthe1”LatchHolefromthe
dooredgefullyintotheLockBore
hole
A) InsertLatchintoHoleandkeepingitparalleltothe
doorEdgemarktheOutline
B) MortisetheDooredgewithaChiselorRouter1/8”
deeporuntilthelatchFaceplateisflushwiththedoor
wheninstalled
A) InsertLatchintoholeindoorandMarkwhereitwillhit
thedoorJambwhenproperlyclosed.
B) Drilla1”holeaMinimumof1”deepintothedoor
JambatthepositionMarked
C) IftheDoorisatightfittotheJambyoumayneedto
markthestrikeandmortisetheJambsothestrikesits
flushtothedoor
CustomerService1‐800‐221‐3379
A) FoldTemplatebelowonFoldLine
andMarkDoorforLockBoreHole
at2‐3/4”or2‐3/8”Backsetand
lockEdgeHoleCenteredonthe
dooredge.
B) Forsetof2Locks,Deadboltshould
be5.5”abovetheentranceKnobor
lever
Note:Mostexteriordoors2‐3/4”
Backsetisused
CommonStandardforLockHeightoffFlooris36”to39”above
thefloor.
A
B
AB
A
B
ABC
K020

This manual suits for next models

11

Popular Door Lock manuals by other brands
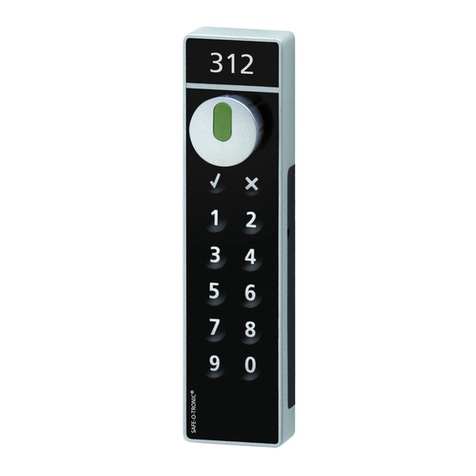
Schulte-Schlagbaum SAFE-O-TRONIC access LS101 manual
Schulte-Schlagbaum

Schulte-Schlagbaum SAFE-O-TRONIC access LS101 manual

Digilock Numeris Versa Standard user guide
Digilock

Digilock Numeris Versa Standard user guide

Cross point XM3 MICROPROXS installation manual

Cross point

Cross point XM3 MICROPROXS installation manual

McGrathLocks MLNX1 manual

McGrathLocks

McGrathLocks MLNX1 manual
Life Smart LS099GD user guide

Life Smart

Life Smart LS099GD user guide
Borglocks BL5000 Parts List, Installation and General Information
Borglocks

Borglocks BL5000 Parts List, Installation and General Information

HavenLock HAVEN LOCKDOWN Z quick start guide
HavenLock

HavenLock HAVEN LOCKDOWN Z quick start guide

Simons Voss PegaSys Door Handle 4.1 Panic bar quick guide
Simons Voss

Simons Voss PegaSys Door Handle 4.1 Panic bar quick guide

Simons Voss PegaSys Door Handle 4.1 Scandinavian Oval quick guide
Simons Voss

Simons Voss PegaSys Door Handle 4.1 Scandinavian Oval quick guide

Abus HomeTec Pro CFA3000 Supplement to installation instructions and user guide
Abus

Abus HomeTec Pro CFA3000 Supplement to installation instructions and user guide

Glutz 51017 Fixing instructions

Glutz

Glutz 51017 Fixing instructions
Von Duprin 6300 installation instructions

Von Duprin

Von Duprin 6300 installation instructions

Dorma TENSOR Installation instruction

Dorma

Dorma TENSOR Installation instruction

Kwikset 907 15 SMT owner's manual

Kwikset

Kwikset 907 15 SMT owner's manual

Von Duprin Strike Force 6211 installation instructions

Von Duprin

Von Duprin Strike Force 6211 installation instructions

Coastal BLU-e Fittings guide

Coastal

Coastal BLU-e Fittings guide

Keyless Entry CG-PK installation guide

Keyless Entry

Keyless Entry CG-PK installation guide

LockState RemoteLock openEDGE RG Hardware installation

LockState

LockState RemoteLock openEDGE RG Hardware installation

manuals.online logo
manuals.online logoBrands
  • About & Mission
  • Contact us
  • Privacy Policy
  • Terms and Conditions

Copyright 2025 Manuals.Online. All Rights Reserved.