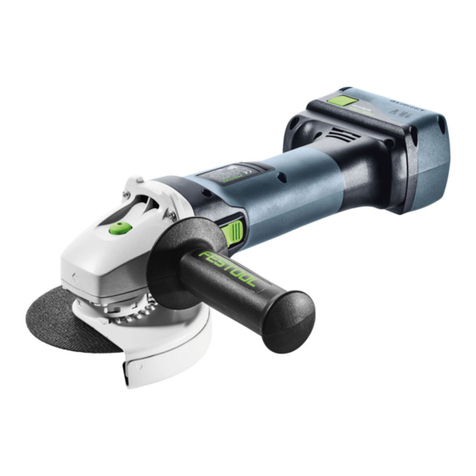
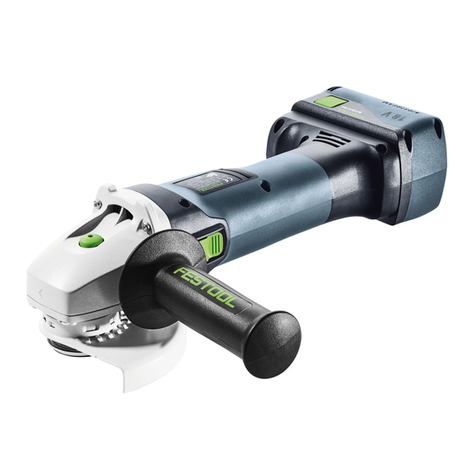
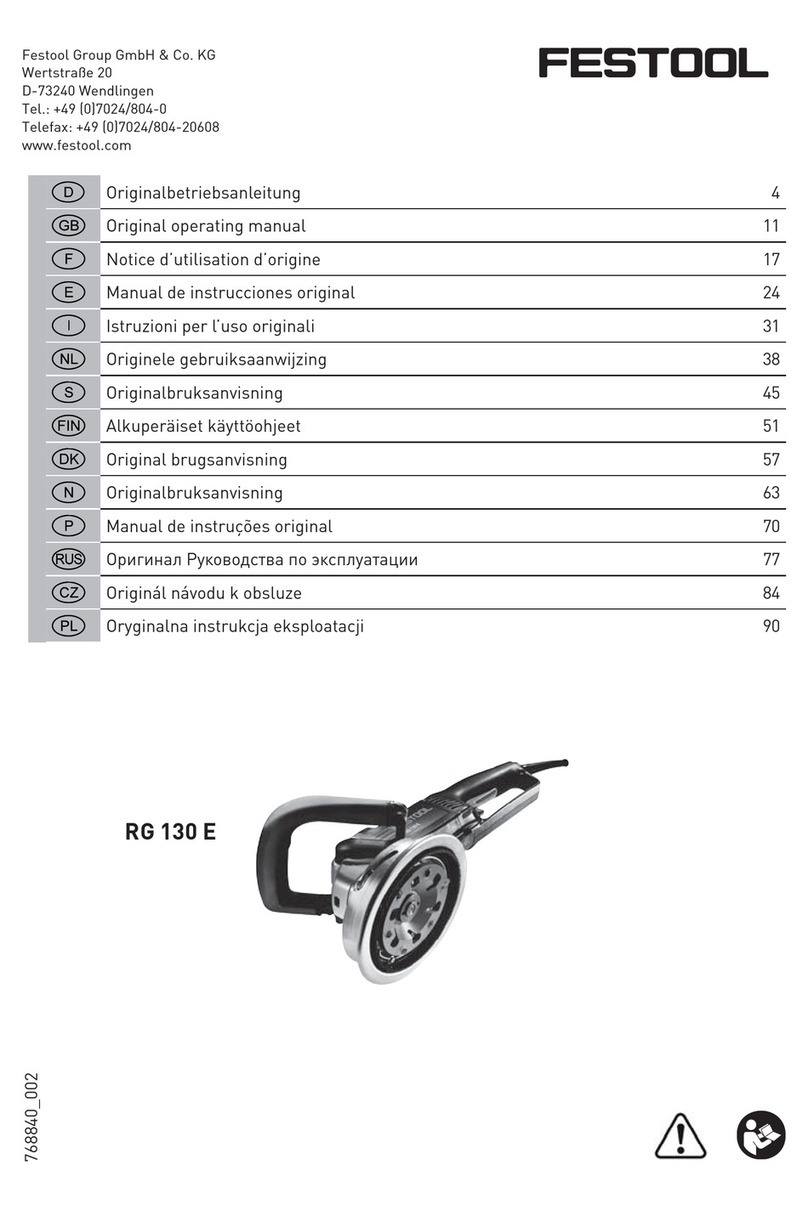
Festool AGC 18 User manual

en Original Instructions – Cordless angle grinder 6
fr Notice d'utilisation d'origine - meuleuse d'angle sans fil 19
es Manual de instrucciones original - Amoladora angular a batería 34
Read all instructions before using
Lire toutes les instructions avant de démarrer les travaux.
Lea y comprende todas las instrucciones antes de usar.
AGC 18
Festool GmbH
Wertstraße 20
73240 Wendlingen
Germany
www.festoolusa.com
718399_B / 2019-06-06


1
1-7
1-1
1-6
1-11
1-6
1-2 1-5
1-3
1-8
1-3
1-4
1-8
1-9
1-10


Contents
1 About this manual....................................... 6
2 Symbols.......................................................6
3 Safety warnings...........................................7
4 Intended use..............................................11
5 Technical data........................................... 12
6 Functional description.............................. 12
7 Commissioning..........................................12
8 Battery pack.............................................. 13
9 Settings......................................................13
10 Working with the electric power tool........16
11 Acoustic warning signals.......................... 16
12 Service and maintenance..........................16
13 Accessories............................................... 17
14 Environment..............................................18
1 About this manual
Save these instructions
It is important for you to read and understand
this manual. The information it contains relates
to protecting your safety and preventing prob
lems. The symbols below are used to help you
recognize this information.
DANGER Description of imminent
hazard and failure to avoid
hazard will result in death.
WARN
ING
Description of hazard and
possible resulting injures
or death.
CAUTION Description of hazard and
possible resulting injuries.
NOTICE Description of possible
damage of the device or its
surroundings.
2 Symbols
Warning of general danger
Warning of electric shock
Read the operating manual and safety
instructions.
Wear ear protection.
Wear protective gloves.
Wear a dust mask.
Wear protective goggles.
Wear sturdy shoes.
Tip or advice
Handling instruction
Inserting the battery pack
Removing the battery pack
V volts
d.c direct current
min-1 revolutions per minute
m/s meters per second
n0no load speed
diameter
mm millimetre
" inch
lb. pound
CAUTION
For
use only with FESTOOL
batteries BP 18.
ATTENTION À
utiliser seulement avec
les batteries FESTOOL
BP 18.
PRECAUCIÓN
Para uso
solamente con
las baterías FESTOOL
BP 18.
CAUTION For use only with
FESTOOL batteries BP 18
AVERTISSEMENT Pour
réduire le risque de blessure, utiliser
uniquement des accessoires convenant
au moins à la vitesse maximale
indiquée sur l‘outil. Utiliser toujours le
protecteur au moment de meuler.
ADVERTENCIA Para reducir el
riesgo de lesiones, use exclusivamente
accesorios con una velocidad igual o superior
al valor máximo indicado en la herramienta.
Utilice siempre la protección adecuada al
realizar trabajos de amoladura.
WARNING To reduce the risk of injury,
use only accessories rated at least equal to
the maximum speed marked on the tool.
Always use proper guards when grinding.
WARNING To reduce the risk of injury, use
only accessories rated at least equal to the
maximum speed marked on the tool. Always
use proper guards when grinding.
English
6

3 Safety warnings
3.1 General power tool safety warnings
WARNING! Read all safety warnings and
all instructions. Failure to follow the
warnings and instructions may result in electric
shock, fire and/or serious injury.
Save all warnings and instructions for future
reference.
The term "power tool" in the warnings refers to
your mains-operated (corded) power tool or
battery-operated (cordless) power tool.
1 WORK AREA SAFETY
a. Keep work area clean and well lit. Clut
tered or dark areas invite accidents.
b. Do not operate power tools in explosive
atmospheres, such as in the presence of
flammable liquids, gases or dust. Power
tools create sparks which may ignite the
dust or fumes.
c. Keep children and bystanders away while
operating a power tool. Distractions can
cause you to lose control.
2 ELECTRICAL SAFETY
a. Power tool plugs must match the outlet.
Never modify the plug in any way. Do not
use any adapter plugs with earthed
(grounded) power tools. Unmodified plugs
and matching outlets will reduce risk of
electric shock.
b. Avoid body contact with earthed or
grounded surfaces, such as pipes, radia
tors, ranges and refrigerators. There is an
increased risk of electric shock if your body
is earthed or grounded.
c. Do not expose power tools to rain or wet
conditions. Water entering a power tool will
increase the risk of electric shock.
d. Do not abuse the cord. Never use the cord
for carrying, pulling or unplugging the
power tool. Keep cord away from heat, oil,
sharp edges or moving parts. Damaged or
entangled cords increase the risk of elec
tric shock.
e. When operating a power tool outdoors,
use an extension cord suitable for outdoor
use. Use of a cord suitable for outdoor use
reduces the risk of electric shock.
f. If operating a power tool in a damp loca
tion is unavoidable, use a residual current
device (RCD) protected supply. Use of an
RCD reduces the risk of electric shock.
3 PERSONAL SAFETY
a. Stay alert, watch what you are doing and
use common sense when operating a pow
er tool. Do not use a power tool while you
are tired or under the influence of drugs,
alcohol or medication. A moment of inat
tention while operating power tools may re
sult in serious personal injury.
b. Use personal protective equipment. Al
ways wear eye protection. Protective
equipment such as a dust mask, non-skid
safety shoes, hard hat or hearing protection
used for appropriate conditions will reduce
personal injuries.
c. Prevent unintentional starting. Ensure the
switch is in the off-position before con
necting to power source and/or battery
pack, picking up or carrying the tool. Car
rying power tools with your finger on the
switch or energising power tools that have
the switch on invites accidents.
d. Remove any adjusting key or wrench be
fore turning the power tool on. A wrench
or a key left attached to a rotating part of
the power tool may result in personal in
jury.
e. Do not overreach. Keep proper footing and
balance at all times. This enables better
control of the power tool in unexpected sit
uations.
f. Dress properly. Do not wear loose cloth
ing or jewellery. Keep your hair and cloth
ing away from moving parts. Loose
clothes, jewellery or long hair can be
caught in moving parts.
g. If devices are provided for the connection
of dust extraction and collection facilities,
ensure these are connected and properly
used. Use of dust collection can reduce
dust-related hazards.
4 POWER TOOL USE AND CARE
a. Do not force the power tool. Use the cor
rect power tool for your application. The
correct power tool will do the job better and
safer at the rate for which it was designed.
b. Do not use the power tool if the switch
does not turn it on and off. Any power tool
that cannot be controlled with the switch is
dangerous and must be repaired.
c. Disconnect the plug from the power
source and/or remove the battery pack, if
detachable, from the power tool before
making any adjustments, changing acces
sories, or storing power tools. Such pre
English
7

ventive safety measures reduce the risk of
starting the power tool accidentally.
d. Store idle power tools out of the reach of
children and do not allow persons unfami
liar with the power tool or these instruc
tions to operate the power tool. Power
tools are dangerous in the hands of un
trained users.
e. Maintain power tools and accessories.
Check for misalignment or binding of mov
ing parts, breakage of parts and any other
condition that may affect the power tool’s
operation. If damaged, have the power
tool repaired before use. Many accidents
are caused by poorly maintained power
tools.
f. Keep cutting tools sharp and clean. Prop
erly maintained cutting tools with sharp
cutting edges are less likely to bind and are
easier to control.
g. Use the power tool, accessories and tool
bits etc. in accordance with these instruc
tions, taking into account the working con
ditions and the work to be performed. Use
of the power tool for operations different
from those intended could result in a haz
ardous situation.
5 Battery tool use and care
a. Recharge only with the charger specified
by the manufacturer. A charger that is
suitable for one type of battery pack may
create a risk of fire when used with another
battery pack.
b. Use power tools only with specifically des
ignated battery packs. Use of any other
battery packs may create a risk of injury
and fire.
c. When battery pack is not in use, keep it
away from other metal objects, like paper
clips, coins, keys, nails, screws or other
small metal objects, that can make a con
nection from one terminal to another.
Shorting the battery terminals together
may cause burns or a fire.
d. Under abusive conditions, liquid may be
ejected from the battery; avoid contact. If
contact accidentally occurs, flush with wa
ter. If liquid contacts eyes, additionally
seek medical help. Liquid ejected from the
battery may cause irritation or burns.
6 SERVICE
a. Have your power tool serviced by a quali
fied repair person using only identical re
placement parts. This will ensure that the
safety of the power tool is maintained.
3.2 Machine-specific safety notices
General safety warnings for sanding, wire
brushing and abrasive cutting
–This power tool is designed to be used as a
sander, wire brush and abrasive cutting
machine. Read all safety warnings, infor
mation, illustrations and technical data
enclosed with the tool. If the following in
structions are not observed, this may lead
to electric shock, fire and/or serious inju
ries.
–This power tool is not suitable for sanding
using sandpaper or polishing. Applications
for which the power tool is not intended can
pose a serious risk and cause injuries.
–Do not use accessories which are not spe
cifically designed and recommended by
the tool manufacturer. Just because the
accessory can be attached to your power
tool, it does not assure safe operation.
–The rated speed of the accessory must be
at least equal to the maximum speed
marked on the power tool. Accessories
running faster than their rated speed can
break and fly apart.
–The outside diameter and the thickness of
your accessory must be within the capaci
ty rating of your power tool. Incorrectly
sized accessories cannot be adequately
guarded or controlled.
–Threaded mounting of accessories must
match the grinder spindle thread. For ac
cessories mounted by flanges, the arbour
hole of the accessory must fit the locating
diameter of the flange. Accessories that do
not match the mounting hardware of the
power tool will run out of balance, vibrate
excessively and may cause loss of control.
–Do not use a damaged accessory. Before
each use inspect the accessory such as
abrasive wheels for chips and cracks,
backing pad for cracks, tear or excess
wear, wire brush for loose or cracked
wires. If power tool or accessory is drop
ped, inspect for damage or install an un
damaged accessory. After inspecting and
installing an accessory, position yourself
and bystanders away from the plane of the
rotating accessory and run the power tool
at maximum no-load speed for one mi
nute. Damaged accessories will normally
break apart during this test time.
English
8

–Wear personal protective equipment. De
pending on application, use face shield,
safety goggles or safety glasses. As ap
propriate, wear dust mask, hearing pro
tectors, gloves and workshop apron capa
ble of stopping small abrasive or work
piece fragments. The eye protection must
be capable of stopping flying debris gener
ated by various operations . The dust mask
or respirator must be capable of filtrating
particles generated by your operation. Pro
longed exposure to high intensity noise may
cause hearing loss.
–Make sure that any other persons in the
vicinity are at a safe distance from your
work area. Anyone entering the work area
must wear personal protective equipment.
Fragments of the workpiece or broken
tools may fly off and even cause injuries
outside the immediate work area.
–Hold the power tool by insulated gripping
surfaces only, when performing an opera
tion where the cutting accessory may con
tact hidden wiring. Cutting accessory con
tacting a "live" wire may make exposed
metal parts of the power tool "live" and
could give the operator an electric shock.
–Never lay the power tool down until the
accessory has come to a complete stop.
The spinning accessory may grab the sur
face and pull the power tool out of your
control.
–Do not run the power tool while carrying it
at your side. Accidental contact with the
spinning accessory could snag your cloth
ing, pulling the accessory into your body.
–Regularly clean the power tool’s air vents.
The motor’s fan will draw the dust inside
the housing and excessive accumulation of
powdered metal may cause electrical haz
ards.
–Do not operate the power tool near flam
mable materials. Sparks could ignite these
materials.
–Do not use accessories that require liquid
coolants. Using water or other liquid cool
ants may result in electrocution or shock.
Kickbacks and corresponding safety warnings
Kickback is a sudden reaction caused by an in
sertion tool becoming caught or jammed while
rotating, such as an abrasive wheel, sanding
pad, wire brush, etc. Catching or jamming
causes the rotating insertion tool to stop sud
denly. This accelerates an uncontrolled power
tool against the rotational direction of the ac
cessory at the site where the accessory is jam
med.
If, for example, an abrasive wheel becomes
caught or jammed in the workpiece, the edge of
the abrasive wheel which is plunged into the
workpiece may become stuck, causing the
abrasive wheel to break or resulting in kick
back. The abrasive wheel then moves towards
or away from the operator, depending on the
wheel's rotational direction. This can also
cause abrasive wheels to break.
A kickback occurs as a result of using the pow
er tool incorrectly or misguidedly. It can be pre
vented by taking appropriate precautions, as
described below.
–Maintain a firm grip on the power tool and
position your body and arm to allow you to
resist kickback forces. Always use auxili
ary handle, if provided, for maximum con
trol over kickback or torque reaction dur
ing start-up. The operator can control tor
que reactions or kickback forces, if proper
precautions are taken.
–Never place your hand near the rotating
accessory. Accessory may kickback over
your hand.
–Do not position your body in the area
where power tool will move if kickback oc
curs. Kickback will propel the tool in direc
tion opposite to the wheel’s movement at
the point of snagging.
–Use special care when working corners,
sharp edges etc. Avoid bouncing and snag
ging the accessory. Aorners, sharp edges
or bouncing have a tendency to snag the ro
tating accessory and cause loss of control
or kickback.
–Do not attach a saw chain woodcarving
blade or toothed saw blade. Such blades
create frequent kickback and loss of con
trol.
Specific safety warnings on sanding and abra
sive cutting
–Use only wheel types that are recom
mended for your power tool and the spe
cific guard designed for the selected
wheel. Wheels for which the power tool
was not designed cannot be adequately
guarded and are unsafe.
–The grinding surface of centre depressed
wheels must be mounted below the plane
of the guard lip. An improperly mounted
wheel that projects through the plane of
English
9

the guard lip cannot be adequately protect
ed.
–The guard must be securely attached to
the power tool and positioned for maxi
mum safety, so the least amount of wheel
is exposed towards the operator. The
guard helps to protect the operator from
broken wheel fragments, accidental con
tact with wheel and sparks that could ignite
clothing.
–Wheels must be used only for recom
mended applications. For example: do not
grind with the side of cut-off wheel. Abra
sive cut-off wheels are intended for periph
eral grinding, side forces applied to these
wheels may cause them to shatter.
–Always use undamaged wheel flanges that
are of correct size and shape for your se
lected wheel. Proper wheel flanges sup
port the wheel thus reducing the possibility
of wheel breakage. Flanges for cut-off
wheels may be different from grinding
wheel flanges.
–Do not use worn down wheels from larger
power tools. Wheel intended for larger
power tool is not suitable for the higher
speed of a smaller tool and may burst.
Other specific safety warnings on abrasive
cutting
–Do not “jam” the cut-off wheel or apply
excessive pressure. Do not attempt to
make an excessive depth of cut. Over
stressing the wheel increases the loading
and susceptibility to twisting or binding of
the wheel in the cut and the possibility of
kickback or wheel breakage.
–Do not position your body in line with and
behind the rotating wheel. When the
wheel, at the point of operation, is moving
away from your body, the possible kickback
may propel the spinning wheel and the
power tool directly at you.
–When wheel is binding or when interrupt
ing a cut for any reason, switch off the
power tool and hold the power tool mo
tionless until the wheel comes to a com
plete stop. Never attempt to remove the
cut-off wheel from the cut while the wheel
is in motion otherwise kickback may oc
cur. Investigate and take corrective action
to eliminate the cause of wheel binding.
–Do not restart the cutting operation in the
workpiece. Let the wheel reach full speed
and carefully re-enter the cut. The wheel
may bind, walk up or kickback if the power
tool is restarted in the workpiece.
–Support panels or any oversized work
piece to minimize the risk of wheel pinch
ing and kickback. Large workpieces tend to
sag under their own weight. Supports must
be placed under the workpiece near the
line of cut and near the edge of the work
piece on both sides of the wheel.
–Use extra caution when making a “pocket
cut” into existing walls or other blind
areas. The protruding wheel may cut gas or
water pipes, electrical wiring or objects
that can cause kickback.
Safety Warnings Specific for Wire Brushing
Operations
–Note that the wire brushes lose wire bris
tles during normal use. Do not overload
the wire by applying too much pressure.
Flying wire pieces can easily penetrate thin
clothing and/or skin.
–If the use of a guard is recommended for
wire brushing, do not allow any interfer
ence of the wire wheel or brush with the
guard. Wire wheel or brush may expand in
diameter due to work load and centrifugal
forces.
Follow the operating manual for the charger
and the battery pack.
3.3 Further safety warnings
–Do not use the power tool in the rain or in
damp surroundings. Moisture in the power
tool may cause a short circuit and burning.
– Only guide the power tool into the material
when it is switched on (running).
– For safety reasons, the workpiece must be
clamped in a vice or another type of clamp
ing device. Clamping a workpiece frees up
both your hands for operating the power
tool.
– Never perform work while standing on lad
ders.
– Do not carry out cutting work above metal
lic objects, nails, screws or bolts.
–Use appropriate detection devices to look
for any hidden supply lines or consult your
local utility company. If the insertion tool
makes contact with live cables, it can result
in fire and electric shock. Damage to a gas
pipe can lead to an explosion. Penetration
of a water pipe can result in damage to
property.
–Harmful/toxic dust may be produced dur
ing your work (e.g. paint containing lead,
English
10

certain types of wood and metal). Only
qualified persons are permitted to handle
materials containing asbestos. Aontact
with or inhalation of this dust may pose a
risk for the operating personnel or persons
in the vicinity. Comply with the safety regu
lations that apply in your country.
Wear a P2 respiratory mask to protect
your health.
–After machining mineral materials (e.g.
gypsum): Blow out the inside of the power
tool through the vents and the control ele
ment using dry, oil-free compressed air.
Otherwise, dust deposits may build up in
side the power tool's housing and on the
on/off switch and harden when exposed to
humidity. This may impair the switching
mechanism and cause the power tool to
overheat.
–After machining metal: Blow out the inside
of the power tool through the vents using
dry, oil-free compressed air. Otherwise,
conductive dust deposits may build up in
side the power tool. This can cause a short-
circuit.
–Do not use power supply units or third-
party battery packs to operate cordless
power tools. Do not use third-party charg
ers to charge the battery packs. The use of
accessories not expressly authorised by the
manufacturer can result in electric shocks
and/or serious accidents.
3.4 Safety warnings for sanding tools
– Sanding tools are fragile, which is why you
must be extremely careful when handling
them. The use of damaged, incorrectly
clamped or inserted sanding tools is dan
gerous and can cause serious injuries.
– Ensure that the sanding tools are not ex
posed to any mechanical damage or harm
ful environmental conditions during stor
age.
– Handle and transport sanding tools with
care.
– Pay attention to the information on the la
bel or the sanding tool itself, as well as us
age restrictions, safety warnings or other
instructions. If any points are unclear when
choosing sanding tools, the user must con
tact the manufacturer for information be
fore using the tool.
– Sanding tools must be fitted in accordance
with Section 9.2 .
– Only experienced staff are permitted to fit
sanding tools.
3.5 Health hazard by dust
WARNING! various dust created by pow
er sanding, sawing, grinding, drilling and
other construction activities contains chemicals
known (to the State of California) to cause can
cer, birth defects or other reproductive harm.
Some examples of these chemicals are:
• lead from lead-based paints,
• crystalline silica from bricks and cement
and other masonry products, and
• arsenic and chromium from chemically
treated lumber.
The risk from these exposures varies, depend
ing on how often you do this type of work. To re
duce your exposure to these chemicals: work in
a well ventilated area, and work with approved
safety equipment, such as dust masks that are
specially designed to filter out microscopic par
ticles. Wash hands after handling.
WARNING
TO REDUCE THE RISK OF INJURY, USER
MUST READ INSTRUCTION MANUAL.
4 Intended use
The power tool is designed for abrasive cutting,
light sanding, working with wire brushes and
deburring metal and stone materials without
the use of liquid coolant or lubricant.
Use the guard provided for the application in
each case.
Only bonded cutting discs and abrasive wheels
as per EN 12413, diamond cutting discs as per
EN 13236 and wire brushes as per EN 1083 may
be used.
Do not use this power tool for polishing, sand
ing surfaces using diamond discs or for appli
cations involving diamond or hard ceramic
discs.
Cutter wheels, carbide and machining sanding
tools (with geometrically defined cutting edge)
are not suitable for use.
This power tool is intended for use with
BP Festool battery packs of the same voltage
class.
English
11

The user is liable for improper or non-in
tended use.
5 Technical data
Cordless angle grinder AGC 18
Motor voltage 18 V DC
Speed (no-load) 4500 – 8500 min-1
Speed settings 1 4500 min-1
25300 min-1
36100 min-1
46900 min-1
57700 min-1
68500 min-1
Circumferential speed
of sanding tool
80 m/s
Grinding spindle
thread
5/8"
Sanding tool diameter 4.5" (115 mm)
Sanding tool thickness max. 1/4" (6.0 mm)
min. 3/64"
(1.0 mm)
Weight as per EPTA
procedure 01:2014
5.9 lbs
6 Functional description
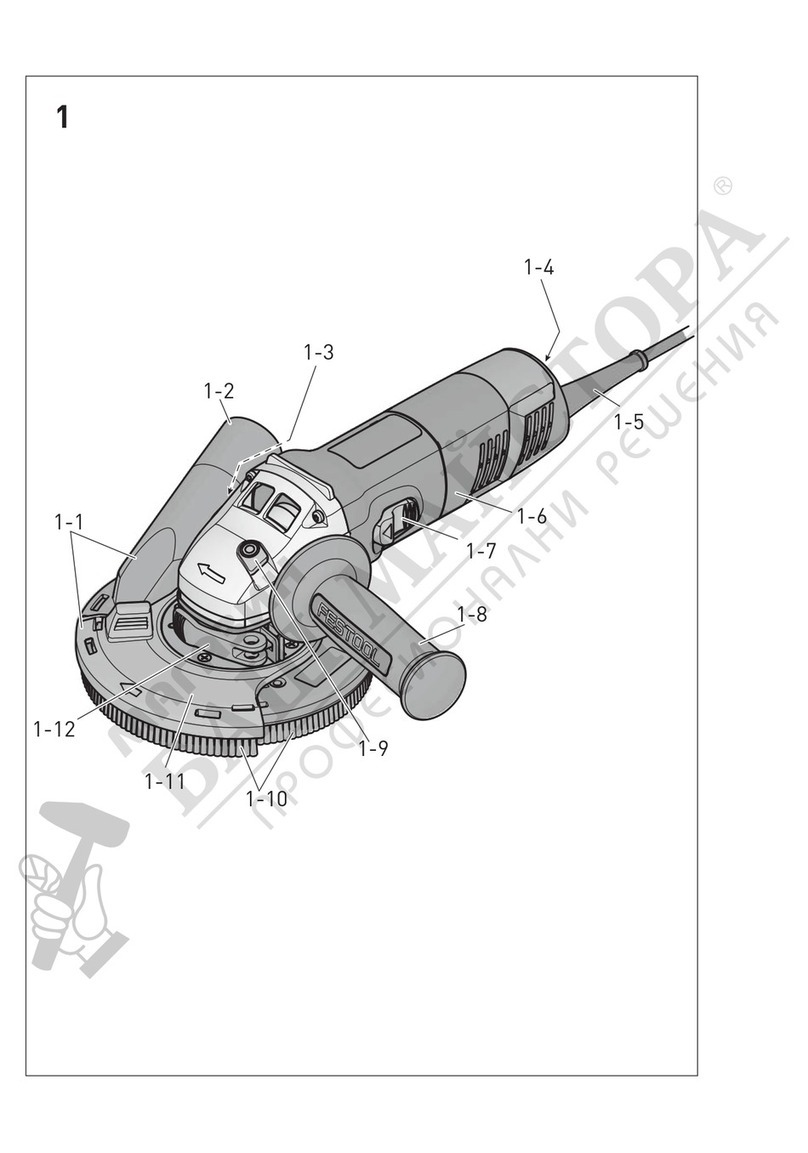
[1-1] Guard
[1-2] Spindle lock
[1-3] Thread for auxiliary handle
[1-4] Speed control
[1-5] On/off switch
[1-6] Auxiliary handle
[1-7] Insulated gripping surfaces (grey
shaded area)
[1-8] Buttons for releasing the battery pack
[1-9] Capacity button on battery pack
[1-10] Capacity indicator
[1-11] Support points
Accessories shown or described are not always
included in the scope of delivery.
The pictures for the functional description are
on a fold-out page at the beginning of the in
struction manual. While reading the manual
you can fold out the page for comparison and
quick reference.
6.1 Electronics
Smooth start-up
The electronically controlled smooth start-up
function ensures that the power tool starts up
smoothly.
Speed regulator [1-4]
You can continuously adjust the speed within
the speed range using the adjusting wheel .
This enables you to optimise the speed to suit
the respective material. Please also note the
specifications on the sanding tools.
Constant speed
The preselected motor speed is kept constant
through electronic control. This ensures a uni
form speed even when under load.
Recoil protection
In the event of a sudden speed reduction, e.g. if
the power tool becomes jammed in a separat
ing cut, the motor is switched off immediately.
To put the power tool back into operation, it
must first be switched off and then on again.
Restart protection
The built-in restart protection prevents the
power tool from starting up again automatically
if the power is disconnected during continuous
use. To put the power tool back into operation,
it must first be switched off and then on again.
Overheating protection
In the event of overheating, the safety electron
ics system switches to cooling mode. The motor
continues to run and the constant speed is de
activated. Let the machine cool down for ap
proximately 10–20 seconds before using it
and/or fully loading it again.
7 Commissioning
7.1 Holding the power tool correctly
Hold the power tool with both hands using the
insulated gripping surfaces [1-7]: One hand on
the motor housing behind the switch and the
other on the auxiliary handle [1-6].
7.2 Switch on/off
Switching on [2A]
► Push the on/off switch [1-5] forwards.
Pressing the front part of the switch at the
same time locks the on/off switch.
English
12

On/off switch [1-5] is locked and the power tool
is switched on.
Only position the tool on the material once
it has reached operating speed.
Setting the speed
The speed can be adapted in six settings de
pending on the workpiece requirements.
► Set the speed regulator [1-4] to the re
quired setting.
Switching off [2B]
► Lift the power tool from the processed ma
terial.
► Press the rear part of the on/off
switch [1-5].
Lock is released and the power tool is switched
off.
WARNING
Risk of injury from kickback, ejected parts
► Before setting down the power tool, wait
until the rotating sanding tool has come to
a complete stop.
► Set the power tool down on the support
points [1-11].
2B2A
8 Battery pack
► Inserting the battery pack [3A]
► Removing the battery pack [3B]
2
1
1
BP 18
3B3A
8.1 Capacity display
The capacity display [1-10] indicates the charge
of the battery pack for approx. 2 seconds after
the button [1-9] is pressed:
70‑100%
40‑70%
15‑40%
< 15% *
* Recommendation: Charge the battery pack
before any further use.
Further information about the battery pack
and charger can be found in the corre
sponding operating manual.
9 Settings
WARNING
Risk of injury
► Remove the battery pack from the power
tool before performing any work on the
power tool.
9.1 Fitting the auxiliary handle [1-6]
Always use the auxiliary handle to ensure
a safe working posture that prevents you
from tiring.
The special "VIBRASTOP" design of the auxiliary
handle helps to reduce vibrations.
► Screw in the auxiliary handle [1-6] on the
side of the thread [1-3] according to the
working method.
9.2 Fitting the sanding tool [4]
CAUTION
Risk of injury from hot and sharp tool
► Do not use any vibrating, blunt or defective
sanding tools.
► Do not use sanding tools that have been
exposed to extreme humidity, moisture or
high temperatures prior to installation.
► Wear protective gloves.
English
13

WARNING
Risk of injury from incorrectly fitted sanding
tool
► Only fold up the lift-up handle [4-3] for the
quick-action clamping nut when you are
replacing the sanding tool.
► Ensure that the flange [4-4] is fitted on the
spindle before installing the sanding tool.
Only tighten or loosen the clamping nut by
hand. Never use tools to loosen or tighten
the lift-up handle.
If the nut can no longer be loosened by
hand, it should only be loosened with a
face wrench [5-1].
If the lift-up handle is loose or damaged,
the clamping nut must no longer be used
under any circumstances.
Use the guard provided for the application
in each case.
► Remove the battery pack from the power
tool.
► Open the lift-up handle [4-3] for the quick-
action clamping nut.
► Unscrew the quick-action clamping nut
[4-2] by hand.
► Place the sanding tool on the spindle
and flange [4-4].
Ensure that the centring ridge of the flange
fits exactly into the opening in the disc and
that the form-fit connection between the
power tool/spindle and flange matches.
Ensure that the diameter of the power tool
spindle matches the hole in the sanding
tool.
Offset sanding tools must be fitted so
that their sanding area does not pro
trude beyond the edge of the guard.
Adhere to the stipulated rotational direction
of the sanding tool (arrow on the sanding
tool = arrow on the tool housing [4-1]).
► Place the quick-action clamping nut on the
sanding tool and spindle.
► Press the spindle lock [4-5] on the re
verse of the tool.
► Tighten the quick-action clamping nut by
hand.
► Close the lift-up handle for the quick-ac
tion clamping nut.
► Check that the sanding tool is securely at
tached and fitted to the power tool.
► Let new sanding tools run for around one
minute with no load as a test.
Removal is performed in reverse sequence to
assembly [5A].
4-2
4-4
4-1
4-5
4-3
2
1
3
4
4
2
1
34
5A
5-1
5B
9.3 Fitting the wire brushes [6]
► Remove the handle [6-1].
► Fit the handle with hand protection
[6-2].
► Fit the wire brushes [6-3] securely in the
holding thread [6-4].
Observe the information provided for the
wire brushes.
English
14

2
1
3
6-2
6-1
6-3
6-4
6
9.4 Positioning the guard/cutting guard [7]
The guard is preassembled. You can simply
turn the guard to adapt its position to the re
quirements of the task.
► Press and hold the locking lever on the
guard.
► Adjust the guard on the power tool so
that sparks and particles are deflected away
from the body.
► Release the locking lever and continue
to turn the guard until it locks in place.
The cutting guard, available as an acces
sory, can be positioned in the same way.
Click
2
3
1
7
9.5 Removing the guard/cutting guard [8]
CAUTION
Risk of injury due to flying sparks and bro
ken cutting discs.
► For abrasive cutting, use the cutting guard
that is available as an accessory: See sec
tion 10.2
► Remove the sanding tool that has already
been fitted to the power tool: See section
9.2 .
► Press and hold the locking lever on the
guard.
► After passing the pressure point, turn
the guard forwards.
► Remove the guard from the power tool.
2
2
3
1
8
9.6 Fitting the guard/cutting guard [9]
NOTICE
Signs of wear on the cutting guard.
► Before switching on the sanding tool, check
that it can move freely. The sanding tool
must not sand against the cutting guard.
Use the guard provided for the application
in each case.
► Insert the guard in the front position.
Make sure that the position of the pin and
groove match.
► Turn the guard to the required position
until the locking lever engages automatical
ly.
To fit the sanding tool, see section 9.2 .
2
2
1
9
English
15

10 Working with the electric
power tool
WARNING
Risk of injury
► Only guide the power tool into the material
when it is switched on (running).
► Always secure the workpiece in such a
manner that it cannot move.
► Keep your hands away from the rotating
sanding tools.
WARNING
Risk of injury from the fragile sanding tool
► Ensure that the sanding tool's expiry date
has not been exceeded.
WARNING
Risk of injury due to moving workpiece
► Ensure that the workpiece is secure.
WARNING
Risk of injury from overhead work
► Always wear safety glasses for overhead
work.
► Wear a P2 respiratory mask.
When not in use, the power tool can be set
down on the support points [1-11].
► Remove the sanding tool from the power
tool for transport.
10.1 Sanding
For sanding, always use the guard supplied
with the tool.
The guard is preassembled. For how to remove
the guard, see section 9.5 .
10.2 Abrasive cutting
For abrasive cutting, always use the TSH-
AGC 18-115 cutting guard that is available as an
accessory.
The cutting guard is fitted, positioned and re
moved in the same way as the guard, see sec
tions 9.5 and 9.6 .
► Always guide the sanding tool through the
workpiece in a straight line.
Ensure that the sanding tool does not tilt
and that it is not loaded at an angle or from
the side.
► For thick-walled workpieces, make a sepa
rating cut using oscillating movements
while applying slight pressure to the power
tool.
10.3 Working with wire brushes
WARNING
Risk of eye injuries caused by flying parts/
wires
► Wear protective goggles.
For working with wire brushes, always use the
TSH-AGC 18-115 hand protection that is availa
ble as an accessory, see section 9.3 .
11 Acoustic warning signals
If the power tool switches off due to one of the
following operating states, a warning signal
sounds when switching on the tool and the
power tool switches off again.
Battery pack not accepted
– Insert the correct battery pack model.
Battery pack empty
– Change the battery pack.
– Charge the battery pack.
Battery pack fault
– Change the battery pack.
– Use the charger to check that the battery
pack is fully functional once it has cooled
down.
Battery pack overheated
– Let the battery pack cool down.
Power tool overheated
– You must allow the power tool to cool down
before starting it up again.
Power tool fault
– Contact a Festool service workshop or spe
cialist dealer.
Power tool jammed
– Eliminate the cause of the jam.
If the power tool switches of when it be
comes jammed, no warning signal sounds.
12 Service and maintenance
WARNING
Risk of injury, electric shock
► Always disconnect the battery pack from
the machine before any cleaning or main
tenance!
English
16

WARNING
Any maintenance or repair work that re
quires opening of the motor or gear housing
should only be carried out by an authorised
Customer Service Centre (name supplied by
your dealer)!
► Maintenance or repair work carried out by
an unauthorised person can lead to the
wrong connection of the power cord or oth
er components, which in turn can lead to
accidents with serious consequences.
CAUTION
Certain cleaning agents and solvents are
harmful to plastic parts.
► Some of these include, but are not limited
to: Gasoline, Acetone, Methyl Ethyl Ketone
(MEK), Carbonyl Chloride, cleaning solu
tions containing Chlorine, Ammonia, and
household cleaners containing Ammonia.
Customer service and repairs
must only be carried out by the
manufacturer or service work
shops. Find the nearest address
at: www.festoolusa.com/service
Always use original Festool
spare parts. Order no. at:
www.festoolusa.com/service
EKAT
1
235
4
To ensure constant air circulation, always keep
the cooling air openings in the motor housing
clean and free of blockages.
When machining mineral materials (e.g. gyp
sum, etc.), dust deposits may build up in the
power tool housing and on the on/off switch and
harden when exposed to humidity. This may im
pair the switching mechanism and cause the
power tool to overheat.
When machining metal, conductive dust depos
its may build up inside the power tool. This can
cause a short-circuit.
► After each machining process, blow out the
inside of the power tool through the vents
and the on/off switch using dry, oil-free
compressed air.
Clean the sanding tools after use.
Keep the contacts on the power tool, charger
and battery pack clean.
Check all warnings on the electric power tool
for readability and completeness. Replace
missing or illegible warnings.
13 Accessories
WARNING
Risk of injury
► Remove the battery pack from the power
tool before performing any work on the
power tool.
Use only original Festool accessories and
Festool consumable material intended for this
machine. These components are designed spe
cifically for this machine. Using accessories
and consumable material from other suppliers
will most likely affect the quality of your results
and limit warranty claims. Machine wear or
your own personal workload may increase de
pending on the application. Protect yourself and
your machine, and preserve your warranty
claims by always using original Festool acces
sories and Festool consumable material!
The order numbers of the accessories and tools
can be found in the Festool catalogue or on the
Internet under "www.festoolusa.com".
13.1 SYSTAINER
Systainer
Many Festool products are shipped in a unique
system container, called "Systainer". This pro
vides protection and storage for the tool and ac
cessories. The Systainers are stackable and
can be interlocked together. They also can be
interlocked atop Festool CT dust extractors.
To open the Systainer
Turn the T-loc [SYS-b-1] to this posi
tion.
To lock the Systainer
Turn the T-loc [SYS-b-1] to this posi
tion.
To connect two Systainers
Place one Systainer on the top of the other
(Fig. [SYS-a]).
Turn the T-loc [SYS-b-1] to one of
this positions (Fig. [SYS-b]).
The Systainers are connected and locked.
English
17

A new generation Systainer is connectable
on top of a previous generation Systainer
by the four latches of the previous Systain
er.
SYS-a
open
lock
connect
connect
T-loc
SYS-b-1
SYS-b
14 Environment
Do not dispose of the device together with do
mestic waste! Dispose of machines, accesso
ries and packaging at an environmentally re
sponsible recycling centre. Observe the valid
national regulations.
Battery Disposal
WARNING
Risk of fire or injury
► Do not attempt to disassemble the battery
or remove any component projecting from
the battery terminals.
► Prior to disposal, protect exposed termi
nals with heavy insulating tape to prevent
shorting.
The RBRCTM (Rechargeable Battery Recycling
Corporation) Seal on nickel cadmium (NiCd),
nickel metal hydride (NiMH) or lithium-ion
(LiIon) batteries (or battery packs) indicates
Festool is voluntarily participating in an indus
try program to collect and recycle these batter
ies at the end of their useful life, when taken
out of service in the United States or Canada. In
some areas, it is illegal to place spent batteries
in the trash or municipal solid waste stream
and RBRC Program provides an environmental
ly conscious alternative.
Please call 1-800-822-8837 for information on
battery recycling and disposal bans/restrictions
in your area, or return your batteries to the
Festool Service Center for recycling. Help pro
tect our environment and conserve natural re
sources!
To ensure constant air circulation, always keep
the cooling air openings in the motor housing
clean and free of blockages.
Keep the contacts on the power tool, charger
and battery pack clean.
English
18

Sommaire
1 À propos de ce manuel..............................19
2 Symboles................................................... 19
3 Consignes de sécurité...............................20
4 Utilisation conforme..................................26
5 Caractéristiques techniques.....................26
6 Éléments de l'appareil..............................26
7 Mise en service..........................................27
8 Batterie......................................................27
9 Réglages....................................................28
10 Utilisation de l'outil électroportatif...........30
11 Signaux d'avertissement sonores.............31
12 Entretien et maintenance......................... 31
13 Accessoires............................................... 32
14 Environnement..........................................33
1 À propos de ce manuel
Conservez ces instructions
Il est important pour vous de lire et de com
prendre ce manuel. Les informations qu'il con
tient, se rapporte à la protection de votre sécu
rité et de prévention des problèmes. Les sym
boles suivants sont utilisés pour vous aider à
reconnaître cette information.
DANGER Description du risque immi
nent et l'incapacité à éviter
tout risque qui peut entraî
ner la mort.
AVER
TISSE
MENT
Description des dangers
possibles et des blessures
qui en résultent ou la mort.
ATTEN
TION
Description des dangers et
des éventuelles blessures
qui en résultent.
AVIS Description des dommages
potentiels sur l'appareil ou
dans son environnement.
2 Symboles
Avertit d'un danger général
Avertit d'un risque de décharge électri
que
Lire le mode d'emploi et les consignes
de sécurité !
Porter une protection auditive !
Porter des gants de protection !
Porter une protection respiratoire !
Porter des lunettes de protection !
Porter des chaussures robustes !
Conseil, information
Handlungsanweisung
Insérer la batterie
Dégager la batterie
V Volt
d.c Tension continu
m/s mètre par seconde
n0Vitesse de rotation à vide
Diamètre
mm millimètre
" pouce
lb. livre
CAUTION
For
use only with FESTOOL
batteries BP 18.
ATTENTION À
utiliser seulement avec
les batteries FESTOOL
BP 18.
PRECAUCIÓN
Para uso
solamente con
las baterías FESTOOL
BP 18.
ATTENTION À utiliser seule
ment avec les batteries FES
TOOL BP 18
AVERTISSEMENT Pour
réduire le risque de blessure, utiliser
uniquement des accessoires convenant
au moins à la vitesse maximale
indiquée sur l‘outil. Utiliser toujours le
protecteur au moment de meuler.
ADVERTENCIA Para reducir el
riesgo de lesiones, use exclusivamente
accesorios con una velocidad igual o superior
al valor máximo indicado en la herramienta.
Utilice siempre la protección adecuada al
realizar trabajos de amoladura.
WARNING To reduce the risk of injury,
use only accessories rated at least equal to
the maximum speed marked on the tool.
Always use proper guards when grinding.
AVERTISSEMENT Pour réduire le risque de
blessure, utiliser uniquement des accessoires
convenant au moins à la vitesse maximale in
diquée sur l‘outil. Utiliser toujours le protec
teur au moment de meuler.
Français
19

3 Consignes de sécurité
3.1 Indications générales de sécurité pour
les outils électriques
ATTENTION! Lire toutes les consignes de
sécurité et indications. Le non-respect
des avertissements et instructions indiqués cia
près peut entraîner un choc électrique, un in
cendie et/ou de graves blessures.
Conserver tous les avertissements et toutes
les instructions pour pouvoir s’y reporter ulté
rieurement.
Le terme « outil » dans les avertissements fait
reference à votre outil électrique alimenté par
le secteur (avec cordon d’alimentation) ou votre
outil fonctionnant sur batterie (sans cordon
d’alimentation).
1 PLACE DE TRAVAIL
a. Maintenez l’endroit de travail propre et
bien éclairé. Un lieu de travail en désordre
ou mal éclairé augmente le risque d’acci
dents.
b. N’utilisez pas l’appareil dans un environ
nement présentant des risques d’explo
sion et où se trouvent des liquides, des
gaz ou poussières infl ammables. Les ou
tils électroportatifs génèrent des étincelles
risquant d’enfl ammer les poussières ou
les vapeurs.
c. Tenez les enfants et autres personnes
éloignés durant l’utilisation de l’outil élec
troportatif. En cas d’inattention vous ris
quez de perdre le contrôle sur l’appareil.
2 SÉCURITÉ RELATIVE AU SYSTÈME
ÉLECTRIQUE
a. La fi che de secteur de l’outil électropor
tatif doit être appropriée à la prise de cou
rant. Ne modifi ez en aucun cas la fi che.
N’utilisez pas de fi ches d’adaptateur avec
des appareils avec mise à la terre. Les fi
ches non modifi ées et les prises de cou
rant appropriées réduisent le risque de
choc électrique.
b. Evitez le contact physique avec des surfa
ces mises à la terre tels que tuyaux, radia
teurs, fours et réfrigérateurs. Il y a un ris
que élevé de choc électrique au cas où vo
tre corps serait relié à la terre.
c. N’exposez pas l’outil électroportatif à la
pluie ou à l’humidité. La pénétration d’eau
dans un outil électroportatif augmente le
risque d’un choc électrique.
d. N’utilisez pas le câble à d’autres fi ns que
celles prévues, n’utilisez pas le câble pour
porter l’appareil ou pour l’accrocher ou
encore pour le débrancher de la prise de
courant. Maintenez le câble éloigné des
sources de chaleur, des parties grasses,
des bords tranchants ou des parties de
l’appareil en rotation. Un câble endomma
gé ou torsadé augmente le risque d’un
choc électrique.
e. Au cas où vous utiliseriez l’outil électro
portatif à l’extérieur, utilisez une rallonge
autorisée homologuée pour les applica
tions extérieures. L’utilisation d’une ral
longe électrique homologuée pour les ap
plications extérieures réduit le risque d’un
choc électrique.
f. Si l’usage d’un outil dans un emplacement
humide est inévitable, utiliser une alimen
tation protégée par un dispositif à courant
différentiel résiduel (RCD). L’usage d’un
RCD réduit le risque de choc électrique.
3 SÉCURITÉ DES PERSONNES
a. Restez vigilant, surveillez ce que vous fai
tes. Faites preuve de bon en utilisant l’ou
til électroportatif. N’utilisez pas l’appareil
lorsque vous êtes fatigué ou après avoir
consommé de l’alcool, des drogues ou
avoir pris des médicaments. Un moment
d’inattention lors de l’utilisation de l’appa
reil peut entraîner de graves blessures sur
les personnes.
b. Portez des équipements de protection.
Portez toujours des lunettes de protec
tion. Le fait de porter des équipements de
protection personnels tels que masque an
ti-poussières, chaussures de sécurité anti
dérapantes, casque de protection ou pro
tection acoustique suivant le travail à effec
tuer, réduit le risque de blessures.
c. Evitez une mise en service par mégarde.
Assurez-vous que l’interrupteur est effec
tivement en position d’arrêt avant de reti
rer la fi che de la prise de courant. Le fait
de porter l’appareil avec le doigt sur l’in
terrupteur ou de brancher l’appareil sur la
source de courant lorsque l’interrupteur
est en position de fonctionnement, peut en
traîner des accidents.
d. Enlevez tout outil de réglage ou toute clé
avant de mettre l’appareil en fonctionne
ment. Une clé ou un outil se trouvant sur
une partie en rotation peut causer des
blessures.
e. Ne surestimez pas vos capacités. Veillez à
garder toujours une position stable et
équilibrée. Ceci vous permet de mieux
Français
20
Other manuals for AGC 18
3
Table of contents
Languages:
Other Festool Grinder manuals

Festool
Festool BS 75 Installation instructions

Festool
Festool PLANEX LHS 225 EQ User manual

Festool
Festool DSC-AG 125 FH Installation instructions

Festool
Festool AGC 18 User manual

Festool
Festool AGC 18 User manual

Festool
Festool AGC 18 User manual

Festool
Festool RG 150 E Installation instructions

Festool
Festool DSG-AG 125 Installation instructions

Festool
Festool RG 130 E User manual

Festool
Festool RG 130 E Operation instructions