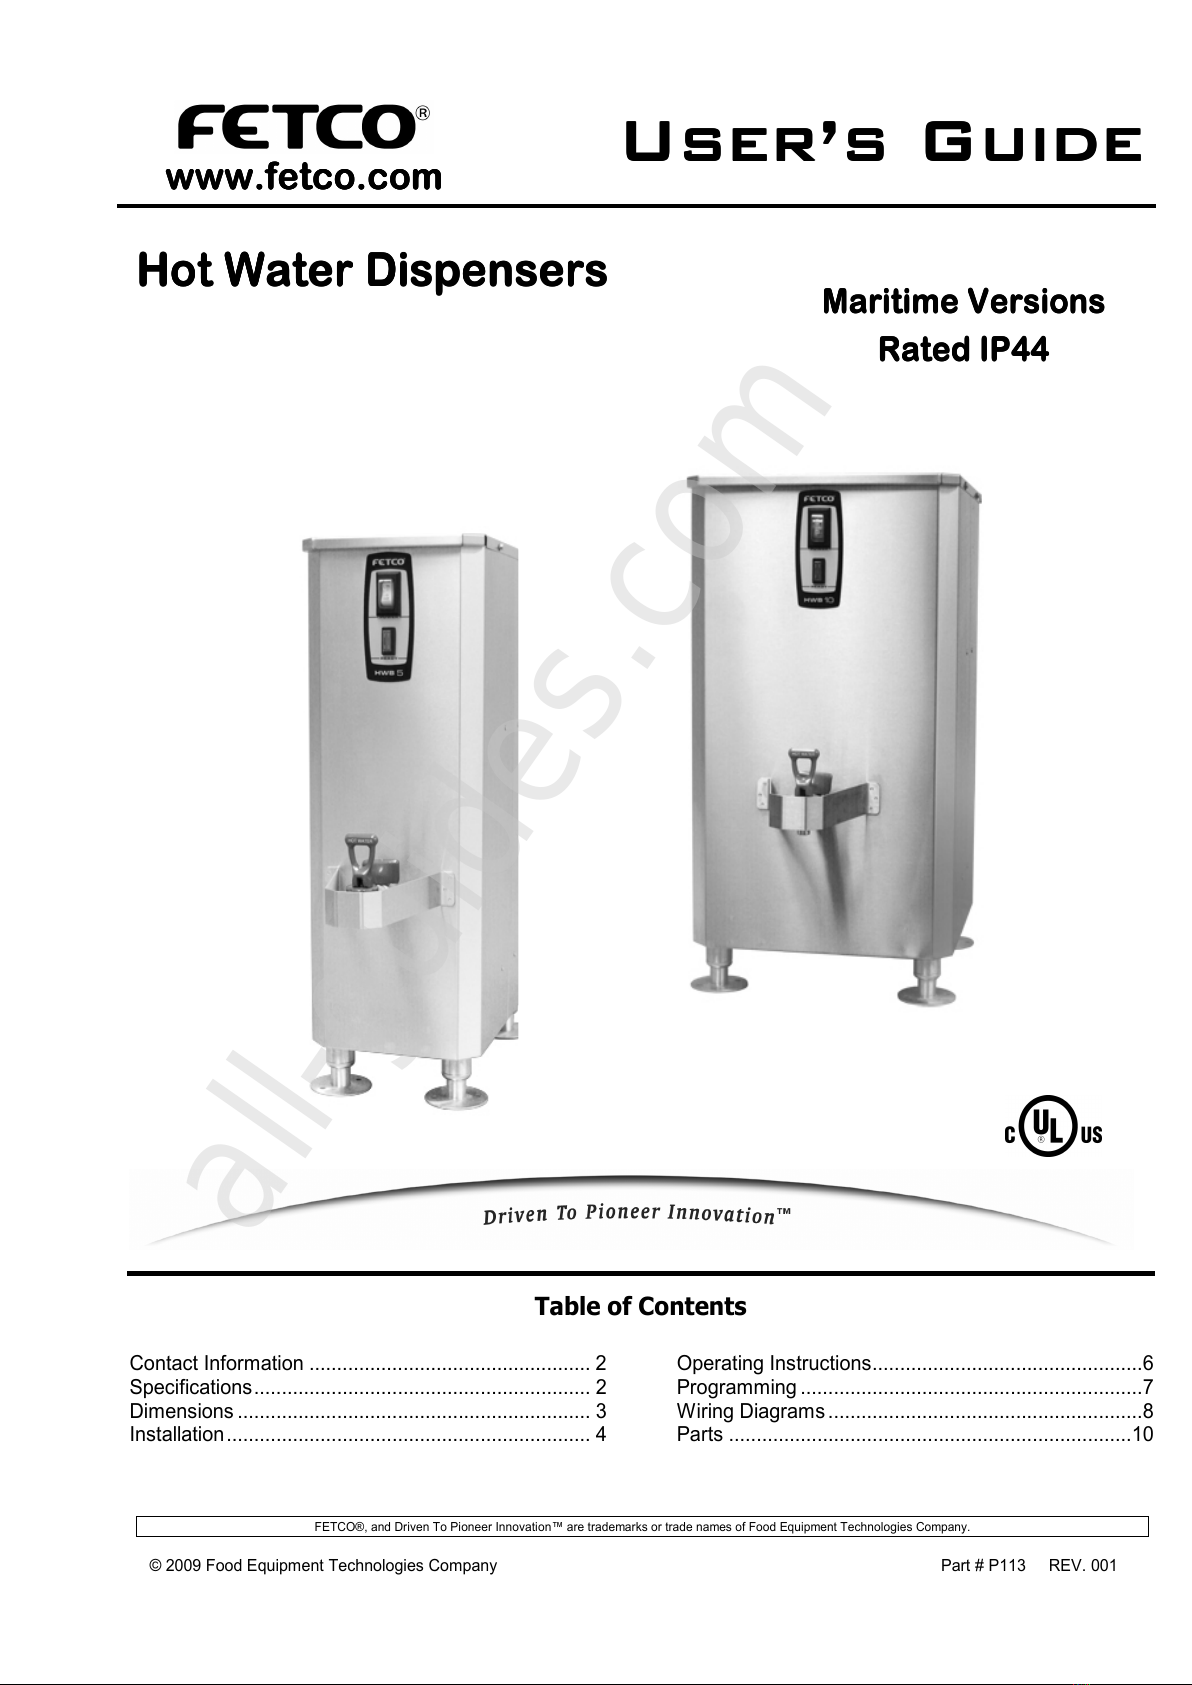
4
Installation
InstallationInstallation
Installation
(For Qualified Service Technicians Only)
Keys To A Successful Installation
Electrical:
• The power switch has a built-in circuit breaker. To reset it, turn to the “OFF” position, and then back to the
“ON” position.
• The wirin dia ram for the dispenser is located on the inside of the cover.
Plumbing:
• The water line must be flushed thorou hly prior to connectin it to the dispenser to prevent debris from
contaminatin the machine. An in-line water filter is stron ly recommended.
• Verify that the water line will provide at least 1.5 allons per minute before connectin it to the dispenser.
• The end of the vent tube must be open to the air, not connected to anythin or submer ed in liquid.
General:
• The installation must comply with applicable federal, state, and local codes havin jurisdiction at your
location.
• Utilize only qualified bevera e equipment service technicians for installation. A Service Company Directory
may be found on our web site, http://www.fetco.com.
• Do not adjust the thermostat settin s unless absolutely necessary. They are set at the factory for optimum
performance.
Installation Instrucions
Setup
1. Before placin the unit, verify that it will fit in the space intended for it, and
that the counter or table will support its’ wei ht.
2. Place the unit on its back and screw in the le s.
3. Place the unit on the counter or stand.
4. When the unit is in position, level it front to back as well as side-to-side by
adjustin the le s.
5. Mark the surface of the counter with the location of the mountin holes in the le s.
6. Drill ¼” diameter holes in the counter and secure the le s to the counter with bolts and nuts (not included).
Water Connection
1. The water inlet is a 3/8” male flare fittin .
2. The dispenser can be connected to cold or hot water. Cold water is preferred for best flavor, but hot water will
allow for faster recovery times. Use of an in-line water filter is stron ly recommended.
3. Install a shut off valve near the unit to facilitate service. If an in-line water filter is used, it should be installed
after the water shut off valve and in a position to facilitate filter replacement.
4. Flush the water supply line and filter before connectin it to the unit.
5. Verify that the water line provides at least 1.5 GPM, and that the water pressure is between 20 and 75 psi .
Vent Tube Connection
1. Condensation and steam from the water tank is dischar ed from the 3/8-inch hose barb fittin on the back of
the unit.
2. Attach a hose (not provided) to the fittin and run it to a drain, sink or a container. The end of the vent tube must
be open to the air, not connected to anythin or submer ed in liquid.
Electrical Connection
1. Verify that the actual volta e at the electrical service connection is compatible with the specifications on the
unit’s serial number label.
2. The temperature and water tank fill level are pre-set at the factory. There is no need to turn off the heaters
durin the installation process. The control board disables the heaters until the tank is full of water. The
heatin process will start automatically when the tank has filled.
Warning: Legs are to be
adjusted only for
leveling the unit.
Do not extend them
higher than