01 03 0602 0504
07 09 1208 1110
Directly to
Service Port
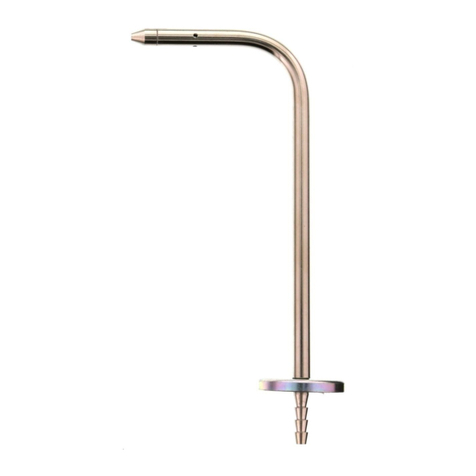
Schrader Core
Removal Tool
Hose
To
Pump
SVG3
Fieldpiece
VACUUM
GAUGE
MIN
ALARM
ENTER
UNITS
Quick Start
1. Power on your SVG3 by holding the
button for 1 second.
2. Connect to system directly to an
unused service port, a Schrader core
removal tool (SCRT), or via hoses.
3. View your vacuum measurement
on the top line and rate of change
(±microns per minute) on the bot-
tom line.
Certifications
C-Tick (N22675)
CE
WEEE
RoHS Compliant
Description
Proper evacuation of any system
exposed to atmosphere is critical to
ensure the system is dry and tight.
SVG3 is the right tool to help HVACR
professionals verify they reach proper
vacuum levels. See your vacuum
measurement clearly and easily with
the newly designed easy-view hook
and backlight. SVG3 is built for eld
use with its ruggedized rubber case.
SVG3 has a female 1/4"
flare fitting with schrader
valve depressor so you can
connect it directly to a service port
or your Schrader core removal tool
(SCRT) reducing connections and
minimizes leaks
Be alerted when you've reached
your desired vacuum levels with built
in Hi and Lo Alarm functions. Check for
leaks with rate indication in microns
per minute. The HVACR professional
can do more with condence that he
is doing the job right the rst time.
Display
Top Line: Live Vacuum Measurement
in Units selected
Bottom Line: Rate of Change or Alarm
Stopwatch
Auto Power O
Battery Life
Alarm Set Mode
Low Alarm Mode
High Alarm Mode
Rate of Change
(±Units Selected Per Minute)
Fieldpiece
Easy View
Vacuum Gauge
OPERATOR'S MANUAL
Model SVG3
Controls
Hold 1 second to power SVG3 on/o. Press
<1 second to toggle backlight.
Press to activate Alarm Lo, Alarm Hi, and
return to real time mode. Hold 1 second to
enter or exit Alarm Set mode.
Press to lock in selected digit and move
to next digit in Alarm Set Mode. Press and
hold >1 second to Change Units.
Increase or decrease blinking digit in
Alarm Set Mode. Toggle to display
stopwatch or rate of change when an
alarm is activated in real time mode.
BACKLIGHT NOTE: The backlight timer is automatically
extended for 1 min when any button is pressed. A short
press of toggles backlight on and o.
Specifications
Operating temperature: 32°F (0°C) to 122°F (50°C) at
<75%RH
Storage temperature: -4°F to 140°F (-20°C to 60°C), 0
to 80% RH (with battery removed)
Temperature coecient: 0.1 x (specied accuracy)/°C
(<18°C or >28°C)
Over range: "OL" is displayed
Power: 4 x AAA batteries, NEDA 24A, JIS UM4, IEC R03
Auto power o: after 15 minutes of readings more
than 10,000 microns if APO is active.
Battery life: 40 hours standard use (alkaline) without
backlight use.
Low battery indication: is displayed when the
battery voltage drops below the operating level.
Vacuum Pressure
Units of measure: microns (µm) of mercury, mmHg,
mbar, mTorr, Torr, and Pascals
Connector type: Standard 1/4" female are tting. "T"
tting included ( 3 male are ports)
Range: 0 to 9999 microns of mercury (9.999 mmHg,
13.33 mbar, 9999 mTorr, 9.999 Torr, 1333 Pa)
Accuracy: ±(5% of reading + 5 microns), 50 to 1000
Resolution: 1 micron (50 to 2000 microns), 250
microns (2001 to 5000 microns), 500 microns (5001
to 8000 microns), 1000 microns (8001 to 9999
microns)
Rate: Units selected per minute
Refresh rate: 0.5 seconds
Atmospheric pressure: "OL" will be displayed
Maximum overload pressure: 500 psig
How to Use
Normal Mode
Measure deep vacuums to moni-
tor your system evacuations. Deep
vacuums remove moisture and
non-condensable gases that can
cause problems in a system.
There are many ways to connect to
the system, Fieldpiece recommends
using a SCRT and the shortest vacuum
rated hoses possible. Fewer connec-
tions reduce the potential for leaks.
1. Connect to system.Techs typically prefer connect-
ing to the Schrader Core Removal Tool (SCRT) or an
unused service port.
2. Hold for 1 second to power ON the SVG3.
3. The top display shows the vacuum in microns of
mercury.
4. The bottom display shows how fast the measure-
ment is increasing or decreasing (± microns of
mercury per minute).
Low and High Alarms
Be alerted when you've reached your
desired vacuum levels. Work on other
tasks at the jobsite and let SVG3 alert
you when the system is ready.
Activate the low alarm (default 500
microns) to alert when the vacuum has
dropped to your desired micron level.
Activate the high alarm (default 1000
microns) to see how long it takes the
system to stabilize after the vacuum
pump has been isolated. If the system
does not stabilize over time, you may
have a leak in the system or your con-
nections.
The stopwatch will start when an
alarm is activated. It will restart when
the low alarm has been reached to show
how long you've pulled a vacuum after
reaching your desired micron level. The
stopwatch will stop when the high alarm
has been reached to show how long it
took to rise to your high alarm value.
When an alarm is activated the UP or
DOWN ARROW toggles the stopwatch
and rate of change (± microns per min-
ute) display.
How to Activate the Alarms
1. Press ALARM to activate low alarm.
2. Press ALARM again to deactivate low alarm and
activate high alarm.
3. Press ALARM again to deactivate high alarm and
return to real time mode.
How to Set the Alarms
The default low (500 microns) and
high (1000 microns) alarm values can
easily be set to whatever you want.
1. Hold ALARM for 1 second to enter Alarm Set Mode.
The rst digit of LO alarm will blink.
2. Use ARROWS to change the blinking number. Press
ENTER to lock in a digit and move to the next digit.
Repeat for all LO alarm digits.
3. When LO alarm is complete, the rst digit of HI alarm
will blink. Use ARROWS to change the blinking
number. Press ENTER to lock in a digit and move to
the next digit. Repeat for all HI alarm digits.
4. When all digits of HI alarm are locked in you will
automatically exit Alarm Set Mode and your
customized alarm values will be saved.
Note: Anytime while in Alarm Set Mode, you can press
ALARM to toggle between alarm HI set and alarm
LO set. Hold ALARM to exit Alarm Set Mode and
save at any time.
Note: "Err" will show if you try to set the HI alarm
lower than the LO alarm, or the LO alarm higher
than the HI alarm.
How to Change Units
1. Press and hold ENTER (>1 sec) to enter Change
Units mode. Current units selected will be
displayed.
2. Press UP or DOWN arrow to toggle the list of
available units. Microns-mmHg-mbar-mTorr-Torr-
Pascals. Stop on the units you want to select.
3. Press ENTER to save units selection and return to
real time mode.
SVG3
Fieldpiece
VACUUM
GAUGE
MIN
ALARM
ENTER
UNITS
