Fieryred WIN6500-SHIP2 User manual
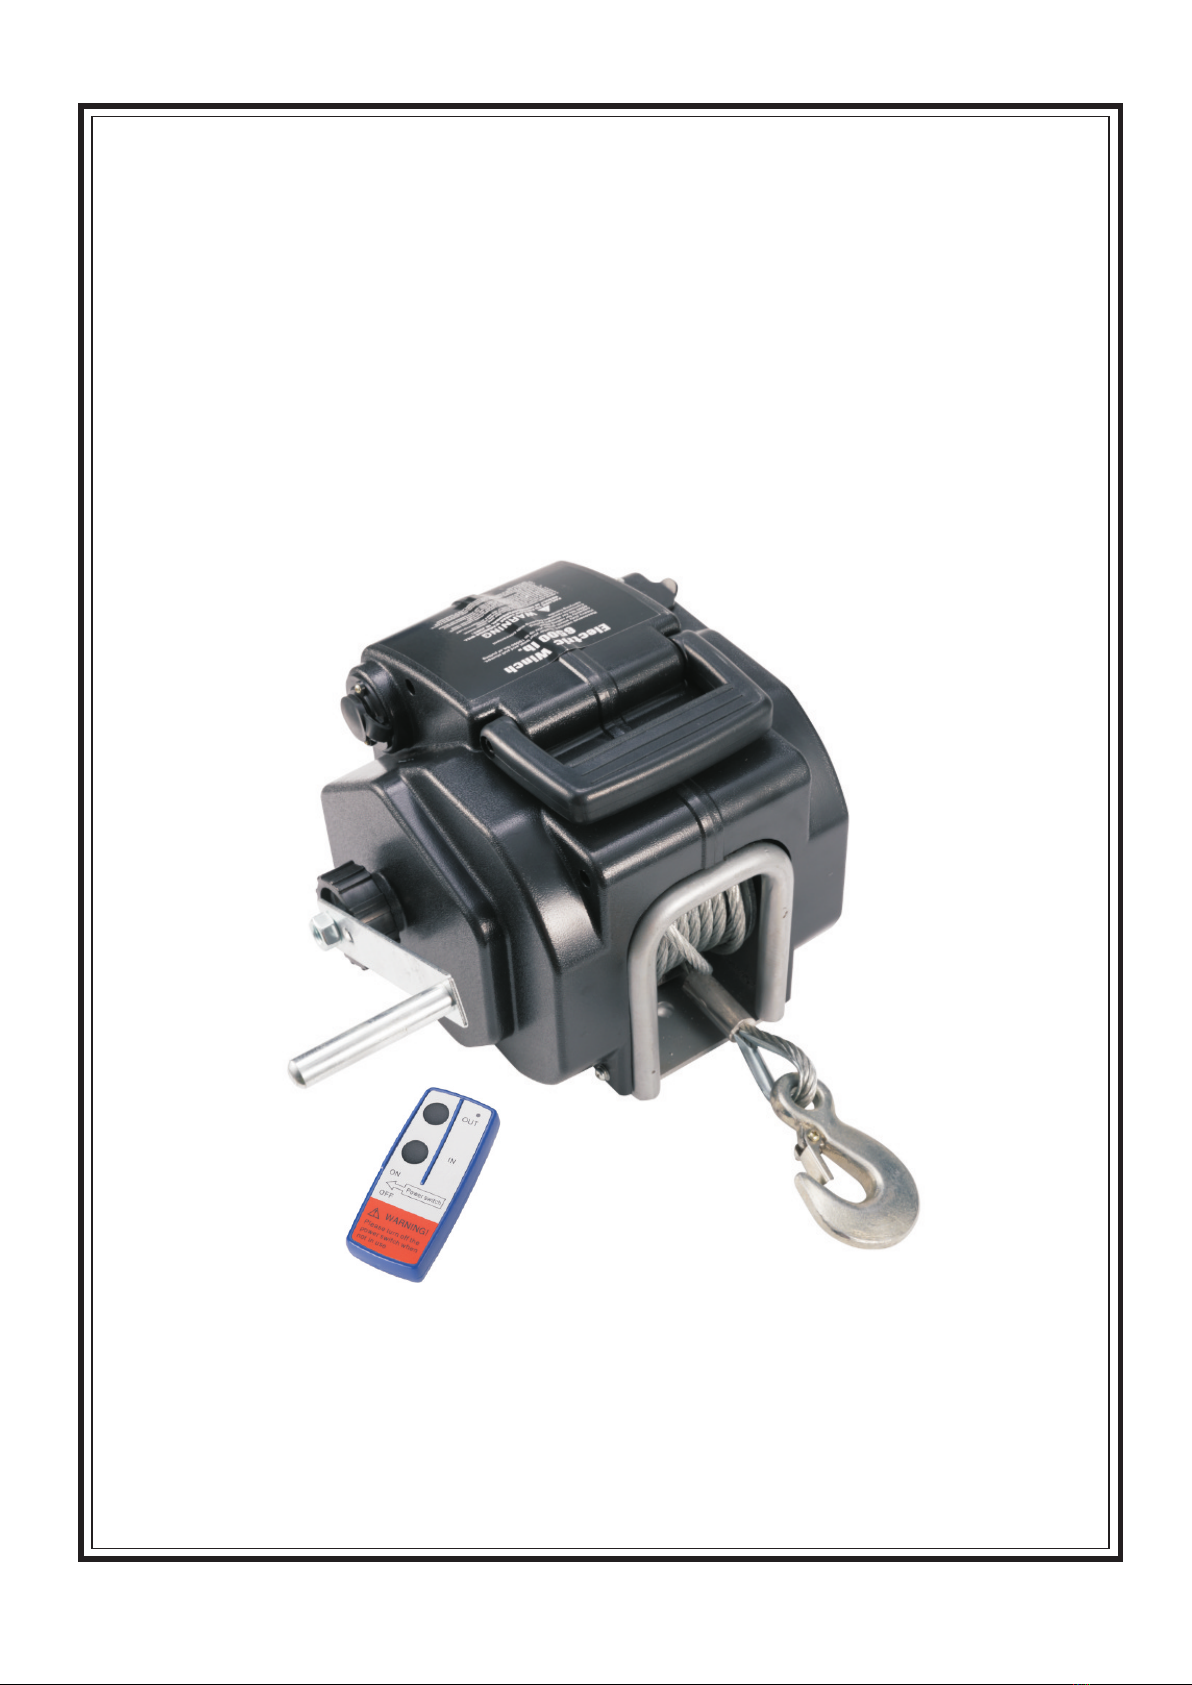
Electric Boat Winch
User Manual
SKU: WIN6500-SHIP2
V1.0

Safety Information
Read this manual thoroughly before first use, and keep it in a safe place for future reference.
The following Safety Precautions Must be Followed at ALL Times. Failure to follow the warnings and cautions in
this manual could result in serious injury and/or property damage.
WORK AREA SAFETY
Inspect the work area before each use. Keep work area clean, dry, free of clutter, and well-lit.
Keep children and bystanders away from the work area while operating the tool. Do not allow children to
handle the electric winch.
PERSONAL SAFETY
Do not use winch to lift or move people.
Keep clear of wire cable when under load.
Keep clear of the load being towed, so that if a failure occurs the load will not harm any bystanders.
This tool is not intended for use by persons (including children) with reduced physical, sensory or mental
capabilities, or lack of experience and knowledge.
Wear safe clothes when using the winch, including non-slip sturdy footwear and gloves.
Do not wear loose clothing, neckties, or jewellery that can get caught in the winch's moving parts and cause
personal injury. Keep long hair safely tied up when using the winch.
INSTALLATION SAFETY
Choose a mounting location that can support the winch and rated load capacity.
Do not weld mounting bolts.
Only use supplied power cable and winch cable. Do not use thinner/longer cables or link multiple cables
together.
Do not route electrical cables near sharp edges or parts that will move or become hot.
WINCHING SAFETY
Do not exceed maximum line pull capacity.
Don't use force when using the winch. It needs to operate at the speed to which it has been designed.
Do not use for more than 5 minutes under full load. Let the motor cool down for 10 minutes before using again.
Carefully inspect all cords and cables periodically. If damaged, do not use the product.
Disconnect from the power when not in use.
Never leave the winch running or powered while unattended. Ensure the winch has come to a complete stop,
and is not supporting a load when unattended.
There are no user serviceable parts in the product. Do not attempt to repair, open or alter any components. In
the case of improper usage or if you have opened, altered or repaired the product yourself, all guarantees are
void. This excludes battery replacement in the wireless remote control.
Do not engage or disengage clutch while under load.
Always ensure hook latch is closed.
Never apply load to hook tip or latch. Apply load only to the center of hook.
Stay out of the direct line that the winch cable is pulling. If it slips or breaks, it will create a whiplash effect.
Utilize a winch dampener to help absorb the force released in case the winch cable breaks.
Do not use for hoisting. This winch is intended to be used for pulling only.
Hook onto the object using a pulling point, tow strap or chain. Do not wrap the winch cable around the object
and hook onto the winch cable itself.
Keep at least 5 full turns of winch cable on the drum.
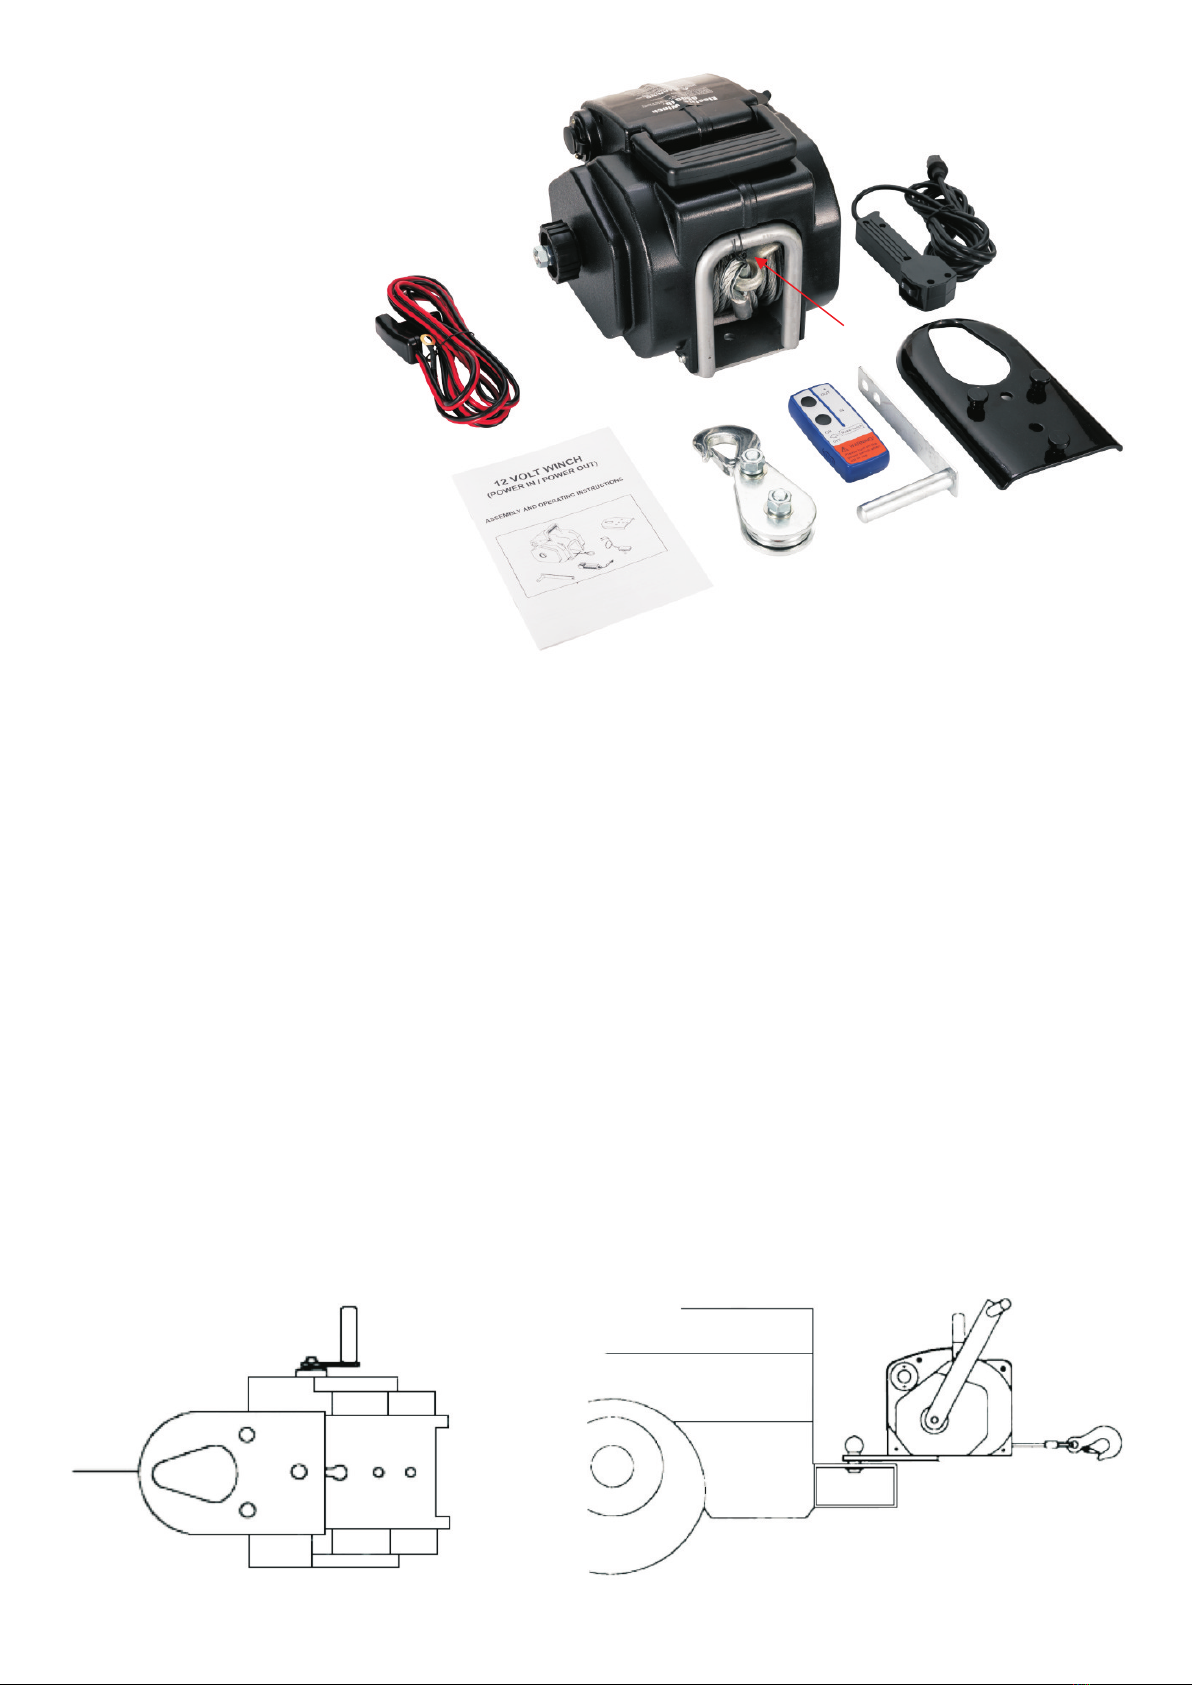
Parts List
1. Boat Winch
2. Hand Crank
3. Snap Hook with Winch Cable
4. Wired Remote Socket
5. Control Cable
6. Power Cable
7. Remote Control
8. Mounting Plate
9. Pulley
10. User Manual
1
3
2
4
5
6
7
8
9
10
Specifications
Product Dimension: 9.45"L (24.0cm) x 9.25"W (23.5cm) x 8.27"H (21.0cm)
Weight: 35.27lbs (16kg)
Color: Black
Capacity: 6,500lbs Rolling / 5,000lbs Marine / 2,000lbs Pulling / Max Boat Weight - 5,000lbs
Voltage: 12V DC
Motor power: 380w
Gear Ratio: 717:1
Steel Cable (Diameter): 0.28" (7.2mm)
Steel Cable (Length): 32.81ft (10m)
Control Cable Length: 9.84ft (3m)
Power Cable Length: 9.84ft (3m)
Control: Wireless Remote Control & Wired Remote Control
Mounting Plate Size: 220 x 124mm
Temporary Winch Mounting
Push the heads of the 3 screws on the
mounting plate into the keyhole slots on
the bottom of the winch and slide them
into the narrow section of the keyholes.
Place the teardrop-shaped hole in the mounting
plate over the hitch ball.

Permanent Winch Mounting
Select a mounting site on the boat trailer, vehicle
bumper, truck bed, or other suitable location.
Align the winch perpendicular to the center line of
the vehicle at the desired location. Use mounting
holes in the winch as a template to mark for drilling
mounting holes in the installation surface.
Before drilling, make sure that there are no hidden
components or structural pieces that will be
damaged in the installation surface.
Drill 3/8'' holes at the marked locations.
Bolt the winch to the installation surface with 3/8''
bolts, nuts, and washers (not included).
Note:
1. This winch can generate extreme forces. Select a location that can withstand the rated capacity
without damage or weakening.
2. This winch is not intended for use underwater. Do not mount in locations that are subject to
submersion in water.
Attaching the Hand Crank
Remove the outer lock nut on the thread shaft.
Tighten the clutch knob and the inner lock nut.
Slide the hand crank over the thread shaft up against the inner lock nut.
Secure the hand crank in place with the outer lock nut.
Outer Lock Nut
Outer Lock Nut
Hand Crank
Clutch Knob
Inner Lock Nut
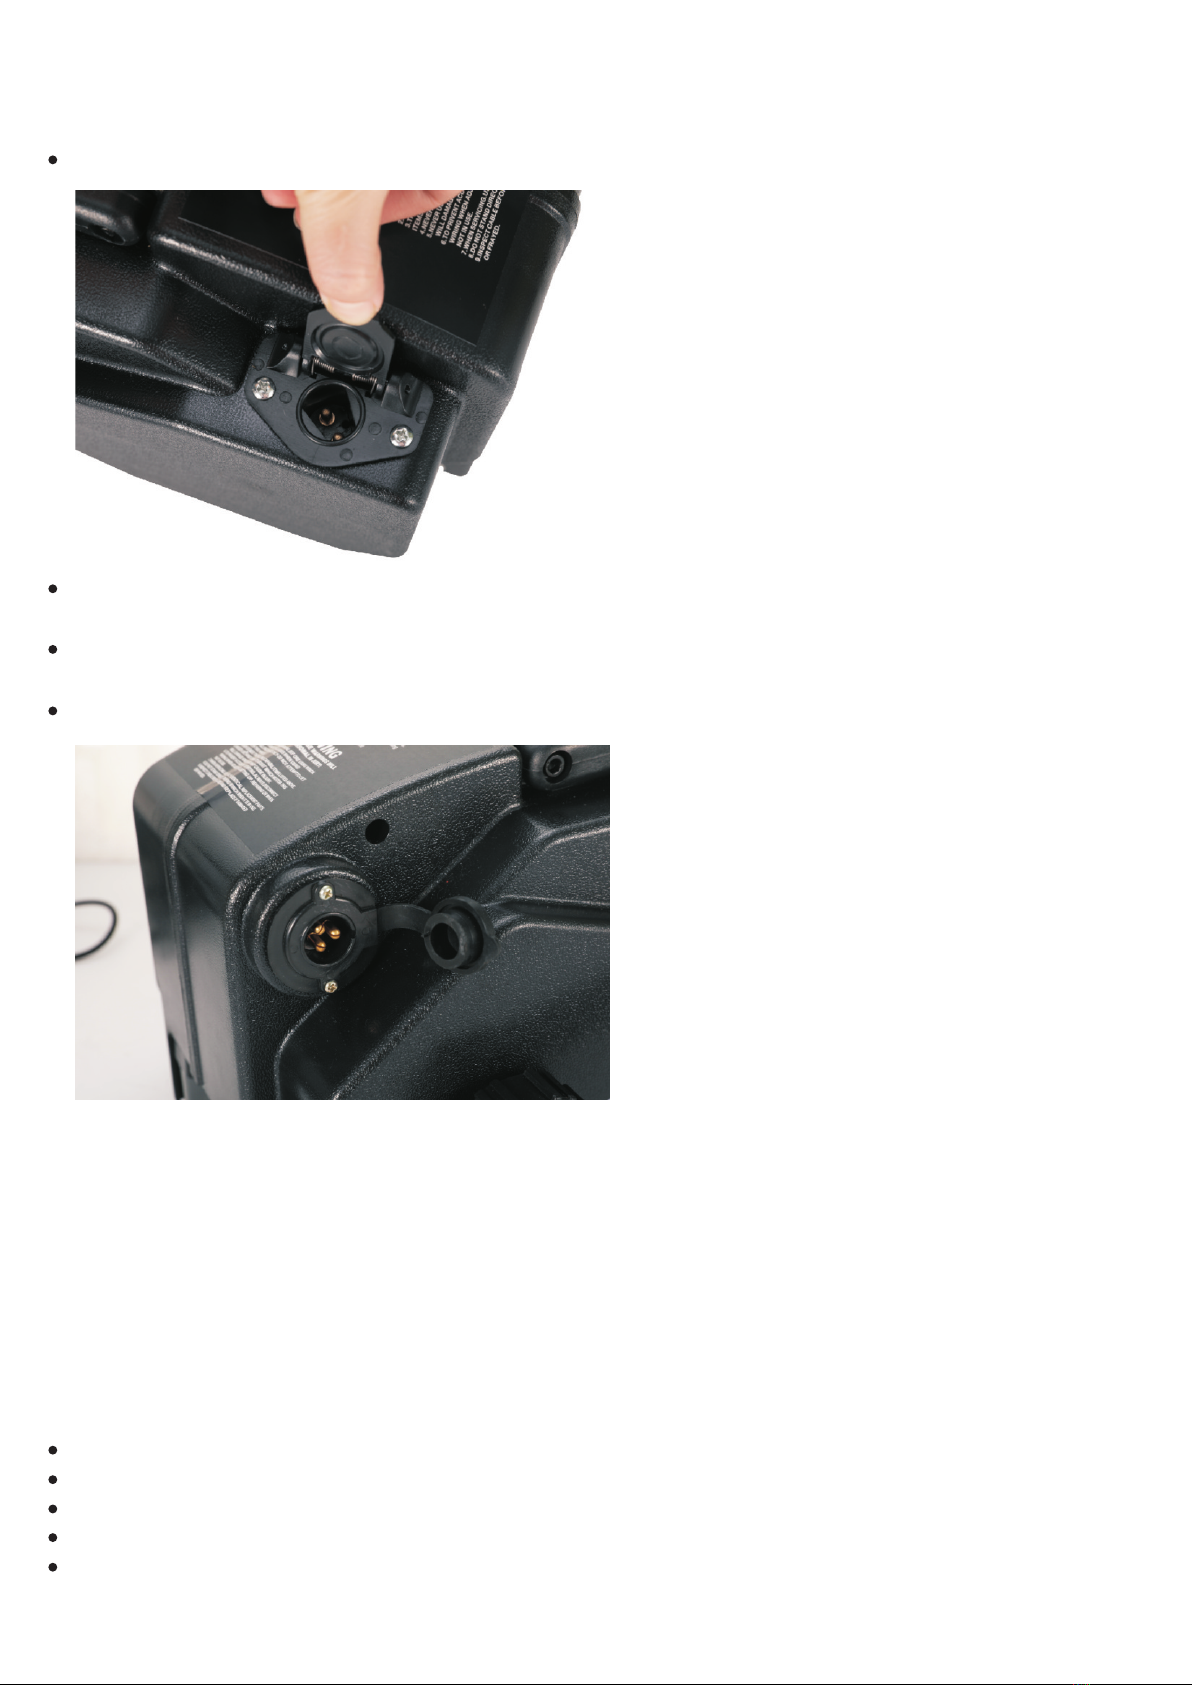
Wiring
Insert the power cable plug at the end of the power cable into the socket on the right side of the winch body.
Route the power cable from the winch to the battery, being careful to avoid tangling it in moving equipment,
or causing a tripping hazard.
Connect the ring on the black power cable to the negative (-) terminal of the battery, and connect the ring on
the red power cable to the positive (+) terminal of the battery.
Insert the control cable plug at the end of the control cable into the socket on the left side of the winch body.
The route for the wiring must be secured and out of the way of moving parts, road debris, or any possibility
of being damaged by operation or maintenance of the vehicle. Do not attach the wires to the exhaust
system, drive shaft, emergency brake cable, fuel line, or any other components which may create damage
to the wiring due to heat or motion, or create a fire hazard.
If you drill through the bumper or any part of the body to route the cable, be sure to install a rubber
grommet in the hole to prevent fraying of the cable at that point.
Operating the Winch
Loading the boat:
Align the boat and trailer.
Power out the cable and attach the cable hook to the bow eye.
Step clear of the cable, winch and boat.
Press the IN switch on the remote control to power in the cable until the boat touches the bow stop.
When fully loaded, secure the boat to the trailer.
1.
2.
Note:

Unloading the boat:
If not previously done, attach the winch cable hook to the bow eye on the boat.
Connect the power to the winch.
Connect the wired remote.
Remove the tie down straps from the boat.
By pressing the OUT switch on the remote control, power out the cable until the boat is unloaded.
When the boat is in the water, release the cable hook.
While maintaining tension in the cable, press the IN switch on the remote control to roll the cable up
completely. DO NOT allow the cable to roll up loosely or allow the cable hook to roll into the winch as
damage to the cable and winch components could occur.
To prevent accidents, secure the cable hook, disconnect the power supply and the remote control after use.
Stopping the Boat Winch in Emergency
When you need to stop the electric boat winch in emergency, simply pull the rotary knob.
Using the Pulley Hook
Unscrew the nut on the pulley block and remove the
bolt which secures the pulley wheel.
Remove the pulley wheel and insert the winch cable in
the pulley.

Re-insert the pulley wheel and secure it with the nut and bolt ensuring the winch cable is on the inside of the
wheel.
The pulley hook can increase the pulling capacity by approximately 55%.
Adjusting The Brake
The winch is equipped with a friction brake that hold the load when the power is off. The brake requires
adjustment if the load creeps while the power is off or if the brake slips while powering the load in or out.
Disconnect the boat from the winch.
Loosen the outer lock nut.
Tighten the inner lock nut to increase the load capacity or loosen to decrease the load capacity. The inner lock
nut must be tight enough to prevent the load from slipping or creeping.
Caution: Do not over tighten the inner lock nut. Over tightening the inner nut can shorten the motor life.
Outer Lock Nut Inner Lock Nut

Troubleshooting
Failure Possible Cause Corrective Action
Insufficient current or voltage. Recharge the battery.
Run winch with vehicle motor running.
Loose or corroded battery cable
connections.
Clean, tighten, or replace them.
Wires are worn or bare that may cause
shorts.
Remote control is not connected
properly.
Remote control is damaged.
Solenoid malfunctioning.
Replace them.
Connect it properly.
Replace it.
Tap solenoid to loosen contacts. Apply
12 volts to coil terminals directly. A
clicking indicates proper activation.
Water has entered motor.
Allow to drain and dry. Run in short
bursts without load until completely
dry.
Defective motor. Contact us.
Motor does
not turn on.
Insufficient current or voltage. Recharge the battery.
Run winch with vehicle motor running.
Loose or corroded battery cable
connections.
Clean, tighten, or replace.
Incorrect power cords. Use only supplied power cords.
Motor runs slowly
or without
normal power.
Loose brake. Adjust the brake.
Break is damaged. Contact us.
Load slips.
Incorrect power cords. Use only supplied power cords.
Winch running time is too long. Allow winch to cool down periodically.
Motor overheats.

Warranty
We (“Manufacturer”) warrant to the original buyer (“User”) that the Electric Boat Winch sold hereunder shall
be free from defects in workmanship or materials and conform to our specifications for this product under
normal application, installation, use and maintenance conditions from the date sold and for the duration
(the “Warranty Period”) of 1 YEAR.
If it fails to operate during the limited warranty period due to defects in materials or workmanship, we will, at
our option, replace it with the same or similar product, or issue a refund.
This limited warranty is provided by us and there are no other warranties, expressed or implied, except as
required by law, including warranties of merchantability and fitness for a specific purpose, that are provided
for herein, however all such implied warranties, if any, are limited to the duration of this specific limited
product warranty. Oral statements or representations about the product do not constitute warranties.
THE WARRANTY DOES NOT COVER:
Items not covered by this Warranty include: the removal or re-installation of the product, steel cable and
product finish.
This warranty does not apply if the product has been damaged by accident, wind, rain, or other acts of God,
abuse, misuse, collision, overloading, modification, misapplication, improper installation, or improper service.
Commercial or industrial use or application, or any hoisting application of the product, voids the warranty.
REPAIR AND REPLACEMENT:
No returns will be credited without an authorization. If our product is suspected of being defective, you'll
need to provide proof of purchase (e. g. a screenshot of the order) and a picture or video of the damaged
goods in their entirety to the seller you purchased from for evaluation. Removal, installation, or reinstallation
costs are not covered by this limited warranty.
Table of contents
Other Fieryred Winch manuals


Popular Winch manuals by other brands

Harken
Harken Powered Performa 60.3 STP E Installation and maintenance manual

Come.up Winch
Come.up Winch Seal Slim 12.5 quick start guide

Come.up Winch
Come.up Winch APE-9 manual

Far Tools
Far Tools TE 907 Original manual

Come.up Winch
Come.up Winch Seal Gen2 9.5rsi quick start guide

Pulley-man
Pulley-man CSW-3060 user manual

Berger & Schroter
Berger & Schroter 31593 Instructions for use

Cycle Country
Cycle Country 25-5193 Assembly & owners manual

Ramsey Winch
Ramsey Winch PATRIOT 9500 UT owner's manual

Clas Ohlson
Clas Ohlson HP-123D manual

Harken
Harken Carbo AirBlock 340 instructions

Farmi Forest
Farmi Forest W30F OPERATION, MAINTENANCE AND SPARE PARTS MANUAL


