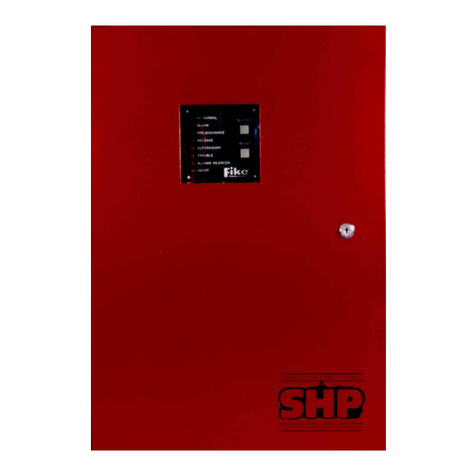
Fike Twinflex V3 User manual

26-0338 Issue 10
Twinflex - V3
FireDetection&AlarmSystem
Control Panel Engineering and
Commissioning Manual
(TO BE RETAINED BY THE COMMISSIONING ENGINEER)

Twinflex V3 Control Panel Engineering and Commissioning Manual
2
Fike’s policy is one of continual improvement and the right to change a specification at any time without notice is reserved. Whilst every care
has been taken to ensure that the contents of this document are correct at time of publication, Fike shall be under no liability whatsoever in
respect of such contents.
Due to the complexity and inherent importance of a life risk type system, training on this equipment is essential and commissioning should only
be carried out by competent persons.
Fike cannot guarantee the operation of any equipment unless all documented instructions are complied with, without variation.
E&OE.
Fike equipment is protected by one or more of the following patent numbers: GB2426367, GB2370670, EP1158472, PT1035528T, GB2346758,
EP0917121, GB2329056, EP0980056, GB2325018, GB2305284, EP1174835, EP0856828, GB2327752, GB2313690
© 2009 Fike Safety Technology Ltd. All rights reserved. Document revised January 2013.

Twinflex V3 Control Panel Engineering and Commissioning Manual
3
Contents
Introduction.......................................................................................................................5
System Design.......................................................................................................5
Equipment Guarantee............................................................................................5
Antistatic Handling Guidelines...............................................................................5
Warning..................................................................................................................5
The Twinflex System .............................................................................................6
Twinflex Control Panel.....................................................................................................7
Mounting the Control Panel...................................................................................7
Physical Dimensions..............................................................................................7
Power Supply Unit.................................................................................................8
General Assembly .................................................................................................9
Topology and Cabling............................................................................................9
System Wiring Schematic......................................................................................10
Control Panel Connections....................................................................................11
Twinflex Repeater Panel ..................................................................................................18
Installation 1st Stage .............................................................................................18
Installation 2nd Stage............................................................................................18
Connections...........................................................................................................18
Operation...............................................................................................................19
Testing...................................................................................................................19
General Operation ............................................................................................................20
Introduction............................................................................................................20
Access Levels........................................................................................................20
Access Level 2 (User) Operating Diagram: 2&4 Zone Panels..............................21
Access Level 2 (User) Operating Diagram: 8 Zone Panels...................................22
LED Indication .......................................................................................................23
Access Level 1 (Normal)........................................................................................25
Access Level 2 (User)............................................................................................25
Access Level 3 (Engineer).....................................................................................25
Programming Summary.........................................................................................31
Check Point Plus ..............................................................................................................32
Introduction............................................................................................................32
Zone Modes...........................................................................................................32
Instant Zones: Normal Operation in Communal Areas..........................................32
Delayed Zones: Confirmation Delay in Dwelling Areas.........................................33
Delayed Zones: Local or Zonal Confirmation?......................................................33
Confirmation Delay Time.......................................................................................34
Checkpoint Plus Setup at Access Level 3 (Engineer)...........................................34
Installation and Commissioning .....................................................................................36
Installation 1st Stage .............................................................................................36
Installation 2nd Stage............................................................................................36
Commissioning......................................................................................................36
End User Training..................................................................................................37

Twinflex V3 Control Panel Engineering and Commissioning Manual
4
Fault Finding .....................................................................................................................38
Summary of Faults.................................................................................................38
Finding Zone Faults...............................................................................................40
Advanced Connections....................................................................................................41
Monitored Relays on the ‘Remote Fire Output’ .....................................................41
Remote Indication LEDs........................................................................................41
Connecting Two Panels Together.........................................................................42
Connecting More than Two Twinflex Panels Together..........................................43
Magnetic Door Hold Units......................................................................................44
Technical Data ..................................................................................................................45
Control Panel Specification ...................................................................................45
Resistor Colour Codes...........................................................................................46
Battery Calculations...............................................................................................47
Installation Checklist..............................................................................................48
Commissioning Checklist.......................................................................................49
Cable Continuity and Insulation Test Results........................................................50
Control Panel Instruction Notice............................................................................51
Apartment Notice for Checkpoint Plus Systems....................................................52
Important Points ...............................................................................................................56 – BACK PAGE

Twinflex V3 Control Panel Engineering and Commissioning Manual
5
Introduction
This Manual is intended as a guide to the engineering and commissioning principles of the Twinflex 2-wire
Fire Detection and Alarm system, and covers the system hardware information only.
Due to the complexity and inherent importance of a system covering a ‘Life Protection Risk’, training on this
equipment is essential, and commissioning should only be carried out by competent and approved
persons. For further details of the availability of commissioning services contact your supplier.
System Design
This document does not cover Fire Alarm system design, and a basic understanding is
assumed.
A knowledge of BS5839: Pt 1: 2002 +A2: 2008 : Fire Detection and Alarm Systems for
Buildings is essential.
It is strongly recommended that a suitably qualified and competent person is consulted in
connection with the Fire Alarm System design and that the entire system is commissioned in
accordance with the current national standards and specifications.
Equipment Guarantee
The equipment carries no warranty unless the system is installed, commissioned and serviced
in accordance with this manual and the relevant standards by a suitably qualified and
competent person or organisation
Anti Static Handling Guidelines
Immediately prior to handling any PCBs or other static sensitive devices, it is essential to
ensure that a personal connection to earth is made with an anti-static wrist-strap or similar
apparatus.
Always handle PCBs by their sides and avoid touching any components. PCBs should also be
stored in a clean dry place, which is free from vibration, dust and excessive heat, and protected
from mechanical damage.
Warning
Do not attempt to install this equipment until you have fully read and understood this
manual.
Failure to do so may result in damage to the equipment and could invalidate the warranty.
Technical support will not be available if the instruction manual has not been read and
understood. Please have this instruction manual available whenever you call for technical
support.
For further technical support please contact your distributor. Do not call the Fike Safety
Technology support department unless your distributor has first given their advice and
attempted to rectify the issue.
EMC This equipment when installed is subject to the EMC directive 2004/108/EC. It is also subject
to UK Statutory Instrument 2006 No. 3418.
To maintain EMC compliance this system must be installed as defined within this manual. Any
deviation from this renders the installer liable for any EMC problems that may occur either to
the equipment or to any other equipment affected by the installation.
!
!
!
!
!

Twinflex V3 Control Panel Engineering and Commissioning Manual
6
The Twinflex System
This system is an intelligent ‘2-wire’ system with conventional type cabling format, and is classed as an
‘Analogue non-addressable’ system due to the architecture used within the system design. All field devices
including sounders on a zone are connected via a common 2-core and screen fire rated cable, and
communicate with the control panel using the ‘Twinflex’ data protocol.
The Twinflex panel is able to recognise and separately indicate a detector alarm and a manual call point
alarm. The panel also monitors each zone for detector head removal, device fault, ‘End of line’ fault and
open or short circuit fault.
Every device has an inbuilt ‘End of line’ signal, which may be activated as required.
Do not use a resistor or capacitor or any other 3rd party ‘End of line’
module for ‘End of line’.
The Twinflex control panel also provides a single conventional 24V sounder circuit, a monitored
conventional 24V relay circuit, a volt free common fire relay and a volt free common fault relay. There is
also a multifunction non-latching input, programmable with options such as ‘Class-Change’ and ‘Remote
fire input’.
The Twinflex control panel also incorporates an integral power supply unit and requires the following
standby batteries to provide up to 72 hour standby times (refer to Technical Data for further information).
2 or 4 zone panel 2 x 12v 2.1 Ah batteries
8 zone panel 2 x 12v 3.2 (or 3.3) Ah or 7.2 Ah batteries
Please note that the earlier version 1 of the control panel requires only one battery, so check the battery
labels in the control panel for clarification, as all the current version 3 control panels are labelled clearly
with ‘Battery 1’ and ‘Battery 2’.
Unlike most conventional fire alarm systems, which require separate pairs of cables for detector zones and
sounder circuits, the Twinflex system requires one 2-core and screen fire rated cable for each zone to
accommodate both detection devices and sounders. Furthermore sounders are incorporated within the
detector to reduce system components and simplify installation.

Twinflex V3 Control Panel Engineering and Commissioning Manual
7
Control Panel
Mounting the Control Panel
Firstly identify the proposed location for the control panel. Ensure that the control panel will be easily
accessible, and that account is taken of any subsequent work that may affect access. It should be located
at the most likely point of access for the fire services.
The control panel should be mounted on a flat, vertical wall at a height where the indicators may be seen
without difficulty.
Do not locate the control panel at high level where stepladders or other access equipment
may be required, in spaces with restricted access, or in a position that may require access
panels to be removed.
Do not locate the control panel where extremes of temperature or humidity may occur, or
where there is any possibility of condensation or water ingress.
Like all electronic equipment, the control panel may be affected by extreme environmental conditions. The
position selected for its installation should therefore be clean and dry, not subjected to high levels of
vibration or shock and at least 2 metres away from any pager or radio transmitting equipment. Ambient
temperatures should be within the range given within the Technical Data section, i.e., not directly over a
radiator or heater.
In common with all microprocessor-controlled panels, the control panel may operate erratically or may be
damaged if subjected to lightening induced transients. Proper earth/ground connections will greatly reduce
susceptibility to this problem.
Physical Dimensions
2 & 4 Zone Panels 8 Zone Panels
The 2 & 4 zone control panel back box is designed as a dual-purpose surface or flush unit. The
14mm flange facilitates flush mounting. To allow installation of the main front moulding, this flange
must be flush with the mounting surface and not recessed into it.
The 8 zone panel is designed for surface mounting only and will require the use of the optional
flush mount bezel if the control panel needs to be flush mounted.

Twinflex V3 Control Panel Engineering and Commissioning Manual
8
Power Supply Unit
The Fire Alarm Panel 230V AC supply requires fixed wiring between 0.75 mm2and 1.5 mm2, a 3 amp
fused un-switched spur with local isolation, to be terminated into the fused terminals provided in the back
box. On the 8 zone panel a metal cover, held in place with a locking nut, protects these terminals. The
mains supply should be dedicated to the Fire Alarm Panel and should be clearly labelled ‘FIRE ALARM:
DO NOT SWITCH OFF’ at all isolation points.
Note: The output of the power supply to zones, sounder outputs and auxiliary supply can vary between
21V and 32V.
The control panel requires standby sealed lead acid batteries to be installed according to the following
table. These are to be sited in the control panel back box in the provided enclosure. The batteries should
be connected in series using the connection leads supplied. See the section entitled Control Panel
Connections for panel connections.
Control Panel Standby Requirements Batteries required
All 2 or 4 zone panels 24 hours & 30 minutes in
alarm 2 x 12v 2.1 Ah
All 2 or 4 zone panels 72 hours & 30 minutes in
alarm 2 x 12v 2.1 Ah
All 8 zone panels 24 hours & 30 minutes in
alarm 2 x 12v 3.2 (or 3.3) Ah
All 8 zone panels 72 hours & 30 minutes in
alarm 2 x 12v 7.2 Ah
Note that the charging circuit will be in its high impedance state (approximately 3V DC) if no batteries,
faulty batteries or only one battery is connected. The full 27V DC charging voltage should be present if the
correct batteries are connected.
If the system shows a charger or battery fault on first power up, leave the system to charge its batteries for
5-6 hours.
In order to test for correct operation of the batteries, remove the mains 230V AC fuse and allow the
batteries to settle from their charging voltage for approximately 5 minutes. The battery voltage should then
be measured using an electronic test meter and a voltage greater than 24V DC should be seen.
Note that batteries are electrically live at all times and great care should be taken to ensure that the
terminals are never presented with a short circuit. Care should be taken at all times, especially during
transit, installation and normal use.
Batteries no longer required should be disposed of in a safe and environmentally friendly manner by the
manufacturer or a suitable recycling service. They should never be incinerated or placed in normal rubbish
collection facilities.

Twinflex V3 Control Panel Engineering and Commissioning Manual
9
General Assembly
2 & 4 Zone Panels
8 Zone Panels
Topology & Cabling
All system wiring should be installed to comply with BS 5839 : Pt 1 : 2002 and BS 7671 (wiring regulations)
and any other standards relevant to the area or type of installation. A cable complying with the BS 5839 : Pt
1 : 2002 Category 1 (cables required to operate for prolonged periods during fire conditions) is required.
This must be a 2-core 1.5mm2screened fire resistant cable (ie. MICC, FP200, Firetuff, Firecell, Lifeline or
equivalent).
Each zone requires a separate 2-core radial circuit from the control panel to the furthest point of the zone,
to a maximum of 500 metres.
In order to protect against possible data corruption it is important ensure the following points are adhered
to:
1. The cable screen must be connected to earth/ground at the control panel only.
2. The cable screen must not be connected to earth/ground at any point other than the control
panel, ie. do not connect the screen to a device back box.
3. The cable screen continuity must be maintained at every point of the circuit, using the
terminals provided or a suitable connection block.
Refer to the following System Wiring Schematic for further details.

Twinflex V3 Control Panel Engineering and Commissioning Manual
10
System Wiring Schematic
The following schematic may prove useful as an aid to understanding the cable requirements for the system;

Twinflex V3 Control Panel Engineering and Commissioning Manual
11
Control Panel Connections
2 & 4 Zone Panels
Battery Connections: BAT+, BAT-
The battery terminals require 24V from 2 x 2.1Ah sealed lead acid batteries, connected in series, in
order to provide secondary backup power when the primary power fails. This input is protected by
the 3A fuse connected inline with the positive battery lead.
AC Input: AC – A, AC – B, EARTH
The AC input is connected to the yellow leads coming from the transformer mounted within the
back box, and is the primary power supply for the system.

Twinflex V3 Control Panel Engineering and Commissioning Manual
12
Auxiliary Power: Aux 24V (Nominal) O/P +, Aux 24V (Nominal) O/P -
250mA of auxiliary, nominal 24V DC power (between 21 & 32 volts) is available here. It is
recommended that additional Power Supply Units be installed to provide power for additional
loads.
Remote Alarm Output: Remote Alarm O/P +/-
The remote alarm output may be used to connect a standard 24V DC conventional relay. This is
monitored for short circuit and open circuit with a 4K7 ohm ‘End Of Line’ resistor and is rated at
24V DC 250mA. The relay operates when the control panels enters the fire state and deactivates
when the system is reset. Any relays must be dioded. See the section on relays for further
information.
Remote Alarm input: Alarm I/P
The Remote alarm input is a non-latching input suitable for interfacing to other fire panels. Simply
apply auxiliary –ve (0V) to this terminal and its chosen function will operate as follows;
Mode 1 – Timed Class Change
On application of a 0V trigger, the sounders will operate for 10 seconds, but the control panel will
show no indication, and neither the ‘Fire Relay’ nor the ‘Remote Alarm Output’ will operate.
Mode 2 – Remote Alarm excluding ‘Remote Alarm Output’
On application of a 0V trigger, the sounders will operate, the control panel will show ‘Common Fire’
and ‘Remote Alarm Input’ indication, the ‘Fire Relay’ will change state, but the ‘Remote Alarm
Output’ will not operate. This will reset when the trigger condition is removed.
Mode 3 – Class Change
On application of a 0V trigger, the sounders will operate until the trigger condition is removed, but
the control panel will show no indication, and neither the ‘Fire Relay’ nor the ‘Remote Alarm
Output’ will operate.
Mode 4 – Remote Alarm
On application of a 0V trigger, the sounders will operate, the control panel will show ‘Common
Fire’, ‘Remote Alarm Input’ and ‘Remote Alarm Output’ indication, and the ‘Fire Relay’ and the
‘Remote Alarm Output’ will change state. This will reset when the trigger condition is removed.
Repeater Outputs: Z1, Z2, Z3, Z4, Flt
The repeater output will change to 0v when the relevant state is present, ie, the ‘Z1’ terminal will
become 0v when zone one is in the fire state. An Led or low current relay may be operated if
connected between this terminal and auxiliary 24V positive. Any relays must be dioded. See the
section on relays for further information.

Twinflex V3 Control Panel Engineering and Commissioning Manual
13
Repeater Inputs: EVAC, SIL, RST
These inputs require that a switched 0V trigger is applied in order for the relevant action to take
place as follows;
EVAC- Evacuate Input
On application of the 0V trigger input the sounders will operate, the control panel will show
‘Common Fire’ and ‘Remote Alarm Output’ indication, and the ‘Fire Relay’ and the ‘Remote Alarm
Output’ will change state. This will latch in place and the control panel must be reset to clear the
event.
SIL – Silence Input
On application of the 0V trigger input the alarm sounders will stop if they were operating.
RST - Reset Input
On application of the 0V trigger input the system will reset.
Fire Relay: NO, COM, NC
The fire relay provides a set of volt free single pole changeover contacts rated at 30V DC 1A. This
contact will change state when the control panel enters the fire state, and remain so until the
system is reset. All inductive loads should be diode protected (eg. using a 1N4004 diode) to
prevent back EMF. However, if this is not done, the load should be limited to 200mA to reduce the
likelihood of back EMF causing damage to the relay contacts.
Fault Relay: NO, COM, NC
The fault relay provides a set of volt free single pole changeover contacts rated at 30V DC 1A. This
contact will change state when the control panel enters the fault state, and remain so until the fault
condition is cleared. All inductive loads should be diode protected (eg. using a 1N4004 diode) to
prevent back EMF. However, if this is not done, the load should be limited to 200mA to reduce the
likelihood of back EMF causing damage to the relay contacts.
Conventional Sounder Circuit: BELL OUTPUT +/-
The conventional sounder circuit may be used to connect a standard sounders or strobe circuit.
This is monitored for short circuit and open circuit with a 4K7 ohm ‘End Of Line’ resistor and is
rated at 24V DC 500mA (Note: loads must be kept below 500mA to avoid blowing the fuse).
The alarm sounders operate when the control panel enters the fire state and deactivates when the
system is silenced. Nominal output voltage 21 – 32V.
Device circuits: ZONE 1/2/3/4 +/-
The Twinflex devices may be connected in radial circuits utilising the in built ‘End Of Line’ signal
within the last device. NB. Do not use a resistor or capacitor or any other 3rd party ‘End of line’
module for ‘End Of Line’ on the zones. Unused zones must be programmed off. See the
programming section for further details.
Fuses
Bell Fuse - Located on PCB adjacent Bell Output terminals......................F500mA (Quick Blow)
Battery Fuse – Located in line in the positive battery lead..........................F3A (Quick Blow)
Mains Fuse – Located in the back box adjacent to the transformer............T315mA (Anti Surge)

Twinflex V3 Control Panel Engineering and Commissioning Manual
14
8 Zone Panels
POWER SUPPLY:
24V DC SWITCH
MODE PSU
LOCATED IN
CONTROL PANEL
BACK BOX
POWER
SUPPLY DC
E
RED
BLACK

Twinflex V3 Control Panel Engineering and Commissioning Manual
15
Device circuits: ZONE 1/2/3/4/5/6/7/8 +/-
The Twinflex devices may be connected in radial circuits utilising the in built ‘End Of Line’ signal
within the last device. NB. Do not use a resistor or capacitor or any other 3rd party ‘End of line’
module for ‘End Of Line’ on the zones. Unused zones must be programmed off. See the
programming section for further details.
Remote Alarm Output: Remote Fire O/P +/-
The remote alarm output may be used to connect a standard 24V DC conventional relay. This is
monitored for short circuit and open circuit with a 4K7 ohm ‘End Of Line’ resistor and is rated at
24V DC 800mA. The relay operates when the control panels enters the fire state and deactivates
when the system is reset. Any relays must be dioded. See the section on relays for further
information.
Conventional Sounder Circuit: SOUNDER +/-
The conventional sounder circuit may be used to connect a standard sounder or strobe circuit. This
is monitored for short circuit and open circuit with a 4K7 ohm ‘End Of Line’ resistor and is rated at
24V DC 800mA. The alarm sounders operate when the control panel enters the fire state and
deactivates when the system is silenced
Fire Relay: NO, COM, NC
The fire relay provides a set of volt free single pole changeover contacts rated at 30V DC 1A. This
contact will change state when the control panel enters the fire state, and remain so until the
system is reset. All inductive loads should be diode protected (eg. using a 1N4004 diode) to
prevent back EMF. However, if this is not done, the load should be limited to 200mA to reduce the
likelihood of back EMF causing damage to the relay contacts.
Fault Relay: NO, COM, NC
The fault relay provides a set of volt free single pole changeover contacts rated at 30V DC 1A. This
contact will change state when the control panel enters the fault state, and remain so until the fault
condition is cleared. All inductive loads should be diode protected (eg. using a 1N4004 diode) to
prevent back EMF. However, if this is not done, the load should be limited to 200mA to reduce the
likelihood of back EMF causing damage to the relay contacts.
Remote Alarm input: Alarm I/P / Class Change
The Remote alarm input is a non-latching input suitable for interfacing to other fire panels. Simply
apply auxiliary 0V to this terminal and its chosen function will operate as follows;
Mode 1 – Timed Class Change
On application of a 0V trigger, the sounders will operate for 10 seconds, but the control panel will
show no indication, and neither the ‘Fire Relay’ nor the ‘Remote Alarm Output’ will operate.
Mode 2 – Remote Alarm excluding ‘Remote Alarm Output’
On application of a 0V trigger, the sounders will operate, the control panel will show ‘Common Fire’
and ‘Remote Alarm Input’ indication, the ‘Fire Relay’ will change state, but the ‘Remote Alarm
Output’ will not operate. This will reset when the trigger condition is removed.

Twinflex V3 Control Panel Engineering and Commissioning Manual
16
Mode 3 – Class Change
On application of a 0V trigger, the sounders will operate until the trigger condition is removed, but
the control panel will show no indication, and neither the ‘Fire Relay’ nor the ‘Remote Alarm
Output’ will operate.
Mode 4 – Remote Alarm
On application of a 0V trigger, the sounders will operate, the control panel will show ‘Common
Fire’, ‘Remote Alarm Input’ and ‘Remote Alarm Output’ indication, and the ‘Fire Relay’ and the
‘Remote Alarm Output’ will change state. This will reset when the trigger condition is removed.
Internal Speaker: INT SPEAKER +/-
This feature is not currently in use.
Auxiliary Power: Aux 24V O/P +, Aux 24V O/P
Nominal between 21 and 27V
800mA of auxiliary 24V DC power is available here. It is recommended that additional Power
Supply Units be installed to provide power for additional loads.
Power Supply: DC, DC, EARTH
The DC input is connected to the red and black leads coming from the switch mode power supply
mounted within the back box, and is the primary power supply for the system.
Note: Previously the control panel used a 24V AC input, connected to a transformer mounted
within the back box. Ensure that the correct type of power supply is utilised.
Repeater Outputs: Z1, Z2, Z3, Z4, A = FLT O/P, B = RESET O/P
The repeater output will change to 0V when the relevant state is present, ie, the ‘Z1’ terminal will
become 0V when zone one is in the fire state. An Led or low current relay may be operated if
connected between this terminal and auxiliary 24V positive. Any relays must be dioded. See the
section on relays for further information.
Repeater Inputs: D = SILENCE, E = RESET, F = EVAUATE
These inputs require that a switched 0V trigger is applied in order for the relevant action to take
place as follows;
F = EVAC - Evacuate Input
On application of the 0V trigger input the sounders will operate, the control panel will show
‘Common Fire’ and ‘Remote Alarm Output’ indication, and the ‘Fire Relay’ and the ‘Remote Alarm
Output’ will change state. This will latch in place and the control panel must be reset to clear the
event.
D = SIL – Silence Input
On application of the 0V trigger input the alarm sounders will stop if they were operating.
E = RST - Reset Input
On application of the 0V trigger input the system will reset.

Twinflex V3 Control Panel Engineering and Commissioning Manual
17
Battery Connections: BAT+, BAT-
The battery terminals require 24V from 2 x 3.2 (or 3.3) Ah or 2 x 7.2 Ah sealed lead acid batteries,
connected in series, in order to provide secondary backup power when the primary power fails.
This input is protected by the 3A fuse located on the PCB.
Note that earlier versions of the 8 zone control panel had two sets of battery connections and
required a 12V battery on each. With the current versions a link wire is provided to allow the
batteries to be connected in series to the single set of connectors.
Fuses
Sounder Fuse - Located on PCB near centre. ...........................................F1A (Quick Blow)
Remote Fire Fuse - Located on PCB adjacent Fire relay...........................F1A (Quick Blow)
Battery Fuse – Located on PCB adjacent to battery terminals....................F3A (Quick Blow)
Mains Fuse – Located in the back box adjacent to the transformer............T3A (Anti Surge)

Twinflex V3 Control Panel Engineering and Commissioning Manual
18
Twinflex Repeater Panel
Installation 1st Stage
This unit is classed as ‘secondary indicating equipment’ (as stipulated in the British Standards). It is
available in 8 or 16 zone formats and has the optional functionality to provide system controls (silence,
reset and evacuate). The main control panel controls and indication will not be affected or hidden.
Fix the back box in a suitable position using the three screw holes provided remembering to allow enough
space for the correct termination of the appropriate cables.
The repeater panel requires a multi-core cable from the main control panel, and must consist of the
following:
Number of Cores Function Example 8 zone
repeater
2 24V DC power supply 2
5 Silence, reset, evacuate, fire and fault 5
1 Per zone indication required 8
Example Total 15
Please remember that all high voltage testing must be carried out before the installation of any electronic
devices as this may cause damage. The installer needs to provide proof of zone continuity readings etc., to
enable commissioning to proceed.
Installation 2nd Stage
Once all testing has been carried out on the cabling and ‘continuity & integrity’ has been proven, then the
repeater panel may be assembled.
Connections

Twinflex V3 Control Panel Engineering and Commissioning Manual
19
Operation
In the event of a fire state being active on one of the main control panel zones, the common fire LEDs and
the relevant zone led will light up, and the buzzer will sound.
Turning the key switch to the on position enables the controls buttons for ‘Silence Alarms’, ‘Reset System’
and ‘Sound Alarms’. If these controls are not required then do not connect the terminals labelled ‘EVAC’,
‘SIL’ and ‘RESET’.
Testing
Simply ensure that the relevant zone indications occur by activating each zone in turn at the main control
panel and by creating a fault. The controls may be tested at the same time by silencing and resetting from
the repeater panel.

Twinflex V3 Control Panel Engineering and Commissioning Manual
20
General Operation
Introduction
This section describes the operation of the panel in response to fire and fault conditions, operator actions
required to process alarms and restore the panel to the normal state, and engineering functions such as
testing and system configuration.
The panel controls and indicators are largely the same for the 2/4 and the 8 zone panels, but there are a
few differences. Eg, the 8 zone panel uses a key switch for Access Level 2 (User) entry, whereas the 2/4
zone panels use a code entry.
Access Levels
The system access levels are set into three access levels as follows. For simple indication the status of the
‘Controls Enabled’ LED will show the level selected as follows;
Access
Level Description Controls Enabled LED 2/4z Panel
Codes 8z Panel Codes
1 Normal OFF - -
2 User ON ACCESS 514 Key Switch
3 Engineer FLASHING ACCESS 5244 ACCESS 5244
Table of contents
Other Fike Security System manuals

