Qualied Provider
Attachment, adjustment, alignment, and delivery of this device
must be performed by or under the direct supervision of a qualied
prosthetist. Unless stated in this manual, any such activities should
not be attempted by the user and will potentially void the device
warranty.
Specications and Preparations
BeforeUse (Risk Management for
Installation andCalibration)
Preparation
Consider the following factors as you determine the most
appropriate technology and prosthesis design for your client:
• Does the user understand the function and safety features of the
device?
• What other terminal devices will be used with this prosthesis?
• In what types of environments will the device(s) be used?
• In what positions will the person use the device?
• How will the user switch terminal devices? Will quick-disconnect
be helpful?
• For what other activities might this device be helpful?
• Will the person benet from additional training in the use of the
device?
Installation
Passive Gripping TDs may be installed in any Fillauer wrist unit with a
½-20 thread. Follow the instructions provided with the wrist unit for
best results.
Cabling
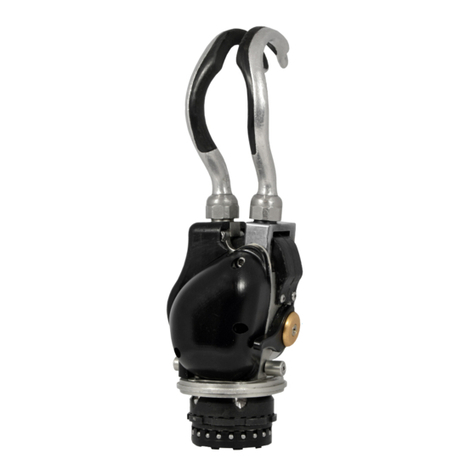
The SkiTrek can be used with a prosthetic cable system or without.
Using a body powered prosthetic cable will allow you to simply
reach forward to extend the pole. Without a cable, the pole must be
“pendulum” swung out in front and then will retract automatically
when disengaged from the ground or snow surface. The cable
attachment accepts both 9/32 and 3/16 inch diameter cable ball
systems.
Pole Modication
All poles will require the removal of their standard grip. Some
poles will require a length adjustment to ensure that both arms
are positioned equally distant from the ground or snow surface.
Most poles will require re-sizing their diameter at the grip area so
that a uniform mating- interface is created between the pole and
the SkiTrek prosthetic terminal device. Telescoping brass tubing
has been included with the SkiTrek to provide for re-sizing options.
In certain instances, the surface “outside diameter” of the pole at
the grip area will need to be reduced slightly to t this brass tube
system. Alternatively in certain cases simple electrical black plastic
tape or equivalent can be used to increase the outside diameter of
the pole to help mate with the female pole receiver in the bottom of
the SkiTrek. Suitable glue may also be used to permanently secure a
modied pole into the largest diameter brass tube which is precisely
sized to slide into the female cylindrical receiver on the bottom of
the SkiTrek.
A strip of adhesive-backed “hook” Velcro (included with device) will
be added onto the pole below the SkiTrek to help capture the “loop”
Velcro sheath which helps secure the pole into the SkiTrek.
Please note that the SkiTrek does not provide a ski boot type
“release” of the pole. The pole will typically only release when
the end of the pole gets “snagged” and the pole will pull out of
the SkiTrek.
This is also the manner in which a downhill (alpine) skier rides on a
chair lift by removing the pole from the SkiTrek and carrying the pole
in the manner a skier normally carries the poles during such a lift
ride, held in one hand or positioned across the seat of the lift chair.
Pole grips are typically glued or bonded securely to the pole shaft.
They can be removed by using a sharp razor knife but this can be
a dicult process. The pole shaft must be completely free of grip
material and have a smooth surface. A belt sander can be used to
more quickly grind away the grip. Be careful not to grind into the
pole surface and gouge the shaft if at all possible. Approximately 4
inches of pole will be used when the job is complete. Four inches is
the depth of the inside of the pole receiver in the SkiTrek. The brass
tubing that we provide is 5 inches long providing some excess which
may need to be trimmed o for the nal assembly.
Once the grip is completely removed, try to determine which of the
brass tubes will t over the pole. The goal is to have the largest
diameter brass tube be the outside surface. Pole diameters vary
in size to some extent so:
1. You may need to reduce the outside diameter (OD) slightly
or build it up to t the system. If you are reducing the OD be
careful to reduce it uniformly and do not compromise the wall
thickness too much.
2. ALSO, it is best to cut the pole length down before you begin
changing the diameter so that when you alter the diameter it
is only in the four-inch area needed to t into the SkiTrek. This
will save time and labor.


