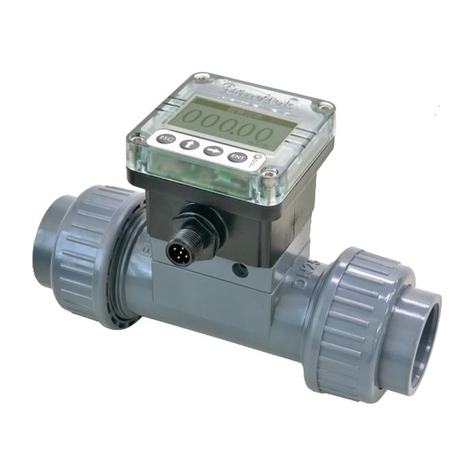
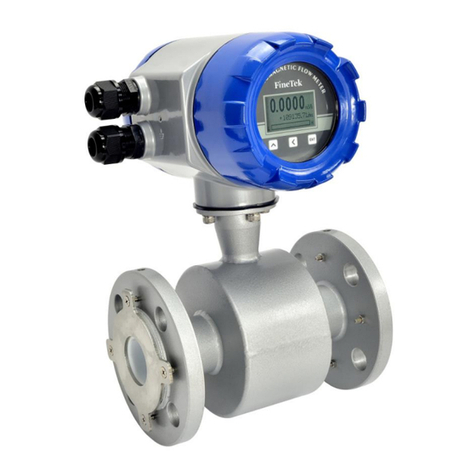
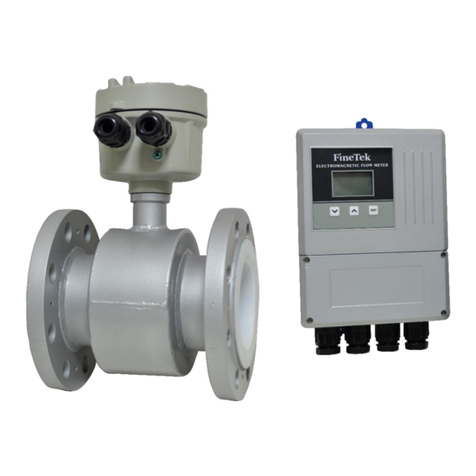
FineTek EPD36 Technical manual

Contents
1. Reading Labels......................................................................................................1
2. Product Warranty...................................................................................................2
2.1 New Product Warranty..........................................................................................2
2.2 Repair Warranty....................................................................................................2
2.3 Service Network....................................................................................................3
3. Product Inspection ................................................................................................4
3.1 Check Content ......................................................................................................4
3.2 Safety Inspection...................................................................................................4
4. Summary………………………………………………………………………………… 4
5. Product Features...................................................................................................5
6. Applicable Scope...................................................................................................5
7. Environmental Condition......................................................................................5
8. Working Principles ................................................................................................6
9. Technical Performance .........................................................................................7
9.1 Execution Standards.............................................................................................7
9.2 Basic Parameters and Performance Indicators.....................................................7
9.2.2 Recommended Flow Range for Tube Diameters..............................................8
9.2.3 Lining Material...................................................................................................8
9.2.4 Electrode Material.............................................................................................8
9.2.5 Housing Protection Rating(IP)...........................................................................8
10. Appearance and Dimension...............................................................................9
10.1 Tri-Clmp Type .....................................................................................................9
10.1.1 Tri-Clamp .........................................................................................................9
11. Installation…………………………………………………………………………….. 10
11.1 Conditions required to guarantee the measurement accuracy of the
electromagnetic flow meter: ............................................................................10
11.2 Safety Measures...............................................................................................10
11.3 Inspection before Installation ............................................................................10
11.4 Handling............................................................................................................11
11.5 Correct Installation............................................................................................11
11.6 Notes for Installation on the Pipe .....................................................................13
11.7 Grounding Requirements..................................................................................14
11.8 Changing the Direction of the Transmitter Box ................................................14
12. Wiring and Using ..............................................................................................15
12.1 Wiring................................................................................................................15
12.1.1 Notes for Wiring ............................................................................................15
12.1.2 Open the external cover on the rear side, you will see the wiring terminal as
shown below. .....................................................................................................15

13.Inspection before Power-On..............................................................................16
14. Parameter Functions......................................................................................... 17
14.1 Procedure for Menu Setting..............................................................................17
14.1.1Functions of the Display Interface...................................................................17
14.1.2 Button Functions in Parameter Setting Status:...............................................17
14.2 Various Parameter Setting Ranges...................................................................18
14.3 System record illustration..................................................................................20
15. Ordering Information.........................................................................................23
16. Transportation and Storage..............................................................................24
17. Fault Inspection and Repair..............................................................................25
18. MODBUS Communication Protocol .................................................................26

1
1. Reading Labels
Thanks for purchasing FineTek’s Product. This operation manual describes the product
features, working principles, operation and maintenance methods. It makes the user fully
understand how to use the product correctly, so as to prevent dangerous situations such as
device damage or operator injury.
Please read this operation manual completely and carefully before using the product.
Please contact the company if this operation manual can’t satisfy your demands.
The content of the operation manual is updated based on the version upgrade, which will
be uploaded to the website for the user to access.
Please don’t disassemble or repair the product on your own, as this will make you
disqualified from availing of the warranty service. Please send the product back to the
company for repair and calibration, or just contact the company.
Explanation of warning signs:
Danger→It indicates that wrong operation will cause death or major disasters.
Note→It indicates that wrong operation will cause injury and device damage to some
extent.
Electric shock→It warns of possible electric shock.
Fire→It warns of possible fire.
Prohibited→It indicates the prohibited wrong behavior.

2
2. Product Warranty
2.1 New Product Warranty
We don’t charge for the inspection, part/s and repair for the product of the company
that has a defect within 12 months from the delivery date and meets the warranty
terms.
If the product defect is not due to human error during its transportation, user may
change to a new unit from the company within 7 days from delivery date.
When the product needs to be sent back to the factory for repair, please send the
whole set, and don’t disassemble the parts. Moreover, please be sure it is completely
packed to avoid damage and causing more loss and defect during the transportation.
The warranty is not available for causes that fall under the following circumstances,
for which the company shall charge for the inspection, part/s and repair according to
the actual condition:
The product or its parts are beyond the warranty period.
Fault or damage is caused by not following the instruction and use environment
described on the operation manual.
The product damage is caused by aforce majeure factor (natural disasters, floods,
fire, earthquakes, lightning, typhoon, etc.), human destruction (scratches,
dropping, latch broken, tapping, cracks and punching), human error (using
improper voltage, high-humidity, water leakage, stain, corrosion, loss, improper
storage, etc.) and other abnormal factors.
The damage is caused by the customer or the 3rd party through the installation,
addition, expansion, modification and repair of parts not authorized or certified by
the company.
The volume label information is wrong or unclear, so the product serial number
can’t be confirmed.
2.2 Repair Warranty
A 6-month warranty service is provided for the repaired part of the product, during which the
same product can be repaired free of charge in case of the same fault.

3
2.3 Service Network
Company
Address
Telephon
Fax
Taipei Headquarters
(Taiwan)
+886 2 2269 6789
+886 2 2268 6682
Taichung
Sales office
(Taiwan)
+886 4 2465 2820
+886 4 2463 9926
Kaohsiung
Sales office
(Taiwan)
+886 7 333 6968
+886 7 536 8758
Fine automation
Co., Ltd.
(China)
No. 451, Duhui Road, Zhuanqiao
Township, Minhang District,
Shanghai City 201109
+86 021 64907260
+86 021 6490 7276
FineTek Pte Ltd.
(Singapore Branch)
No. 60 Kaki Bukit Place,
#07-06 Eunos Techpark 2
Lobby B, Singapore 415979
+65 6452 6340
+65 6734 1878
FineTek GmbH
(Germany Branch)
Bei den Kämpen 26
21220 Seevetal-Ramelsloh,
Germany
+49 (0) 4185 8083 12
+49 (0) 4185 8083 80
FineTek Co., Ltd.
(Indonesia Branch)
PERGUDANGAN TUNAS
BITUNG
JL. Raya Serang KM. 13,8, Blok
C3 No. 12&15, Bitung Cikupa,
Tangerang 15710
+62 021-2958-1688
+62 021-2923-1988

4
3. Product Inspection
3.1 Check Content
1 flow meter
1 operation manual
1 product inspection sheet
3.2 Safety Inspection
Please check whether the external package is deformed or damaged. Please remember to
take a picture for evidence for compensation later.
After unpacking, please check whether the content is deformed or damaged, or has any
quality problem. Please remember to take a picture for evidence for compensation later.
After unpacking, please check whether the content is consistent with the ordering info, and
whether the quantity is right.
Please contact the company within 7 days if any of the above situations occur (attach the
picture together with your complaint). Otherwise, we won’t compensate for, change or repair
the product defect.
4. Summary
The company’s electromagnetic flow meter adopts coil excitation, which is more stable than
the traditional magnetism generation. After strict vibration and anti-noise test, it can work
stably and is highly tolerant of complex environments in the industrial field, which also has a
longer life span in practical application.
The electromagnetic flow meter has kept on evolving since its initial development, which is
widely applied in monitoring various industrial fluid pipes, including power generation, water
treatment, food, medication, shipping, dyeing & finishing, and semi-conductor process
industries. With its simple working principle, the electromagnetic flow meter is widely
applicable in various environments as long as the correct model is selected to match the
fluid properties.

5
5. Product Features
The measurement results is not affected by the change of liquid density, viscosity,
temperature, pressure and conductivity.
There are only two measurement points in the measuring tube without baffle and
movable parts, so it won’t cause pressure loss and jam.
It can test the flow for the conducting fluid and the fluidic containing some solid
granules.
The straight tube section required for the installation just needs the upstream front 5D
and downstream 2D of the flow meter without complicated pipeline design.
The measurement turndown ratio can reach 1:100, which can achieve high accuracy
especially for measuring small flow.
It has a self-diagnosis function, which can automatically detect the excited signal,
whether the measuring tube is empty and whether the electrode is stained or
damaged.
The material of lining is PFA
The maximum fluidic temperature permitted can reach 150℃
The flow converter setting is simple, with powerful functionality.
6. Applicable Scope
Conductivity: > 5μS/cm
Fluid properties: Pure liquid and fluidic containing some solid granules.
Application industries: Power generation, water treatment, food, medication, shipping,
dying & finishing, and semi-conductor process
7. Environmental Condition
Ambient environment: -40℃~ 70℃
Relative humidity: 5% ~ 95% of RH, without condensing water
Atmospheric pressure: 86 ~ 106 KPa
Power supply: DC24V

6
Converter
v
8. Working Principles
The working principle of the electromagnetic unit is based on the Faraday law of
electromagnetic induction. When the conductor moves in the magnetic field, it will
generate induced EMF on both sides of the conductor in the orthogonal direction of
the magnetic field direction and the motion direction. The EMF is directly proportional
to the motion speed of the conductor and the magnetic induction intensity.
As shown in <Figure 1>, the conducting fluidic passes through the insulating tube with
the internal diameter of D(m) at the average flowing speed V(m/s) that is equipped
with a pair of measuring electrodes. Moreover, the tube is in a magnetic field with
uniform magnetic induction intensity of B (T). In this case, the electrodes will induce
the EMF (E) at the orthogonal direction of the magnetic field and the flowing direction.
According to the law of electromagnetic induction, E can be written as Equation (1):
Wherein, k is the proportional coefficient.
The volume flow can be written as
From Equation (1) and (2), we can get:
Thus, EMF can be represented as:
When B is a constant in Equation(3)
Equation(3) can be modified as:
It can be concluded that the flow qv is directly
proportional to the EMF E.
<Figure 1>

7
9. Technical Performance
9.1 Execution Standards
IEC 60068-2-3 EN 61326-1:2013
IEC 61326-1 EN 55011:2009/A/:2010
IEC 60092-504 ISO 4064-1
JIS B2220 JIS B7554-1997
ANSI B16.5 DIN 25 Series
9.2 Basic Parameters and Performance Indicators
9.2.1 Technical Specification Table
Item
EPD36 Standard type
Display
LCM 128* 64 pixel backlit type
Buttons
Tri-button operation
Communication interface
RS-485 (Modbus) (Optional support for ZigBee Pro wireless
transmission)
Accuracy
±0.5% of reading@1m/s(0.2% optional)
Medium temperature
-20~150℃(PFA Lining)
Ambien temperature
-40~70℃*
Fluidic conductivity
>5uS/cm
Measuring scope
0.1m/s~10m/s
Current output accuracy
0.1% of Pulse Output Accuracy
Temperature coefficient (100ppm/℃)
Operating pressure
10 kg/cm2
Current output mode
Proactive
Analog output
4~20mA
Maximum load of current output
<700Ω
Alarming current
3.6mA or 22mA
Frequency output scope
2~8KHz
Pulse width
Automatic (pulse width 50%)
Pulse mode
NPN transistor output 32vdc/200mA
Time constant
1~100s
Control output (DO)
NPN transistor output 32vdc/200mA;1-CH
Control input (DI)
Dry contact ON< 200Ω ; 1,000Ω< OFF ; 1-CH
Baud rate
1200~57600 bps
Protection rating
IP67/NEMA 4X
Enclosure material
Aluminum alloy
Input power
DC24V
Power consumption
<10 W
Wire inlet specification
M20 x1.5*2
Excitation mode
Pulse DC
Vibration regulation
IEC 60068-2-3
EMC regulation
IEC/EN 61326-1 Class A table 2
*It can’t display when LCM is lower than -20℃.

8
9.2.2 Recommended Flow Range for Tube Diameters
Pipe diameter (mm)
Flow range (m3/h)
Flowing speed 0.1~1.0m/s
Flowing speed 1.0~10m/s
15
0.06~0.64
0.64~6.4
25
0.17~1.77
1.77~17.7
40
0.45~4.5
4.5~45.2
50
0.71~7.1
7.1~71
9.2.3 Lining Material
Lining material
Main properties
Application scope
PFA
1. Stable chemical properties, resistance to
various acid, alkane, and salt solutions
and various organic solvents. It is not
tolerant to the corrosion of CIF3, high-
temperature OF3 and high-speed liquid
oxygen and ozone.
2. The anti-abrasion property is average.
1. -20~150℃
2. Strong corrosive medium
such as concentrated acid
and alkane.
9.2.4 Electrode Material
Electrode material
Anti-corrosion property
Stainless steel (316L)
It is applied in water, sewage and organic corrosive medium.
9.2.5 Housing Protection Rating(IP)
IP67

9
10. Appearance and Dimension
10.1 Tri-Clmp Type
10.1.1 Tri-Clamp
Connection specification
Tri-Clamp
Nominal diameter(mm)
15
25
40
50
Lining material
PFA
Length
L
164
164
258.6
258.6
External diameter
ϕD
68.3
81.1
106.3
106.3
PCD
ϕC
50
60
83
83
Flange thickness
t
41
41
61.5
61.5
Quantity of screw holes
N
4
4
4
4
Height of sensor casing
H1
76.3
89.1
114.3
114.3
Total height
H2
256
270
294
294
Weight(kg)
--
4.9
5.7
8.6
9.1

10
11. Installation
The design, test and power supply for the flow meter are based on the related regulations.
User must strictly follow the instructions to guarantee the safe operation and normal working
of the flow meter.
11.1 Conditions required to guarantee the measurement accuracy of the electromagnetic
flow meter:
The test liquid is conducting.
The measuring pipe must be filled with liquid.
The test liquid must be uniform, so as to prevent the non-uniform conductivity (which
will result in serious interference). If you need to add some chemicals dynamically, it
should be added in the downstream of the flow meter.
The electromagnetic flow meter must be well grounded. Especially in the plastic pipe,
the grounding ring must be installed in order to perform solid grounding.
The straight tube section is required to be at least 5D at the flow meter inlet (internal
diameter of the measuring pipe), and at least 2D at the flow meter outlet.
The flow meter should be kept away from strong EMI, and it should not be installed
near the large motors or transformers.
11.2 Safety Measures
To guarantee human and device safety, the instructions below must be followed:
Before selecting the location and installing the flow meter, the user should carefully
read the related parts in this manual, and consider the safety requirements for the
flow meter, related devices and machine body environment.
The flow meter installation and repair must be performed by the personnel with
some flow meter knowledge.
The flow meter sensors and pipes must be correctly installed, and the sealing must
be safe and reliable. The liquid pressure should not exceed the maximum working
pressure described on the flow meter specification.
Proper measures must be taken to prevent electrical shock accident.
The handling equipment of the flow meter should meet the safety requirements.
11.3 Inspection before Installation
Check whether the flange, lining, casing and outgoing line sleeve are damaged.
Open the box cover to check whether the wiring printed circuit is loosened or
damaged.
Check whether the model number on the nameplate is consistent with the order
information.

11
11.4 Handling
The flow meter must be handled with the correct handling method. The safety load and
protection action of the handling equipment should meet the related regulations. The
transmitter box (for integrated flow meter) or enclosure (for separated flow meter) must
not be tied up to handle the flow meter.
11.5 Correct Installation
It is very important to select the installation site and install the flow meter correctly. If any
mistake is made during the installation, it will affect the measuring accuracy or the life
span of the flow meter, or even cause damage. When selecting the installation site,
please pay special attention to the following:
a. The axis of the measuring electrode must be approximate to the horizontal direction
(Generally, the angle from the level line is within 10°.)
b. The measuring pipe must be filled with liquid.
c. The flow meter must be equipped with the straight tube section in the length of at
least 5×D at the front side (D is the internal diameter of the flow meter), and the
straight tube section in the length of at least 2×D at the rear side (D is the internal
diameter of the flow meter).
d. The flowing direction of the fluidic is the same as the arrow direction on the flow meter.
e. Please prevent the vacuum in the pipe, which will damage the lining of the flow meter.
10°
10°
5D 2D

12
f. The flow meter must be free from strong electromagnetic field. The magnetic intensity
of the flow meter installation site must be smaller than 400A/m.
(It should not be installed near large motors or transformers)。
g. There should be enough space left surrounding the flow meter for installation and repair.
h. If the measuring pipe vibrates, a support frame should be set up on both sides of the flow meter.
i. When measuring the mixture of different media, the distance between the mixing point and the
flow meter must be 30×D at least (D is the internal diameter of the flow meter)).
j. For convenient cleaning and maintenance of the flow meter, a bypass pipe must be installed.
k. When installing the flow meter of the PTFE lining, the bolt connecting two flanges should
be fastened evenly. Otherwise, it will damage the PTFE lining. Please use the torque
wrench as much as possible.
l. The flow meter should be protected from strong vibration and great temperature change.
In the meantime, damage of the corrosive liquid on the flow meter should be prevented.
m. If the flow meter is installed at a position with direct sunlight, shielding facilities should
be set up.
n. When installing the sensor, the measuring pipe and the process pipe must be on the
same axial line. For the senor with the nominal diameter of DN50 or below, the axial line
deviation should not exceed 2mm. For those of DN65~DN150, the axial line deviation
should not exceed 3mm. For those of ≥DN200, the axial line deviation should not exceed
4mm.
o. The shim installed between the flanges should have excellent anti-corrosion property.
The shim should not intrude in the pipe, which will block the flowing fluidic
p. Fasten the bolts and screws of the flow meter. The screw threads should be undamaged
with good lubrication condition. The bolts with torque wrench must be fastened based
on the flange size and torque.
q. When welding or flame-cutting the pipes near the sensor, isolation measure must be
conducted, so as to prevent the lining from heating. Moreover, the flow meter must be
powered off, or it will damage the flow meter.

13
11.6 Notes for Installation on the Pipe
When installing the flow meter, one must follow the installation diagrams as shown
below. This will ensure the flow meter can guarantee the pipe is always filled with the
liquid: (The figures below are only typical cases, which don’t include all feasible
installation methods. The user may judge the installation position based on the actual
condition.)
5m
No.
Diagram
Description
The sensor should be
installed at the pump outlet
rather than the inlet.
It should be installed at the
lower point and the vertically
upward point of the
horizontal pipe.
Don’t install it at the highest
point and the vertically
downward point of the pipe.
2
It should be installed at
the rising point of the
pipe.
If the pipe gap exceeds 5m,
the air release valve should
be installed at the
downstream of the sensor.
The downstream of the
sensor should have some
back pressure.
The control valve and cut
valve should be installed at
the downstream of the
sensor rather than the
upstream.
1
3
4

14
11.7 Grounding Requirements
The grounding of the electromagnetic flow meter is very important. If the grounding is poor, it
won’t work normally. The sensor and transmitter should be equipped with high-quality
independent grounding wire (The section area of the copper core is 1.6mm2). The grounding
resistance should be <10Ω.
Diagram
Description
Grounding
Ring
The grounding ring is needed
if the pipe connecting with the
sensor is insulating.
The same material as the
electrode should be chosen, to
prevent corrosion by the liquid.
If the test medium is abrasive,
the neck grounding ring
should be selected.
Grounding
Method
It is for installing the flow meter
on the metal pipe not coated with
insulating layer.
。
When installing the flow mater
on the plastic pipe or the pipe
with insulating coating
material, paints or lining,
grounding rings on both ends
of the sensor should be
installed.
When installing the flow meter
on the protective pipe of
cathode, the pipe with the
protection of electrolytic
corrosion generally has
insulating walls and external
sides. Thus, during
installation, the grounding ring
and the flanges on the pipe
should be insulating.
11.8 Changing the Direction of the Transmitter Box
The transmitter box can change into four different directions as needed.
a. Changing the direction of the transmitter box for the integrated flow meter.
1. Remove 4 hex screws used to fasten the transmitter.
2. Rotate the transmitter to the target direction, and pay attention to the internal
connecting wire during rotation.
3. Fasten the transmitter again.

15
12. Wiring and Using
12.1 Wiring
12.1.1 Notes for Wiring
For the power line, the 2-core rubber insulated cable is recommended.
For AC power supply, L1 should be “Live Wire”.
The wiring of all terminal blocks should be clamped with slotted terminal and
performed with insulation. The cable must be prevented from intruding into the
terminal block directly.
The total impedance of the outgoing cable on the current output terminal
should not be larger than the value stated in the specification.
The pulse or frequency output is NPN transistor output generally, which
requires external power supply.
12.1.2 Open the external cover on the rear side, you will see the wiring terminal as shown below.
DC24V
Digital output 1
RS-485 communication
Digital input
DO1-
DO1+
D-
D+
DI-
DI+
V+
V-
P-
P+
mA-
mA+
DC24V
Voltage pulse
output
4-20mA output

16
13. Inspection before Power-On
1. Check whether the flow meter is damaged during transportation and installation.
2. Check whether the voltage of the power supply is consistent with that specified on
the nameplate.
3. Check whether the fuse used is of the correct current value.
4. Check whether the flow meter is grounded correctly.
5. Open the pipe valve to fill the pipeline system with liquid. One should pay attention
to removing the leaked gas and residuals in the system.
6. Power on the flow meter to warm up for 10 minutes. Then it can work normally.

17
14. Parameter Functions
14.1 Procedure for Menu Setting
Measurement screen
Main menu 1 Sub menu 1 Parameter
1
Main menu 2 Parameter
2
Main menu 3 Parameter
3Parameter editing
3 seconds
ENT
ENT
↑
↑
↓
↓
↑
↓
↓
ENT
EN
T
14.1.1Functions of the Display Interface
14.1.2 Button Functions in Parameter Setting Status:
Parameter Setting Page
Button
Main
Measuring
Page
Menu Mode
Read Only
Number Edit
Mode
List Edit Mode
ENT
Enter menu
Enter sub menu
Confirm button
(Keep pressing)
Confirm button
(Keep pressing)
<
Return to the
previous page
Return to
the previous
page
"Left" button
Return to the
previous page
^
Sub menu
option【Down】
Number: "Plus"
button
Option: Next
page
ENT+ <
Cancel
Button
Number edit mode
ENT
Confirm (Holding)
←
Move “Left
↑
Number: “Up”
ENT+←
Cancel
Instantaneous flow rate
Volume accumulation
Operation buttons
Pressure in Tube
0.0000
m3/h
+1274205.8 Liter
L H
00.00 Bar
Percentage of
measuring
range
Table of contents
Other FineTek Measuring Instrument manuals

FineTek
FineTek EPD34 User manual

FineTek
FineTek EPD30 Technical manual

FineTek
FineTek JTR Series Technical manual

FineTek
FineTek SC38 User manual

FineTek
FineTek ECP2 User manual

FineTek
FineTek EDX2 User manual

FineTek
FineTek EE310 User manual

FineTek
FineTek EPF Series User manual

FineTek
FineTek EPR5 User manual

FineTek
FineTek EPR1 Series Technical manual
Popular Measuring Instrument manuals by other brands

System air
System air Fantech 463988 Installation and operation manual

Great Plains Industries, Inc.
Great Plains Industries, Inc. FM-300U owner's manual

B+K precision
B+K precision 1050 instruction manual

Delta-T Devices
Delta-T Devices PR2 user manual

TAS
TAS TA122MB series instruction manual

X-Vision
X-Vision XANR100 user manual