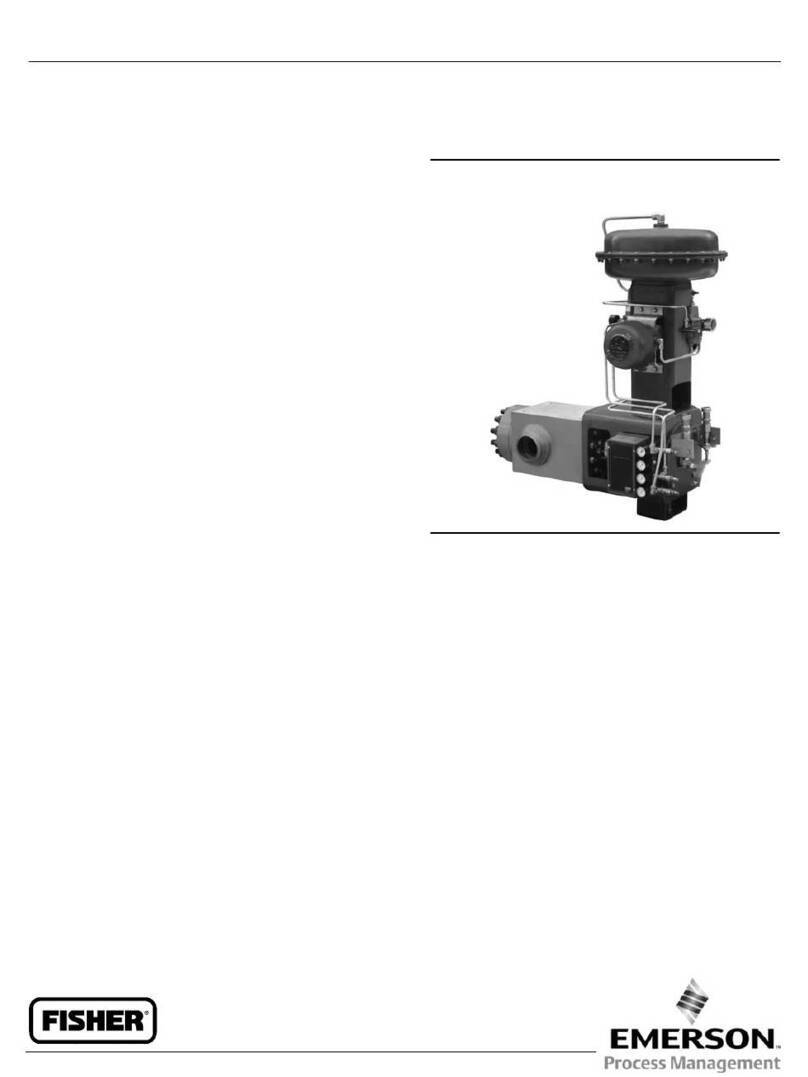
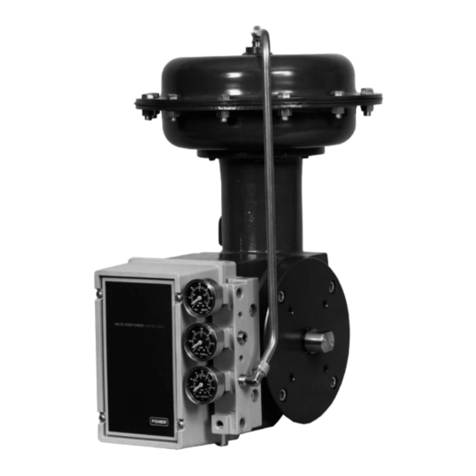
Fisher 2502 Series Level-Trol User manual

D200126X012
250
2 S
erie
s L
evel-Trol
C
ontroller
Contents
Introduction
2.
. . . . . . . . . . . . . . . . . . . . . . . . . . . . . .
Scope of Manual 2.
. . . . . . . . . . . . . . . . . . . . . . . . . . . .
Description 2
. . . . . . . . . . . . . . . . . . . . . . . . . . . . . . . . . .
Specifications 2
. . . . . . . . . . . . . . . . . . . . . . . . . . . . . . .
Controller Action 2.
. . . . . . . . . . . . . . . . . . . . . . . . . . . .
Installation%2
249 Series Sensors 2.
. . . . . . . . . . . . . . . . . . . . . . . . .
Uncrating 4
. . . . . . . . . . . . . . . . . . . . . . . . . . . . . . . . . . .
Controller Orientation 4.
. . . . . . . . . . . . . . . . . . . . . . . .
Mounting Caged Sensors 4.
. . . . . . . . . . . . . . . . . . . .
Mounting Cageless Sensors 5.
. . . . . . . . . . . . . . . . . .
Side-Mounted Sensor 7.
. . . . . . . . . . . . . . . . . . . . . .
Top-Mounted Sensor 7.
. . . . . . . . . . . . . . . . . . . . . . .
Special Constructions 7.
. . . . . . . . . . . . . . . . . . . . . . .
Temperature-Compensated Displacer 7.
. . . . . . . .
Piezometer Ring 8.
. . . . . . . . . . . . . . . . . . . . . . . . . . .
Regulator Supply Pressure 8.
. . . . . . . . . . . . . . . . . . .
Prestartup Checks
9.
. . . . . . . . . . . . . . . . . . . . . .
Adjustments 10
. . . . . . . . . . . . . . . . . . . . . . . . . . . . . . .
Level Set Adjustment 10.
. . . . . . . . . . . . . . . . . . . . .
Proportional Band Adjustment 10.
. . . . . . . . . . . . .
Reset Adjustment 10.
. . . . . . . . . . . . . . . . . . . . . . . .
Differential Relief Adjustment 10.
. . . . . . . . . . . . . .
Calibration
11
. . . . . . . . . . . . . . . . . . . . . . . . . . . . . . .
Precalibration Requirements 11.
. . . . . . . . . . . . . . . .
Wet Calibration 11.
. . . . . . . . . . . . . . . . . . . . . . . . . .
Dry Calibration 11.
. . . . . . . . . . . . . . . . . . . . . . . . . .
Controller and Torque Tube Arm Disassembly 11
Determining Suspended Weight for Calibration 12
Calibration Procedure 12.
. . . . . . . . . . . . . . . . . . . . .
Startup
13
. . . . . . . . . . . . . . . . . . . . . . . . . . . . . . . . . . .
Principle of Operation
13.
. . . . . . . . . . . . . . . . .
Type 2502 Controller 15.
. . . . . . . . . . . . . . . . . . . . . .
Type 2502F Controller with Reset Relief Valve 15.
Figure 1. Type 2502 Controller Mounted on
Type 249B Sensor
W3121-3/IL
TYPE 249B SENSOR
TYPE 2502 CONTROLLER
Maintenance
15.
. . . . . . . . . . . . . . . . . . . . . . . . . . . .
Troubleshooting 16
. . . . . . . . . . . . . . . . . . . . . . . . . . .
Removing Controller from Sensor 16.
. . . . . . . . . . .
Changing Mounting Method 18.
. . . . . . . . . . . . . . . .
Installing Controller on Sensor 19.
. . . . . . . . . . . . . .
Changing Proportional, Reset, or
Differential Relief Valve 19.
. . . . . . . . . . . . . . . . . . .
Testing Relay Dead Band 19.
. . . . . . . . . . . . . . . . . .
Changing Relay 20.
. . . . . . . . . . . . . . . . . . . . . . . . . . .
Replacing Bellows 20.
. . . . . . . . . . . . . . . . . . . . . . . .
Reversing Action 20.
. . . . . . . . . . . . . . . . . . . . . . . . . .
Disassembling Relay 20.
. . . . . . . . . . . . . . . . . . . . . .
Parts Ordering
21.
. . . . . . . . . . . . . . . . . . . . . . . . . .
Parts Kits
21.
. . . . . . . . . . . . . . . . . . . . . . . . . . . . . . .
Parts List
21.
. . . . . . . . . . . . . . . . . . . . . . . . . . . . . . . .
Instruction Manual
Form 1446
June 1994 2502 Series

2502 Series
2
Introduction
Scope of Manual
This instruction manual provides installation, operat-
ing, calibration, maintenance procedures for 2502 Se-
ries pneumatic controllers (figure 1) used in combina-
tion with 249 Series level sensors.
This manual does not include regulator or sensor
installation or maintenance procedures. For this infor-
mation, refer to the instruction manual for the appropri-
ate regulator and 249 Series level sensor.
Only personnel qualified through training or experience
should install, operate, and maintain this controller. If
there are any questions concerning these instructions
contact your Fisher Controls sales office or sales rep-
resentative before proceeding.
Description
The Type 2502 Level-TrolRController described in
this manual provides proportional-plus-reset and pro-
portional-plus-reset-with-anti-reset-windup control. The
controller output is a pneumatic signal that operates a
final control element. These controllers are designed
to control liquid level, the level of interface between
two liquids, or density (specific gravity). Each unit con-
sists of a 249 Series liquid level sensor and a 2502
Series pneumatic controller.
Refer to the Principle of Operation section for a more
comprehensive discussion of how the Type 2502
pneumatic controller operates.
Specifications
Table 1 gives general specifications for the Type 2502
Series Controllers.
Controller-Sensor Action
The following controller description is for right-hand
mounting. Left-hand mounting produces an output sig-
nal with the opposite action. Figure 4 shows cage
head mounting positions.
For right-hand mounting:
SDirect Action--Increasing liquid or interface level, or
density, increases the output signal.
SReverse Action--Decreasing liquid or interface level,
or density, increases the output signal. A factory-sup-
Figure2. Guidelines for Use of Optional
Heat Insulator Assembly
USE INSULATOR (CAUTION! IF AMBIENT DEWPOINT IS
ABOVE PROCESS TEMPERATURE, ICE FORMATION MAY
CAUSE INSTRUMENT MALFUNCTION AND REDUCE
INSULATOR EFFECTIVENESS.)
0 20 40 60 80 100 120 140 160
01020
–18 –10 30 40 50 60 70
71
593
500
400
300
200
100
0
0
400
800
1100
–20 –29
NO INSULATOR NECESSARY
AMBIENT TEMPERATURE (_C)
AMBIENT TEMPERATURE (_F)
HEAT INSULATOR
REQUIRED
TOO
HOT
NOTE: FOR SERVICE BELOW –20_F (–29_C) CONTACT FACTORY.
PROCESS TEMPERATURE ( C)
_
PROCESS TEMPERATURE ( F)
_
B1413-1/IL
0 20 40 60 80 100 120 140 200
01020
–18 –10 30 40 50 60 70 93
593
500
400
300
200
100
0
0
400
800
1100
–20 –29
NO INSULATOR NECESSARY
AMBIENT TEMPERATURE (_C)
AMBIENT TEMPERATURE (_F)
HEAT INSULATOR
REQUIRED
TOO
HOT
PROCESS TEMPERATURE ( F)
_
180160
80 90
USE INSULATOR (CAUTION! IF AMBIENT DEWPOINT IS
ABOVE PROCESS TEMPERATURE, ICE FORMATION MAY
CAUSE INSTRUMENT MALFUNCTION AND REDUCE
INSULATOR EFFECTIVENESS.)
plied reverse-acting unit has the suffix letter R added
to the type number.
Installation
The 2502 Series controllers are used in combination
with 249 Series sensors, and unless ordered separate-
ly, the controller will be attached to the sensor.
249 Series Sensors
DThe Type 249, 249B, 249C, 249K, 249L, and
249N, sensors side-mount on the vessel with the dis-
placer mounted inside a cage (caged) outside the ves-
sel.
DThe Type 249BP and 249CP sensors top-mount
on the vessel with the displacer hanging down into the
vessel (cageless).
DThe Type 249V sensor side-mounts on the ves-
sel with the displacer hanging out into the vessel
(cageless).
External sensors provide more stable operation than
do internal sensors for vessels with internal obstruc-
tions or considerable internal turbulence.

2502 Series
3
Table1. Specifications
Available Configurations
Type 2502: A direct-acting controller which pro-
vides proportional-plus-reset control
Type 2502C: A Type 2502 with a level indicator
assembly
Type 2502F: A Type 2502 with a differential relief
valve
These type numbered products are also avail-
able with reverse action. For example, Type
2502R, Type 2502CR, and 2502FR
Input Signal(1)
Liquid Level or Liquid-to-Liquid Interface Level:
From 0 to 100 percent of displacer length—stan-
dard lengths for all sensors are 14 inches (356 mm)
or 32 inches (813 mm). Other lengths available de-
pending on sensor construction
Liquid Density: From 0 to 100 percent of displace-
ment force change obtained with given displacer
volume—standard volumes are 60 inches3(980
cm3) for Types 249C and 249CP sensors, or 100
inches3(1640 cm3) for most other 249 Series sen-
sors; other volumes available depending on
construction
Output Signal(1)
3 to 15 psig (0.2 to 1.0 bar) or 6 to 30 psig (0.4 to
2.0 bar)
Action: Field reversible between direct (increasing
liquid or interface leel or specific gravity increases
output pressure) and reverse (increasing liquid or
interface level or specific gravity decreases output
pressure)
Area Ratio of Relay Diaphragms
3:1
Supply Pressure Requirement
20(2) psig (1.4 bar) for 3 to 15 psig (0.2 to 1.0 bar)
output signal or 35(2) psig (2.4 bar) for 6 to 30 psig
(0.4 to 2.0 bar) output signal
Maximum Supply Pressure
50 psig (3.4 bar)
Supply Pressure Consumption
At 20 Psig (1.4 bar)
Minimum:
4.2 scfh(3) (0.11 m3/h) at proportional
band setting of 0 or 200 percent
Maximum:
27 scfh (0.72 m3/h) at proportional band
setting of 100 percent
At 35 psig (2.4 bar)
Minimum:
7 scfh (0.2 m3/h) at proportional band
setting of 0 or 200 percent
Maximum:
42 scfh (1.1 m3/h) at proportional band
setting of 100 percent
Performance
Hysteresis: 0.6 percent of output pressure change
at 100 percent of proportional band
Repeatability(1): 0.2 percent of displacer length or
displacement force change
Dead Band(1): 0.05 percent of proportional band or
span
Typical Frequency Response(1): 4 Hz and 90-de-
gree phase shift at 100 percent of proportional band
with output piped to typical instrument bellows using
20 feet (6.1 meters) of 1/4 inch (6.4 mm) tubing
Ambient Temperature Error: 1.5 percent of out-
put pressure change per 50_F (28_C) of tempera-
ture change at 100 percent of proportional band
when using sensor with standard-wall N05500
(K-Monel(4)) torque tube with 249 Series sensors
Reset(1): Adjustable from 0.01 to 74 minutes per
repeat (100 to 0.01 repeats per minute)
Differential Relief (Type 2502F and 2502FR Con-
trollers Only): Adjustable from 2 to 7 psi (0.1 to
0.48 bar differential) to relieve excessive difference
between proportional and reset pressures. Differen-
tial relief can be switched between rising output
pressure and falling output pressure.
Standard Tubing Connections
1/4 inch (6.4 mm) NPT female
Maximum Working Pressures (Sensors Only)
Consistent with aplicable ANSI pressure/tempera-
ture ratings
Operative Ambient Temperatures
Standard Construction: 40 to 160_F (40 to
71_C)
High Temperature Construction: 0 to 220_F
(18 to 104_C). See figure 2
1. Term defined in ISA Standard S51.1-1979.
2. Control and stability may be impaired if this pressure is exceeded.
3. Scfh=standard cubic feet per hour at 60_F and 14.7 psia (normal cubic meters per hour (m3/hr) at 0_C and 1.01325 bar).
4. K-Monel is a mark owned by Inco International.

2502 Series
4
WARNING
When replacing the sensor assembly,
the displacer may retain process liquid
or pressure. Personal injury or property
damage due to sudden release of pres-
sure, contact with hazardous liquid, fire,
or explosion can be caused by punctur-
ing, heating, or repairing a displacer
that is retaining process pressure or liq-
uid. This danger may not be readily ap-
parent when disassembling the sensor
or removing the displacer. Before disas-
sembling the sensor or removing the
displacer, observe the more specific
warning provided in the sensor instruc-
tion manual.
Uncrating
Unless ordered separately, the controller will be at-
tached to the sensor when shipped. Carefully uncrate
the assembly.
CAUTION
A thin-wall torque tube has a T stamped
on the sensor end flange (not visible un-
less the controller/transmitter is re-
moved from the sensor). For sensors
with a thin-wall torque tube, always sup-
port the displacer if the travel stop must
be removed.
Note
Caged sensors have a rod and block
installed on each end of the displacer to
protect the displacer in shipping. Re-
move these parts before installing the
sensor to allow the displacer to function
properly.
Caged sensors will be shipped with the displacer
installed in the cage. If the sensor is ordered with a
tubular gauge glass, the gauge glass will be crated
separately and must be installed at the site. Be certain
that the cage equalizing connections are not plugged
with foreign material.
A caged sensor has a damping plate installed in the
lower screwed or flanged connection to provide more
stable operation. If the process liquid could clog the
plate opening with sediment, then remove the damp-
ing plate. For screwed connections, use a 1/2-inch
Figure3. Pressure Connections
1/4”-18 NPT
SUPPLY
CONNECTION
ADJUSTING
SCREW
FILTER WELL
DRAIN VALVE
LOCKNUT
1/4”-18 NPT
OUTPUT
CONNECTION
VENT
PRESSURE
REGULATOR
CD1700-E
A1909-1/IL
(12.7 mm) hexagon wrench to unscrew the damping
plate. For flanged connections, use a screwdriver to
pry the damping plate out of the flange.
A cageless sensor is shipped with the displacer sepa-
rated from the sensor assembly. A displacer longer
than 32 inches (813 mm) is crated separately. A short-
er displacer is crated with the sensor, but is not at-
tached to the displacer rod. Inspect the displacer and
replace if it is dented. A dent may reduce the pressure
rating of the displacer.
Controller Orientation
A controller is to be mounted with the vent opening
pointing downward as shown in figure 3. This orienta-
tion is necessary to ensure draining of accumulated
moisture. The controller is attached to the sensor in
one or the other of the mounting positions shown in
figure 4: Right hand (with the case to the right of the
displacer when looking at the front of the case) or left
hand (with the case to the left of the displacer). The
mounting position can be changed in the field if re-
quired; refer to the appropriate sensor manual for in-
structions. Changing this mounting position will change
controller action from direct to reverse, or vice versa.
All caged sensors have a rotatable head. That is, the
controller may be positioned at any of eight alternate
positions around the cage as indicated by the numbers
1 through 8 in figure 4. To rotate the head, remove the
head flange bolts and nuts and position the head as
desired.
Mounting Caged Sensor
CAUTION
The cage must be installed plumb so
that the displacer does not touch the
cage wall. Should the displacer touch
the cage wall, the unit transmits an erro-
neous output signal.

2502 Series
5
Figure
4. Cage Head Mounting Positions
Figure 5. Cage Connection Styles
A1271–2/IL
AH9150–A
A2613–2/IL
Note
If the controller is not mounted on the
sensor, refer to the Installing Controller
on Sensor section. That section also
provides instructions for adding a heat
insulator to a unit. If a temperature-com-
pensating displacer or piezometer ring
is used, refer to the special installation
procedures in this section before pro-
ceeding.
Cage connections will normally be either 1-1/2 or
2-inch (38.1 to 50.8 mm) screwed or flanged. Figure 5
shows the combinations. It is recommended that a
drain be installed between the cage and shutoff or
hand valve whenever the bottom cage line has a liq-
uid-trapping low point.
Mount the cage by running equalizing lines between
the cage connections and the vessel (figure 6). On
liquid or interface level applications, position the sen-
sor so that the line marked FLOAT CENTER on the
cage is located as close as possible to the center of
the liquid level or interface level range being mea-
sured.
For liquid or interface level applications, it is advanta-
geous to install a gauge glass either on the vessel, or
on the sensor cage (if the cage is tapped for a gauge).
With flanged connections, use standard gaskets or
other flat-sheet gaskets compatible with the process
liquid. Spiral wound gaskets without compression-con-
trolling centering rings cannot be used for flanged con-
nections.
Mounting Cageless Sensor
CAUTION
If a stillwell is used, it must be installed
plumb so that the displacer does not
touch the wall of the stillwell. Should
the displacer touch the wall while the
unit is in service, the unit will transmit
an erroneous output signal.
Since the displacer hangs inside the vessel, it is advis-
able to provide a stillwell around the displacer when
the liquid is in a state of continuous agitation and ex-
cessive turbulence can be expected.

2502 Series
6
Figure
6. Caged Sensor Mounting
DRAIN
CENTER
OF
LIQUID OR
INTERFACE
LEVEL
DF5379-A
A6771/IL
SHUTOFF
VALVES
VENT
EQUALIZING
LINE
CAUTION
Since a displacer used in an interface
level or a density application must be
completely submerged during opera-
tion, obtaining desired controller sensi-
tivity requires the use of either a thin-
wall torque tube or an overweight
displacer, or both. An overweight dis-
placer cannot be used for any service
except those conditions for which it was
specified.
Note
If the controller is not mounted on the
sensor, refer to the Installing Controller
on Sensor section. That section also
provides instructions for adding a heat
insulator to a unit. If the sensor has a
temperature-compensated displacer or
piezometer ring, refer to the special
constructions procedures in this sec-
tion before proceeding.
Attach a cageless sensor to a flanged connection on
the vessel as shown in figure 7. For interface or liquid
level applications, install a gauge glass on the vessel.
Figure
7. Cageless Sensor Mounting
CF5380-A
A3893/IL
TOP
MOUNTED
W0645-1
CAUTION
If the displacer is to be inserted into the
vessel before being attached to the dis-
placer rod, provide a suitable means of

2502 Series
7
supporting the displacer to prevent it
from dropping into the vessel and suf-
fering damage.
To help support a Type 249BP or 249CP displacer,
install the displacer stem and stem end piece, or a
threaded rod, into the 1/4 inch-28 UNF threaded hole
in the displacer spud or stem end piece (figure 8). On
the Type 249BP with optional travel stop, the stem
end piece pins will secure the displacer as long as the
travel stop plate is installed and the sensor head is in
position.
Side-Mounted Sensor
If a stillwell is required (figure 7), the displacer must be
attached to the displacer rod from inside the vessel.
Connect the displacer as shown in figure 8, locking the
assembly with the cotter spring provided. If a stillwell
is not required, the displacer can be attached to the
displacer rod before mounting the sensor to the vessel
connection. The displacer may then be swung out hor-
izontally for insertion into the vessel. If an extension is
used between the displacer spud and the displacer
stem end piece, make sure the nuts are tight at each
end of the displacer stem extension. Install and tighten
suitable bolting or cap screws in the flanged connec-
tion to complete the installation.
Top-Mounted Sensor
Figure 7 shows the installation of a top-mounted cage-
less sensor. The displacer may be attached to the dis-
placer rod before installing the sensor on the vessel.
Where the displacer diameter is small enough, it may
be desirable to install a long or sectionalized displacer
through the sensor head access hole after the sensor
is installed on the vessel. Connect the displacer as
shown in figure 8, locking the assembly with the cotter
springs provided. If a stem is used between the dis-
placer as shown in figure 8, lock the assembly with the
cotter springs provided. If a stem is used between the
displacer spud and the stem end piece, make sure the
nuts are tight at each end of the stem. Install and tight-
en suitable cap screws in the flanged connection to
complete the installation.
Special Constructions
Temperature-Compensated Displacer
Some sensors use a temperature-compensated dis-
placer (figure 9). This displacer is appropriate for den-
sity applications that do not tolerate specific gravity
changes due to temperature. The displacer must be
filled with the liquid to be measured, or with a liquid of
equal expansion coefficient. In service, the displacer
W0228-1A/IL
DISPLACER ROD
DISPLACER
SPUD
COTTER SPRING
Figure8. Displacer/Displacer Rod Connections
W0229-1A/IL
COTTER SPRING
DISPLACER ROD
LOCKING NUTS
DISPLACER SPUD
DISPLACER
STEM
EXTENSION
DISPLACER
STEM
END PIECE
A0746–1/IL
Figure
9. Temperature-Compensated Displacer

2502 Series
8
expands and contracts the same amount as the mea-
sured liquid to nullify signal changes that would be
caused by temperature changes.
This type of displacer is shipped in a separate carton
but crated with the rest of the assembly. See the ap-
propriate sensor manual for filling instructions.
Piezometer Ring
A piezometer ring (figure 10) is used when it is desir-
able to measure the specific gravity of a liquid in a
flowing line, and when the liquid velocity exceeds two
feet/minute (10 mm/second) past the displacer in the
cage. The piezometer ring reduces the velocity effects
caused by liquid passing through the displacer cage.
To install this type of sensor, connect a line to the
cage inlet and outlet piping at each end of the cage.
Use hand valves to balance the liquid flow through the
cage and keep the displacer cage filled. It is advisable
to provide a rotameter or sight flow gauge for measur-
ing velocity through the cage. If the flow rates are
properly balanced, the transmitter output will show
little change when flow through the cage is shut off. If
the flow rate through the cage is too high the turbu-
lence may cause an erratic output pressure signal.
Readjust hand valves to stabilize the output pressure
signal.
Regulator Supply Pressure
WARNING
Do not overpressurize any system com-
ponent. Personal injury or property
damage may occur due to sudden pres-
sure release or explosion. To avoid
damage, provide suitable pressure-re-
lieving or pressure limiting devices if
supply pressure can exceed the maxi-
mum supply pressure listed in table 1.
Personal injury or property danage may
occur from an uncontrolled process if
the supply medium is not clean, dry, oil-
free, or non-corrosive gas. Industry in-
strument air quality standards describe
acceptable dirt, oil, and moisture con-
tent. Due to the variability in nature of
the problems these influences can have
on pneumatic equipment, Fisher Con-
trols has no technical basis to recom-
mend the level of filtration equipment
required to prevent performance degra-
dation of pneumatic equipment. A filter
or filter regulator capable of removing
Figure
10. Piezometer-Ring Cage for Flow Line Mounting
A1317-1/IL
particles 40 microns in diameter will suf-
fice for most applications. Use of suit-
able filtration equipment and the estab-
lishment of a maintenance cycle to
monitor its operation is recommended.
Standard 2502 Series controllers come complete with
supply and output pressure gauges and an integrally
mounted Type 67FR regulator to reduce supply pres-
sure from a maximum of 250 psig (17.3 bar) to the 20
or 35 psig (1.4 or 2.4 bar) required. This regulator has
built-in relief and a standard 40-micron to remove par-
ticles from the supply source.
The output pressure connection is on the back of the
controller case (figure 3). Pipe the supply pressure to
the in connection of the regulator mounted to the case
back. Provide a clean, dry, and noncorrosive air or gas
supply to the controller as follows:
After pressure connections have been made, turn on
the supply pressure and check all connections for
leaks.

2502 Series
9
Figure11. Controller Adjustments
RESET ADJUSTMENT
W5637/IL/A
29A2834-C
30A8943-H
A1933/IL
1E8731-C
1E8732-C
A1897-1/IL
21A6447-A
A1903/IL
Prestartup Checks
WARNING
The following calibration procedure re-
quires taking the controller out of ser-
vice. To avoid personal injury and prop-
erty damage caused by an uncontrolled
process, provide some temporary
means of control for the process before
taking the controller out of service.
Adjustment locations are shown in figure 11 unless
otherwise indicted. When performing the checks, open
loop conditions must exist. One way to obtain an open
loop is to ensure that there is no flow through the final
control element. Another way to obtain an open loop is
to disconnect the controller output signal line and plug
the output connection.
During startup, it is necessary to change process lev-
els to position the displacer from its maximum to its
minimum range of operations. Provide a means to
change the process level or interface. If the process
variable cannot be varied sufficiently, follow the in-

2502 Series
10
structions in the Calibration section to simulate the
process variable changes required for these checks.
Make sure that the raise level dial on the controller is
mounted with the correct side facing out. The dial is
printed on both sides with the arrow on one side point-
ing to the left and the arrow on the other side pointing
to the right. Figure 11 shows the dial arrow positioned
for a sensor that is mounted to the left of the control-
ler; the arrow points to the left. If the sensor is to the
right of the controller, remove the two mounting
screws, turn the dial over so the arrow points to the
right, then reinstall the mounting screws.
On a controller with optical mechanical indicator as-
sembly, the travel indicator plate is printed on both
sides. If the sensor is to the left of the controller (right-
hand mounting), use the side of the plate that has the
arrow pointing to the left. If displacer is to right of con-
troller (left-hand mounting), use the side of the plate
that has the arrow pointing to the right.
1. Turn on the supply pressure and check that the
controller supply gauge reads 20 psig (1.4 bar) for a 3
to 15 psig (0.2 to 1.0 bar) output pressure range or 35
psig (2.4 bar) for a 6 to 30 psig (0.4 to 2.0 bar) output
pressure range. If the pressure is incorrect, loosen the
locknut of the filter/regulator (figure 3); turn the adjust-
ing screw clockwise to increase or counterclockwise to
decrease pressure. Tighten the locknut after setting
the pressure.
2. Turn the reset control to .05 minutes per repeat.
3. Locate the process variable at its minimum value
(on level applications, for instance, lower the liquid
below the displacer). Zero the proportional band and
raise level controls. Output pressure on direct-acting
controllers should be greater than zero but less than 3
psig (0.2 bar) for the 3 to 15 psig (0.2 to 1.0 bar) range
or 6 psig (0.4 bar) for the 6 to 30 psig (0.4 to 2.0 bar)
range. For reverse-acting controllers, the output pres-
sure should be greater than 15 psig (1.0 bar) and less
than 20 psig (1.4 bar) for the 3 to 15 psig (0.2 to 1.0
bar) range or greater than 30 psig (2.0 bar) and less
than 35 psig (3.4 bar) for the 6 to 30 psig (0.4 to 2.0
bar) range. On a controller with indicator assembly,
the pointer should be over the low point on the indica-
tor plate; slight adjustment might be necessary by
loosening the bottom shaft nut (key 40, figure 16),
shifting the pointer, and retightening the nut.
4. Set the raise level control as desired. Determine
the dial setting by moving the nameplate slide until the
specific gravity on scale B is opposite the displacer
volume on scale A. Choose the percentage of displac-
er length, as measured from the displacer bottom, that
you desire the liquid or interface level to cover. Locate
this percentage on scale D, and read up from this per-
centage to find the raise level dial setting on scale C.
For example, with a liquid level application, a specific
gravity of one (water service), and a 90-cubic-inch (1.5
L) displacer, move the slide so that 1.0 on scale B is
over 90 on scale A. If it is desired to have water level
cover 50 per cent of the displacer length at the control
point, read up from 50 on scale D to find a 4.5 dial set-
ting on scale C.
5. Relocate the process variable to the control point
determined in step 4. If not, see if another setting on
the raise level dial brings the output pressure into
agreement with the process. For example, with water
level at 50 percent of the height of the displacer, the
output of a 3-15 psig (0.2 to 1.0 bar) unit should be
aproximately 50 percent of the way between 3 and 15
psig (0.2 and 1.0 bar) or 9 psig (0.6 bar). If the new
setting is more than one graduation away from the
setting determined in step 4, the unit would appear to
be out of calibration and recalibration may be desir-
able. See Calibribration Procedure on page 12 steps 1
thru 10.
On a controller with level indicator, the pointer should
reflect the magnitude of the process variable; for
instance, with liquid or interface level covering 50 per-
cent of the displacer, the pointer should be in the
middle of the high-low scale. Slight plate adjustment
might be necessary as described at the end of step 3.
6. If all prestartup checks are satisfactory proceed to
the Startup section.
Adjustments
Controller adjustments are provided in this section.
Refer to figure 11 for adjustment locations.
Level Set Adjustment
To perform the level adjustment, open the controller
cover, loosen the knurled adjustment screw (see figure
11), and rotate the adjustment lever around the RAISE
LEVEL dial. To raise the fluid or interface level, or in-
crease density, rotate this knob in the direction of the
arrows. To lower the level or decrease density, rotate
the knob in the opposite direction. This procedure is
the same for both direct and reverse action controllers.
Tighten the knurled screw.
Note
The raise level dial does not reflect actu-
al fluid level in the tank or fluid level
position on the displacer.
Proportional Band Adjustment
Proportional band adjustment is made to change the
amount of displacement force change required to ob-
tain full output pressure change, by determining the
2502 Series
11
percentage of pressure fed back to the proportional
bellows. The adjustment is performed by opening the
controller cover and turning the percent proportional
band knob (just below the raise level dial).
Reset Adjustment
To adjust reset action (figure 11) turn the knob clock-
wise to decrease the minutes per repeat. Turn the
knob counterclockwise to increase the minutes per
repeat. Increasing the minutes per repeat provides a

slower reset action.
The reset rate adjustment dial is calibrated in minutes
per repeat. By definition, this is the time in minutes
required for the reset action to produce a correction
which is equal to the correction produced by propor-
tional control action. This is, in effect, the time in min-
utes required for the controller to increase (or de-
crease) its output pressure by an amount equal to a
proportional increase (or decrease) caused by a
change in control conditions.
Differential Relief Adjustment
The differential relief valve protrudes from the back of
the controller case on a construction with an F in the
type number. Although normally factory-set to relieve
when the differential between the proportional and re-
set bellows reaches 5 psi, the differential may be re-
duced down to 2 psi by turning the adjustment screw
clockwise or increased up to 7 psi by turning the screw
counterclockwise. The minimum differential setting will
yield the minimum set point overshoot during startup.
Depending on the characteristics of the process, the
relief valve can be positioned so that the arrow cast on
the case points either to the letters RE (reset) or to the
letter P (proportional) on the back of the manifold. To
reposition the arrow, see figure 11. Remove the
mounting screws. Reposition the differential relief
valve to RE or P and reinstall the mounting screws.
Calibration
Precalibration Requirements
Note
Calibration of a unit with a displacer de-
signed for interface or density control
must be conducted with the displacer
completely submerged in a liquid of the
specific gravity for which the unit was
designed.
To calibrate a controller, it is necessary to place the
device into operation. This may be done on the vessel
with the actual service liquid. It may also be done in
the shop, but other means of obtaining a displacement
force change must be provided. It must be done in the
shop if the process variable is not available for calibra-
tion or if the process cannot be varied for calibration.
There are two methods of adapting the calibration pro-
cedure to shop calibration: wet and dry.
Wet Calibration
Remove the entire controller and sensor assembly
from the vessel. For caged sensors, pour the liquid
into the cage. For cageless sensors, suspend the dis-
placer to an appropriate depth in a liquid having a spe-
cific gravity equal to that of the process liquid.
If necessary, use water for wet calibration in the shop.
However, this procedure requires compensation for
the difference between the specific gravity of the water
and that of the process liquids. For example, assume
that the process liquid has a specific gravity of 0.7 and
that wet calibration with water (specific gravity of 1.0)
is desired. To simulate a process level of 50 percent of
the input span, a water level of 35 percent is required
(0.7/1.0 x 50 percent = 35 percent).
Dry Calibration
Remove the controller and torque tube arm, as a
single unit, from the cage or vessel. Then, wherever
the standard calibration instructions in this manual re-
quire a specific process variable for input to the sen-
sor, simulate that variable by suspending the proper
weight (such as a can of sand) from the end of the
displacer rod. Complete the following Controller and
Torque Tube Arm Disassembly and the Determining
Suspended Weight for Calibration sections before pro-
ceeding to the calibration procedure.
Controller and Torque Tube Arm
Disassembly
WARNING
To avoid personal injury from contact
with the process liquid, lower the vessel
level below the sensor torque tube arm,
or shut off the cage equalizing valves
and drain the cage before proceeding.
For closed vessels, release any pres-
sure that may be in the vessel before
removing the sensor assembly.
When removing the displacer from the displacer rod or
removing the controller and torque tube arm from the

2502 Series
12
cage or vessel, refer to the appropriate sensor instruc-
tion manual for assistance. The method of removing
the displacer or torque tube arm and attached control-
ler will vary with the type of sensor.
For a caged sensor with top equalizing connection, it
may be appropriate to remove the entire cage from the
vessel before disassembling.
CAUTION
If the displacer is to be disconnected
from the displacer rod before the sensor
assembly is removed from the cage or
vessel, provide a means of supporting
the displacer to prevent it from dropping
and suffering damage. The spuds or
stem end pieces on all displacers have
holes suitable for inserting rods or other
supports.
Additionally, a threaded rod may be
installed into the 1/4-inch 28 UNF
threaded hole in the displacer spud or
stem end piece of top-mounted cageless
and all caged sensors. For some top-
mounted sensors with long displacers,
it may also be possible to remove the
sensor through the access hole in the
sensor head.
For Type 249BP sensor with the travel
stop, the stem end piece pins will se-
cure the displacer as long as the travel
stop plate is installed and the sensor
head is in position.
Determining Suspended Weight for
Calibration
CAUTION
To avoid overloading a torque tube
sized for interface or density applica-
tions under dry conditions, consult your
Fisher Controls sales office or sales rep-
resentative for the maximum allowable
substitute weight Ws that can be used
with your particular construction.
To determine the total weight that must be suspended
from the displacer rod to simulate a certain condition
of liquid level or specific gravity, solve the following
equation:
Ws= Wd- [(0.0361) (V) (SP GR)]
where:
Ws= Total suspended weight in pounds (should
never be less than 0.5 pounds). For a unit with
a horizontal displacer, make sure the center of
gravity of the substitute weight is where it
would be on the actual displacer.
Note
For liquid level control only, simulate
the lower range limit of the input span
by suspending the displacer from the
displacer rod. For other values of input
span, remove the displacer and suspend
the appropriate weight as determined in
the equation above.
Wd= Weight of the displacer, in pounds (determine
by weighing displacer).
0.0361 = Weight of one cubic inch of water (specific
gravity = 1.0), in pounds.
V = Volume of the displacer in cubic inches, that
would be submerged at the level required by
the calibration procedure. Or,
V = π/4 (displacer diameter)2x (length of displacer
submerged)
SP GR = Specific gravity of the process liquid at
operating temperature.
For interface level measurement, the equation be-
comes:
Ws= Wd- [(0.0361) (V1) (SP GR1) +
(0.0361) (Vh) (SP GRh)]
where:
V1= Volume of the displacer submerged by the
lighter liquid, in cubic inches.
Or,
V = π/4 (displacer diameter)2x (length of the dis-
placer submerged)
SP GR1= Specific gravity of the lighter liquid at op-
erating temperature.
Vh= Volume of the displacer submerged by the
heavier liquid, in cubic inches.
Or,
V = π/4 (displacer diameter)2x (length of the dis-
placer submerged)

2502 Series
13
Table2. Minimum and Maximum Limits for Setting Process Variables
Application Minimum Limit Maximum Limit
Liquid level Displacer must be completely out of liquid Displacer must be completely submerged in liquid
Interface Displacer must be completely submerged in the upper
of two process liquids Displacer must be completely submerged in the lower
of two process liquids
Density Displacer must be completely submerged in liquid having
highest specific gravity expected Displacer must be completely submerged in liquid
having the lowest specific gravity expected
SP GRh= Specific gravity of the heavier liquid at
operating temperature.
Calibration Procedure
WARNING
The following calibration procedure re-
quires taking the controller out of ser-
vice. To avoid personal injury and prop-
erty damage caused by an uncontrolled
process, provide some temporary
means of control for the process before
taking the controller out of service.
Figure 11 shows adjustment locations for the following
steps, except as otherwise indicated. When calibrat-
ing, open loop conditions must exist. One way to ob-
tain an open loop is to place the final control element
into manual control or bypass it. If there is no provision
for manual control, shut down the process. It is recom-
mended that a test pressure gauge be installed in the
controller output line for subsequent calibration steps.
Several steps in these calibration procedures require
setting the process variable at its minimum and maxi-
mum limits according to table 2. Reverse-acting con-
trollers produce the opposite response.
1. Connect a supply pressure source to the controller
and provide a supply pressure suitable for the sensing
element range: 20 psig (1.4 bar) for a 3 to 15 psig (0.2
to 1.0 bar) output pressure range or 35 psig (2.4 bar)
for a 6 to 30 psig (0.4 to 2.0 bar) output pressure range.
2. Rotate the reset knob to 0.01 minutes per repeat.
3. Rotate the proportional band knob to zero.
4. Set the liquid at the minimum limit (dry displacer).
5. Turn the raise level knob to zero.
6. Adjust the nozzle until output pressure is between
0 and 3 psig for a 3 to 15 psig signal range (0 and 0.2
bar for a 0.2 to 1.0 bar signal range) or 0 and 6 psig
for a 6 to 30 psig signal range (0 and 0.4 bar for a 0.4
to 2.0 bar signal range).
7. Set the liquid at the maximum limit (covered dis-
placer).
8. Turn the raise level knob until the output pressure is
15 psig for a 3 to 15 psig signal range (1.0 bar for a 0.2
to 1.0 bar signal range) or 30 psig for a 6 to 30 psig sig-
nal range (2.0 bar for a 0.4 to 2.0 bar signal range).
9. The controller is within its calibration accuracy if the
raise level knob is between the 9.0 and 10.0 positions.
10. If the controller is out of calibration, adjust the cal-
ibration adjuster as follows:
Note
Loosen the two calibration adjuster
screws (key 45, figure 16), and slide the
calibration adjuster (key 100, figure 16)
in the desired direction.
a. If output is below 15 psig for a 3 to 15 psig sig-
nal range (1.0 bar for a 0.2 to 1.0 bar signal range)
or 30 psig for a 6 to 30 psig signal range (2.0 bar
for a 0.4 to 2.0 bar signal range) , move the adjus-
tor a small distance away from the pivot to in-
crease span. Then repeat steps 4 through 9.
b. If output is above 15 psig for a 3 to 15 psig sig-
nal range (1.0 bar for a 0.2 to 1.0 bar signal range)
or 30 psig for a 6 to 30 psig signal range (2.0 bar
for a 0.4 to 2.0 bar signal range), move the adjustor
a small distance toward the pivot to decrease
span. Then repeat steps 4 through 9.
Note
If the controller cannot be calibrated,
look for other problems as described in
the Troubleshooting section, such as a
nonperpendicular flapper-nozzle condi-
tion, leaky connections, or a binding
displacer rod. If none of these troubles is
apparent, the displacer or torque tube is
probably sized for a different set of ser-
vice conditions. Ensure that the displacer
is sized correctly for the application.
Startup
Adjustment locations are shown in figure 11.
1. Set the raise level control to the desired control
point as determined in prestartup checks step 4.

2502 Series
14
2. Set the percent proportional band control to 200.
3. Set the reset control to .05 minutes per repeat.
4. Slowly open the downstream and upstream manual
control valves in the pipeline and close the manual
bypass valve if one is used.
5. With the controller set at the desired control point,
narrow the proportional band until a cycling condition
exists. Then broaden the proportional band slightly
until stable control is obtained.
6. Adjust the reset control to obtain the highest reset
setting without introducing cycling.
7. To ensure that the optimum proportional band and
reset settings have been obtained, momentarily create
a load upset. If cycling occurs, broaden the proportion-
al band slightly and repeat the load upset until stability
is attained. In general, the narrowest proportional band
and the highest reset setting that will not produce cycl-
ing will provide the best control.
Principle of Operation
All 2502 Series controllers use the same basic pres-
sure-balanced relay with a yoked double-diaphragm
assembly (figure 12). This relay is connected so that
supply pressure is fed to the inlet side of the relay
valve and to the fixed restriction. From this restriction,
the air pressure goes into the relay chamber on the
side of the large diaphragm, and to the nozzle. As long
as there is no pressure change on either diaphragm,
the relay valve remains in equilibrium with both the
inlet and exhaust ends closed.
The area ratio of the large diaphragm to the small dia-
phragm is 3 to 1. A 12 psig (0.8 bar) pressure change
on the small diaphragm need only be balanced by a 4
psig (0.3 bar) change on the large diaphragm.
A change in liquid level, interface level, or density
changes the buoyant force exerted on the sensor dis-
placer, which in turn imparts a rotary motion through
the torque tube shaft. The rotary motion is applied to
the controller, which uses a nozzle, bellows, and pneu-
matic relay to convert the rotary motion to a standard
pneumatic output signal. The output signal is sent to a
final control element. In conjunction with this control
element, 2502-249 Series controller-sensors are capa-
ble of bringing the controlled variable back to a specif-
ic control point all the time.
The following descriptions show how the relay works
in conjunction with the standard proportional-plus-reset
controller, and how the reset relief valve construction
works.
Type 2502 Controller
As long as inflow and outflow of the vessel are equal,
the beam and flapper remain motionless and allow sup-
ply pressure to bleed through the nozzle as fast as it
enters the relay through the fixed restriction. A level or
density change either raises or lowers the displacer and
pivots the beam and flapper with respect to the nozzle.
An increase in level or density with direct action, or a
decrease with reverse action, moves the beam and
flapper closer to the nozzle and restricts the escape of
supply pressure. This builds up the loading differential
on the side of the large diaphragm and opens the relay
valve to supply pressure inflow.
On the other hand, a decrease in level or density with
direct action, or an increase with reverse action,
moves the beam and flapper away from the nozzle
and permits supply pressure to bleed through the
nozzle faster than it can enter through the fixed restric-
tion. This builds up the loading differential on the side
of the small diaphragm, and opens the relay valve to
exhaust loading pressure.
The three-way proportional valve can be opened and
adjusted to allow some or all of the output pressure
change to feed back to the proportional bellows in or-
der to change the proportional band of the controller.
This pushes the beam and flapper opposite the way it
is being pivoted by the torque tube shaft, counteract-
ing the pressure change in the nozzle and again stabi-
lizing the relay diaphragm pressure differential. The
relay valve shuts off and maintains a new output pres-
sure according to the change in sensed displacer posi-
tion.
A wide-open proportional valve permits feedback of all
the output change and produces 100 percent propor-
tional response. Closing of this valve produces smaller
proportional responses, since part of the output
change is vented through the valve exhaust and only
the remainder is available to reposition the bellows.
The reset valve can be adjusted to channel some or all
of the proportional pressure into a reset bellows that
opposes proportional bellows action. This automatical-
ly dampens the effect of any proportional overcorrec-
tion by a set amount per time interval, as long as there
is a deviation from the control point.
Figure 12 illustrates these principles at work in a di-
rect-acting right-hand-mounted construction controlling
liquid inflow to a vessel, by means of a direct-acting
diaphragm-actuated control valve. Nozzle positions
and bellows connections would be reversed for direct
action with left-hand mounting or reverse action with
right-hand mounting.

2502 Series
15
Figure
12. Direct-Acting Right-Hand-Mounted 2502-249 Series Controller
CD2114-A
CJ4081-A
C0313-1
Type 2502F Controller with Reset Relief
Valve
This construction (figure 13) has a differential relief
valve used to prevent proportional pressure from ex-
ceeding reset pressure by more than a set value, a
feature useful for intermittent control applications. Pro-
portional valve output registers in the outer chamber of
the relief valve as well as in the proportional bellows.

2502 Series
16
Figure
13. Type 2502F Controller with Reset Relief Valve
CJ4081-A
CU7387-B
C0311-2
A sudden increase in the output pressure will cause a
rapid pressure increase in the proportional bellows and
in the outer relief valve chamber. If the outer chamber
pressure exceeds that in the inner relief valve cham-
ber by the amount of the relief pressure setting, the
relief diaphragm will move off the orifice in the relief
valve, and the pressure in the outer chamber will bleed
into the reset system. This action provides quick relief
of excessive proportional pressure and reduces the
time required by the system to return to the control
point.
Maintenance
The 2502 Series controllers are used in combination
with 249 Series sensors. Due to the care Fisher Con-
trols takes in meeting all manufacturing requirements
(heat treating, dimensional tolerances, etc.), use only
replacement parts manufactured or furnished by Fish-
er Controls.
WARNING
Personal injury or property damage due
to sudden release of pressure, contact
with hazardous liquid, fire, or explosion
can be caused by puncturing, heating,
or repairing a displacer that is retaining
process pressure or liquid. This danger
may not be readily apparent when disas-
sembling the sensor or removing the
displacer. Before disassembling the
sensor or removing the displacer, ob-
serve the more specific warning pro-
vided in the sensor instruction manual.
Troubleshooting
When troubleshooting, open loop conditions must exist
unless otherwise stated. When monitoring the process
variable, use the most accurate level indicting device
readily available. The output signal measuring device
should have a corresponding accuracy.

2502 Series
17
Table 3 lists some common operating faults, their
probable causes, and corrective action.
Removing Controller from Sensor
WARNING
To avoid injury in the following steps,
turn off the supply pressure and careful-
ly release any pressure trapped in the
controller before breaking any pressure
connection. Provide a bypass for the
control device if continuous operation
is required during maintenance.
Refer to figure 16 for key number locations, unless
otherwise indicated.
1. Disconnect the supply and output pressure tubing
from the controller.
2. Loosen the hex nut (key 40) that secures the oper-
ating arm base or pointer assembly (key 68 or 51) to
the torque tube rotary shaft. Do not lose the two link
bearings (key 87, not shown).
CAUTION
If the hex nut has not been loosened ac-
cording to step 2, attempting to remove
the controller from the sensor may bend
the rotary shaft or operating arm and
linkage. Be careful that the back of the
controller case or the heat insulator
does not drop down and bend the rotary
shaft or shaft extension.
3. Remove any insulating tape from the joint between
the controller case and the torque tube arm. Remove
he four cap screws (key 39, figure 14) that hold the
controller or heat insulator to the torque tube arm. Pull
the case straight out from the torque tube arm, easing
it over the shaft coupling (key 36, figure 14) if one is
installed.
4. If the controller has a heat insulator, remove the
button head cap screws (key 40). Remove four wash-
ers (key 53) and the insulator assembly (key 35).
Changing Mounting Method
WARNING
To avoid injury from contact with the
process liquid, lower the vessel level
below the torque-tube arm before pro-
ceeding. For closed vessels, release any
pressure that may be above the liquid.
Also, be careful to avoid overloading a
thin-wall torque tube and/or overweight
displacer.
Refer to figure 16 for key number locations.
1. Remove the controller as described previously.
2. A controller is attached to the sensor in one or the
other of the mounting positions shown in figure 4.
Right hand mount is with the case to the right of the
displacer when looking at the front of the case. Left
hand mount is with the case to the left of the displacer.
For a 249 Series sensor, remove the torque tube arm
from the sensor or vessel and reinstall the torque tube
arm in the opposite position according to the appropri-
ate instruction manual.
3. Check the desired control action to determine if it is
also necessary to reverse the controller action. The
nozzle block and bellows tubing should be arranged in
the proper position as shown in figure 15.
4. Remove the raise level dial, turn it over, and install
it in the desired position. The arrow on it under the
word FLOAT should point toward the displacer. On a
controller with indicator assembly, remove two screws
(key 41, figure 16), turn the front plate (key 54, figure
16) to the side that will have the float arrow pointing
toward the displacer, and secure the plate with the
screws.
5. Install the controller according to the next section.
Installing Controller on Sensor
Note
If the installation is in a location that is
not readily accessible and shop calibra-
tion is required, remove the torque tube
arm from the cage or vessel before mat-
ing the controller to the sensor. Install
the controller on the torque tube arm in
the shop; then calibrate and return the
controller and torque tube arm assem-
bly to the installation.

2502 Series
18
Table
3. Troubleshooting Chart for 2502 Series Controllers
Fault Possible Cause Check Correction
1. Process wanders or cycles
around setpoint. 1.1 Proportional band or specific
gravity adjsutment incorrect or
improperly tuned control loop.
1.1 Insure the prestartup
procedures are completed
correctly. Tune control loop.
1.1 If stable control cannot be
attained and all other elements are
functionally correct, examine other
ossible causes related to the
controller/transmitter.
1.2 Supply pressure varying or
incorrect supply pressure setting. 1.2 Use input pressure gauge to
monitor stability. Make sure
regulator IN supply pressure is
withlin limits.
1.2 Apply correct supply pressure.
It is recommended to use one
regulator per instrument.
1.3 Sensor not plumb and is in
contact with sidewall or leak in
displacer.
1.3 Check cage vessel and stillwell
installation, or for leaking displacer. 1.3 Make sure the displacer and
displacer rod hangs freely. Make
sure linkage is tight. Replace
displacer if leaking.
1.4 Relay malfunction. 1.4 Check for relay malfunction by
using the testing relay deadband
procedure
1.4 Depress plunger to clean out
the fixed restriction. Replace or
repair relay using the procedure in
the Maintenance section.
2. Controller controlling off setpoint
or switching point. 2.1 Supply pressure not set
correctly. 2.1 Make sure regulator supply
pressure is set correctly. Make sure
regulator IN supply pressure is
within limits.
2.1 Reset the supply regulator
pressure. If the condition occurs
again, rebuilld or replace regulator.
Provide a regulator input pressure
within regulator limits.
2.2 Leak in the controller loop. 2.2 Use soap and water to check
for internal and external leaks. 2.2 Replace or repair leaking parts
as necessary.
2.3 Leaking displacer. 2.3 Insure the displacer is not filling
with process fluid. 2.3 Refer to sensor maintenance
procedures in the appropriate
sensor instruction manual.
2.4 Flapper adjustment. 2.4 Insure the flapper is not loose
on the torque tube shaft and is
centered on the nozzle.
2.4 Replace or tighten flapper
assembly as necessary and/or
center flapper on nozzle.
2.5 Process variable changed. 2.5 Insure the process variable has
not changed from original
calibration settings or, displacer not
design specific gravity of process.
2.5 Change process variable back
to original sepcification or
recalibrate. If necessary, provide
replacement displacer of correct
size and recalibrate.
3. Controller cannot attain full
output range. 3.1 Supply pressure not set
correctly. 3.1 Make sure supply pressure is
set correctly. Make sure regulator
IN supply pressure is within limits.
3.1 Reset the regulator pressure. If
problem reoccurs, replace or
rebuild the regulator. Insure
regulator IN supply pressure is
within limits at all operating levels.
3.2 Flapper adjustment. 3.2 Insure the flapper is not loose
on the torque tube shaft and is
centered on the nozzle.
3.2 Replace or tighten flapper
assembly as necessary and/or
center flapper on nozzle.
3.3 Process variable changed. 3.3 Insure the process variable has
not changed from original
calibration settings or, from
displacer design specific gravity.
3.3 Change process variable back
to original specificaton or
recalibrate. If necessary, provide
replacement displacer of correct
size and recalibrate.
3.4 Relay malfunction. 3.4 Check for relay malfunction by
using the testing relay deadband
procedure.
3.4 Depress plunger to clean out
the fixed restriction. Replace or
repair relay using the procedure in
the Maintenance section.
3.5 Leaking controller loop. 3.5 Use soap and water to check
for internal and external leaks. 3.5 Replace or repair leaking parts
as necessary.
4. Controller remains at full or zero
output pressure. 4.1 Supply or output pressure
gauge malfunction 4.1 Insure the pressure gauges are
registering correctly. 4.1 Replace pressure gauges. Use
corrective action given in section 3
of this table.
4.2 Flapper adjustment. 4.2 Insure the flapper is not loose
on the torque tube shaft. Insure the
flapper is centered on the nozzle.
4.2 Replace or tighten flapper
assembly as necesary and/or
center flapper on nozzle.
Perform step 1 only if adding a heat insulator to a
unit that does not have one. Key numbers in this
step are shown in figure 14.
1. To install the heat insulator, secure the shaft exten-
sion (key 37) to the torque tube assembly rotary shaft
with the shaft coupling (key 36). Tighten both set
screws (key 38), with the coupling centered as shown

2502 Series
19
Figure
14. Heat Insulator Shown Installed on 249 Series
20A7423-C/DOC
in the figure. Then mount the insulator assembly (key
35) on the controller case with four washers (key 53)
and button-head cap screws (key 40). Tighten the
screws.
CAUTION
In the following step, avoid bending the
torque tube rotary shaft of the torque
tube assembly. Bending or side loading
of this shaft could cause erroneous
readings. Additionally, make sure the
ball bearing assembly (key 12, figure 16)
is removed from the case (key 1, figure
16) to provide clearance when installing
the case on the sensor.
2. Remove the bearing assembly (key 12) from the
case (key 1).
3. Carefully slide the controller case straight in, guid-
ing the bearing assembly (key 12), operating arm base
or pointer assembly (key 68 or 51, figure 16) over the
rotary shaft and easing an attached heat insulator over
the shaft coupling (key 36, figure 14) if necessary. Se-
cure the case or insulator to the torque tube arm with
the four cap screws (key 39, figure 14).
Figure
15. Nozzle, Flapper, and Tubing Arrangements
for Various Actions and Mountings
AV2323-A
AV2322-A
B0995-2/IL
Note
If a heat insulator is used, do not insu-
late its exterior.
4. On a unit without a heat insulator, tape the joint
between the case and torque tube arm to minimize the
entrance of atmospheric moisture around the torque
tube rotary shaft.

2502 Series
20
5. Install and tighten the bearing assembly (key 12) in
the case (key1). Secure the operating arm base or point-
er assembly to the rotary shaft by tightening the hex nut
(key 40, figure 16). Connect the supply and output pres-
sure tubing and perform the calibration procedure.
Changing Proportional, Reset, or
Differential Relief Valve
1. Remove the proportional band valve assembly (key
36, figure 16) by unscrewing it from the relay base
(key 23, figure 16). Install the desired replacement
assembly, or a 1/8-inch (3.2 mm) NPT pipe plug into
the proportional band tapping if testing relay dead
band.
2. To change the reset restriction valve assembly (key
91), remove the two mounting screws (key 182) located
on the back side of case. Install the replacement valve
assembly, and reconnect the tubing connections.
3. Remove the differential relief valve assembly (key
186, figure 16) by removing the two mounting screws
(figure 11) that anchor the valve to the manifold (key
184, figure 16). Install the valve with the arrow pointing
to the same letter(s) as before removal, unless it is
desired to change the relief action.
Testing Relay Dead Band
1. Replace the proportional band adjustment assem-
bly with a 1/8-inch (3.2 mm) NPT pipe plug according
to the Changing Proportional, Reset, or Differential
Relief Valve section.
2. Turn on the supply pressure and set it to 20 or 35
psig (1.4 or 2.4 bar).
3. By changing the process variable and adjusting the
raise level control, set the output pressure to 15 or 30
psig (1.0 or 2.0 bar). While monitoring the output pres-
sure, slowly change the process until an output pres-
sure change can just be detected, and record the val-
ue of the process variable at the detection point.
4. Change the process variable in the opposite direc-
tion until another output pressure change can be de-
tected, and again record the value of the process vari-
able. If the difference between the two recorded
values (the dead band) is more than 0.2 percent of the
maximum displacer length, the relay will have to be
replaced or repaired according to the Changing Relay
and the Disassembling Relay sections.
5. Turn off the supply pressure, remove the pipe plug,
and install the proportional band adjustment assembly.
Changing Relay
The relay may be removed for cleaning or repair, and
must be taken off to remove the lower bellows.
1. On a controller with indicator assembly, loosen the
two lower screws (key 96, figure 17) of the relay case
and slide out the indicator base plate (key 53, figure 16).
2. Disconnect the tubing (key 11, figure 16) from the
relay.
3. Remove both mounting screws, the relay, and the
relay gasket (keys 43, 34, and 22, figure 16).
4. Install a new gasket, the replacement relay if nec-
essary, and both mounting screws. Reconnect the tub-
ing. On a controller with indicator assembly, slide the
base plate under the two lower screws of the relay
case, align the plate so that the pointer will read prop-
erly, and tighten the screws.
Replacing Bellows
Key numbers are shown in figure 16.
1. To gain access to the lower bellows, remove the
relay according to the Changing Relay section.
2. Remove the upper and lower bellows frame screws
(key 96) that hold both bellows assemblies to the bel-
lows frame. Unscrew each bellows from the spacer
(key 98), being careful not to lose the O-ring (key 57,
not shown) from the spacer end of the bellows.
3. Inspect each bellows and O-ring and replace if nec-
essary, using an unpainted bellows for a 3 to 15 psig
(0.2 to 1.0 bar) range and a red bellows for a 6 to 30
psig (0.4 to 2.0 bar) range. Be sure to install the O-ring
at the spacer end of the bellows.
4. Install each bellows by screwing it down over the
stud (key 97, not shown) protruding from each end of
the spacer. Secure with a bellows frame screw, and
install the relay according to the Changing Relay sec-
tion if it was removed.
5. Perform the calibration procedure and any other
necessary part of the calibration sequence.
Reversing Action
Note
The following procedure will be neces-
sary to restore previous action if the
mounting method has been changed.
Key numbers are shown in figure 16.
1. Remove two screws (keys 63 and 64), two seal
rings (key 55), and the nozzle block (key 101). Check
seal ring condition and replace rings as necessary.
2. Install the nozzle block, seal rings, and screws on
the opposite side of the beam as shown in figure 15.
Disconnect the proportional band tubing (key 76) and
one of the two pieces of reset tubing (key 75) from the
bellows frame (key 94) and reconnect them in the
proper orientation as shown in figure 15.
Table of contents
Other Fisher Controllers manuals

Fisher
Fisher 133H User manual

Fisher
Fisher EZR User manual

Fisher
Fisher EZH User manual

Fisher
Fisher DPR900 User manual

Fisher
Fisher FIELDVUE DVC6200 User manual

Fisher
Fisher 64 User manual

Fisher
Fisher MR95L User manual

Fisher
Fisher FIELDVUE DVC6200 User manual

Fisher
Fisher EZR Series User manual

Fisher
Fisher 670F User manual

Fisher
Fisher MR108 Series User manual

Fisher
Fisher 2500 Series User manual

Fisher
Fisher 1301F User manual

Fisher
Fisher FIELDVUE DVC6200f User manual

Fisher
Fisher FIELDVUE DLC3010 User manual

Fisher
Fisher EZL User manual

Fisher
Fisher Fieldvue DVC5010 User manual

Fisher
Fisher Type 1008 User manual

Fisher
Fisher FIELDVUE DVC6200 Configuration guide

Fisher
Fisher 4660 User manual