Flextone Rx-8000 User manual

PRODUCT
MANUAL

INDICATIONS FOR USE
Please read the contra-indications, precautions and warnings carefully to
determine whether any of them apply to you.
This device stimulates the motor nerves supplying the muscle. There are
nine (9) different programs with varying timings and intensities which
can be used before exercise for warm-up, as a muscle performance im-
prover and for recovery after exercise.
CONTRA-INDICATIONS, PRECAUTIONS & WARNINGS
This muscle stimulator can be used by all healthy adults; however some
care is needed when using it. Read the Manual and follow the guidelines
prior to use. The signal strength can be adjusted to a high intensity and
caution should be taken when setting the intensity.
Key Guidelines
• The intended use is for healthy adults. Keep out of reach of children.
• Never apply electrodes to any part of the head, face, neck, throat, or
directly over the heart.
• The programs are not designed for use on diseased or injured mus-
cles. That use is contra-indicated.
• Always ensure that the two electrodes from the same lead are used to
exercise one muscle.
• Never use the device in ways other than those directed in the user
manual.
Never use:
• On painful or atrophied muscles
• On muscles prone to spasms
• On muscles connected to painful or aficted joints
• To prevent or retard disuse atrophy
• To improve blood-ow or prevent venous thrombosis
• To maintain or increase range of motion
CONTRA-INDICATIONS
Do not use if:
• You have an electronic implant or if you suffer from any other heart
problem because it may interfere with the functioning of the implant.
• You have cancer or cancerous lesions. The effects of electronic stim-
ulation on cancerous tissue are unknown.
• You suffer from epilepsy
• You have recently undergone a surgical procedure
• You have acute trauma or fracture
• You are pregnant.
• You are under medical supervision for cognitive dysfunction as you
may not be able to comply with safety instructions.
• In cases of critical ischemia of the limbs
• The unit is in close proximity to shortwave or microwave therapy
equipment, or you are connected to high-frequency surgical equip-
ment, due to the risk of device malfunction due to electronic interfer-
ence
• Wearing the pads necessitates placement over areas at which drugs/
medicines are administered by injection
PRECAUTIONS:
• Get your doctor’s permission before using if:
• You have a bad back. Also make sure the intensity is kept low.
• You have serious injury or illness not mentioned in this manual
• You suffer from muscle or joint problems
• You experience any irritation, skin reaction, hypersensitivity, or other
adverse reaction. You should however, note that some reddening of
the skin under the pad is quite normal during and for a short time
after an exercise session
• After strenuous exercise or exertion, always use lower intensity to
avoid muscle fatigue
• Contact FlexTone® or an authorized dealer if your unit is not work-
ing correctly. Do not use in the meantime
• An effective session should not cause undue discomfort
• For rst time users we recommend that you begin in a seated position
with low stimulation intensity settings
• Keep out of reach of children
• Leads and electrodes must not be connected to or used with other
objects
• Do not use this unit while using any other device that transmits elec-
trical current into the body
• Do not touch the pads or lead pins when the machine is on
• Do not use when driving, operating machinery, or cycling
• Cease usage if you are feeling light headed or faint. Call your doctor
if this happens
• Do not over exert yourself when using this unit. Any workout should
be at a comfortable level for you
• Do not place pads over jewelry or body piercings
• FlexTone® will not accept responsibility if these instructions and
guidelines supplied with this unit are not followed

Warnings
• Do not use while sleeping, because you cannot react to safety infor-
mation.
• User must position the pads and operate unit ONLY as indicated
in this manual. Never place the pads on the front or sides of neck,
across or through the heart (i.e., one pad on the front of the chest and
one on the back), in the genital region or on the head, because of the
risk of stimulating inappropriate muscles and organs
• Avoid any recent scars, broken or inamed skin, infected areas or
susceptibility to acne, thrombosis or other vascular problems (vari-
cose veins), or any part of the body where feeling is limited
• Avoid areas of injury or restricted movement
• Avoid placing the pads over metal implants
• Wait before using your FlexTone® product until:
• At least 6 weeks after the birth of your baby. You must consult
your doctor before use
• One month after an IUD contraceptive device has been tted.
You must consult your doctor before use
• At least 3 months after having a caesarian section. You must
consult your doctor before use
• The heavy days of your period have nished because vigorous
abdominal exercise is not recommended at this time
• Do not use in the bath or shower, or in an environment of elevated
humidity (sauna)
• Caution should be used in the following:
• When there is a tendency to bleed internally following a fracture
or injury
• Following recent surgical procedures when electronic stimulation
may disrupt the healing process
• Over areas of skin which lack normal sensation
Adverse Reactions
• Skin irritations and burns have been reported with the use of elec-
tronic muscle stimulators
• On very rare occasions, rst time users of EMS have reported feeling
light-headed or faint. FlexTone® recommends that you use the prod-
uct while seated until you become accustomed to the sensation
Pad Precautions
• To reposition pads during a session, always turn off the program
currently running, reposition the pads as directed in this manual, and
then restart the program
• Only use pads supplied by FlexTone® with your muscle condition-
er. Any others may not be compatible with your machine and could
degrade the minimum safety levels
• The pads are for single person use only
• Do not dunk the pads into water
• Do not apply solvents of any kind to the pads
• Always ensure the unit is OFF before removing the pads
• Apply the whole surface of the pads rmly to the skin. Do not use
pads which do not adhere properly to the skin. You can purchase
new pads at www.FlexToneUsa.com
• If your skin is red under the pad after a session, do not start another
session on the same area until the redness has completely disap-
peared
NOTE: If you are in doubt about using your FlexTone® product for
any reason, please consult your doctor before use.
UNIT AND ACCESSORIES
HOW TO USE YOUR MUSCLE CONDITIONER
There are just three steps to setting up a treatment session.
1. Choose the appropriate muscle area
2. Connect the pads to the unit and place them correctly on the body.
3. Start the program and adjust the exercise intensity

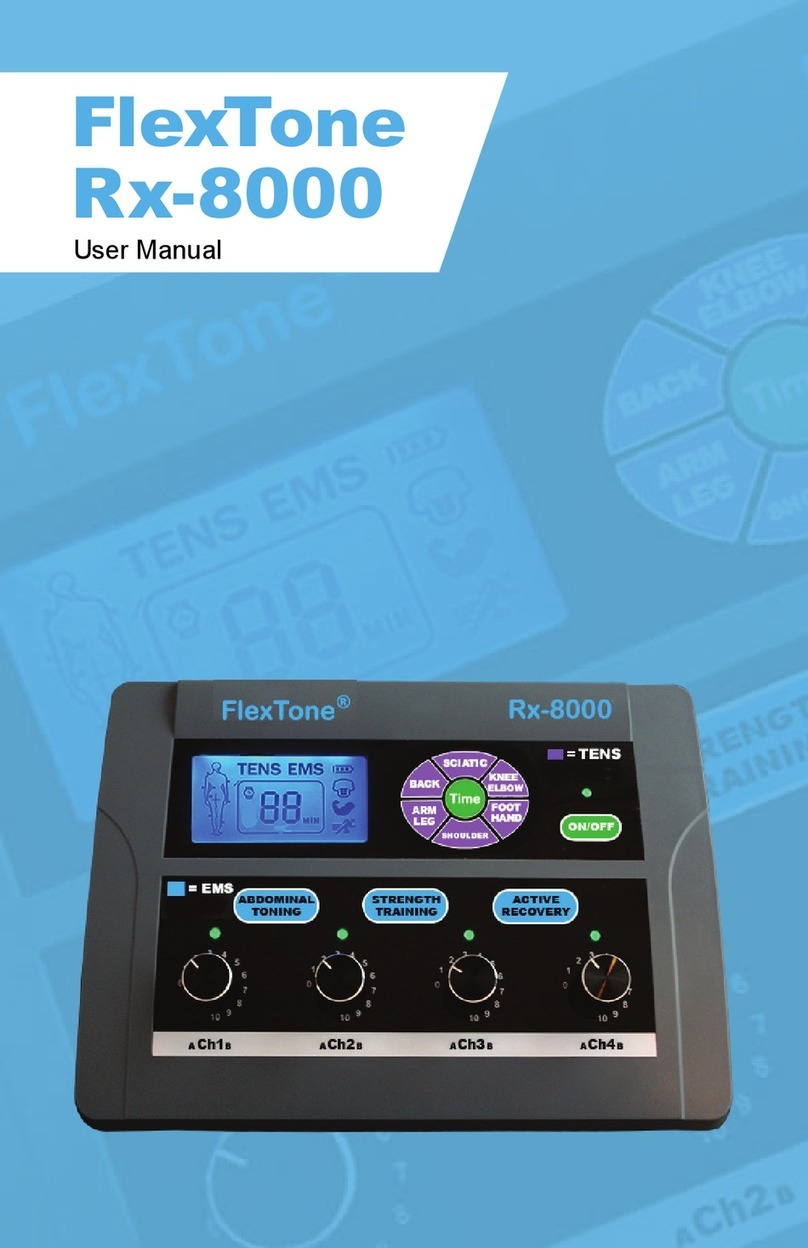
Rx-8000 CONTROL UNIT
Your Rx-8000 muscle conditioner has been designed for ease of use. The
function of each button on the control unit is explained below.
ON/OFF Button
You must press and hold this button for 1 second to switch your unit on
and off.
.
INTENSITY CONTROLS:
Each intensity control channel knob corresponds to the pads attached
to the leads inserted into the A or B channel port of the unit. Adjust the
control knob to an increasing number (0-10) to increase intensity and
turn the knob to a decreasing number to decrease the intensity. To be sure
intensity is off turn the knob all the way left past zero and “click” off.
PROGRAM BUTTONS:
There are nine (9) total program buttons. Eight of these buttons are body
part specic and the 9th button is labeled MASSAGE (P3)
Rx-8000 DISPLAY
Each Unit has a Blue LED display which lets you check the session time,
indicates the body part being worked, and the battery status. The Blue
LCD window light will remain Blue for about 12 seconds after each time
you change the time or the program.
The display above is indicating the knee and elbow program.
1. ON/OFF BUTTON W/GREEN LIGHT – Push down for 1 sec-
ond to turn unit ON or OFF
2. BLUE LED DISPLAY WINDOW- Blue light remains on for 12
seconds after each program selection or time change.
3. PROGRAM BUTTONS - Select your Body Part or Massage
4. TIME BUTTON - Programmable 10 minutes to 60 minutes.
5. INTENSITY CONTROL KNOBS – “Click” on 0 to 10 levels of
Intensity.
6. GREEN CHANNELLIGHT- Indicates which channel is turned on
1. COUNTDOWN TIMER
2. HUMAN BODY PROGRAM INDICATOR
3. BATTERY LIFE INDICATOR

Adapter Port on Back of the unit
Cable Plug in Ports
BATTERY
This FlexTone® Rx-8000 has a built in rechargeable lithium battery.
The unit will fully charge within 30-45 minutes. Check battery indicator
to see that battery is fully charged. Battery life is strong and will allow
many consecutive uses. You can charge the battery with a USB connec-
tion or the adapter provided with your unit.
The battery icon symbol will appear on the Blue LCD display at all times
during operation. As the battery power decreases, the 3 bars on the bat-
tery symbol disappear one by one. The outline of the battery symbol will
ash to indicate when the batteries need to be replaced.
QUICK START GUIDE TO RUNNING A SESSION
Quick steps to setting up an exercise or treatment session
• Press the ON/OFF Button to turn on the unit.
• Connect Lead Wires into ports A and or B of Ch.1
• Connect Electrodes to the lead wires.
• Attach Electrodes to appropriate muscle or joint area
• Select a Body Part by pushing the corresponding button.
• Select your session time 10-60 minutes by pushing Time Button -
continue pushing to increase time as indicated in Blue LCD window.
• Turn on Intensity control knob to start session
• You can change a program during a session.
• Session will stop when time expires
STOPA SESSION
If you wish to STOP a session at any point, briey press the ON/OFF
button and the stimulation will stop. Press the same button briey a
second time to restart the unit.. You can change a program during the
session.
FINISHING YOUR SESSION
The session will stop automatically at the end of each program’s pre-set
treatment time. Remove the pads and replace them on their protective
liners. You may now exercise another area of your body, or you can
simply store your unit in the nylon FlexTone® case provided until your
next session.
Note: You should only do one session per day on any single body
part.
PLACEMENT OF PADS
Connect the pads to the stimulator leads. Remove the plastic liner from
the adhesive pads and position the pads correctly. Keep the liners to
reattach the electrodes after use. The pad placement charts illustrate the
correct placement of the pads for a selection of target muscles. The cor-
rect pad placements are available on the pad placement chart in this user
manual. There is a separate chart for pain.
SETTING THE EXERCISE INTENSITY
Increase the intensity slowly and you will initially feel a tingle in the
area of the pads. As you increase further you will feel the muscles being
activated. As the intensity is increased more muscle bers are stimulated
and eventually you will feel a strong contraction and see visible muscle
movement. Do not exceed your comfort level. Your FlexTone® pro-
fessional muscle conditioner can deliver effective contractions without
undue discomfort.

FLEXTONE ® PROGRAMS
CHOOSE YOUR BODY PART FOR MUSCLE THERAPY
Your FlexTone® professional muscle conditioner has 9 independent pro-
gram buttons. Eight are body programs for specic muscles including
an Abdominal program labeled P1 and a Low Back /Russian program
labeled P2 and the 9th button is labeled MASSAGE P3 a General Mas-
sage Therapy/ Rehab. Depending on your objective you many select the
appropriate program button as follows:
WELLNESS PROGRAMS
Program 1 (P1) -ABDOMINALPROGRAM TONE
More of a muscle toning frequency, this program should be used speci-
cally with the ABDOMINAL BELT that is supplied with two long lasting
silicone pads. These Pads Velcro into the belt. It is suggested that you
use the FlexTone® conductive spay on these abdominal pads for better
contractions. Suggested stim time is 20-60 minutes. Do not exceed your
comfort level.
Program 2 (P2) - LOW BACK/ RUSSIAN PROGRAM STRENGTH
This program uses a powerful frequency which is benecial for deep
muscle penetration, excellent for increasing blood ow and muscle
strengthening. TheAb Belt can be turned around and used on the low
back muscles with this program. This program can be used on any large
muscle group such as the Back and Legs for the strongest and most pow-
erful contractions. Increase the intensity until you get a strong and deep
muscle contraction. Suggested stim time 30-60 minutes. Do not exceed
your comfort level.
Program 3 (P3) - MASSAGE THERAPY MUSCLE REHAB CON-
STANT CONTRACTIONS
The General Massage Therapy program. This program uses an almost
constant pulse frequency of different intensities. This type of constant
stimulation with
very little relaxation is benecial for muscle rehab and recovery. Increase
the stimulation intensity until you get a strong and steady contraction.
Suggested stim time 30-60 minutes. Do not exceed your comfort level.
SPECIFIC BODY PART SELECTION - SELECT A BODY PART
There are six (6) additional programs for pain and strains specic to the
body part that you want to treat. When you push one of these specic
body parts you will see a ashing indicator appear on the gure of the
human body in the BLUE LCD display window.
OBJECTIVE PROGRAM BUTTON INTENSITY
RANGE
DURATION
IN MINUTES
Knee & Elbow Pain KNEE ELBOW 0-10 20-30
Hip Pain HIP 0-10 30-40
Back Pain BACK 0-10 30-60
Arm & Leg Pain ARM LEG 0-10 20-40
Shoulder Pain SHOULDER 0-10 20-30
Foot & Sole Pain FOOT SOLE 0-10 20-30
Ab Belt Tone ABDOMINAL P1 0-10 20-60
Low Back Russian LOW BACK P2 0-10 30-60
Massage Therapy
Rehab Tens MASSAGE P3 0-10 30-60
1. KNEE AND ELBOW
This program produces muscle contractions at frequencies that are
specically designed to work in and around the knee joint and the elbow
joint. It is a combination of rapid re pulses followed by a series of dif-
ferent slower more deliberate contractions. This mixture of frequencies
has proved to be very effective towards knee and elbow pain. These are
areas that have very little blood supply because they are made up of carti-
lage and bone. We recommend the smaller 2’x2’electrodes for these joint
areas. Use a strong intensity to help treat the pain in these problem zones.
Recommended stim time is 20-30 minutes as needed.

2. HIP- SCIATIC NERVE TREATMENT
This program produces a strong, steady and deep muscle penetration
that is critical to hip pain associated with the sciatic nerve. Reduce and
Control Pain – Directly Attack the Sciatic Nerve Pain There are a lot of
reasons why you may feel pain in your hip or back… You could be feel-
ing pain from back or hip muscle spasms, lack of blood ow to your soft
tissue and even stress placed on your nerves due to overall stiffness in
your hip joint. Signicant pain relief can be felt from introducing Stimu-
lation Therapy treatments. Attacking the pain of Sciatica owing through
your back and hip and leg can reduce the pain sensation experienced by
the nerves in your damaged tissue. Recommended stim time 30-40 min-
utes. Do not exceed your comfort level.
3. BACK
The back is one of the largest muscle groups in the human body. It is also
the number one body part where people use a muscle stimulator and a
Tens device. This back program is designed to work the upper back area
also referred to as the trapezes muscles and the middle back muscles
know as the latissimus dorsi. Also known as the “lat” is a very thin trian-
gular muscle that gives the back a V shape. The “Lat” muscle is used in
many exercises such as pull-ups, chin-ups, lat pull downs and swimming.
This back program uses a variation of short burst and long steady con-
tractions designed specically for the back muscles. If you plan to work
your low back muscles use the button labeled Low Back. Recommended
Stim time 30-60 minutes as needed. Do not exceed your comfort level
4. ARM AND LEG
This program uses a series of 4 unique program cycles that are all very
strong and effective that are designed to reach deep into the leg and arm
muscles. Starting with a series of rapid pulses, followed by smooth con-
tractions, powerful pulses, and nishes with short deliberate deep pulses.
Great for use on the Quadriceps and Hamstring as well as the Forearm,
Bicep and Tricep of the upper arm. Recommended Stim time for Legs is
30-60 minutes Recommended Stim time for Arms is 20-40 minutes. Do
not exceed your comfort level
5. SHOULDER
This program is designed for all areas related to the shoulder muscle or
Deltoids. This program attacks pain in the upper back, base of the neck
and shoulder area. This is probably the most popular program out of the
nine Rx-8000 programs. This Shoulder program cycles multiple frequen-
cy waves that start out slow and nish with deep rapid re.
You will feel the increased blood ow to any body part when using this
program. This favorite of programs can be used on any body part to
where you feel muscle aches, pains and strains. Recommended stim time
is 20-40 minutes. Do not exceed your comfort level
6. FOOTAND SOLE
This program is designed to increase blood ow to the ankle, foot, bot-
tom of the foot (SOLE) and even your toes. It is recommended that you
use the small 2x2 electrodes for the feet.
GETTING THE MOST OUT OF YOUR ELECTRODES
Be sure that your skin is clean of dirt, oil and body lotion. If you have a
lot of body hair you may want to consider shaving the hair. The less hair
the better the electrodes will work. The lifespan of the electrode pads will
vary depending on how often that you use them and how you care for
them. Keeping electrode pads clean and sealed in the zip lock bag after
each use will extend their lifespan. Replace the electrode pads when they
lose their adhesive ability.
Advice on how to extend the electrode life:
The electrodes typically have a cloth or foam backing, and a sticky gel
coating that conducts electricity. The gel is the “middle man” between
the wire and the skin. It’s made of hypo-allergenic, water-based material.
You can actually revive the stickiness to a point in a very simple way.

How do I make electrodes last longer?
You should be able to get 15 or more uses from each pair before having
to replace them. Here’s how:
• Keep them away from heat and cold. That means out of the sun,
away from the cold. Just keep them at room temperature.
• Store them on the plastic backing sheet, and keep the plastic bag
sealed. You don’t want them to dry out, so keeping the bag sealed
will preserve moisture.
• Here’s the biggest tip: keep lotions, oils, grease, sweat, dirt, lint, etc.
off of the sticky side. Contaminating the sticky gel part will make it,
well, not sticky. So, just make sure the skin is free of sweat, lotions,
skin oils, etc.
• If the sticky side starts losing the stickiness, you can revive it a few
times before having to replace the pads. It’s easy, just take your
nger, pass it under some running water, and wipe a few drops on
the sticky side of the pad. The water will soak in and re-hydrate the
surface, giving the electrode pad some extra life!

GENERAL PAD PLACEMENT
The Chest: refer to Chart #1
Place 1 pair of electrodes on each area of the upper chest muscle. They
should be placed about 3 inches down from the collarbone. Allow at
least 1/4 inch between the electrodes. Follow the placement diagram
which shows 2 electrodes close to the center of the chest and 2 pads close
to the right and left armpits.
The Abdominals: Refer to Chart #2
Follow the electrode placement shown in the chart, this will require 4
sets of electrodes.
The Biceps & Forearms: Refer to Chart #3
The electrodes should be placed on the thickest part of the muscle to-
wards the top of the arm about a 1/2 inch between the electrodes where
they come close to each other. This exercise will require 2 pairs of pads
for the biceps and another 2 pairs for the forearms. Both muscle groups
can be exercised together.
The Triceps: Refer to Chart #4
Electrode placement for the triceps is similar to that of the biceps. How-
ever, the electrodes are positioned towards the back of the largest part of
the upper arm.
Laterals: Refer to Chart #5
Place the electrodes one above the other on each side as shown. Elec-
trodes should be slightly towards the front. Leave 1/4 inch space be-
tween electrodes
Front & Inner Thighs: Refer to Chart #6
Follow the electrode placement as shown in the diagram. This exercise
will require 4 pairs of electrodes.
Calves: Refer to Chart #7
Place the electrodes over the largest part of the muscle slightly towards
the back of the leg so that the electrodes come closer together in the
back. Leave 1/4 inch between the electrodes and this exercise will re-
quire 2 pairs of electrodes.
Back (Trapezes, Shoulders & Deltoids, Upper Laterals):
Refer to Chart #8 - Follow the electrode placement as shown in the
diagram. This exercise will require 2 pairs of electrodes.
Buttocks & Back Thighs: Refer to Chart #9
Follow the electrode placement as shown in the diagram. This exercise
will require 4 pairs of electrodes.
Back Chart #10 (Alternate Exercise for the Shoulders and Lower
Back): This exercise will require 2 pairs of electrodes.

TECHNICAL SPECIFICATIONS
Caring for your unit
Do not allow to get wet or be left in excessive sunlight. Clean regularly
using a soft cloth, lightly dampened with soapy water. Do not allow the
interior of your unit to become wet. Do not use detergents, alcohol, spray
aerosols or strong solvents on your unit.
Access to the unit’s interior is not required for maintenance purposes.
If your unit is damaged, do not use. Return to Manufacturer for repairs or
replacement. Only manufacturer authorized qualied service personnel
may repair, service, or modify your unit.
Accessories
When order new pads, you should only use those carrying the brand of
your unit. Others may not be compatible and could degrade the mini-
mum safety levels.
Adhesive Pads:
2x2 self-adhesive electrodes
Intended Use: Muscle Stimulator
Waveform:
Symmetrical bi-phase square waveform when measured into a resistive
load.
Environmental Specications Operating:
Temperature Range: 0 – 35 Centigrade
Humidity: 20-65% RH
Storage:
Temperature Range: 0 – 55 Centigrade
Humidity: 10 – 90% RH
Description of your unit’s symbols:
• The unit is assembled in Roswell, GA.
• The Output Frequency indicates the number of pulses per second
transmitted by the unit. This is measured in hertz (Hz).
• Output (RMSA) means the max. Output root mean square current for
each channel.
• Output (RMSV) means the max. Output root mean square voltage for
each channel.
Product Type: Rx-8000
Parameter 500 ohms 1k ohms 1k5 ohms
Output RMSV 7.5v 12.5v 13.7v
Output RMSA 14.9mA 12.5mA 9.2mA
Output
Frequency 2-99 Hz. 2-99 Hz. 2-99 Hz.
DC Component:
Approx. oC oC oC
Positive Pulse
Width: 200-300us 200-300us 200-300us
Negative Pulse
Width: 200-300us 200-300us 200-300us
Interphase
Interval 100u 100u 100u

ADDITIONAL
ACCESSORIES
Ordering information
www.StimRx.com
www.FlexToneUsa.com
AB BELT
$149.99
RUBBER ELECTRODES
$49.99
40 SELF-ADHESIVE
ELECTRODES TOTAL!
10 - 4 packs
$49.99
FACIAL TONER
$49.99
CONDUCTIVE SPRAY
8 oz
$11.99
CONDUCTIVE GEL
2 oz
$5.99

Other manuals for Rx-8000
1
Table of contents
Other Flextone Fitness Equipment manuals
