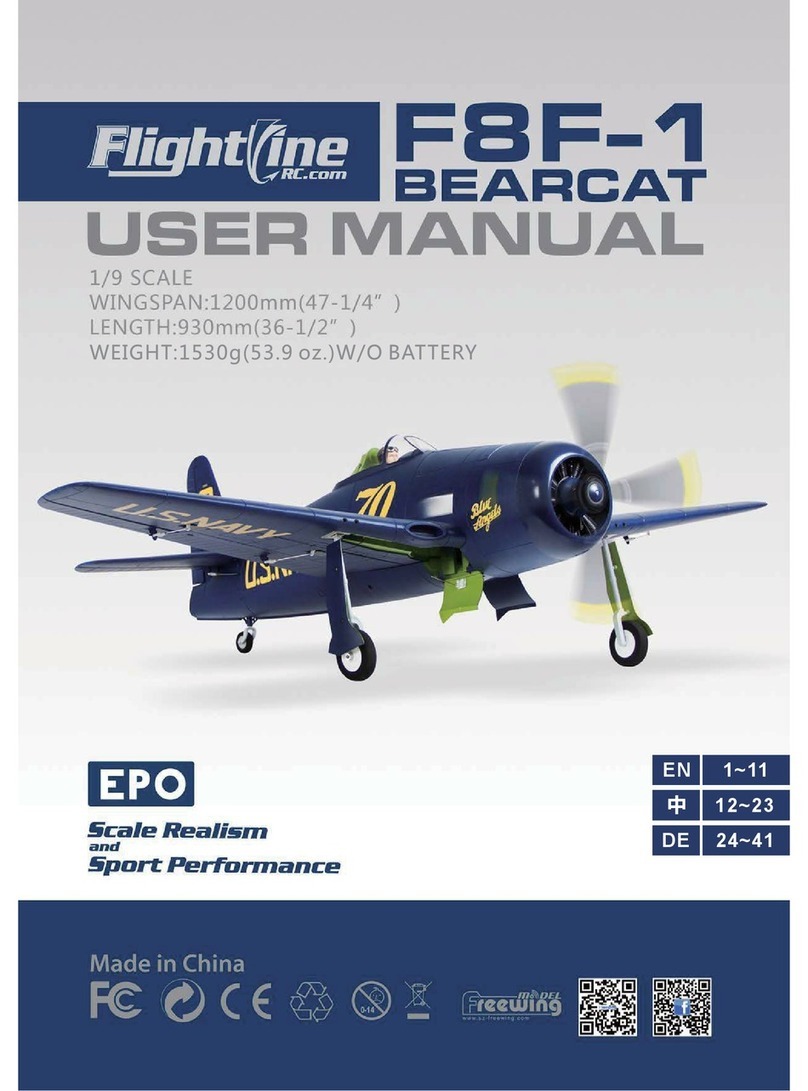
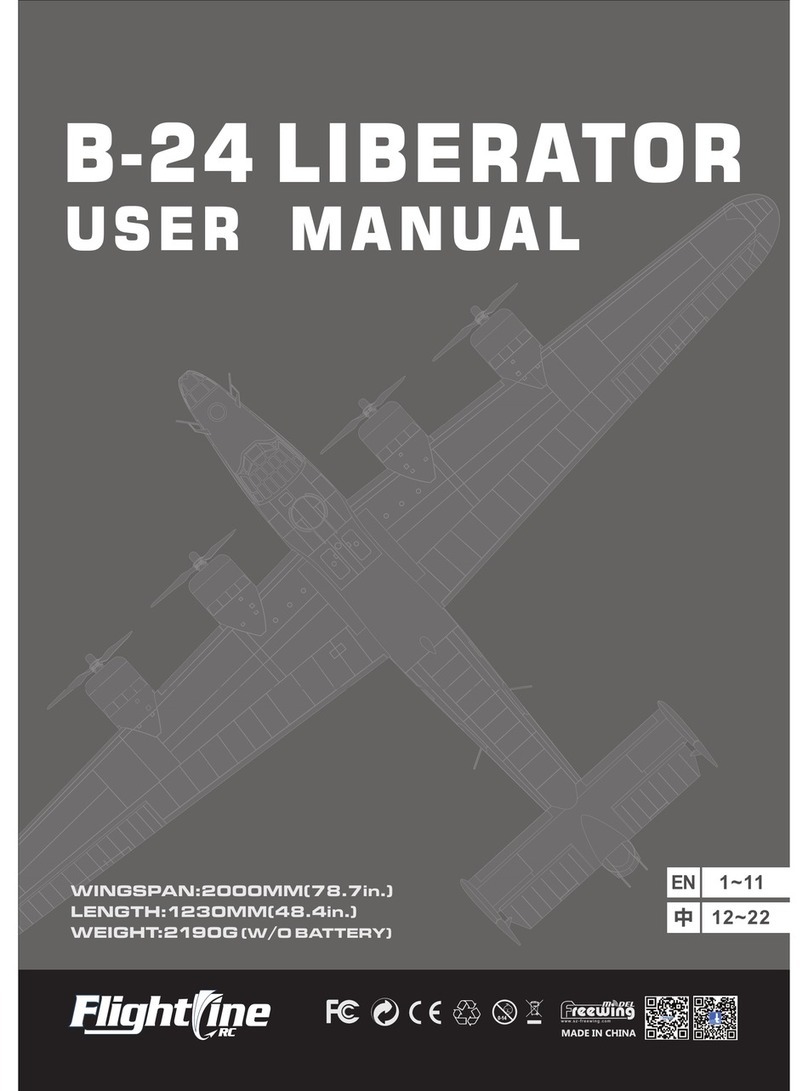
FLIGHT LINE F8F-1 User manual

EN
中
1~11
12~23
DE 24~41

F8F-1BEARCAT
1
Catalog
2
2
3
4
5
6
7
7
7
8
9
10
11
11
Controlboarduseintroduction
Parameterofmotor
Installpowersystem
CenterofGravity
Controldirectiontest
Dualrates
Install the loose-leaf
Productbasicinformation
Packagelist
PNPinstallinstructions
Servoinstructions
Pushrodinstructions
Landinggearassembleinstructions
Installonbattery
Brief History
The F8F “Bearcat” was Grumman’s last piston engine fighter to conquer the skies. First taking flight in August 1944 and
powered by a massive Double Wasp engine, the Bearcat’s performance was superior to many jets of the same era. Over
1,200 Bearcats were produced, operating around the world and participating in conflicts from Korea to Vietnam. The F8F
also served from 1946-1948 with the Blue Angels, the US Navy’s premier flight demonstration squadron, and set the
foundation for generations of inspiring excellence by Blue Angel pilots. In 2016, FlightLineRC commemorates the 70th
Anniversary of the Blue Angels by presenting this electric flying model to inspire new generations to appreciate the historic
F8F Bearcat.
Overview
FlightLineRC presents an exciting 1/9 scale flying electric replica of the F8F-1 Bearcat. This EPO foam model assembles
easily in minutes and features a scale profile with many plastic detail parts such as spring-loaded inner gear doors, highly
detailed cowl and radial engine, and removable cannon barrels. The 1200mm wingspan is easy to transport and strategic
carbon reinforcements provide lightweight strength. The Bearcat’s magnetic hatch reveals a large battery compartment that
can also accommodate a flight stabilization gyro (sold separately). Cooling airflow is channeled over the battery and ESC
compartment. Large flaps help stabilize the aircraft for slow and controlled landings. Scale power is provided by a 3748-
580KV brushless motor with 4-blade scale propeller, which provides impressive vertical climbing power and 120kph/75mph
level speed on a 4s battery. An optional High Performance Power System Set provides 140kph/88mph level speed and
increased vertical performance.
Flight Features
FlightLineRC’s F8F-1 Bearcat is a suitable aircraft for novice warbird pilots to advanced pilots. Its wide landing gear
stance of 490mm provides stable ground handling especially on grass when compared to other aircraft with more narrow
gear stances or smaller wheels. The power to weight ratio also allows for most any acrobatic maneuver you can imagine, yet
the Bearcat’s large wing and flying surfaces are most conducive to stable, scale flight, for an overall relaxing flying
experience. Landing under power with full flaps can yield a very short landing length, which is ideal for pilots flying in
confined areas.
Color scheme introduction
The FlightLineRC F8F-1 Bearcat arrives completely painted in dark blue, with green gear wells. Included in the box are
two optional decal sets:
1.Blue Angels Demonstration Team, 1946 (including our special 70 anniversary decal)
2.US Naval Reserve, Olathe, Kansas, 1948
Other decal sets are also sold separately to further customize your model. Please contact your FlightLineRC dealer for
more information.

2
1200mm
(47-1/4")
930mm(36-1/2")
F8F-1BEARCAT
Package list
Wing loading:76g/dm²
Motor:3748-580KV brushless motor
Propeller:4-blade 12×7
ESC: 60A brushless ESC
Servo:9g MG×2, 9g plastic×4
Weight: 1530g (w/o battery)
Aileron: Yes
Elevator: Yes
Rudder: Yes
Flap: Yes
Landing gear: Retract landing gear
Main landing gear cabin door
Material: EPO
(The following is DIY spare-part, please contact
distributor to purchase separately.)
3648-880KV brushless motor
2-blade 12×8 propeller
High speed DIY spare-part
PNP ARF Plus ARF
1
2
3
4
5
6
7
8
9
10
No.Sparepartsname PNP ARF Plus ARF
No.Sparepartsname
Fuselage
Main wing
Horizontal tail
Decals / Manual
Control board
Propeller and parts
Spinner and parts
Carbon tube
Glue and Screws
Pushrod/Plastic parts
No electronic
equipment
Pre-installed all
electronic parts Pre-installed
servo
No electronic
equipment
Pre-installed all
electronic parts Pre-installed
servo
No electronic
equipment
Pre-installed all
electronic parts Pre-installed
servo

3
A
B
A-
B-
Carbon tube (Ø4x300mm)
Screw (KA2.3x8 4pcs)
A
F8F-1BEARCAT
Screw (PA3x12 4pcs)
5.Insert the guns to the main wing carbon tube holes.
Guns
4.Use 4pcs screws to fix the main wing.
PNP Install instructions
Install main wing
Install elevator
1.Before install, remove the battery compartment cover.
2.Insert the carbon tube to the fuselage.
3.Insert the main wing to the fuselage.
Servo trough
A-Carbon tube (Ø8x255mm)
B-Servos wire
C-Servo trough
1.As the photo shown, install the left/right elevator on the tail fuselage.
2.Use 4pcs screws to fix the elevator to avoid its fall off.
B
C

4
F8F-1BEARCAT
C
B
A
D
A
B
C
Plastic cover
3
5
1
24
6
PNP Install instructions
Install elevator/rudder pushrod
1. Insert one side of elevator pushrod A ,through plastic tube B, to the servo arm C.
2.Buckle the clevis of elevator pushrod to the rudder horn D.
A-
B-
C-
Steering arm
Rudder pushrod
Rudder horn
1.Use rudder pushrod to connect the steering
arm and rudder horn.
2.Use glue to attach on the plastic cover
(as the above photo shown.)
Note: when install on the rudder pushrod, we need to make sure our tail
gear is in the center. Then install the rudder pushrod, and adjust the plastic
clevis to center the rudder.
If you need to purchase other brand servo, please
refer to the following list to choose correct size servo.
Position
1
2
3
4
5
6
500mm
500mm
300mm
300mm
200mm
200mm
Positive
Positive
Reverse
Positive
Positive
Positive
No.
Pos./Rev. Cable length
Aileron(Left)
Aileron(Right)
Flap(Left )
Flap(Right)
Rudder
Elevator
Model
9gDigit-Plastic
9gDigitalMG
9gDigitalMG
9gDigit-Plastic
9gDigit-Plastic
9gDigit-Plastic

F8F-1BEARCAT
5
96mm
(3-3/4")
2
3
570mm
(22-1/2")
524mm
(20-2/3")
2
3
A
B
C
D
A
C
B
1
2
3
55mm
(2-1/5")
78mm
(3-1/5")
2
3
1
2
3
2
3
1.Use servo tester or radio to center the
servo.
2.Use glue to install the servo and aileron
horn on the main wing.
3.Buckle the servo cable to the through,
after installed all the servos, stick on
the decal.
4.One side pushrod insert to the servo
arm, adjust its length. And insert the
clevis to the aileron horn.
5.Repeat the above four steps, install the
other side main wing servo and flap servo.
Install main wing servos A - 9g servo
B - Main wing pushrod
C - Aileron horn
D - Main wing servo trough
Servos install introduction
1. Use servo tester or radio to center the
servo.
2.Use screw A to fix the 9g servo on the
wood piece.
3.Insert the servo cable under the wood
piece, and put it to the battery
compartment.
Install the servo of Elevator/rudder
Note: If you don't choose the factory servo, the
servo maybe don't fix since of its servo different size.
If like that, we need to remove the fixed wood piece,
and glue the servo in the servo position in fuselage, it
also can use in common.
PWA2×8mm
Pushrod instructions
Pushrod diameter Ø1.2mm
Aileron pushrod size
Flap pushrod size
Aileron pushrod mounting hole
Flap pushrod mounting hole
Rudder pushrod size Rudder pushrod mounting hole
Elevator pushrod size Elevator pushrod mounting hole
Pushrod diameter Ø1.2mm
Steering pushrod size Steering pushrod mounting hole

F8F-1BEARCAT 6
A
B
C
D
E
F
1
1
2
3
3
G
H
4
5
I
J
K
2
STEP
3
4
L
M
N
A
B
C
D
A
C
D
B
5
STEP
STEP
前 起 落 架 组 装
Nose Landing Gear Assemble
Please assemble、disassemble the nose landing gear according to the following photo.
Landinggearassembleinstructions
-
-
-
-
-
-
-
A
B
C
D
E
F
G
-
-
-
-
-
-
-
(M3×3mm)
(PB2.3×4mm)
(Ø65×16mm)
(Ø5.5ר4.2mm)
Nose gear main supporting rod
Nose wheel
Wheel chocks
Jimi screw
Nose gear cabin doorA
Screw
Retractable controller
H
I
J
K
L
M
N
Screw
Screw
Nose landing gear
Landing gear mount
Cabin doormount
Nose gear cabin doorB
Cabindoorpushrod
-
-
-
-
-
-
-
(M3x3mm)
(KA2.6x12mm 4pcs)
(65x10mm 2pcs)
STEP
A
B
C
D
-
-
-
-
(Ø35×10mm)
(Ø5ר2mm)
(PA1.6×6mm)
A - Tail steering arm
B - Rear gear fixed plastic part
C - Tail gear set
D - Screw
1.Refer to the right photo, install the tail landing gear set.
2.Insert the tail gear set C to the fixed plastic part B, and continue to insert to the tail steering arm A.
3. Use screw D to fix the tail steering arm.
Rear wheel
Rear gear supporting rod
Rear wheel shaft
E-buckle
Install the tail gear set
1

F8F-1BEARCAT
Parameter of Motor
Battery install on the front of
fuselage, and use magic tape to fix.
Battery Cabin Size:177×80×58mm
4S 14.8V 2600mAh ~ 4S 14.8V 4000mAh
Discharge rate of C > 35C
ESC
Item No. KV Value Volate
(V)
Current
(A)
Pull
(g)
Motor
Resistance
Weight
(g)
No Load
Current
580RPM/V 14.8 41 2500 0.02 170 2.3A/10V 60A
MO137481
Propeller
880RPM/V 14.8 53 2600 0.02 165 2.3A/10V 60A
MO136484
4-Blade12×7
2-Blade12×8
3748-580KV
5.8
8.8
12.6
29.0
8.0*M3.0
5.2
+0
-0.05
∅6
7.0
7.0
∅13.3
4-∅4.6
Ø20.0
4-Ø2.6
Ø9.0
Unit: mm
7
Before connect the battery and receiver, please
switch on the transmitter power and make sure the
throttle stick is in the lowest position.
Tape lift up and remove
the battery compartment
cover
Battery tray
Velcro
Battery
Motor shaft
X-fixed base Motor size
Landing Gear
Flap
Landing gear
Rudder Servo Cable
Elevator Servo Cable
Aileron
(power to the receiver)
Aileron
Flap
Refer to the mark of control board, insert all
the connection cables on the control board.
After connect wires, use glue to fix the control
board, to avoid it loosen.
Landing Gear
Aileron
Flap

A
B
C
D
E
-
-
-
-
-(HM2.5×10mm 4pcs)
(KM3×5mm 4pcs)
Screw
Motor X-fixed base
3748-580KV out-runner motor
Propeller folder
Screw
8
A
A
B
C
D
F8F-1BEARCAT
AB
AB
Install power system
A
B
C
D
-
-
-
-
(PA3×12mm 4pcs)
Motor fixed mount
Screw
Radial Engine Cover
Screw (PWA2×8mm 4pcs)
Spinner
Propeller
Propeller fixed plate
Screw
3748-580KV brushless motor
Screw
A
B
C
D
E
F
-
-
-
-
-
-(PM3×10mm 1pcs)
(KA2.3×20mm 8pcs)
(12×74pcs)
A
B
C
D
E
-
-
-
-
-(HM2.5×10mm 4pcs)
(KM3×5mm 4pcs)
Screw
Motor X-fixed base
3648-880KV out-runner motor
Propeller folder
Screw
Install 2-blade propeller high power system
(12×8)
A
B
C
D
-
-
-
-
3648-880KV brushless motor
2-blade propeller
Washer (Ф14x1.5xФ6.2)
Motor Shaft
A
B
DC
C
D
B
F
E
C
DE
C
DE
We prepared a 2-blade high power system for this
airplane, it can improve its power and flight speed, reduce the propeller
use cost! You can contact our distributor to purchase its high power system.

9
A
B
C
D
F8F-1BEARCAT
Install power system
Install on ESC
A
B
C
D
-
-
-
-
(PWA3×8mm 4pcs)
Screw
Battery tray
ESC
Tray holder
Put the ESC under the battery tray, there
is a special designed ventilation ducts, it
can cool the electric equipment effectively.
85mm
(3-3/8")

10
F8F-1BEARCAT

11 F8F-1BEARCAT
Dual Rates
H1/H2 20mm/20mm
H1/H2 23mm/23mm
H1/H2 20mm/20mm
H1/H2 20mm/20mm
H1/H2 16mm/16mm
H1 30mm
H1 20mm
H1/H2 25mm/25mm
Aileron Elevator Rudder Flaps
Low Rate
High Rate D/R Rate:100%D/R Rate:100%D/R Rate:100%
D/R Rate:80%D/R Rate:90%D/R Rate:80%
H1
H2
H1
H2
H2
H1
Aileron
H1
Flaps
Elevator Rudder
Select the appropriate location,
cook mark. Make sure the three
points in the middle position.
Install the loose-leaf
Step one
Use knife to cut the
surface control
Step two
As the right photo shown, choose
two or three position, attach the
glue on the long end of loose-leaf,
and insert to the three positions.
Step three
As the right photo shown,
repeat the "step two", attach
the control surface to the
loose-leaf.
The surface control use no-hinge connection design, although after a lot of use, has proved to be a reliable
design. However, we don't exclude, in the use process, due to the errors, and cause the control surface fall off.
So, our package box includes one plastic pin hinge, its convenience to revise and strength the control surface.
Please refer:

注意:模型产品是具一定危险性的产品,请禁止14岁以下的儿童玩耍,14 岁以上的儿童,请在有飞行经验的成人指导下使用,无飞行经验的购买者,应当在具有
一定电动涵道飞机飞行经验的成人指导下使用! 组装模型前,请仔细阅读说明书,按照说明书的要求进行安装. 进行调试和飞行时,请根据说明书指示的参数进行调整。
前 言
重 要 提 示
1.模型飞机不是玩具,操作者需要具备一定的经验;没有经验的初学者,必须在有丰富经验的专业人士指引下,逐步学习!
2.在组装之前,必须认真阅读产品说明书,严格按照说明书指示操作。
3.飞翼模型及其销售商,对于违反说明书的要求操作而造成的损失、将不负任何法律责任!
4.模型飞机的使用年龄必须是14岁以上的儿童或者成人。
5.此模型产品使用EPO材料制成,表面喷涂油漆,不可随意使用化学制剂擦拭,否则会损坏模型产品。
6.不可以在公共场合、高压线密集区、高速公路附近、机场附近或者其它法律法规明确禁止飞行的场合飞行。
7.不可以在雷雨、大风、大雪或者其它恶劣气象环境下飞行。
8.模型飞机的电池产品,不可以随意乱扔,乱放。存放时,必须保证周边2M范围内,无易燃、易爆物体。
9.损坏或者报废处理的模型飞机电池,应妥善回收处理,不准随意抛弃,避免自燃而引发火灾。
10.在飞场飞行时,应做到妥善处理飞行后所产生的垃圾,不可随意抛弃、焚毁模型及其配件。
11.在任何情况下,都必须保证油门杆处于起始位、发射机处于打开状态时,才能连接模型飞机内部的动力电池.
12.无论是模型飞机是在正常飞行过程中,或者是在缓慢降落过程中,都不要尝试用手去回收模型。必须等模型降落停
稳以后 ,再进行回收!
目 录
中文版
历史简介
F8F“熊猫”是格鲁曼公司最后一种使用活塞发动机的战斗机,1944年8月21日首飞,使用了普拉特-惠特尼公司的R-
2800“双黄蜂”系列发动机。在小型、轻量化的机身内装配了如此强劲的发动机,直接造就了F8F“熊猫”优异的操控性
和出色的爬升 率 。F8F“熊猫”各型号共计生产了1263架,1952年全部退役。法国空军曾经 在 越 南 战 场 使 用 了F8F“熊
猫”,从诞生到谢幕,这是它唯一一次在战场上使用的机会。但是,这并不影响F8F“熊猫”是一款优秀螺旋桨战斗机的事
实,美国著名的蓝天使表演队,使用它在 1946 年剩余表演季和 1947 及1948年全年表演季进行飞行表演,在鲍勃.克拉克
(Bob Clarke)海军少校的领导下,蓝天使表演队在“熊猫”上实现了 4 机菱形编队和现在许多蓝天使的经典动作。
模型概述
飞行线1/9比例F8F-1模型,采用EPO材料制作,机长930mm,翼展1200mm,这款模型的外形线条及轮廓,完全依
据真实飞机制作,细节的处理,使外形更加逼真。大量的塑料零件运用,使我们可以快速、便捷安装主翼、平尾及垂尾。
特别设计的磁吸附内侧舱门,更加实用与美观。模型的主翼、平尾及每个活动舵面,嵌入了玻纤管,避免高速飞行过程中
出现的扭曲、变形现象,让飞行变得更加稳定。包装盒内配送的针式活页,可以让您进一步增加舵面的可靠性。在机身内
部,设计了一条通风管道,使电子设备能够有效散热,延长寿命。用螺丝固定的电池托盘,将电池舱分为上、下二层,可
以非常方便的安装电调!随机配送的防滑垫,能够有效阻止电池的移动。这款F8F-1“熊猫”模型,采用了高功率无刷马
达,配合四叶仿真桨,使用4S电池时,速度达到120kph/75mph,同时,我们为这款模型产品,特别提供了一套2叶桨动
力改装套件,通过改装,您可以让这款模型飞机达到高达140kph / 87.5mph的时速,带来全新体验!
飞行特性
飞行线F8F-1模型,非常适合于仿真螺旋桨模型的练习者。主轮拥有490mm超宽轮距,这有助于起飞时抵消螺旋桨的
扭矩,能够更轻松的保持滑跑方向,具有良好的地面操控性。宽大的主翼和平尾,较大面积的垂直尾翼,使得模型飞机拥
有极佳的飞行稳定性。飞行过程中,它能够确准响应您的操控指令,不会过于灵活。充沛的动力,可以轻松的完成许多仿
真空战战术动作。降落时,开启襟翼后,飞机会有轻微抬头现象,减速明显,我们可以在遥控器中设定襟翼/升降混控功
能,来抵消抬头的现象。以便我们更加轻松的慢速、轻柔、短距离降落。
涂装介绍
模型在出厂时,已经喷涂海军蓝颜色。包装盒内,配送了二套感压贴纸和贴纸说明书,您可以选择最喜欢的一套贴
纸,粘贴到机体上。(1.蓝天使贴纸 , 2.桔色#45K贴纸)。另外,我们还准备了另外一些的贴纸(贴纸说明书中有展示),
以应对大家不同的需求。此部份贴纸不包含在包装盒内,您可以向您的经销商咨询、购买。
12
F8F-1BEARCAT
产品基本参数
包装清单
PNP 组装介绍
舵机介绍
控制钢丝尺寸
起落架组装说明
电池安装
13
13
14
15
16
17
18
集线盒介绍
电机规格
动力系统安装介绍
重心
舵面测试
大小舵及飞行注意事项
舵面活页改装
18
18
19
20
21
22
22

13
产 品 包 装 清 单
中文版
产 品 基 本 参 数
打开产品包装,核对包装清单。(不同配置的版本,包含内容不同!)
序号 配件名称
机身套件
主翼套件
平尾套件
贴纸
说明书
PNP KIT Plus Airframe
1
2
3
4
5
预装所有电子设备 预装舵机 无电子设备
序号 配件名称
螺旋桨
桨罩及固定件
组装塑料件及螺丝
玻纤管、胶水
集线控制盒
PNP KIT Plus Airframe
6
7
8
9
10
预装所有电子设备
预装所有电子设备
预装舵机
预装舵机
无电子设备
无电子设备
注意: 此处各项参数,均使用本公司配件测试得出,如果使用副厂配件,会有所差异。
使用副厂配件时所产生的问题,我们将无法给予技术支持!
1200mm
(47-1/4")
930mm(36-1/2")
翼载荷:76g/dm²
电机 : 3748-580KV外转无刷电机
螺旋桨 : 4叶 12×7
电调 : 60A 无刷电调
舵机 : 9g数码金属×2, 9g数码塑料×4
重量 : 1530g (不含电池)
副翼功能:有
平尾功能:有
方向舵: 有
襟翼功能:有
起落架:电动可收放起落架
舱门:主起落架舱门
机体材料:EPO
高速版本改装配件
3648-880KV 外转无刷马达
12×8 二叶桨
F8F-1BEARCAT

14
F8F-1BEARCAT
中文版
PNP 组 装
主 翼 安 装
步骤 2
步骤 1
主翼线槽端口
A
A-
B-
C-
碳纤管 (Ø8x255mm)
舵机线、前起落架线
主翼线槽
平 尾 安 装
B
A-
B-
(Ø4x300mm)
(KA2.3x8 4pcs)
1.如图所示,将左、右平尾安装到机身尾部!
2.用4颗螺丝固定已安装好的平尾,防止松脱!
A
1.机体组装前,取下电池舱盖。
2.把碳纤管穿入机身。
3.将二侧主翼插入机身。
(PA3x12 4pcs)
5.将机枪插入主翼碳纤管孔内。
机枪
4.使用4颗螺丝拧紧固定主翼,以防脱落。
B
C

15 F8F-1BEARCAT
中文版
安 装 尾 翼 舵 面 控 制 钢 丝
1.将平尾控制钢丝A未装塑料夹头的一端,通过塑料管B,插入到舵机摇臂C内;
2.将平尾控制钢丝A上的塑料夹头扣入尾舵摇臂D上内。
C
B
A
D
1.用垂尾控制钢丝将转向摇臂与垂直尾翼上的舵面摇臂连接起来;
2.使用胶水粘上塑料盖。(如上图所示)
注意:安装垂尾舵面控制钢丝时,首先需要确保我们已经
将后轮调试到居中位置;然后再安装垂尾舵面控制钢丝,并通过
调节塑料夹头,使垂直尾翼保持居中位置;
A
B
C
塑料盖
A-
B-
C-
转向摇臂
垂尾控制钢丝
垂尾舵面摇臂
PNP 组 装
舵 机 参 数 介 绍
我们的舵机正、反向标准是:
当舵机输入信号从 到 时,
如果舵机摇臂,
顺时针旋转---正向舵机
逆时针旋转---反向舵机
3
5
1
24
6
如果您需要选购其它品牌的舵机进行安装,
请参考下面的表格选择正确的舵机
舵机位置 序号 正、反向 舵机线长
左副翼
右副翼
左襟翼
右襟翼
垂尾
平尾
1
2
3
4
5
6
正向
正向
反向
正向
正向
正向
500mm
500mm
300mm
300mm
200mm
200mm
舵机规格
9g 数码-金属
9g 数码-金属
9g 数码-塑料
9g 数码-塑料
9g 数码-塑料
9g 数码-塑料

16
F8F-1BEARCAT
中文版
钢丝直径 Ø1.2mm
96mm
(3-3/4")
垂尾控制钢丝尺寸 垂尾钢丝安装孔位
2
3
平尾控制钢丝尺寸 平尾钢丝安装孔位
钢丝直径 Ø1.2mm
570mm
(22-1/2")
钢丝直径 Ø1.2mm
方向舵控制钢丝尺寸 方向舵控制钢丝安装孔位
524mm
(20-2/3")
2
3
主翼舵机安装
1.通过舵机测试仪或者遥控器,把舵机摇臂校
正到居中位置;
2.用胶水分别把舵机和舵面摇臂粘到主翼;
3.将舵机线卡到舵机线槽内,待所有主翼舵机
安装完成,贴上贴纸;
4.钢丝一端穿入到舵机摇臂后,调节钢丝长度,
在保持舵面居中的情况下,将夹头扣入舵面
摇臂内;
5.重复以上步聚,安装襟翼舵机和另外一侧主
翼舵机。
A
B
C
D
A-
B-
C-
D-
舵机
主翼舵机控制钢丝
舵面摇臂
主翼舵机线槽
平尾、垂尾舵机安装
1.通过舵机测试仪或者遥控器,把舵机摇臂校正
到居中位置;
2.使用螺丝C把舵机固定在木板上;
3.将舵机线从木板中间拉出至电池舱,接入接
收机!
注意:自选舵机时,可能因为舵机尺寸的关系,无法
固定。此时,我们可以取下舵机固定木片,直接将舵机粘
在木片下方的泡沫舵机孔内,不会影响使用;
A
C
B
1
2
3
钢丝直径 Ø1.2mm
55mm
(2-1/5")
副翼控制钢丝尺寸 副翼舵机钢丝安装孔位
钢丝直径 Ø1.2mm
78mm
(3-1/5")
襟翼控制钢丝尺寸 襟翼舵机钢丝安装孔位
舵 机 安 装 说 明
控 制 钢 丝 尺 寸
2
3
1
2
3
2
3

F8F-1BEARCAT
A
B
C
D
E
F
1
1
2
3
3
G
H
4
5
I
J
K
5
L
M
N
17
中文版
起落架组装
前 起 落 架 组 装
请参考以下图示,组装、更换、维修前起落架;
A -
B -
C-
D-
E -
F -
G-
前起落架主撑杆
前机轮 (Ø65x16mm)
轮档 (Ø5.5xØ4.2mm)
机米螺丝 (M3x3mm)
前起落架随动舱门
螺丝 (PB2.3x4mm)
电动收放控制器
步骤 4
A
B
C
D
A-
B-
C-
D-
后机轮 (Ø10x35mm)
后轮主撑杆
后轮轮轴
E型扣 (Ø5xØ2mm)
尾轮组装
1.参考以下图示,组装好尾轮组;
2.将尾轮组C穿入后轮固定塑料件B,续续插入到尾舵向摇臂A中;
3.将螺丝D锁入尾舵转向摇臂进行固定!
A
C
D
A-
B-
C-
D-
尾轮转向摇臂
尾轮固定塑料件
尾轮组
螺丝 (PA1.6x6mm)
B
机米螺丝 (M3x3mm)
螺丝 (KA2.6x12mm 4pcs)
前起落架套件
起落架固定座
舱门固定座
舱门旋转轴
舱门钢丝 (65x10mm 2pcs)
H -
I -
J -
K -
L -
M-
N-
步骤 2
步骤 1
步骤 3

3748-580KV
5.8
8.8
12.6
29.0
8.0*M3.0
5.2
+0
-0.05
∅6
7.0
7.0
∅13.3
4-∅4.6
Ø20.0
4-Ø2.6
Ø9.0
18
F8F-1BEARCAT
集 线 盒 使 用 说 明
中文版
电 池 安 装 说 明
将电池与接收机连接前,首先请打开发射机电源,
确认油门杆处于低位。
安装电池后,启动油门前,请保证没有任何物体在
螺旋桨转动直径以内,避免造成事故和人身伤害!
我们建议使用的电池容量和放电倍率如下:
4S 14.8V 2600mAh ~ 4S 14.8V 4000mAh
>
放电倍率 35C
电池安装在最前方,用魔术带绑紧
x x
电池舱尺寸:177 80 58mm
电池舱罩 电池
电池托盘
魔术贴
胶纸向上提,
取下电池舱罩
ESC
Item No. KV Value Volate
(V)
Current
(A)
Pull
(g)
Motor
Resistance
Weight
(g)
No Load
Current
580RPM/V 14.8 41 2500 0.02 170 2.3A/10V 60A
MO137481
Propeller
880RPM/V 14.8 53 2600 0.02 165 2.3A/10V 60A
MO136484
4-Blade12×7
2-Blade12×8
参考集线盒上的通道标识,将所有
电池舱内的连接线插入集线盒。
接线工作完成后,使用胶水固定集
线盒,防止松动。
起落架
副翼舵机
襟翼舵机
起落架
副翼舵机
襟翼舵机
接收 机
电机参数
襟翼
起落架
方向舵机
升降舵机
副翼及接收机供电

F8F-1BEARCAT
19
中文版
动 力 系 统 的 安 装
2叶高速版改装套件的安装
C
D
A
B
A-
B-
C-
D-
(PA3x12mm 4pcs)
(PWA2x8mm 4pcs)
A
B
C
D
FE
G
A -
B -
C -
D -
E -
F-
G-
螺旋桨固定盘
仿真螺旋桨 (12x7,四片组合)
螺旋桨桨罩
螺丝 (KA2.3x20mm 8pcs)
3748-580KV无刷马达
螺旋桨套件
螺丝 (PM3x10mm 1pcs)
A
B
D
A-
B-
C-
D-
3648-880KV无刷外转马达
二叶桨(12X8)
垫片 (Ф14x1.5xФ6.2)
螺旋桨固定栓
我们为这款模型准备一个2叶高速改装套件,有效提高
功率和飞行速度,降低螺旋桨的使用成本!您可以向
我们的经销商联系购买专用改装套件!
A-
B-
C-
D-
E-
螺丝 (KM3x5mm 4pcs)
电机固定十字架
3748-580KV无刷外转马达
螺旋桨桨夹
螺丝 (HM2.5x10mm 4pcs)
ABC
DE
A-
B-
C-
D-
E-
螺丝 (KM3x5mm 4pcs)
电机固定十字架
3648-880KV无刷外转马达
螺旋桨桨夹
螺丝 (HM2.5x10mm 4pcs)
ABC
DE
C
Other manuals for F8F-1
1
Table of contents
Other FLIGHT LINE Toy manuals

FLIGHT LINE
FLIGHT LINE F7F TIGERCAT User manual

FLIGHT LINE
FLIGHT LINE P-38L LIGHTNING User manual

FLIGHT LINE
FLIGHT LINE SPITFIRE MK.IXC User manual

FLIGHT LINE
FLIGHT LINE FLW203 User manual

FLIGHT LINE
FLIGHT LINE OV-10 Bronco User manual

FLIGHT LINE
FLIGHT LINE SPITFIRE MK.IXC User manual

FLIGHT LINE
FLIGHT LINE B-24 LIBERATOR User manual

FLIGHT LINE
FLIGHT LINE SUPERMARINE SPITFIRE MK.IXc User manual

FLIGHT LINE
FLIGHT LINE FLW204 User manual

FLIGHT LINE
FLIGHT LINE TA-152H1 User manual