FLIGHT LINE F8F-1 User manual

(1
З
a
a
'( a

))%($5&$7
g
&DWDORJ
&RQWUROERDUGXVHLQWURGXFWLRQ
3DUDPHWHURIPRWRU
,QVWDOOSRZHUV\VWHP
&HQWHURI*UDYLW\
&RQWUROGLUHFWLRQWHVW
'XDOUDWHV
,QVWDOOingWKHPlastic Hinges
3URGXFWEDVLFLQIRUPDWLRQ
3DFNDJHOLVW
313LQVWDOOLQVWUXFWLRQV
6HUYRLQVWUXFWLRQV
3XVKURGLQVWUXFWLRQV
/DQGLQJJHDUDVVHPEOHLQVWUXFWLRQV
%ULHI+LVWRU\
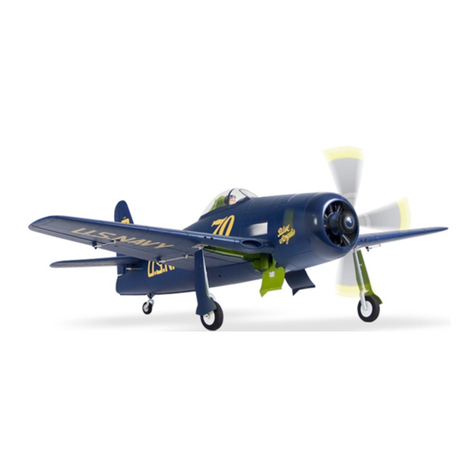
7KH))³%HDUFDW´ZDV*UXPPDQ¶VODVWSLVWRQHQJLQHILJKWHUWRFRQTXHUWKHVNLHV)LUVWWDNLQJIOLJKWLQ$XJXVWDQG
SRZHUHGE\DPDVVLYH'RXEOH:DVSHQJLQHWKH%HDUFDW¶VSHUIRUPDQFHZDVVXSHULRUWRPDQ\MHWVRIWKHVDPHHUD2YHU
%HDUFDWVZHUHSURGXFHGRSHUDWLQJDURXQGWKHZRUOGDQGSDUWLFLSDWLQJLQFRQIOLFWVIURP.RUHDWR9LHWQDP7KH))
DOVR VHUYHG IURP ZLWK WKH %OXH $QJHOV WKH 86 1DY\¶V SUHPLHU IOLJKW GHPRQVWUDWLRQ VTXDGURQ DQG VHW WKH
IRXQGDWLRQ IRU JHQHUDWLRQV RI LQVSLULQJ H[FHOOHQFH E\ %OXH $QJHO SLORWV ,Q )OLJKW/LQH5& FRPPHPRUDWHV WKH WK
$QQLYHUVDU\RIWKH%OXH$QJHOVE\SUHVHQWLQJWKLVHOHFWULFIO\LQJPRGHOWRLQVSLUHQHZJHQHUDWLRQVWRDSSUHFLDWHWKHKLVWRULF
))%HDUFDW
2YHUYLHZ
)OLJKW/LQH5&SUHVHQWVDQH[FLWLQJVFDOHIO\LQJHOHFWULFUHSOLFDRIWKH))%HDUFDW7KLV(32IRDPPRGHODVVHPEOHV
HDVLO\LQPLQXWHVDQGIHDWXUHVDVFDOHSURILOHZLWKPDQ\SODVWLFGHWDLOSDUWVVXFKDVVSULQJORDGHGLQQHUJHDUGRRUVKLJKO\
GHWDLOHGFRZODQGUDGLDOHQJLQHDQGUHPRYDEOHFDQQRQEDUUHOV7KHPPZLQJVSDQLVHDV\WRWUDQVSRUWDQGVWUDWHJLF
FDUERQUHLQIRUFHPHQWVSURYLGHOLJKWZHLJKWVWUHQJWK7KH%HDUFDW¶VPDJQHWLFKDWFKUHYHDOVDODUJHEDWWHU\FRPSDUWPHQWWKDW
FDQDOVRDFFRPPRGDWHDIOLJKWVWDELOL]DWLRQJ\URVROGVHSDUDWHO\&RROLQJDLUIORZLVFKDQQHOHGRYHUWKHEDWWHU\DQG(6&
FRPSDUWPHQW/DUJHIODSVKHOSVWDELOL]HWKHDLUFUDIWIRUVORZDQGFRQWUROOHGODQGLQJV6FDOHSRZHULVSURYLGHGE\D
.9EUXVKOHVVPRWRUZLWKEODGHVFDOHSURSHOOHUZKLFKSURYLGHVLPSUHVVLYHYHUWLFDOFOLPELQJSRZHUDQGNSKPSK
OHYHO VSHHG RQ D V EDWWHU\$Q RSWLRQDO +LJK 3HUIRUPDQFH 3RZHU 6\VWHP 6HW SURYLGHV NSKPSK OHYHO VSHHG DQG
LQFUHDVHGYHUWLFDOSHUIRUPDQFH
)OLJKW)HDWXUHV
)OLJKW/LQH5&¶V )) %HDUFDW LV D VXLWDEOH DLUFUDIW IRU QRYLFH ZDUELUG SLORWV WR DGYDQFHG SLORWV ,WV ZLGH ODQGLQJ JHDU
VWDQFHRIPPSURYLGHVVWDEOHJURXQGKDQGOLQJHVSHFLDOO\RQJUDVVZKHQFRPSDUHGWRRWKHUDLUFUDIWZLWKPRUHQDUURZ
JHDUVWDQFHVRUVPDOOHUZKHHOV7KHSRZHUWRZHLJKWUDWLRDOVRDOORZVIRUPRVWDQ\DFUREDWLFPDQHXYHU\RXFDQLPDJLQH\HW
WKH %HDUFDW¶V ODUJH ZLQJ DQG IO\LQJ VXUIDFHV DUH PRVW FRQGXFLYH WR VWDEOH VFDOH IOLJKW IRU DQ RYHUDOO UHOD[LQJ IO\LQJ
H[SHULHQFH /DQGLQJ XQGHU SRZHU ZLWK IXOO IODSV FDQ \LHOG D YHU\ VKRUW ODQGLQJ OHQJWK ZKLFK LV LGHDO IRU SLORWV IO\LQJ LQ
FRQILQHGDUHDV
&RORUVFKHPHLQWURGXFWLRQ
7KH)OLJKW/LQH5&))%HDUFDWDUULYHVFRPSOHWHO\SDLQWHGLQGDUNEOXHZLWKJUHHQJHDUZHOOV,QFOXGHGLQWKHER[DUH
WZRRSWLRQDOGHFDOVHWV
%OXH$QJHOV'HPRQVWUDWLRQ7HDPLQFOXGLQJRXUVSHFLDODQQLYHUVDU\GHFDO
861DYDO5HVHUYH2ODWKH.DQVDV
2WKHUGHFDOVHWVDUHDOVRVROGVHSDUDWHO\WRIXUWKHUFXVWRPL]H\RXUPRGHO3OHDVHFRQWDFW\RXU)OLJKW/LQH5&
(www.motionrc.com)GHDOHUIRU PRUHLQIRUPDWLRQ
1. This is not a toy! Operators should have some basic experience. Beginners should operate only under the
guidance of an professional instructor.
2. Before beginning assembly, please read through the instructions carefully and follow the instructions through the build.
3. Freewing and it's vendors will not be held responsible for any losses due to improper assembly and operation.
4. Model airplane operators must be at least 14 years of age.
5. This airplane is made with EPO material, covered with surface spray paint. Don't use chemicals to clean as it may cause
damage.
6. You should avoid flying in areas such as public places, areas with high voltage power lines, nearby highways or airports
or any other areas where laws and regulations clearly prohibit.
7. Do not fly in bad weather conditions, including thunderstorms, snow, etc...
8. Lipo batteries should be properly stored in a fire safe container and be kept at a minimum 2M distance away from and
flammable or explosive materials
9. Damaged or scrap batteries must be properly discharged before disposal or recycling to avoid spontaneous combustion
and fire.
10. At the Flying Field, properly dispose of any waste you have created, don't leave or burn your waste.
11. Ensure that your throttle is in the low position and that your radio is turned on before connecting your Lipo battery.
12. Do not try to catch the airplane when flying low or landing. Wait for the airplane and its propeller to come to a complete stop.
Battery Installation
11

h
PP
PP
))%($5&$7
3DFNDJHOLVW
:LQJORDGLQJJGPð
0RWRU.9EUXVKOHVVPRWRU
3URSHOOHUEODGHî
(6&$EUXVKOHVV(6&
6HUYRJ0*îˈJSODVWLFî
:HLJKWJZREDWWHU\
$LOHURQ<HV
(OHYDWRU<HV
5XGGHU<HV
)ODS<HV
/DQGLQJJHDU5HWUDFWODQGLQJJHDU
0DLQODQGLQJJHDUFDELQGRRU
0DWHULDO(32
High speed DIY spare-parts
(The following are DIY spare parts, contact your
distributor to purchase these items separately)
3648-880KV brushless motor
2-blade 12x8 propeller.
313 $8,3OXV $8,
1R.6SDUHSDUWVQDPH 313 $8,3OXV $8,
1R.6SDUHSDUWVQDPH
)XVHODJH
0DLQZLQJ
+RUL]RQWDOWDLO
'HFDOV0DQXDO
&RQWUROERDUG
3URSHOOHUDQGSDUWV
6SLQQHUDQGSDUWV
&DUERQWXEH
*OXHDQG6FUHZV
3XVKURG3ODVWLFSDUWV
1RHOHFWURQLF
HTXLSPHQW
3UHLQVWDOOHGDOO
HOHFWURQLFSDUWV 3UHLQVWDOOHG
VHUYR
1RHOHFWURQLF
HTXLSPHQW
3UHLQVWDOOHGDOO
HOHFWURQLFSDUWV 3UHLQVWDOOHG
VHUYR
1RHOHFWURQLF
HTXLSPHQW
3UHLQVWDOOHGDOO
HOHFWURQLFSDUWV 3UHLQVWDOOHG
VHUYR

i
$
%
$
%
&DUERQWXEH[PP
6FUHZ.$[SFV
$
))%($5&$7
6FUHZ3$[SFV
/TYKXZZNKM[TYZUZNKSGOT]OTMIGXHUTZ[HKNURKY
*XQV
8VH VFUHZVWRIL[WKHPDLQZLQJ
313GAssemblyIQVWUXFWLRQV
,QVWDOOPDLQZLQJ
,QVWDOOHOHYDWRU
1.Before installation, remove the battery hatch.
2.Insert the carbon rod through the fuselage.
3.insert the main wings to the fuselage.
6HUYRWURXJK
$&DUERQWXEH[PP
%6HUYRVZLUH
&6HUYR Wire Slots
d
IQVWDOOWKHOHIWULJKWHOHYDWRURQWKHWDLOIXVHODJH, as shown in the picture
8VHVFUHZVWRafIL[WKHHOHYDWRU to the fuselage.
%
&

j
))%($5&$7
&
%
$
'
$
%
&
3ODVWLFFRYHU
313G,QVWDOOationLQVWUXFWLRQV
,QVWDOOHOHYDWRUUXGGHUSXVKURG
,QVHUWRQHVLGHRIHOHYDWRUSXVKURG$WKURXJKSODVWLFWXEH%WRWKHVHUYRDUP
& Snap WKHFOHYLVRIHOHYDWRUSXVKURGWRWKHUXGGHUKRUQ' and push the
retainer over the clevis
$
%
&
6WHHULQJDUP
5XGGHUSXVKURG
5XGGHUKRUQ
8VHUXGGHUSXVKURGWRFRQQHFWWKHVWHHULQJ
DUP to the UXGGHUKRUQ
8VHJOXHWRDWWDFKWKHSODVWLFFRYHU
DVshown in the photo above.
1RWHwhen installing the rudder pushrod, make sure that the tail
wheel is centered, then adjust the clevis so that the pushrod
attaches to the rudder so it is centered as well.
,I\RXQHHGWRSXUFKDVHRWKHUEUDQGVHUYRSOHDVH
UHIHUWRWKHIROORZLQJOLVWWRFKRRVHFRUUHFWVL]HVHUYR
3RVLWLRQ
PP
PP
PP
PP
PP
PP
3RVLWLYH
3RVLWLYH
5HYHUVH
3RVLWLYH
3RVLWLYH
3RVLWLYH
1R
3RV5HY &DEOHOHQJWK
$LOHURQ/HIW
$LOHURQ5LJKW
)ODS/HIW
)ODS5LJKW
5XGGHU
(OHYDWRU
0RGHO
J'LJLW3ODVWLF
J'LJLWDO0*
J'LJLWDO0*
J'LJLW3ODVWLF
J'LJLW3ODVWLF
J'LJLW3ODVWLF
A positive or reversed servo is defined
as:
when a signal from 1000us to2000us is
applied, if the servo rotates in a
clockwise direction, it's positive.
If the servo rotates in counter clockwise
direction, it's reversed.

))%($5&$7
k
PP
(3-3/4")
PP
(22-1/2")
PP
(-2/3")
$
%
&
'
$
&
%
PP
(2-1/5")
PP
(3-1/5")
,QVWDOOPDLQZLQJVHUYRV $JVHUYR
%0DLQZLQJSXVKURG
&$LOHURQKRUQ
'0DLQZLQJVHUYRWURXJK
6HUYRVGLQVWDOOGLQWURGXFWLRQ
1. Use a servo tester or radio to center
the servo.
2. Use screw A to affix the 9g servo to
the wooden base.
3. Route the servo cable under the
wooden base to the battery
compartment.
,QVWDOOWKHVHUYRRI(OHYDWRUUXGGHU
1RWH,I\RXFKRRVH to use a nonIDFWRU\VHUYRWKH
servo's dimensions may be different. If that is the case,
you will need to modify or remove the wooden base and
attach the servo to a better position.
3:$îPP
3XVKURGGLQVWUXFWLRQV
3XVKURGGLDPHWHUPP
$LOHURQSXVKURGVL]H
)ODSSXVKURGVL]H
$LOHURQSXVKURGPRXQWLQJKROH
)ODSSXVKURGPRXQWLQJKROH
5XGGHUSXVKURGVL]H 5XGGHUSXVKURGPRXQWLQJKROH
(OHYDWRUSXVKURGVL]H (OHYDWRUSXVKURGPRXQWLQJKROH
3XVKURGGLDPHWHUPP
3XVKURGGLDPHWHUPP
3XVKURGGLDPHWHUPP
3XVKURGGLDPHWHUPP
6WHHULQJSXVKURGVL]H 6WHHULQJSXVKURGPRXQWLQJKROH
1. Use a
servo tester or radio to center
the servo.
2. Use glue to install the servo and
aileron horn on the main wing.
3. Route the servo cables through the
wiring slots. After installing all the
servos, apply the covering decal.
4. Attach the pushrod to the servo, adjust
the length to center the control
surface, then attach the clevis to the
control horn.
5. Repeat these four steps for the other
wing.

))%($5&$7 l
$
%
&
'
(
)
*
+
,
-
.
67(3
/
0
1
$
%
&
'
$
&
'
%
67(3
67(3
Ӹફߌঐ
1RVH/DQGLQJ*HDU$VVHPEOH
3OHDVHDVVHPEOH、GLVDVVHPEOHWKHQRVHODQGLQJJHDUDFFRUGLQJWRWKHIROORZLQJSKRWR
/DQGLQJJHDUDVVHPEOHLQVWUXFWLRQV
$
%
&
'
(
)
*
0îPP
3%.îPP
îPP
.î.PP
1RVHJHDUPDLQVXSSRUWLQJURG
1RVHZKHHO
:KHHOFKRFNV
-LPLVFUHZ
1RVHJHDUFDELQGRRU$
6FUHZ
Retract servo.
+
,
-
.
/
0
1
6FUHZ
6FUHZ
1RVHODQGLQJJHDU
/DQGLQJJHDUPRXQW
&DELQGRRUPRXQW
1RVHJHDUFDELQGRRU%
&DELQGRRUSXVKURG
0[PP
.$[PPSFV
[PPSFV
67(3
$
%
&
'
îPP
îPP
3$.îPP
$7DLOVWHHULQJDUP
%5HDUJHDUIL[HGSODVWLFSDUW
&7DLOJHDUVHW
'6FUHZ
5HIHUWRWKHULJKWSKRWRLQVWDOOWKHWDLOODQGLQJJHDUVHW
,QVHUWWKHWDLOJHDUVHW&WRWKHIL[HGSODVWLFSDUW%DQGthenLQVHUW the assemblyWRWKHWDLOVWHHULQJDUP$
8VHVFUHZ'WRIL[WKHWDLOVWHHULQJDUP
5HDUZKHHO
5HDUJHDUVXSSRUWLQJURG
5HDUZKHHOVKDIW
(EXFNOH
,QVWDOOWKHWDLOJHDUVHW

))%($5&$7
3DUDPHWHURI0RWRU
IQVWDOO the battery in the battery compartmentat WKHIURQWRI
IXVHODJHDQGXVHsupplied rubberized liner and the
velcro strapWRhold the battery in place
%DWWHU\&DELQ6L]HφîîPP
69P$Kd69P$K
'LVFKDUJHUDWHRI&!&
/DQGLQJG*HDU
)ODS
/DQGLQJJHDU
5XGGHU6HUYRG&DEOH
(OHYDWRU6HUYRG&DEOH
$LOHURQ
SRZHUWRWKHUHFHLYHU
$LOHURQ
)ODS
(6&
,WHP1R .9 9DOXH 9RODWH
9
&XUUHQW
$
3XOO
J
0RWRU
5HVLVWDQFH
:HLJKW
J
1R/RDG
&XUUHQW
5309
$9 $
02
3URSHOOHU
5309
$9 $
02
%ODGHî
%ODGHî
5HIHUWRWKHPDUNingsRnFRQWUROERDUGFRQQHFW
allFDEOHVtoWKHFRQWUROERDUG
$IWHUFRQQHFWingZLUHVXVHJOXHWRafIL[WKHFRQWURO
ERDUGWRthe side of the fuselage
.9
0
⾘
⾘
⾘
8QLWPP
m
%HIRUHFRQQHFWingWKHEDWWHU\DQGUHFHLYHUSOHDVH
VZLWFKRQWKHWUDQVPLWWHUDQGPDNHVXUHWKH
WKURWWOHVWLFNLVLQWKHORZHVWSRVLWLRQ
Using the installed tape,
lLIWXS the battery
compartment hatch and
remove it.
%DWWHU\WUD\
9HOFUR
%DWWHU\
/DQGLQJG*HDU
$LOHURQ
)ODS
0RWRUVKDIW
;IL[HGEDVH 0RWRUVL]H
Note: This model comes with a slightly different
control board. It has outputs for Ailerons,Flaps
and Landing Gear only. Connect all other control
inputs directly to the receiver.

$
%
&
'
(
+0.îPPSFV
.0îPPSFV
6FUHZ
0RWRU;IL[HGEDVH
.9RXWUXQQHUPRWRU
3URSHOOHUIROGHU
6FUHZ
n
$
$
%
&
'
))%($5&$7
U
$%
$%
,QVWDOOSRZHUV\VWHP
$
%
&
'
3$îPPSFV
0RWRUIL[HGPRXQW
6FUHZ
5DGLDO(QJLQH&RYHU
6FUHZ 3:$îPPSFV
6SLQQHU
3URSHOOHU
3URSHOOHUIL[HGSODWH
6FUHZ
.9EUXVKOHVVPRWRU
6FUHZ
$
%
&
'
(
)
30îPPSFV
.$.îPPSFV
îSFV
$
%
&
'
(
+0.îPPSFV
.0îPPSFV
6FUHZ
0RWRU;IL[HGEDVH
.9RXWUXQQHUPRWRU
3URSHOOHUIROGHU
6FUHZ
,QVWDOOEODGHSURSHOOHUKLJKSRZHUV\VWHP
:HofferDEODGHKLJKSRZHUV\VWHmIRUWKLVairplane which
can improve the flight performance. Contact our distributor
for more information or to purchase this upgrade.
î
$
%
&
'
.9EUXVKOHVVPRWRU
EODGHSURSHOOHU
:DVKHULJ[[Ɏ
0RWRU6KDIW
$
%
'&
&
'
%
)
(
&
'(
&
'(

o
$
%
&
'
))%($5&$7
,QVWDOOthe SRZHUV\VWHP
,QVWDOOthe(6&
$
%
&
'
3:$îPPSFV
6FUHZ
%DWWHU\WUD\
(6&
7UD\KROGHU
3XWWKH(6&XQGHUWKHEDWWHU\WUD\WKHUHDreVSHFLDOly
designed vents to cool the electrical components
PP
%DWWHU\IRUZDUGRUEDFNZDUG
WRDGMXVWWKHFHQWHURIJUDYLW\
,I\RXFDQQRWDGMXVWWKHFHQWHURIJUDYLW\E\ moving the battery, a suitable material such as stick on lead weight pad
can be used.

gf
))%($5&$7
After assembly, before the first flight, with the propeller removed, power on the radio and connect a fully charged battery to
the ESC. Then use the radio to check the control surface movement

gg ))%($5&$7
'XDO5DWHV
++PPPP
++PPPP
++PPPP
++PPPP
++PPPP
+PP
+PP
++PPPP
$LOHURQ (OHYDWRU 5XGGHU )ODSV
/RZ5DWH
+LJK5DWH '55DWH'55DWH'55DWH
'55DWH'55DWH'55DWH
+
+
+
+
+
+
$LOHURQ
+
)ODSV
(OHYDWRU 5XGGHU
Select the appropriate position and
mark it. Make sure the three points are
in the middle position.
,QVWDOOWKHplastic hinges
6WHSRQH
8VHNQLIHWRFXWWKH
VXUIDFHFRQWURO
6WHSWZR
$VWKHSKRWRVKRZsFKRRVH
WZRRUWKUHHSRVLWLRQsDpplyWKH
JOXHRQWKHORQJHQGRIthe hinge
pin and insert onto the three
positions.
Step three
As the photo on the right
shows, repeat Step two,
attach the control surface
to the hinge pins.
7KHVXUIDFHFRQWUROsXVH aQRKLQJHFRQQHFWLRQGHVLJQ.ItKDVSURYHnWREHDUHOLDEOHdesign, however,
ZHGRQWH[FOXGH the possibility, while in use, that errors causing the surfaces to tear or break may occur.
6Rwe haveLQFOXGHdRQH set ofSODVWLFSLQKLQJHs, to provide convenience if repairs are needed. 3OHDVHUHIHU
to the instructions below

Other manuals for F8F-1
1
Table of contents
Other FLIGHT LINE Toy manuals

FLIGHT LINE
FLIGHT LINE Fw190 D-9 Dora User manual

FLIGHT LINE
FLIGHT LINE P-38L LIGHTNING User manual

FLIGHT LINE
FLIGHT LINE SPITFIRE MK.IXC User manual

FLIGHT LINE
FLIGHT LINE LAVOCHKIN LA-7 FLW202 User manual

FLIGHT LINE
FLIGHT LINE FLW204 User manual

FLIGHT LINE
FLIGHT LINE OV-10 Bronco User manual

FLIGHT LINE
FLIGHT LINE F7F TIGERCAT User manual

FLIGHT LINE
FLIGHT LINE FLW203 User manual

FLIGHT LINE
FLIGHT LINE F8F-1 User manual

FLIGHT LINE
FLIGHT LINE TA-152H1 User manual